These guides will show you how to get started with system settings on your Cloud HQ.
- How to edit the floor plan
- How to view the table details
- How to submit a Wi-fi sticker
- How to edit a Wi-fi sticker
- How to view a timer
- How to add a timer
- How to view reminders
- How to add reminders
- How to turn a Kiosk on and off remotely
- How to add an announcement
- How to enable service charge
- How to edit a receipt
- How to view categories on receipts
- How to select what days your business opens
- How to add an end of day time
- How to configure printer.
Before you do anything, make sure you login into your store account SparkEpos
How to edit the floor plan
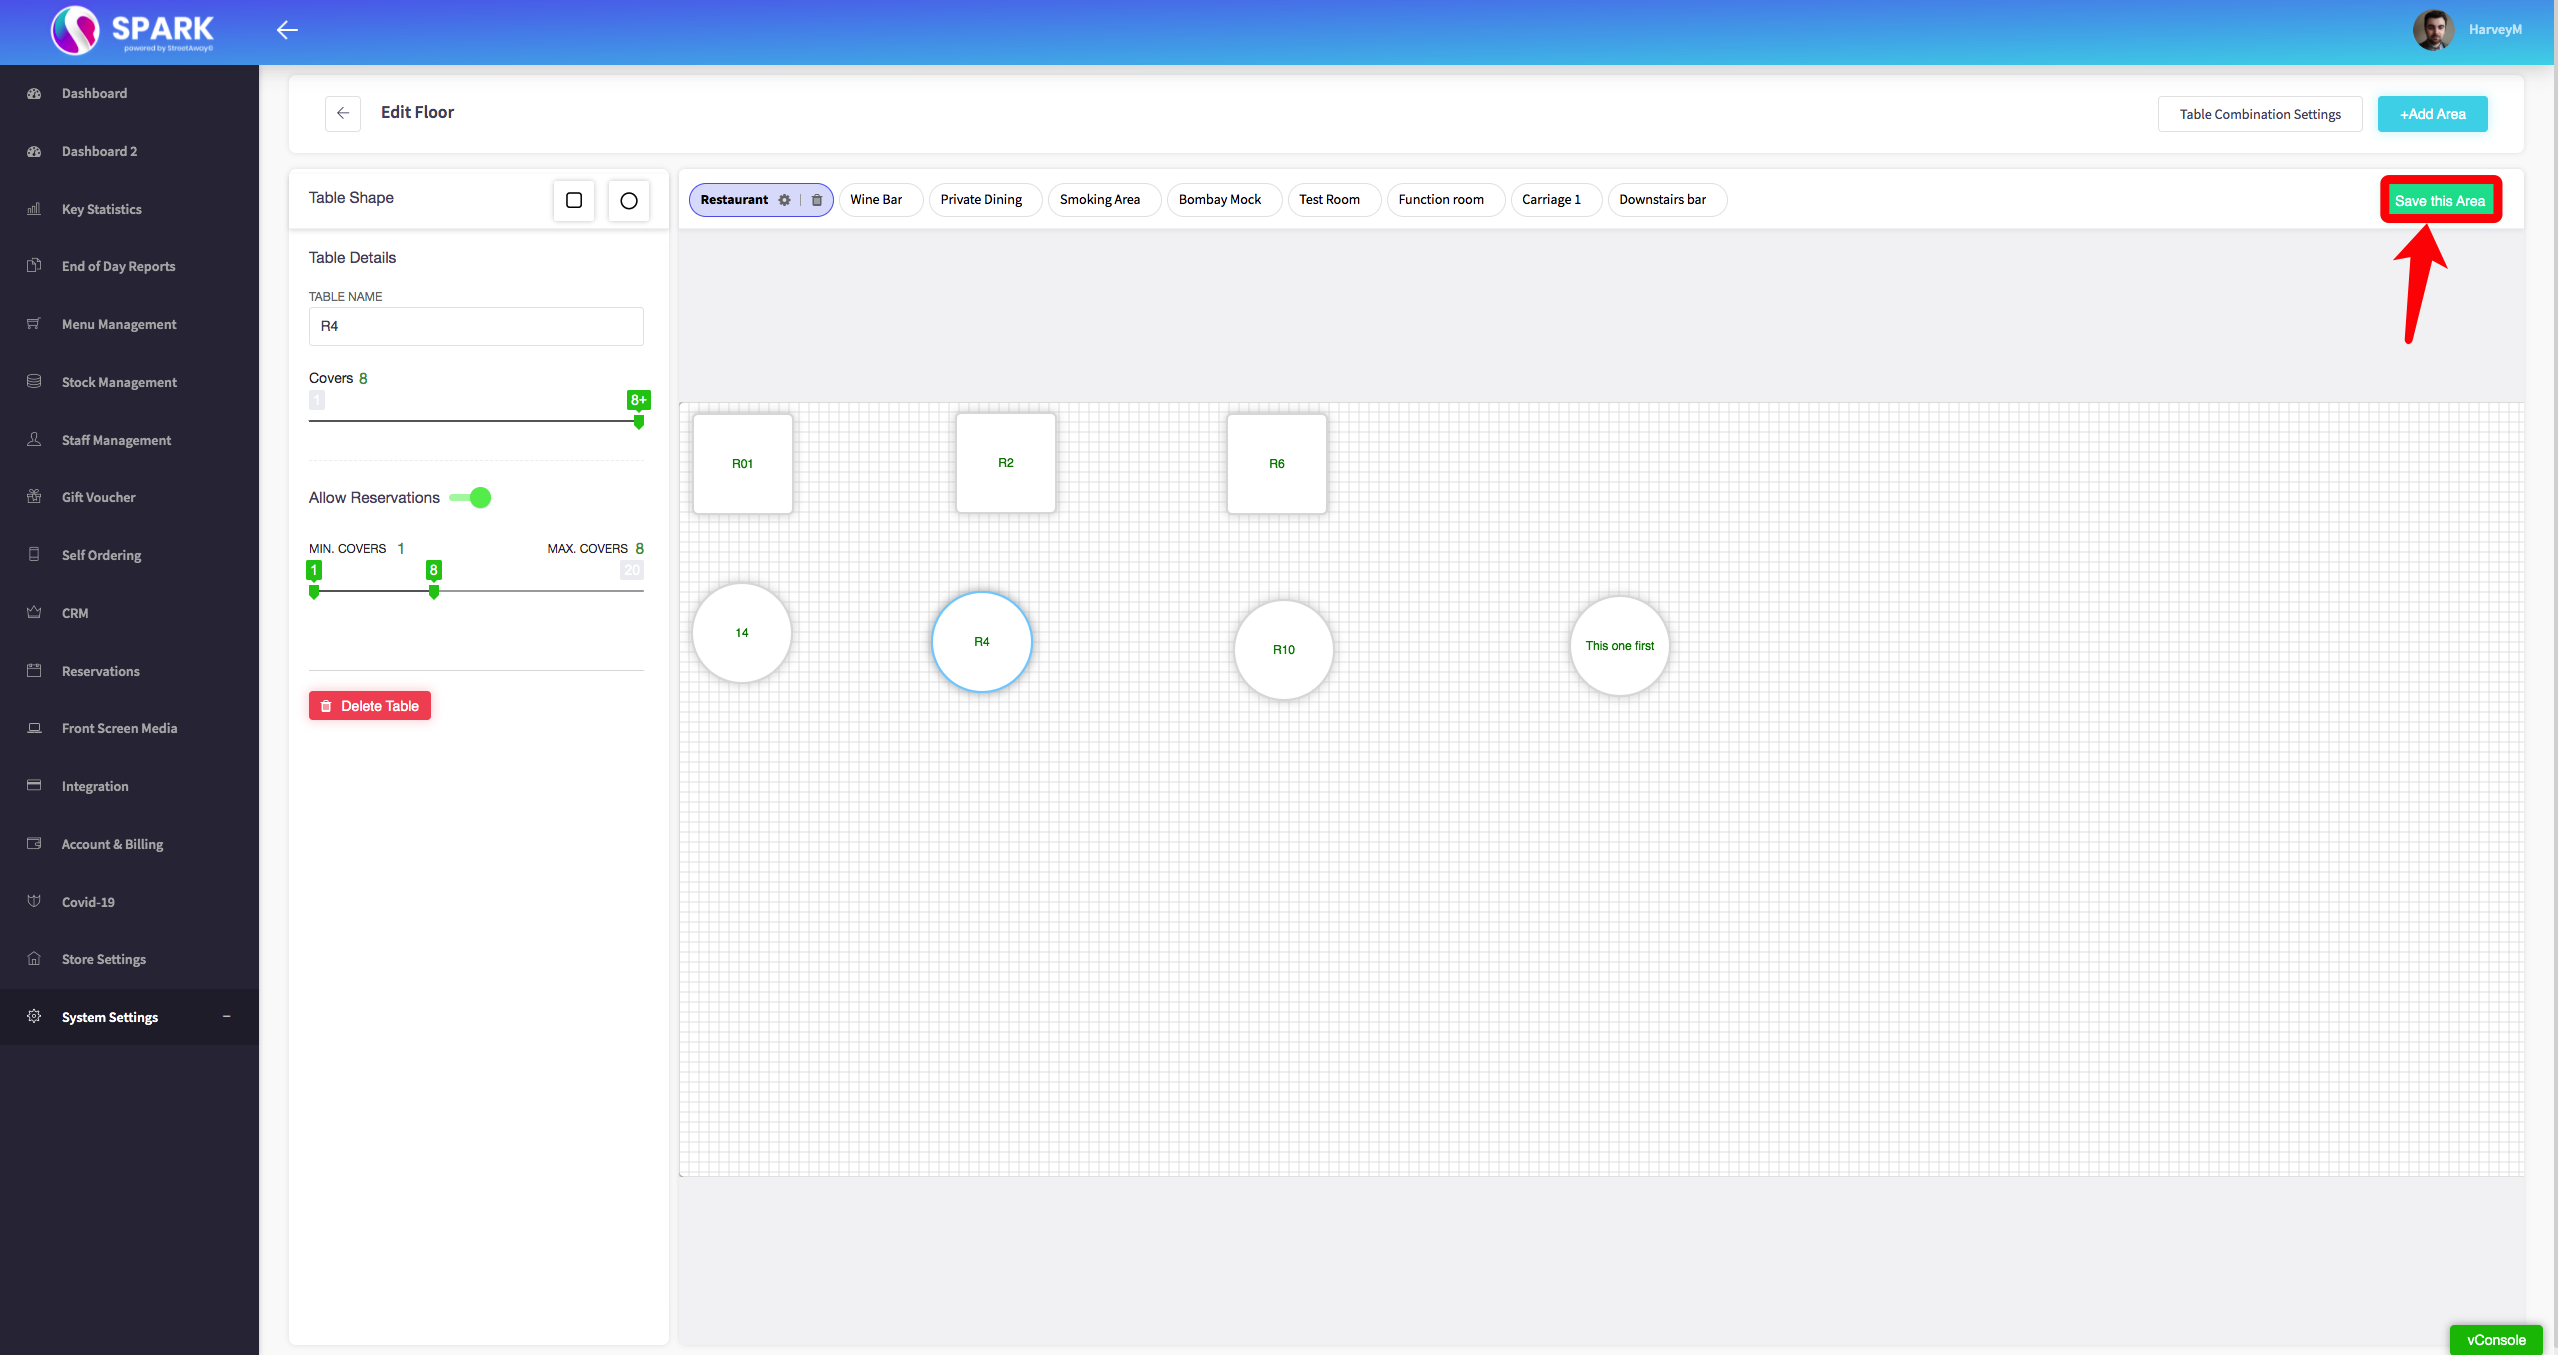
This guide will show you how to edit the floor plan on your Cloud HQ.
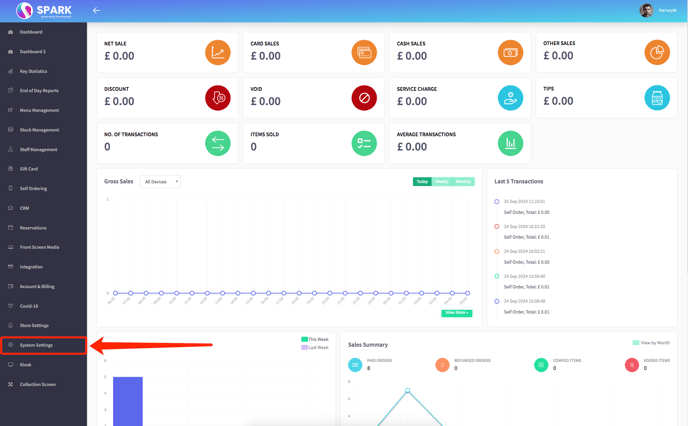
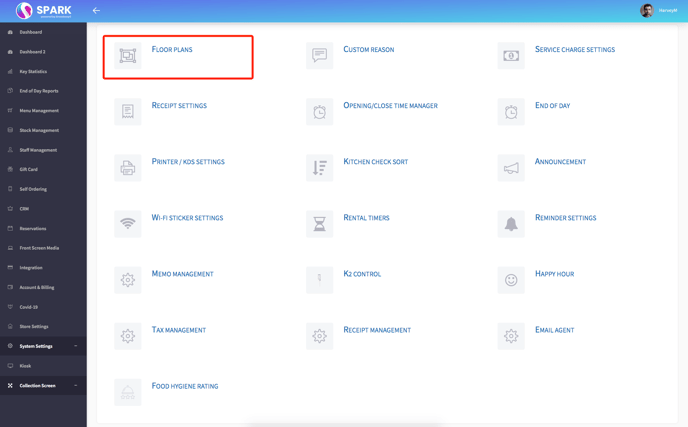
Firstly, scroll down to click on the 'System Settings' section on the left hand side. Then click the 'Floor Plans' option in the menu.
This menu showing the floor plan should appear, shown below.
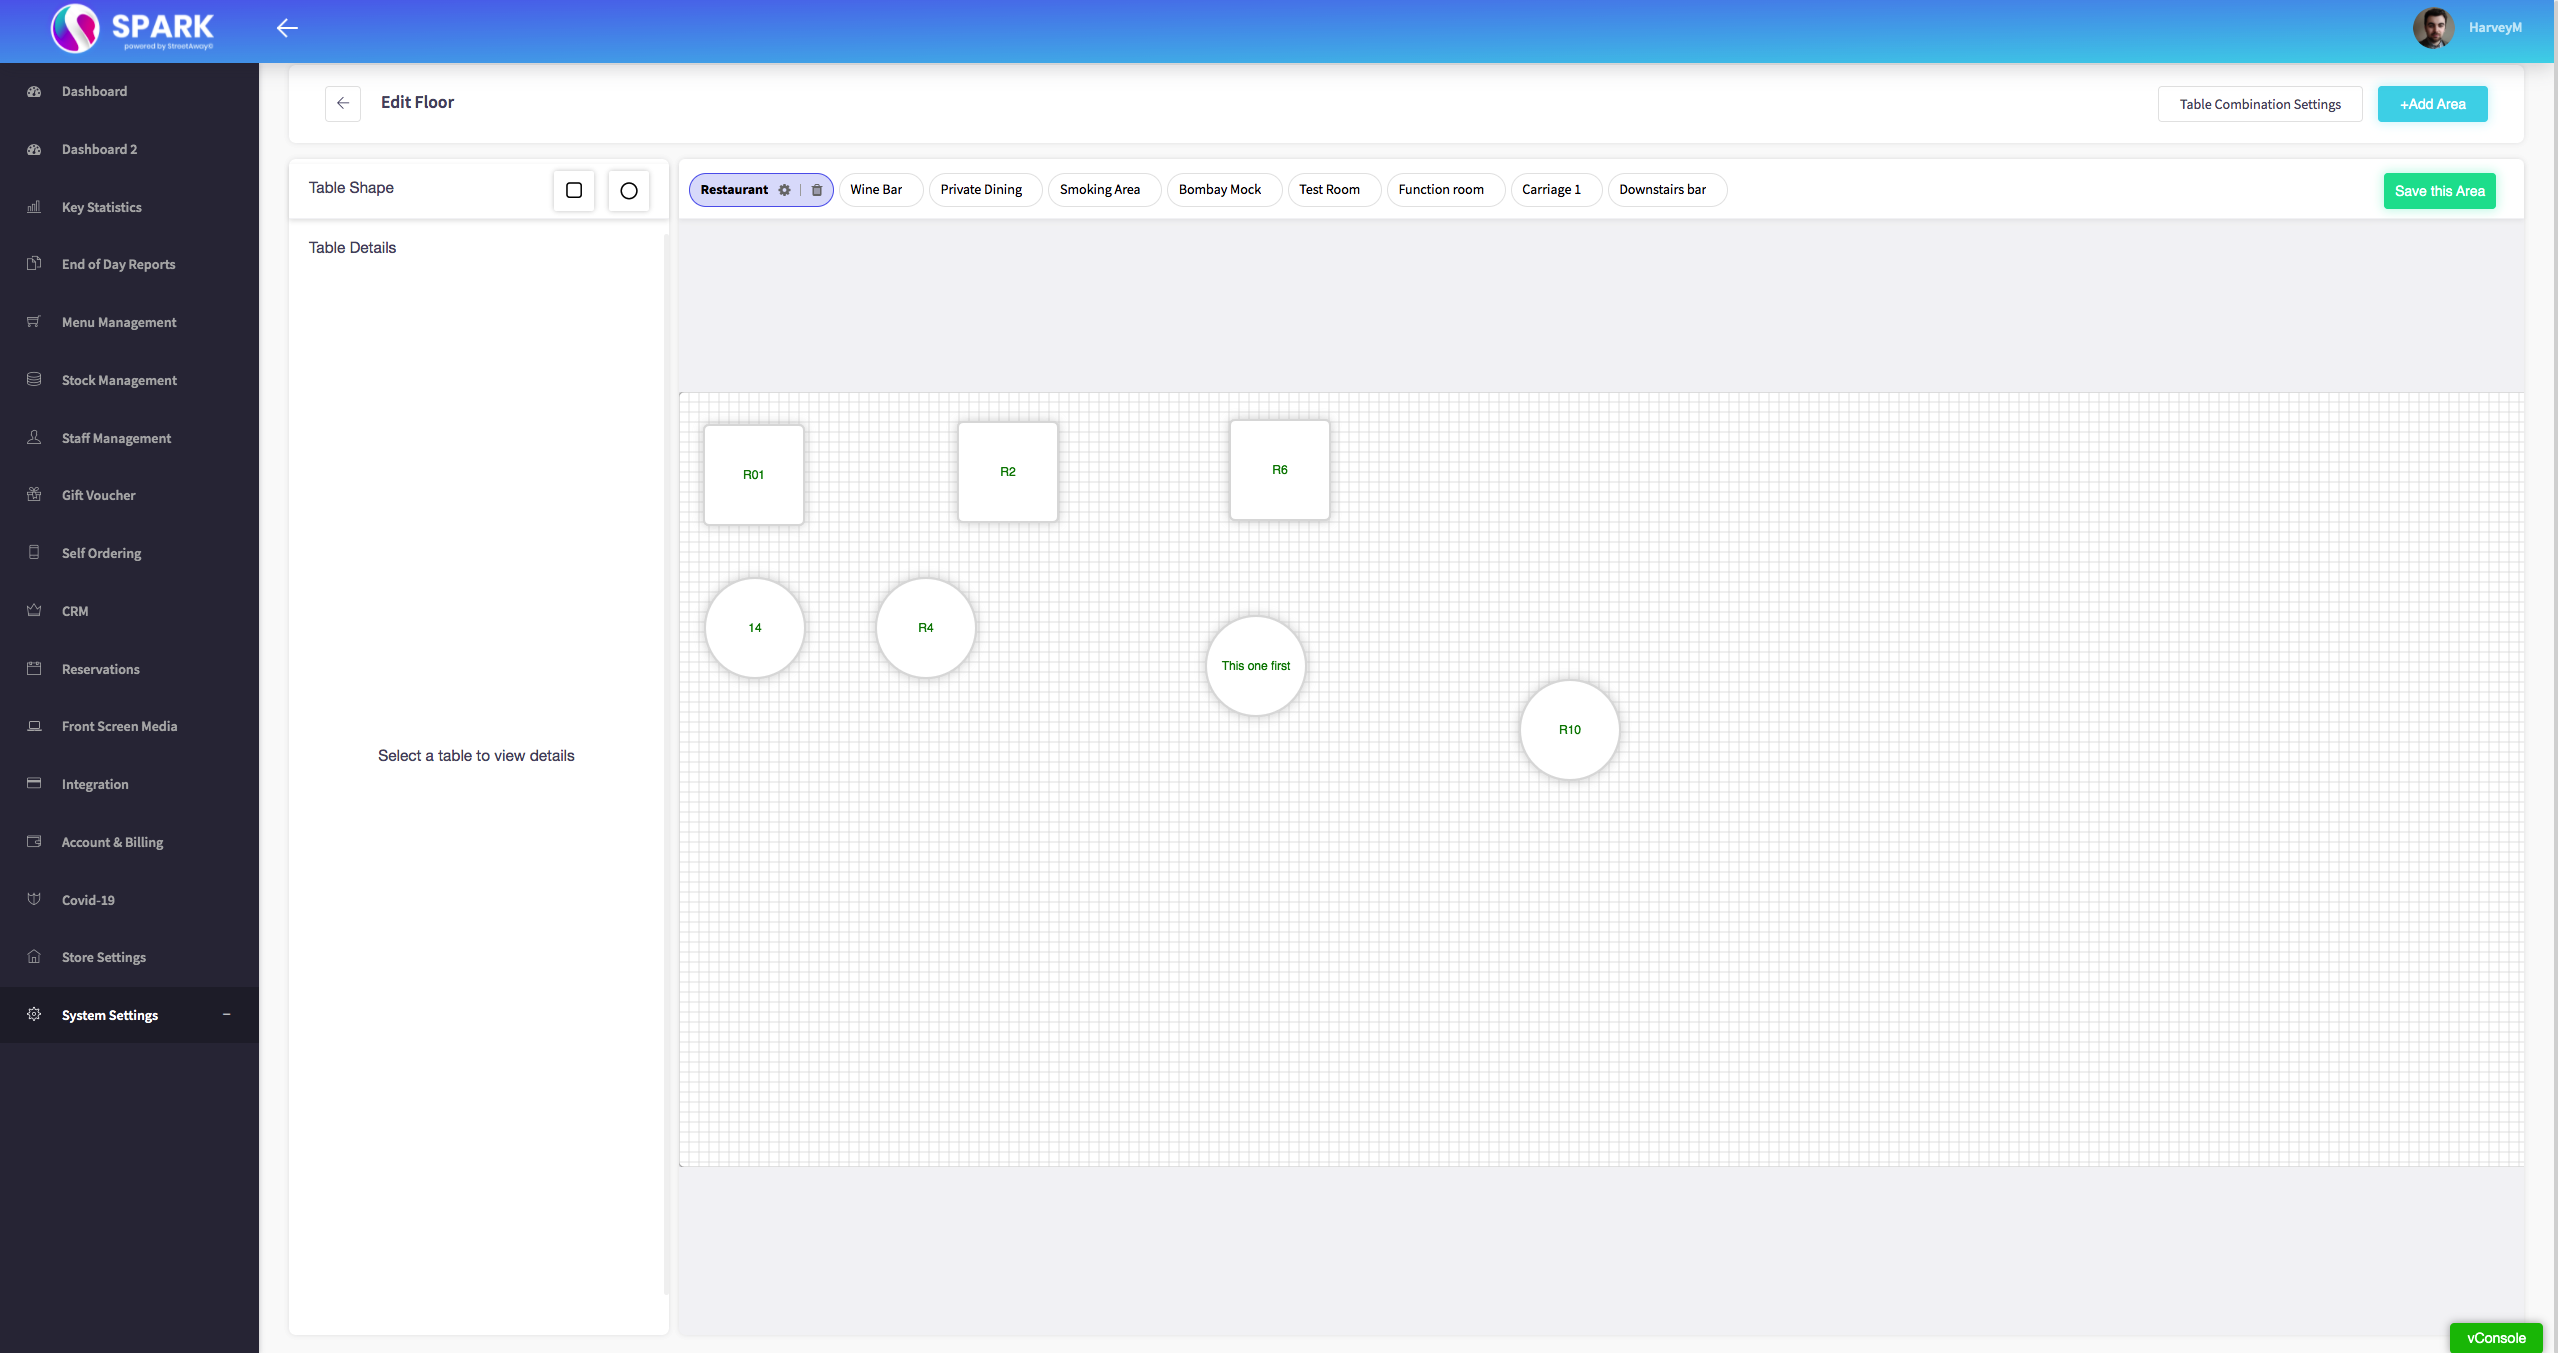
With a table plan, you can easily edit and move tables around to fit your venue just drag and drop the tables on where they would like to go.
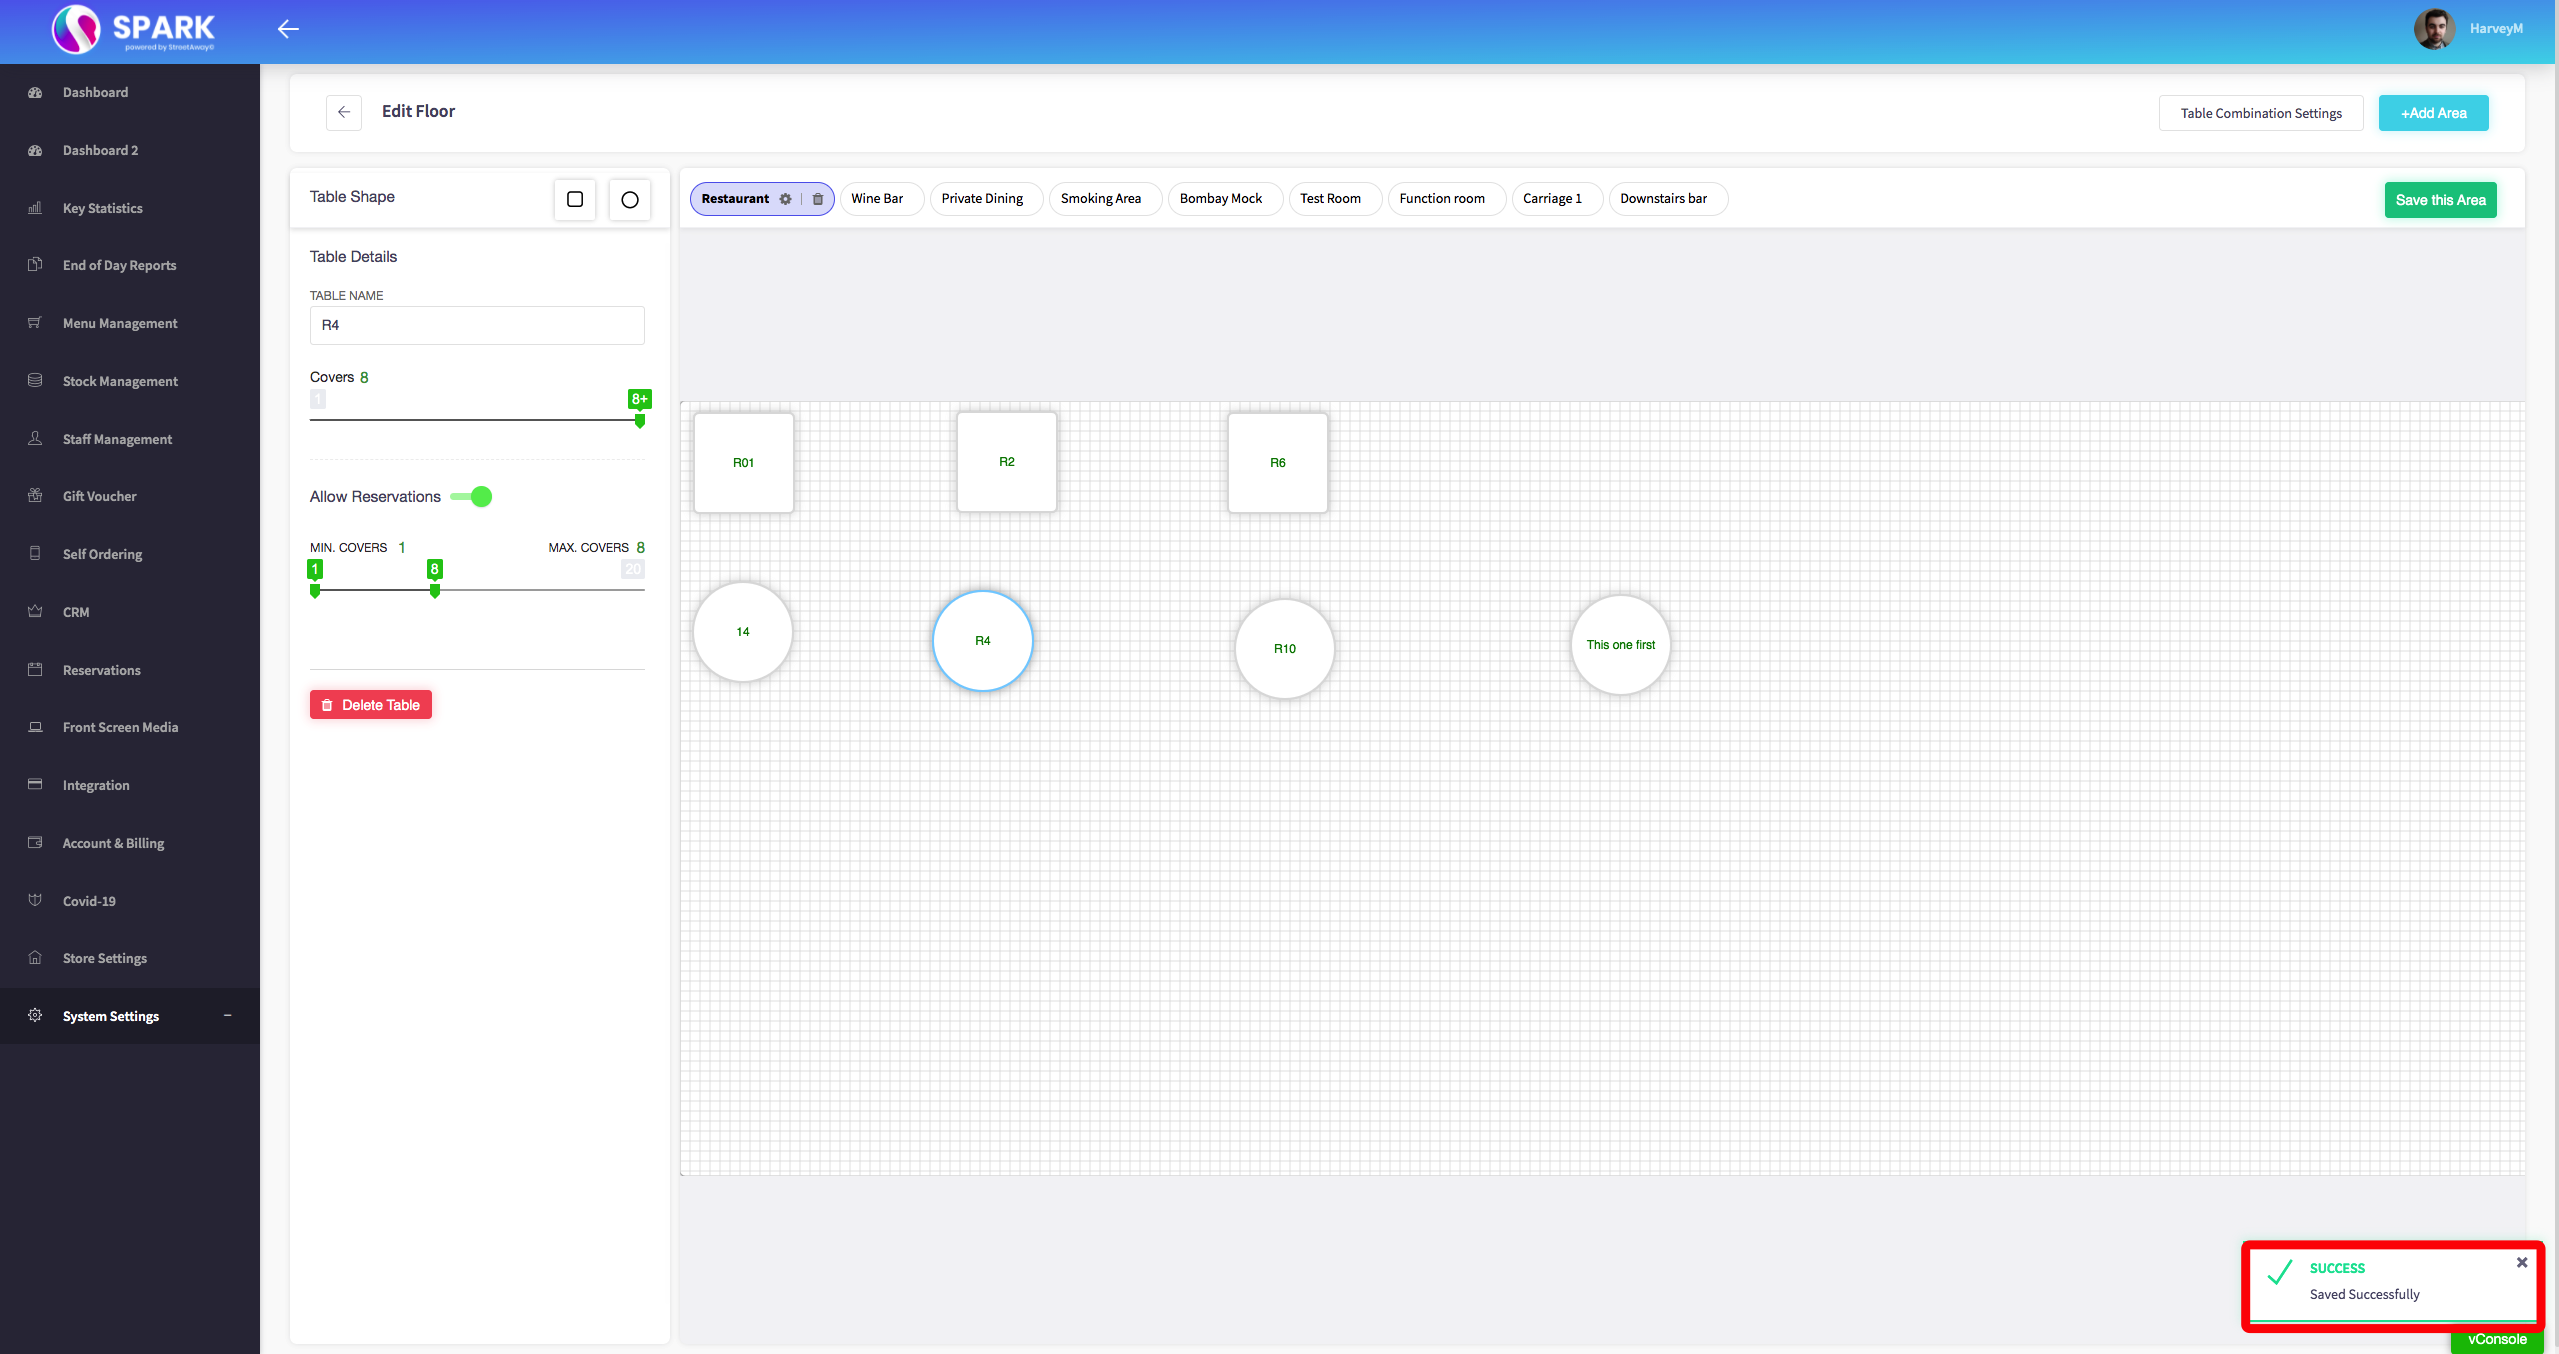
When finishing your table plan make sure you hit the "Save this area" button.
And a confirmation message will confirm that your table plan has been saved.
How to view the table details
This guide will show you how to view the table details on your Cloud HQ.
Firstly, scroll down to click on the 'System Settings'. Once opened click the 'Floor Plans' option in the menu.

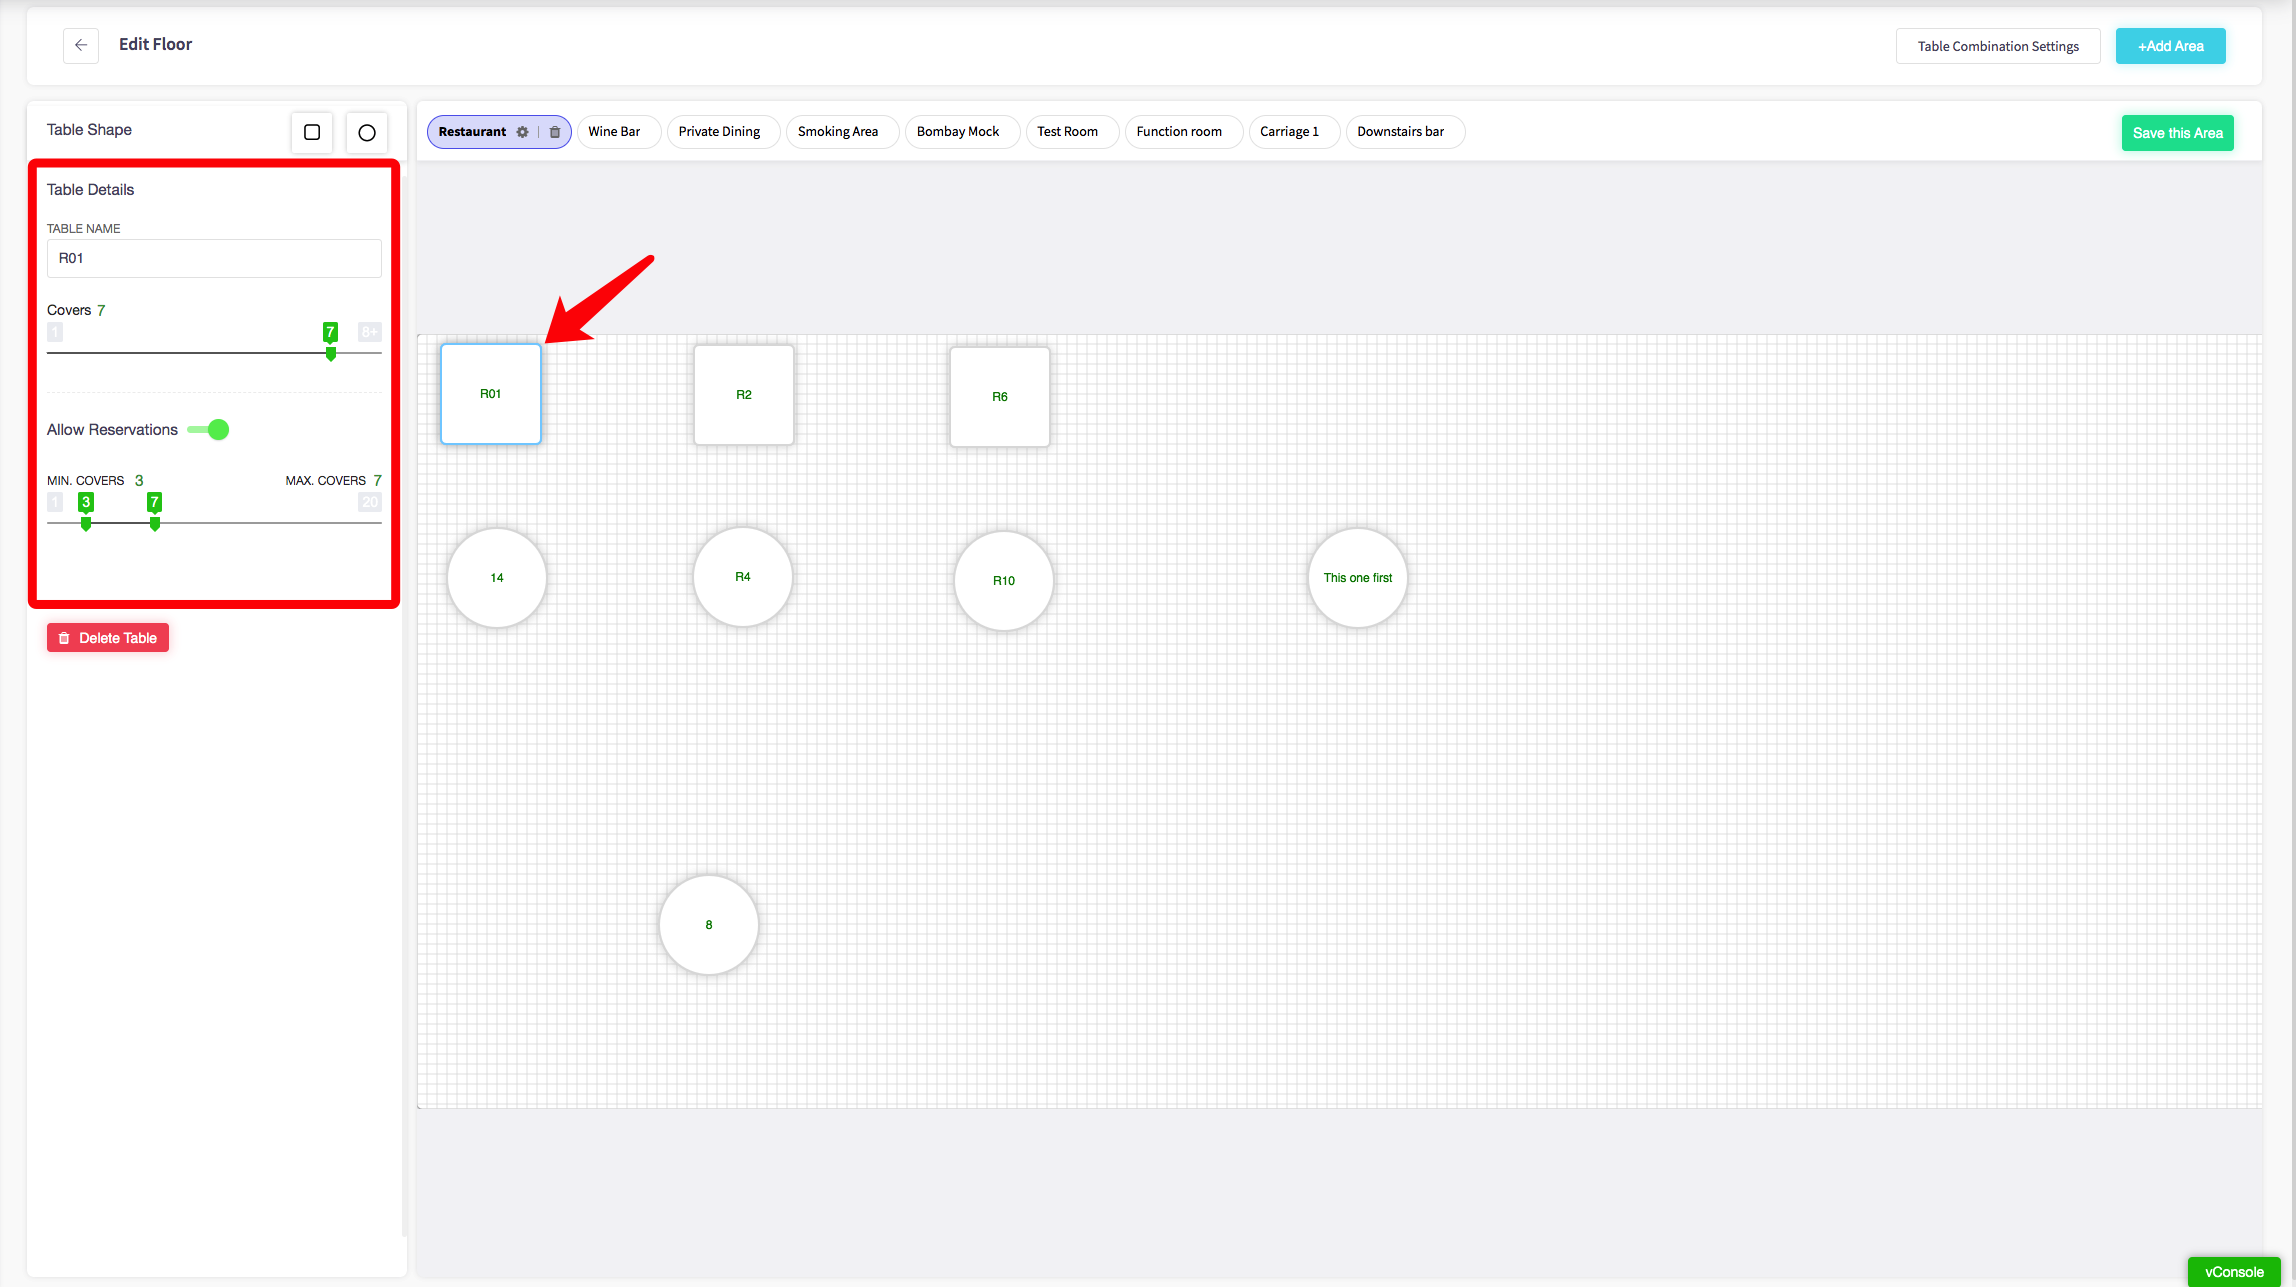
The floor plan should appear, shown below.
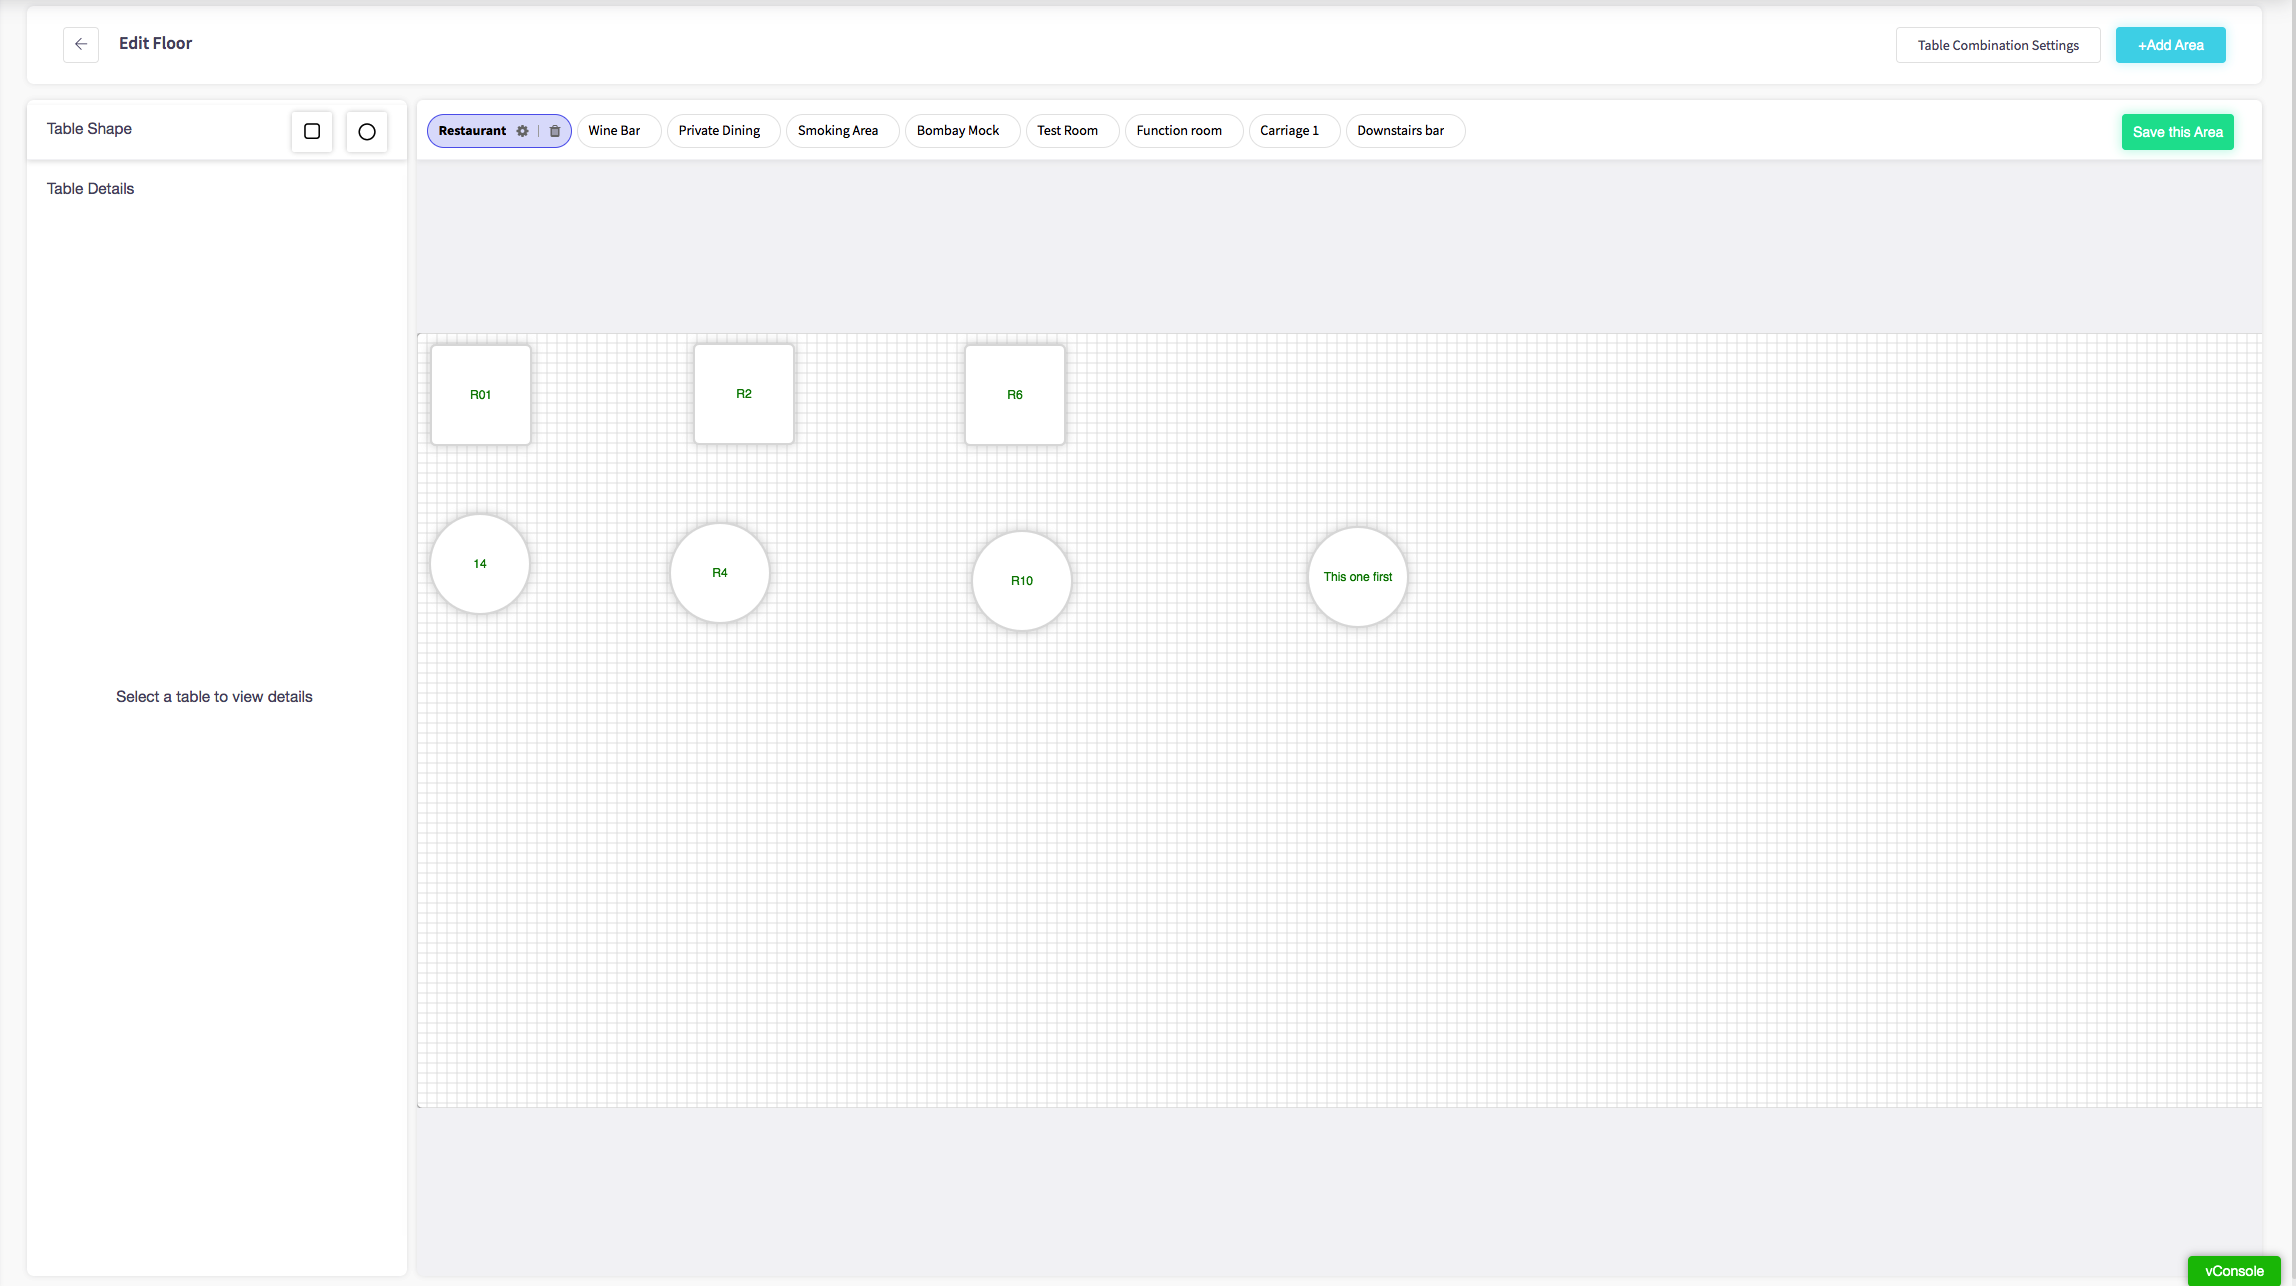
By dragging these icons you can begin to place tables on your floor plan.
Click on the table you have just placed and it brings up several options about the details of the table. Operators have the option to rename the table.

You can choose how many people can sit at that table.
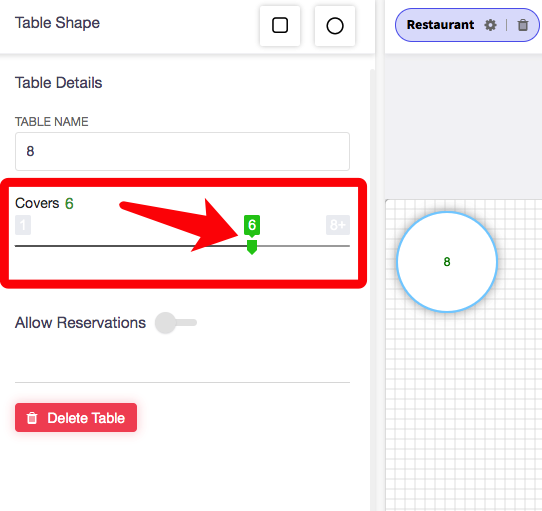
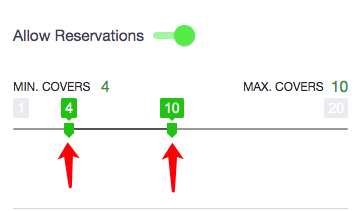
You have a toggle option to allow people to reserve that table and the minimum and maximum amount of people that can sit on that table when creating a reservation.
Operators also have the option to delete a table.
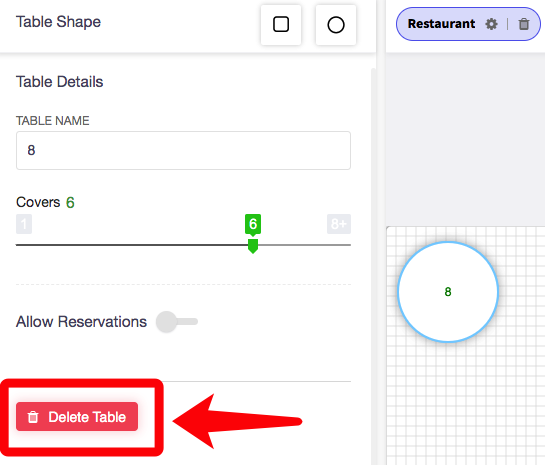
By clicking on a table on the table plan you have access to view all these table details.
How to submit a Wi-Fi Sticker
This guide will show you how to submit a Wi-Fi sticker on your Cloud HQ.
Firstly, scroll down to click on the 'System Settings'. Then click 'Wi-Fi Sticker Settings'.
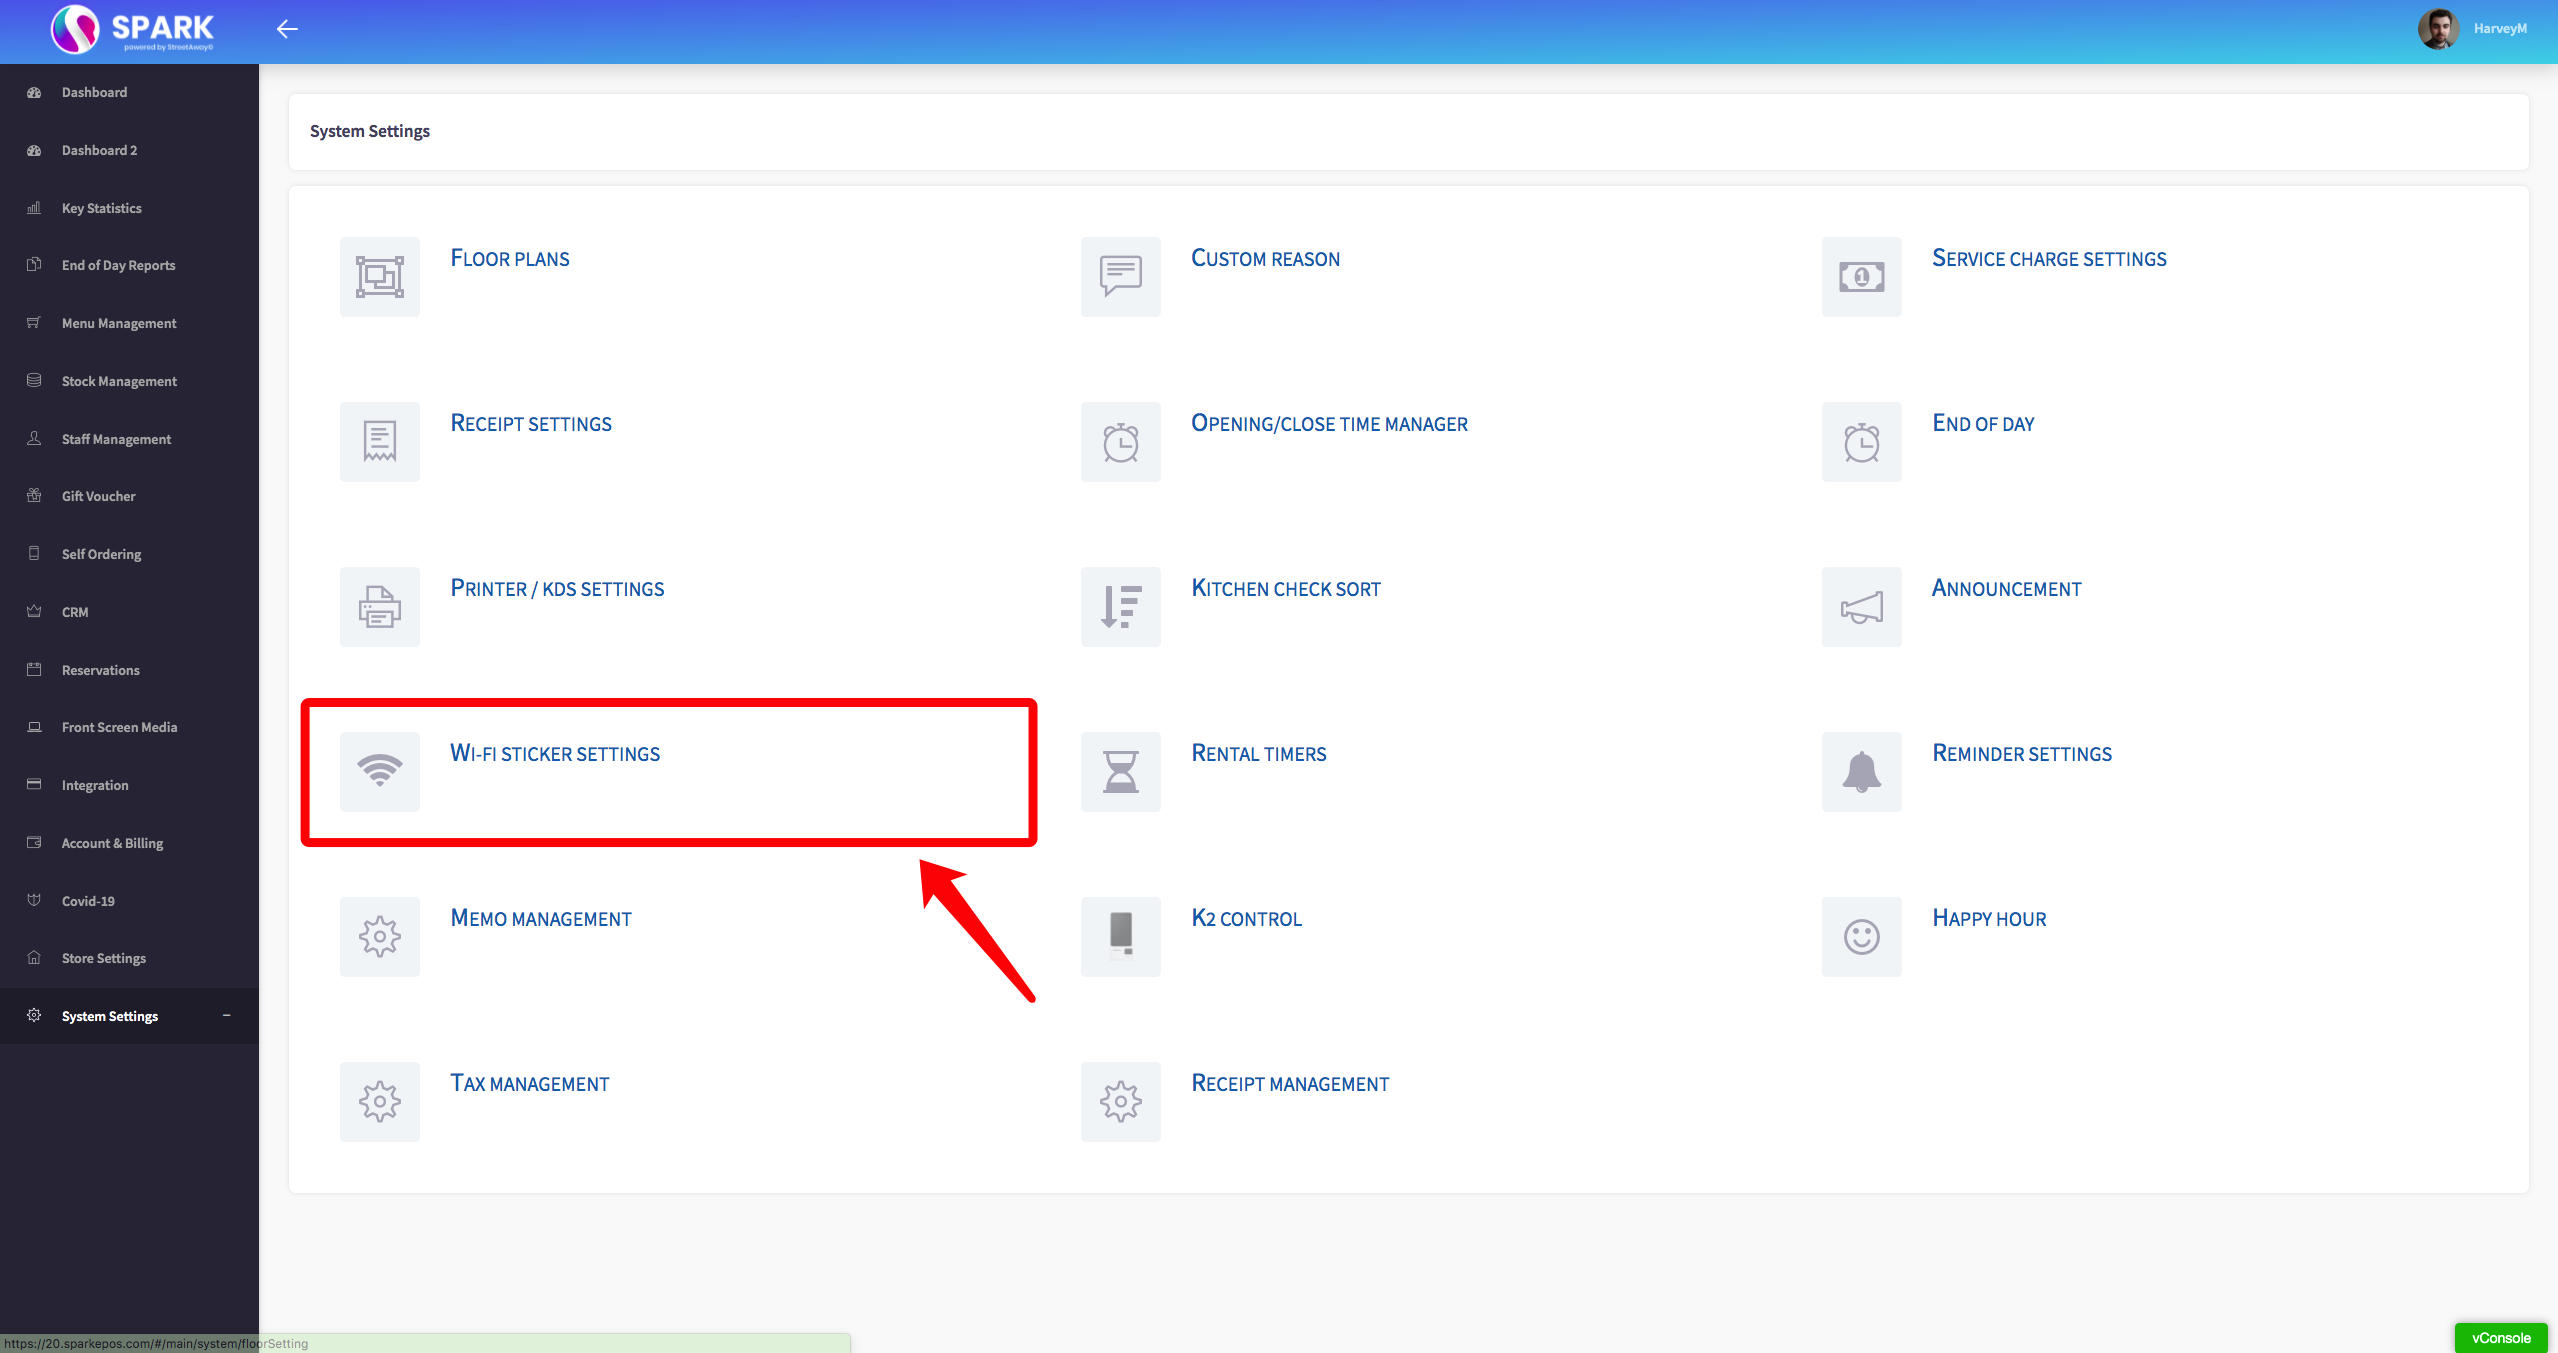
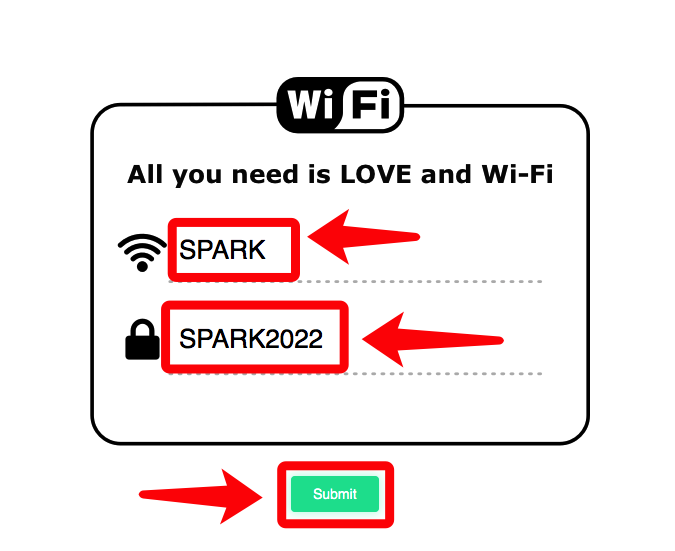
This Wi-fi sticker settings menu should appear, shown below.
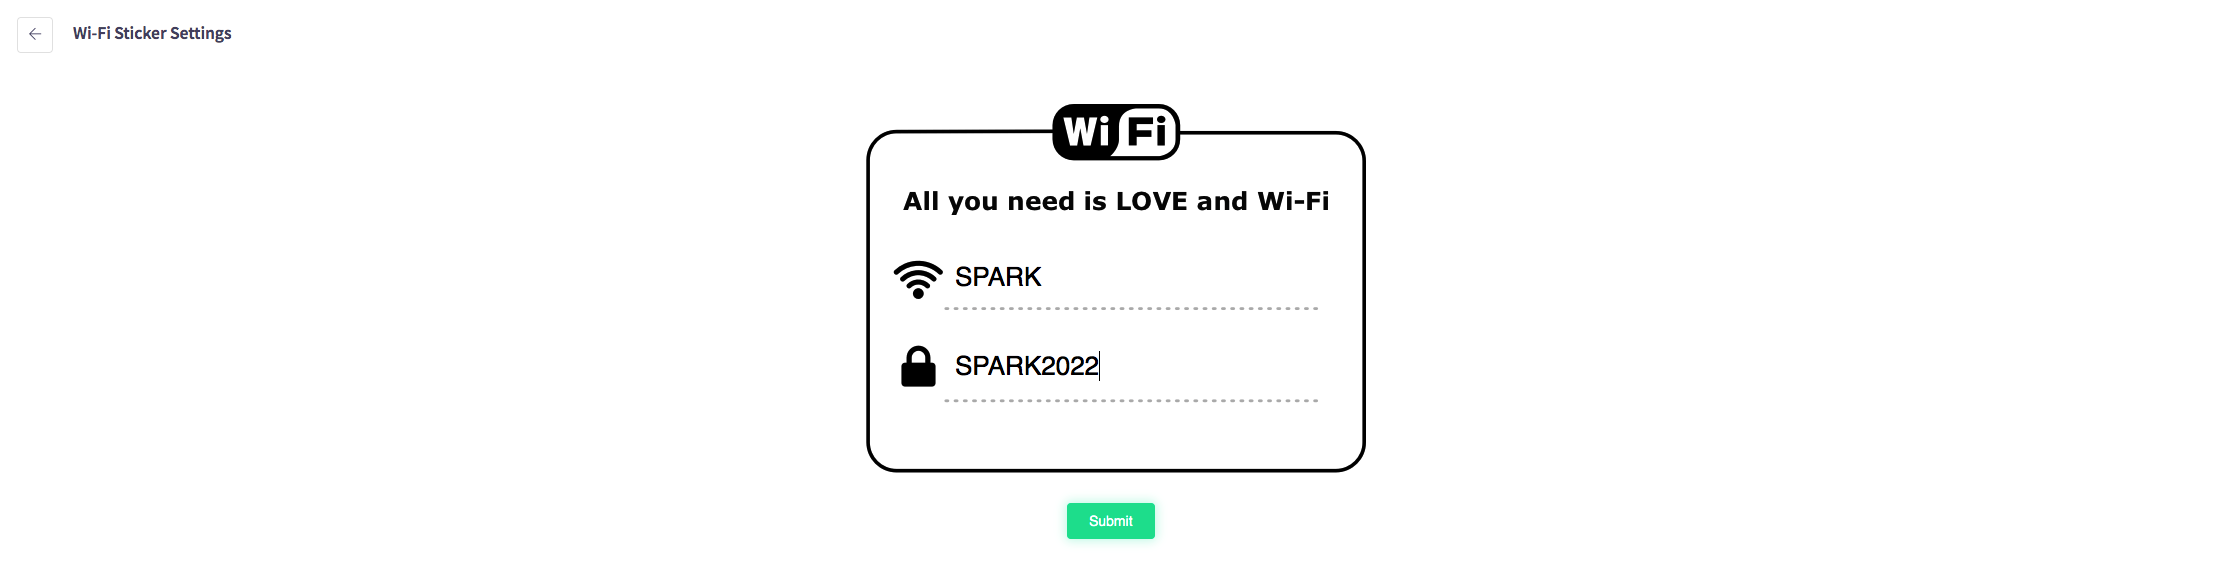
Change these fields to the name of your router and the password for your Wi-Fi. When completed press the green "Submit" button. That is how to submit a Wi-Fi sticker.

How to edit a Wi-Fi sticker
This guide will show you how to edit a Wi-Fi sticker on your Cloud HQ.
Firstly, scroll down to click on the 'System Settings', then the 'Wi-Fi Sticker Settings' option.

The Wi-Fi sticker settings menu should appear, like shown below.
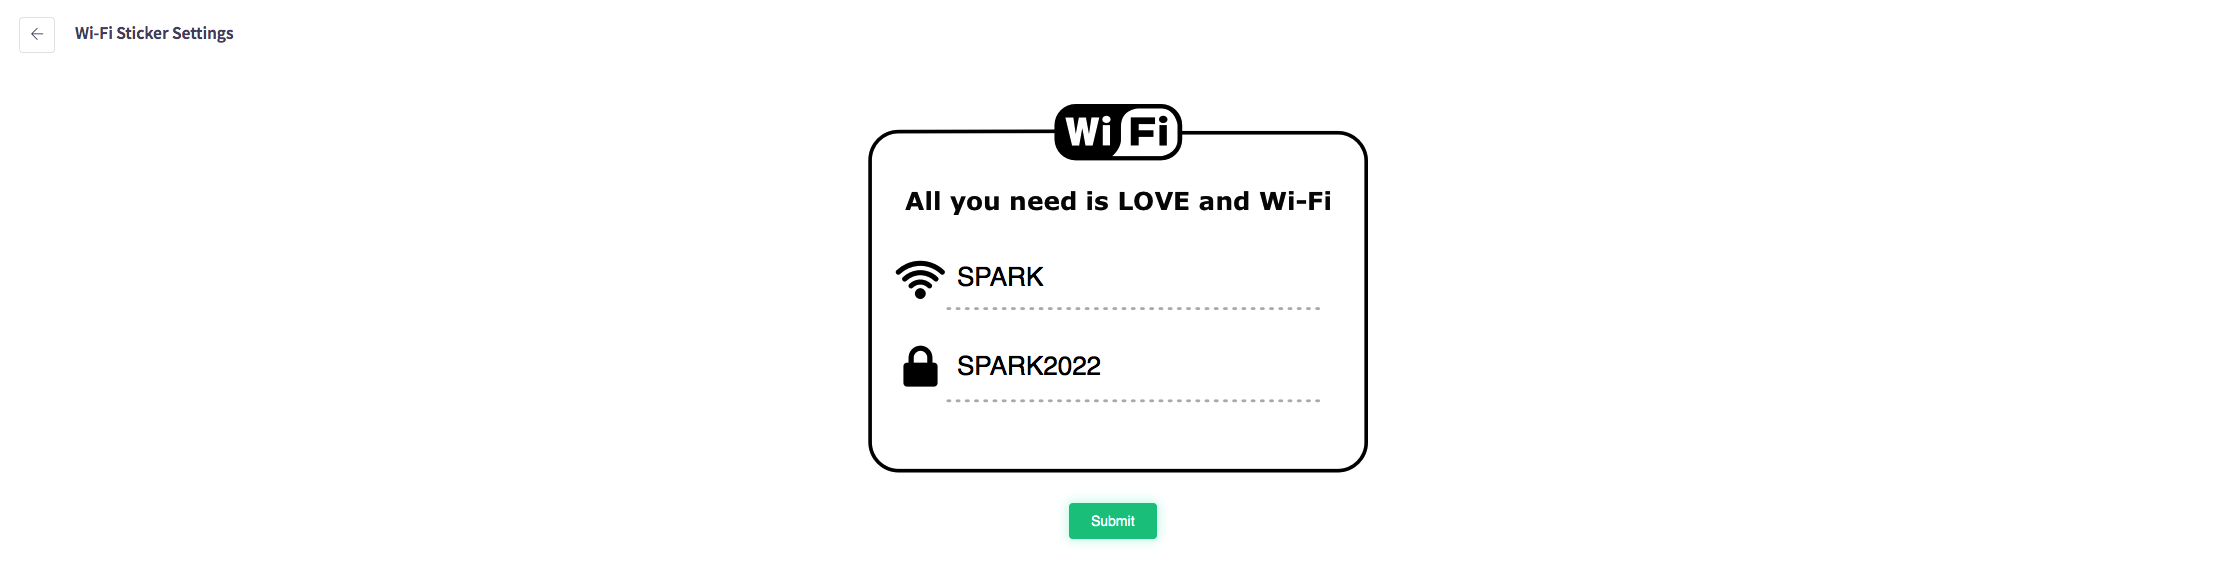
Edit these fields to the name of your router and the password for your Wi-Fi. When completed press the green "Submit" button.
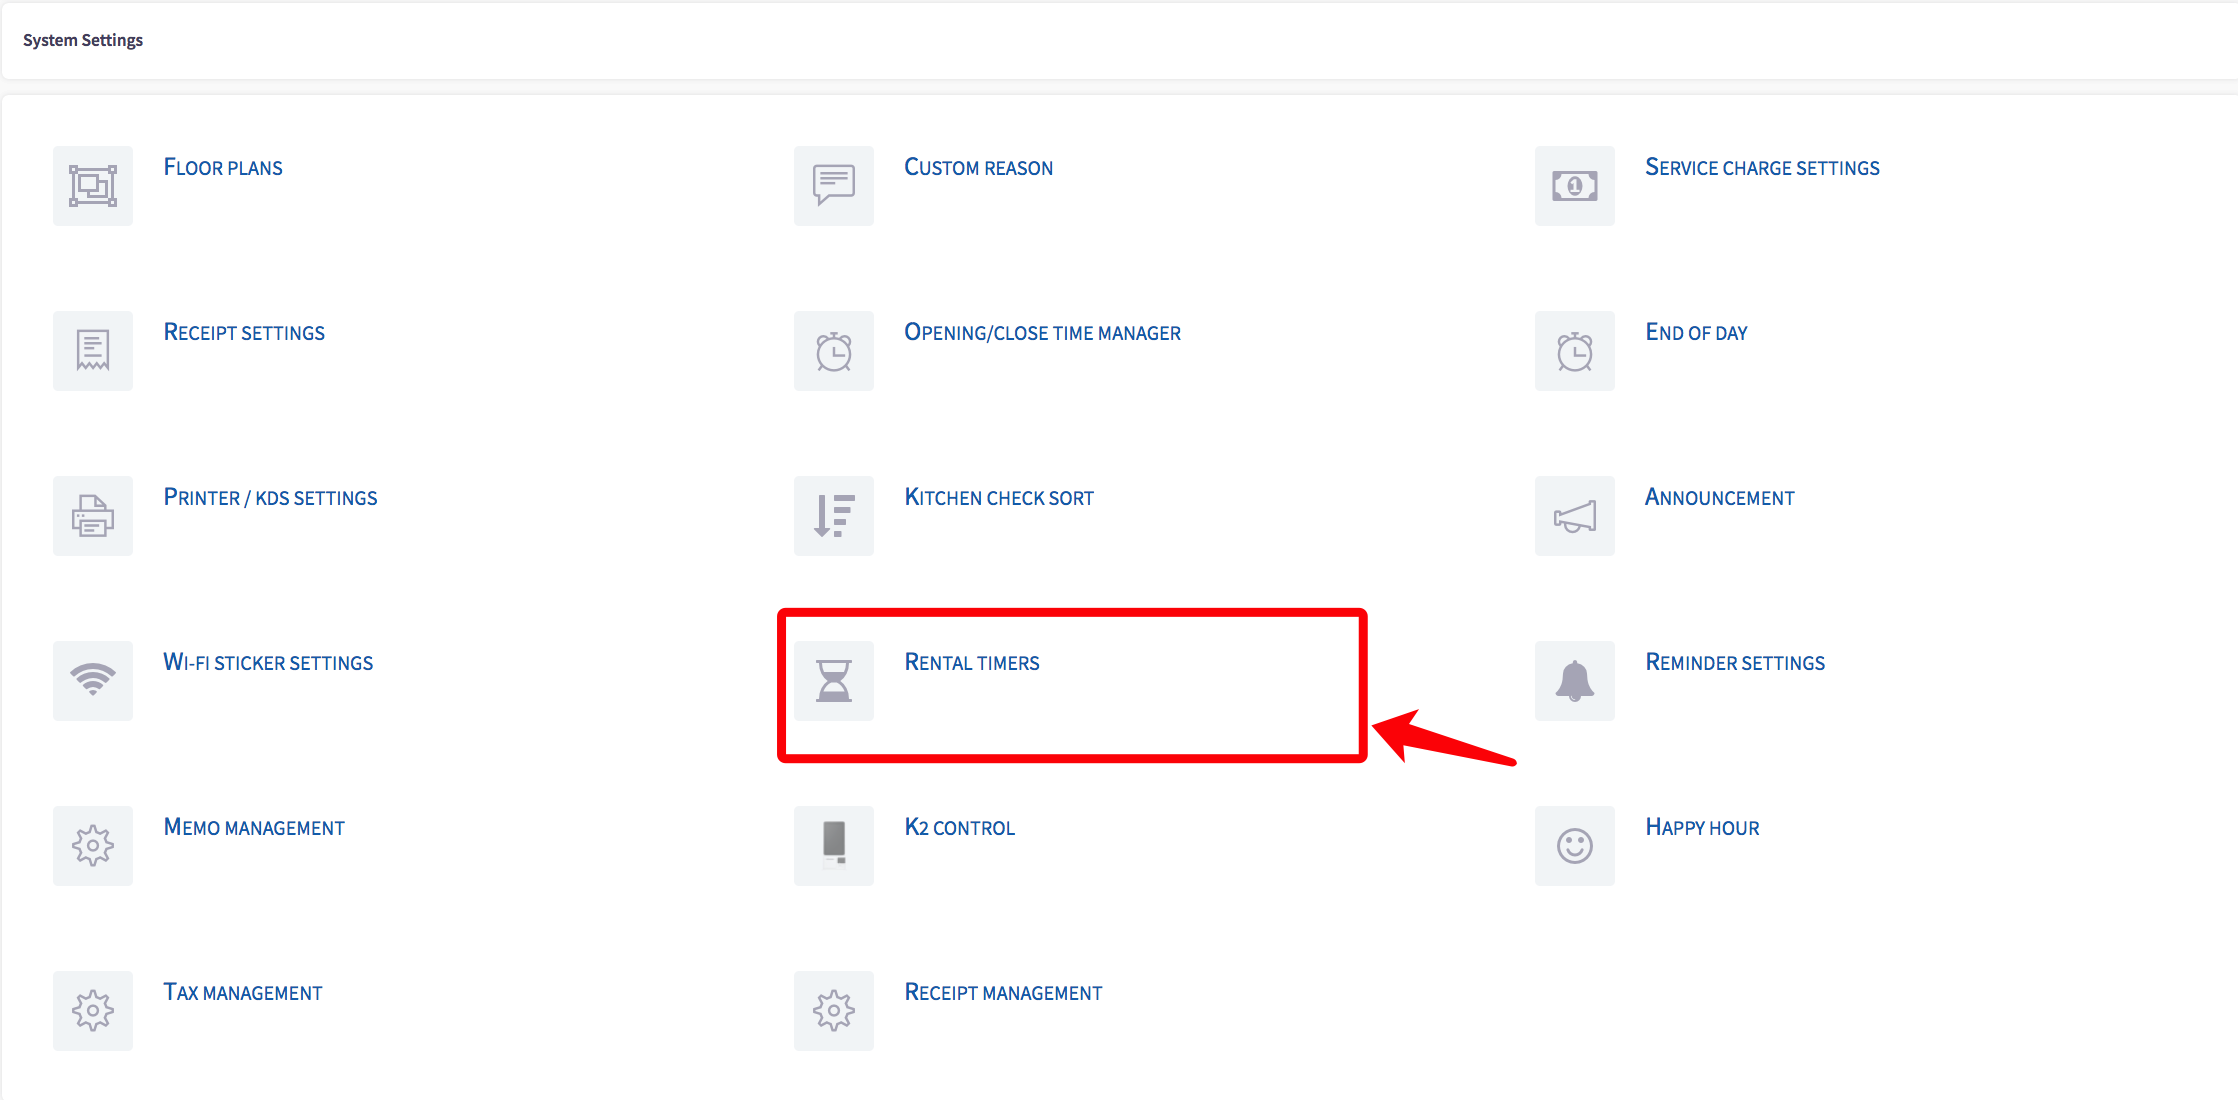
How to view a timer
This guide will show you how to view a timer on your Cloud HQ.
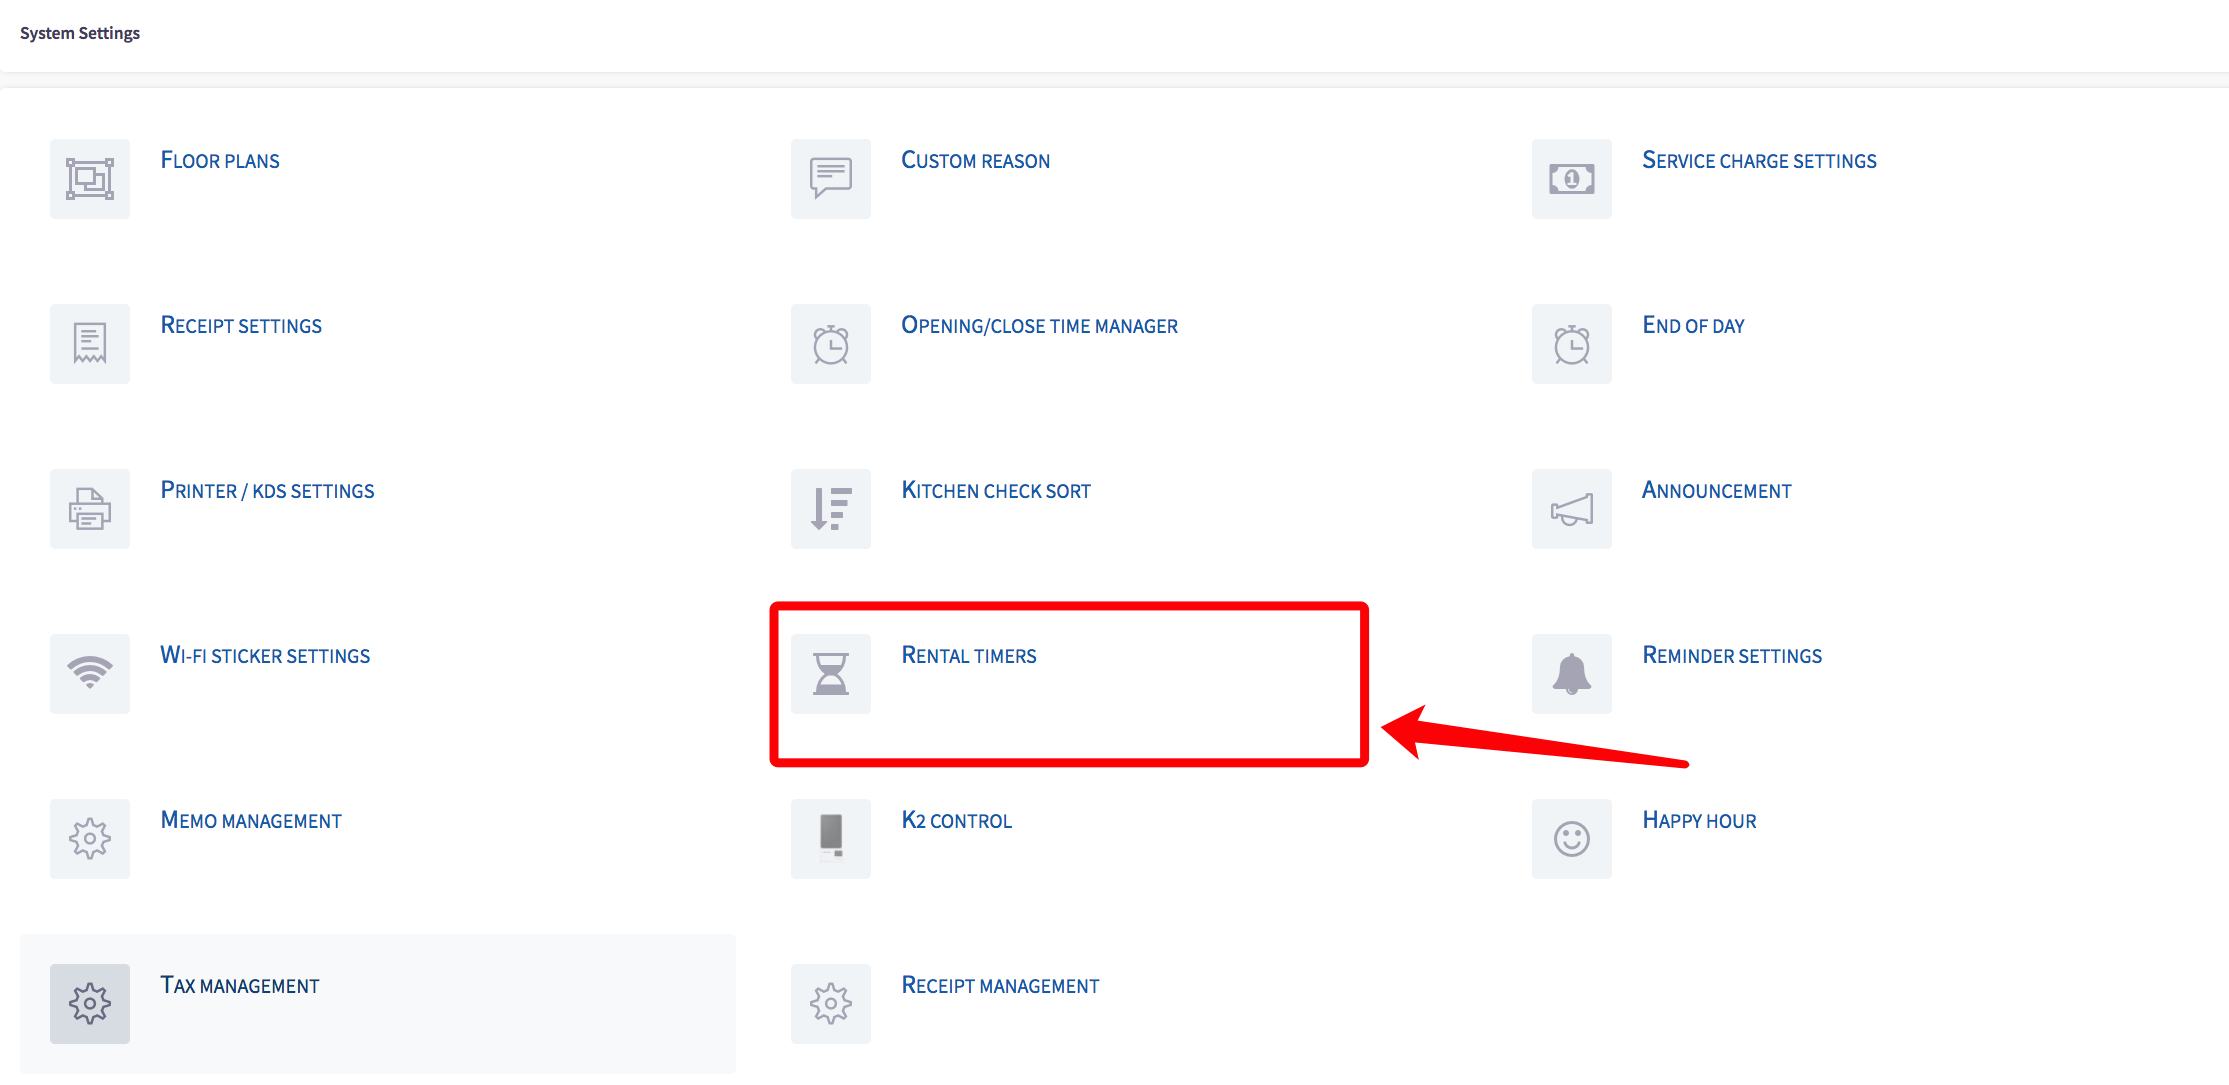
Firstly, navigate to the left hand menu and press 'System Settings' option.
Press 'Rental Timers' in the 'System Settings' menu.
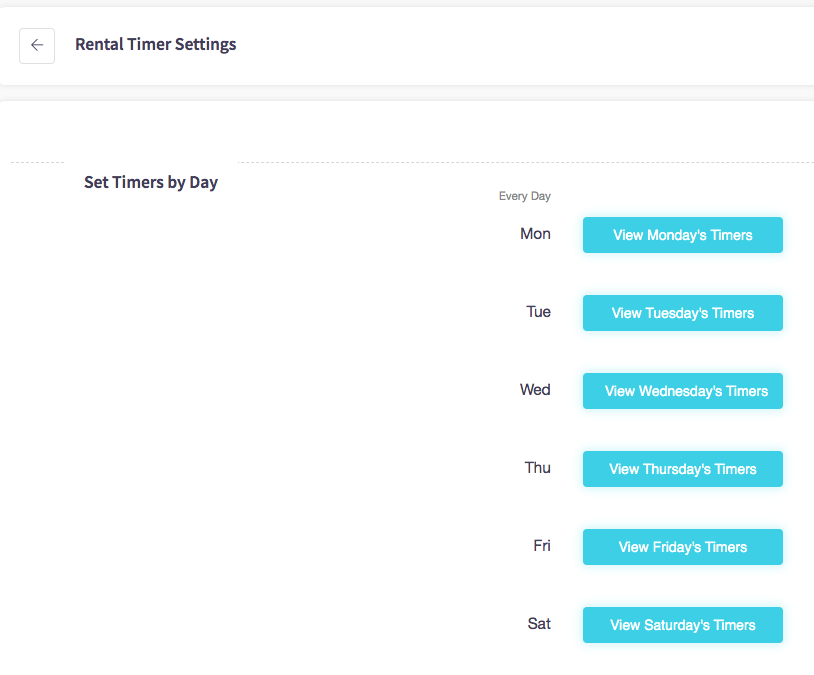
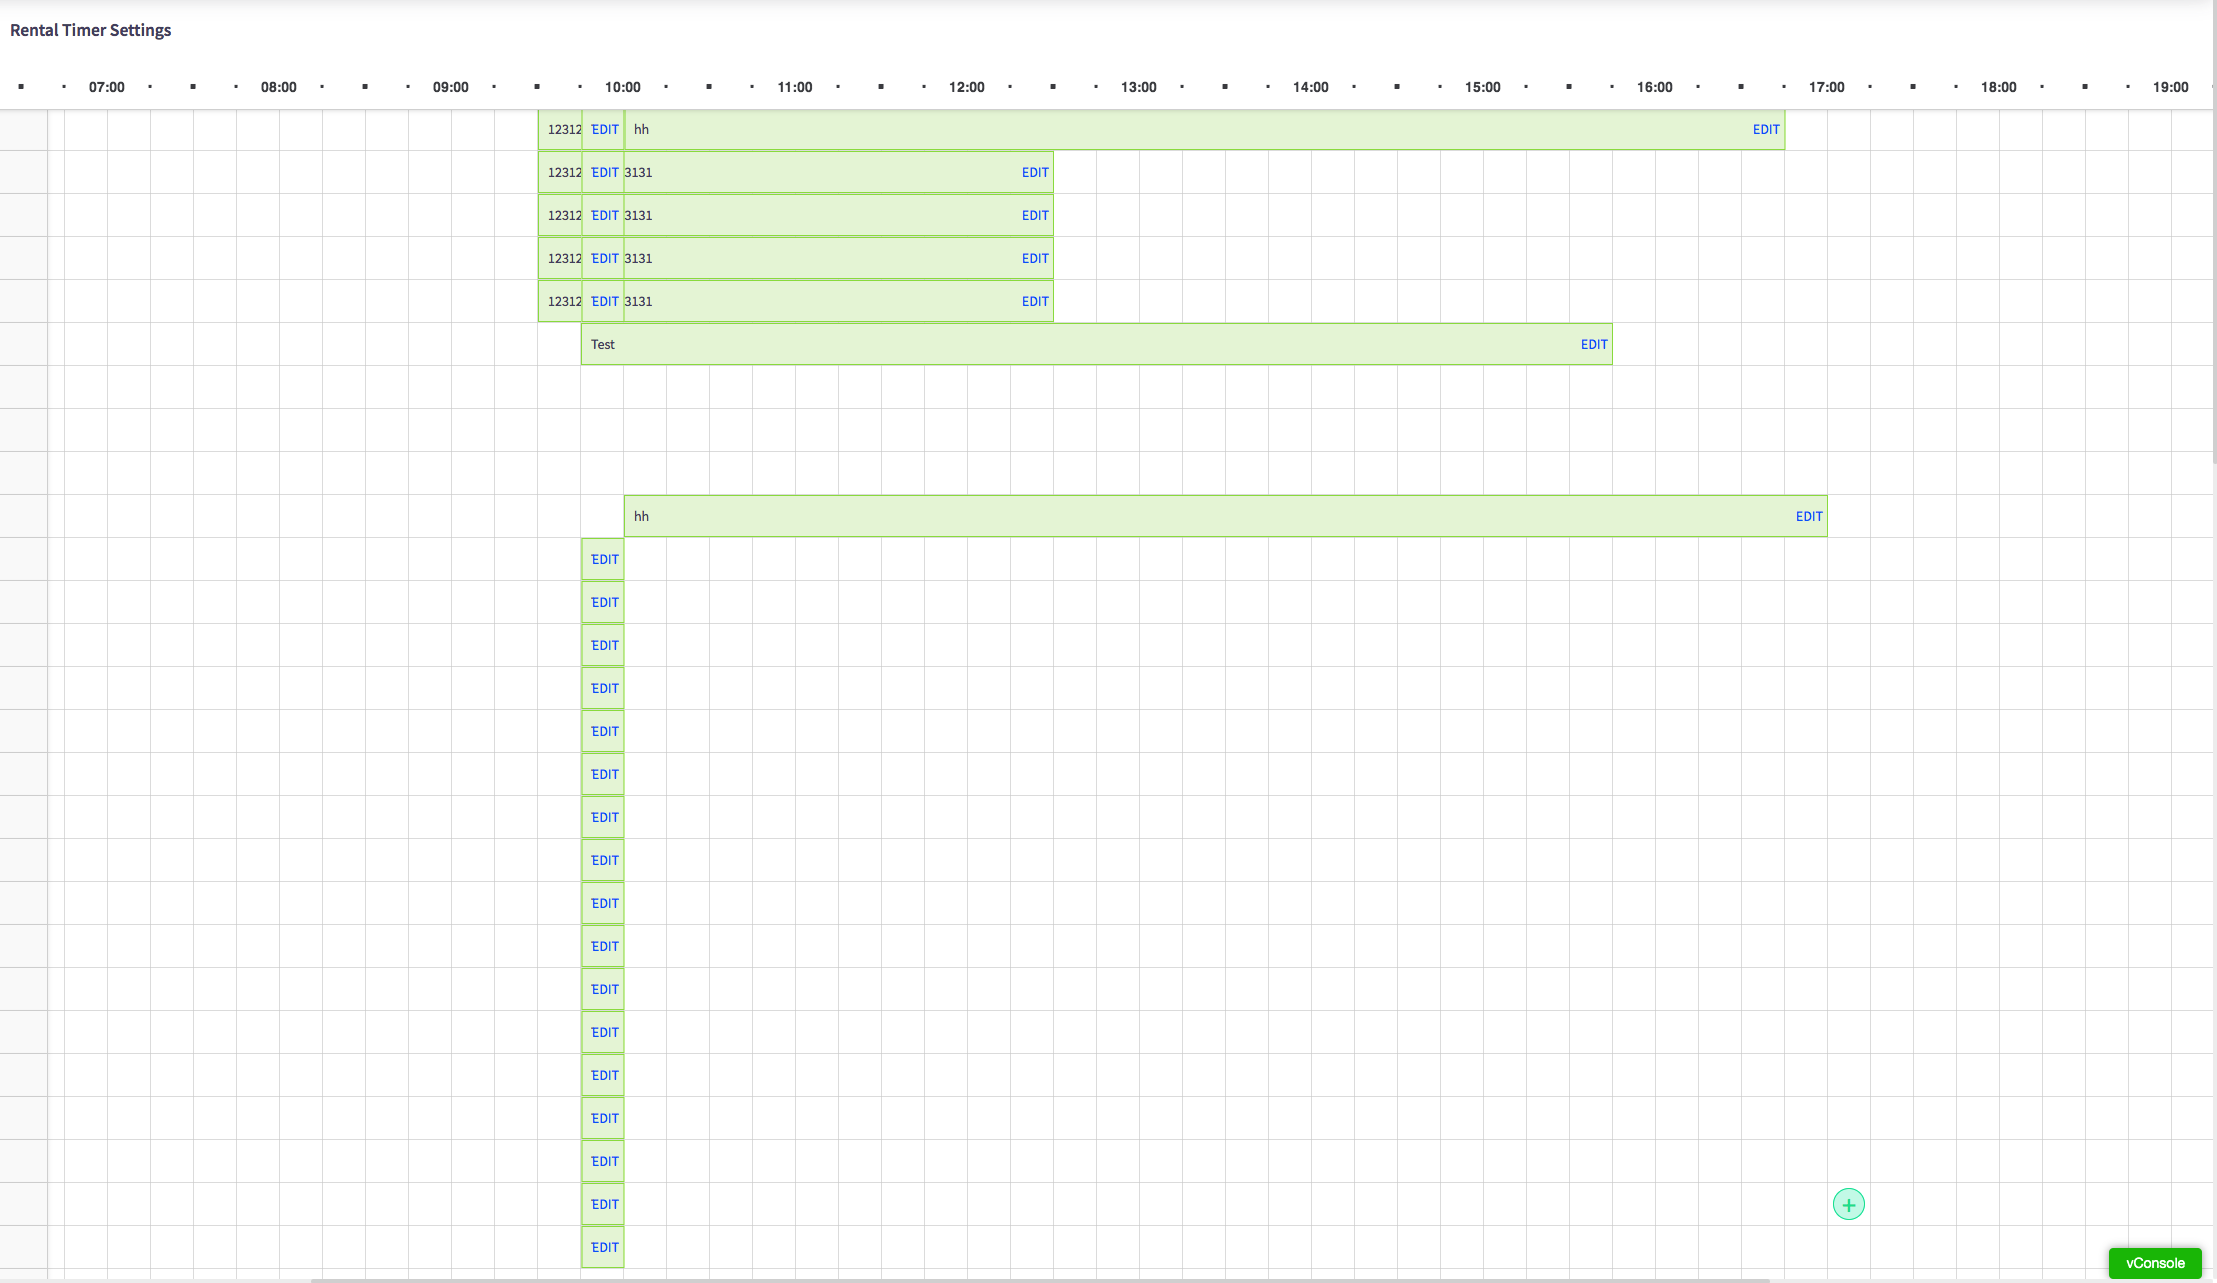
You will be presented with the timer screen for each day.
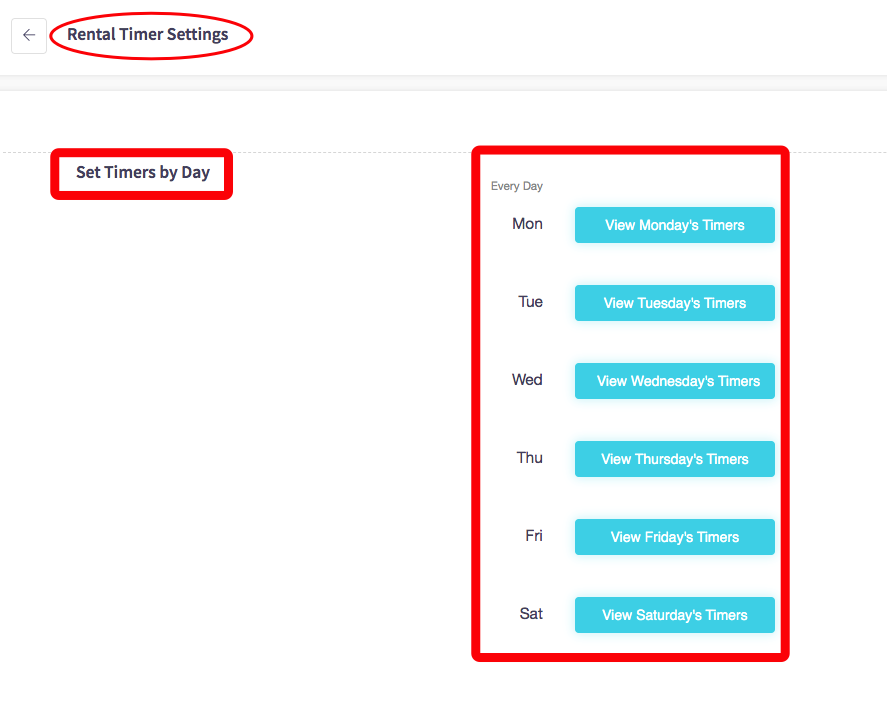
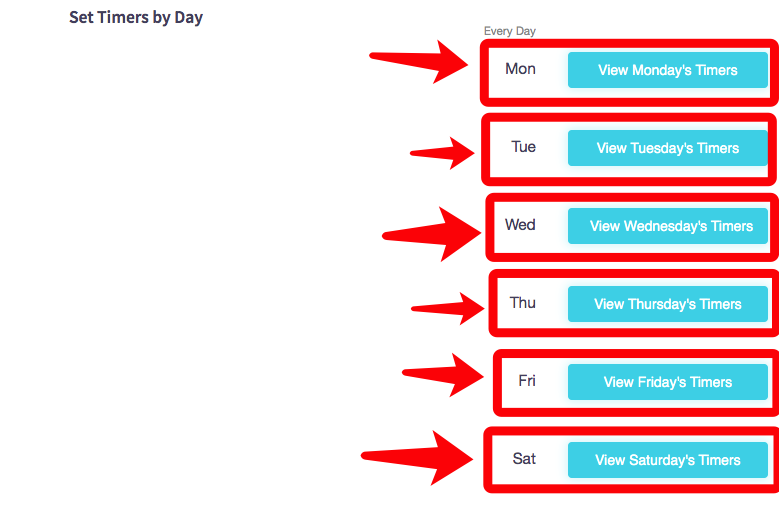
Press the "view ... timers" button, depending on the day you'd like to choose, to see timers.
E.g. Monday
As shown below, to navigate the timers simple scroll left to right or up and down.
With this information you should now be able to see all the active timers for the specific day of your choosing.
How to add a timer
This guide will show you how to view a timer on your Cloud HQ.
Navigate to the left hand menu and press 'System Settings'.
Press 'Rental Timers' settings in the 'System Settings' menu.
You will be presented with the timer screen for each day.
Press the view timers button near each day to see the timers for that specific day.
You can now see all the active timers for the day you selected.
E.g. Monday.
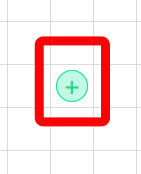
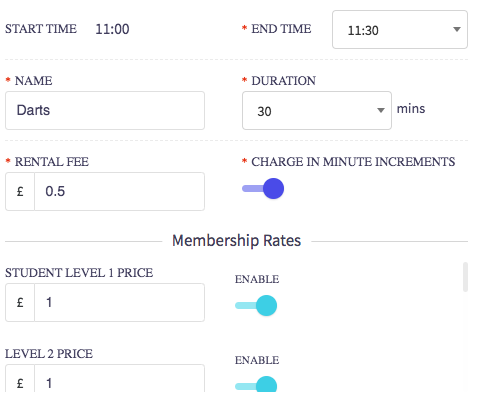
Clicking on a space will create a new timer.
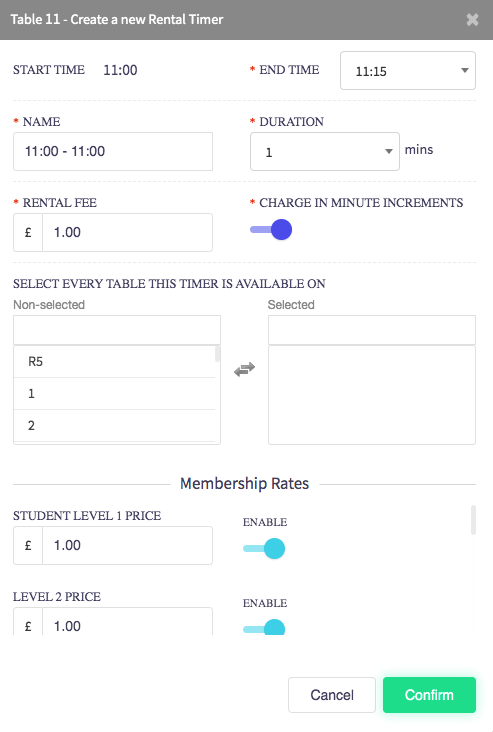
Once you have filled in the forms press confirm.
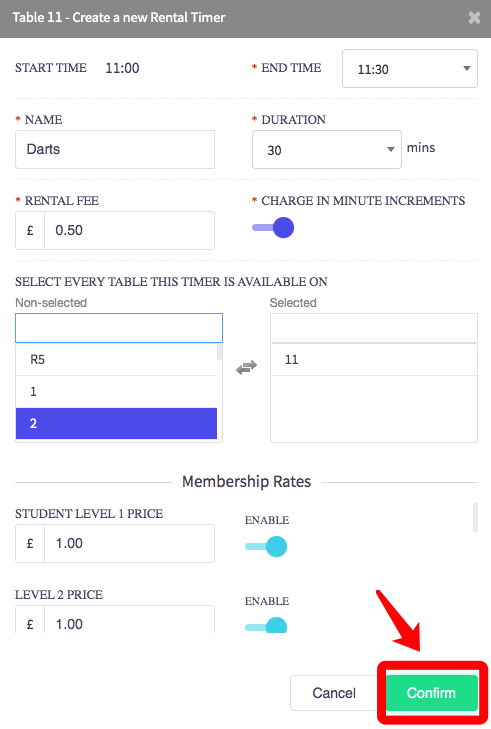
The rental timer should now show in the table.
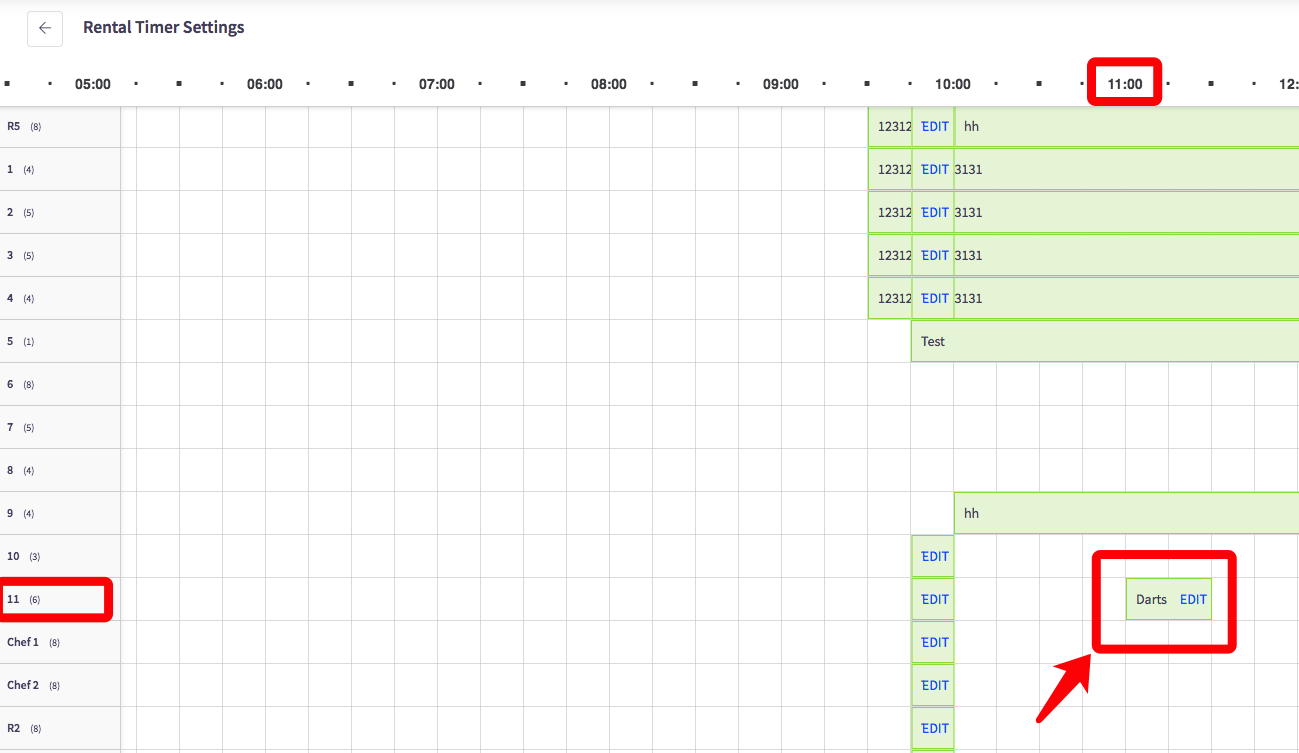
When it is showing where expected you can edit it by simple clicking 'EDIT' near your rental timer.
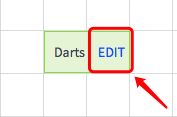
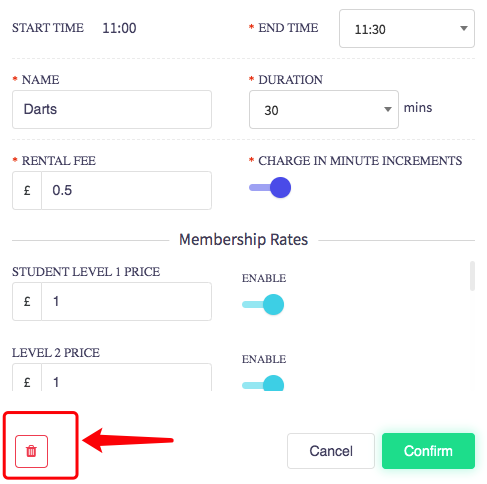
Once you have selected 'EDIT' an option screen should pop up where you can change your rental timer or even delete it.
And to delete it:
How to view reminders
This guide will show you how to view reminders on your Cloud HQ.
Navigate to the left hand menu and press 'System Settings'.
Press 'Reminder Settings' in the 'System Settings' menu.
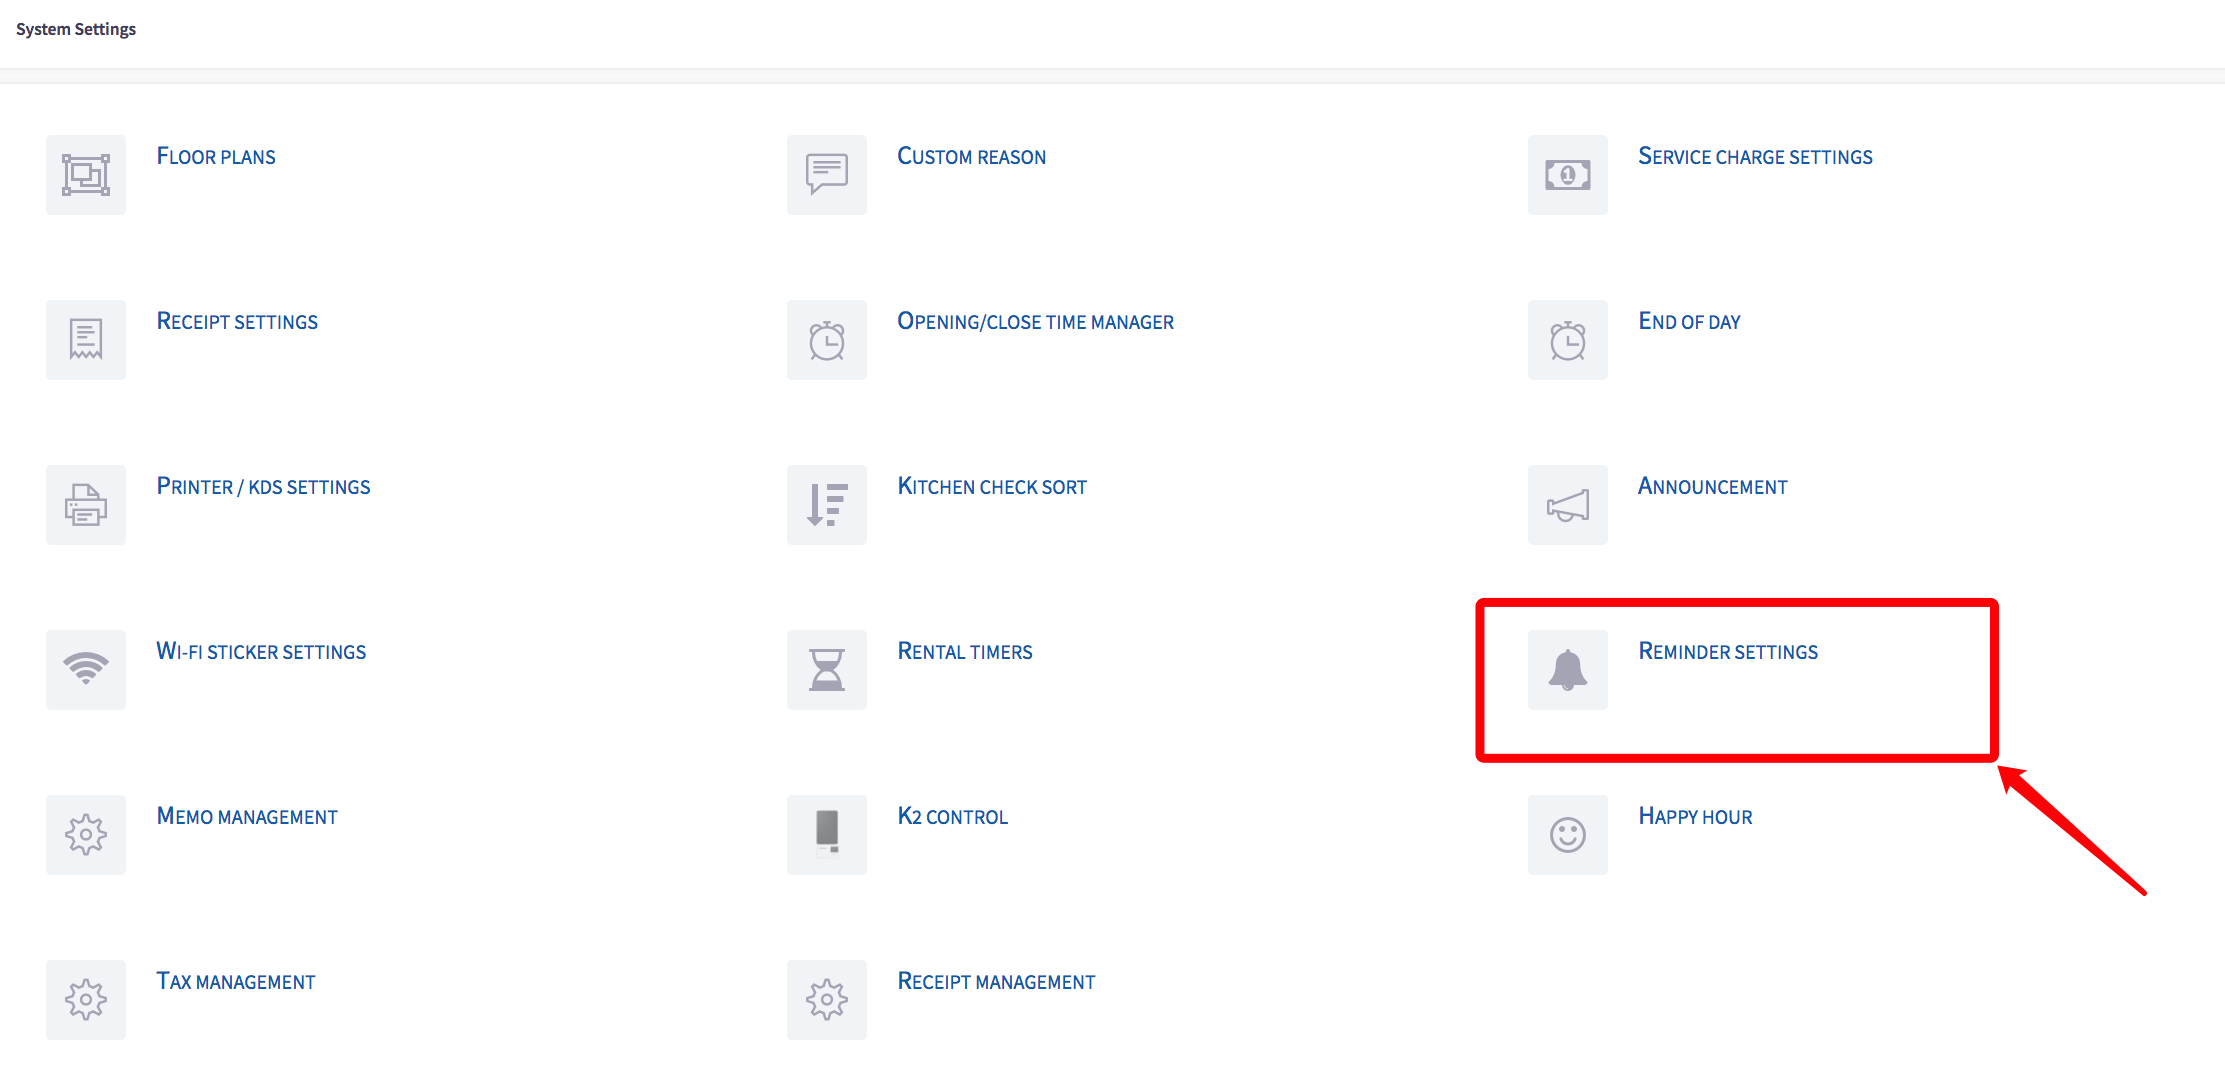
You will be shown the 'Reminder Settings'.
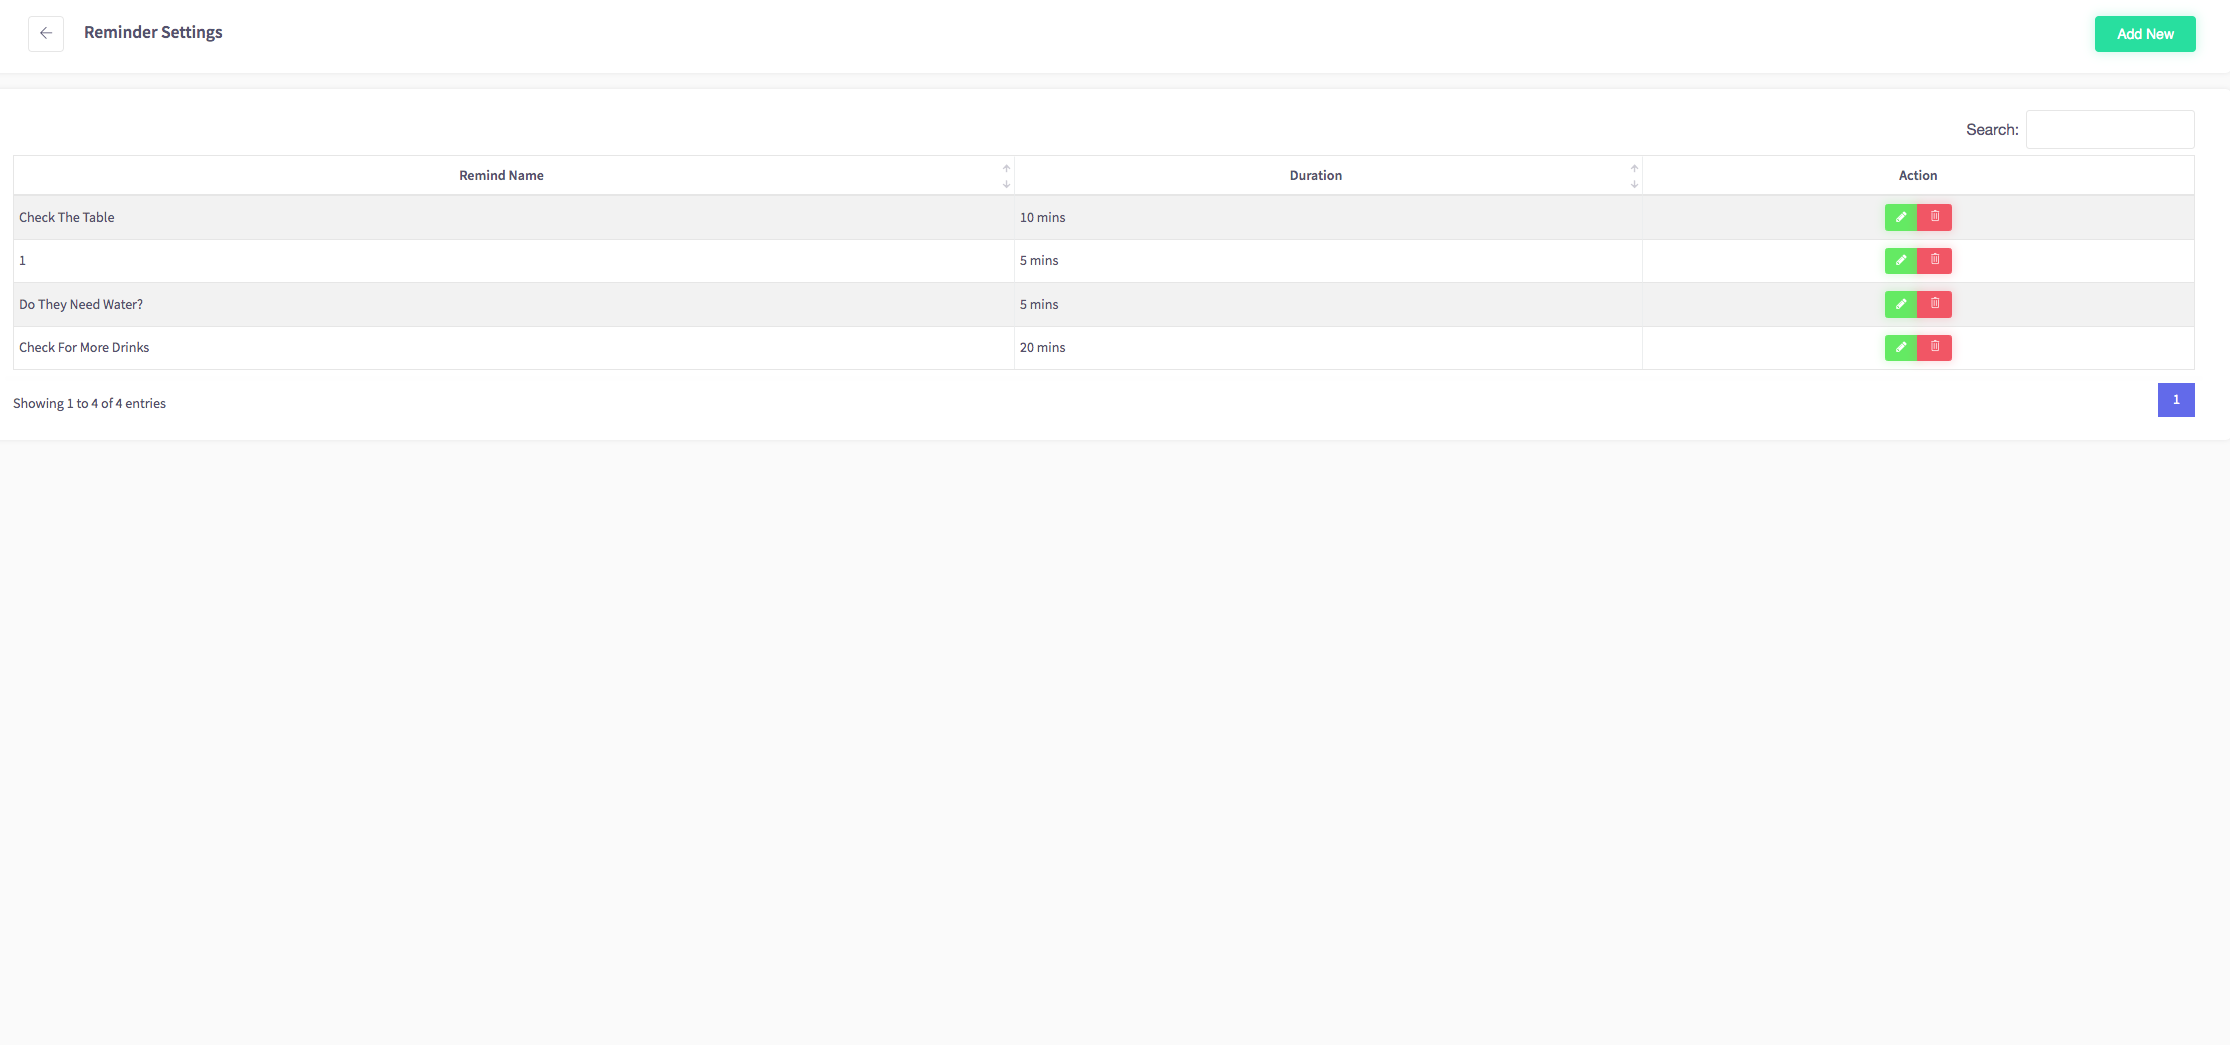
From here you can create or edit reminders.

How to create Reminders
This guide will show you how to create/add reminders to your Cloud HQ.
Navigate to the left hand menu and press system settings.
Press reminder settings in the system settings menu.
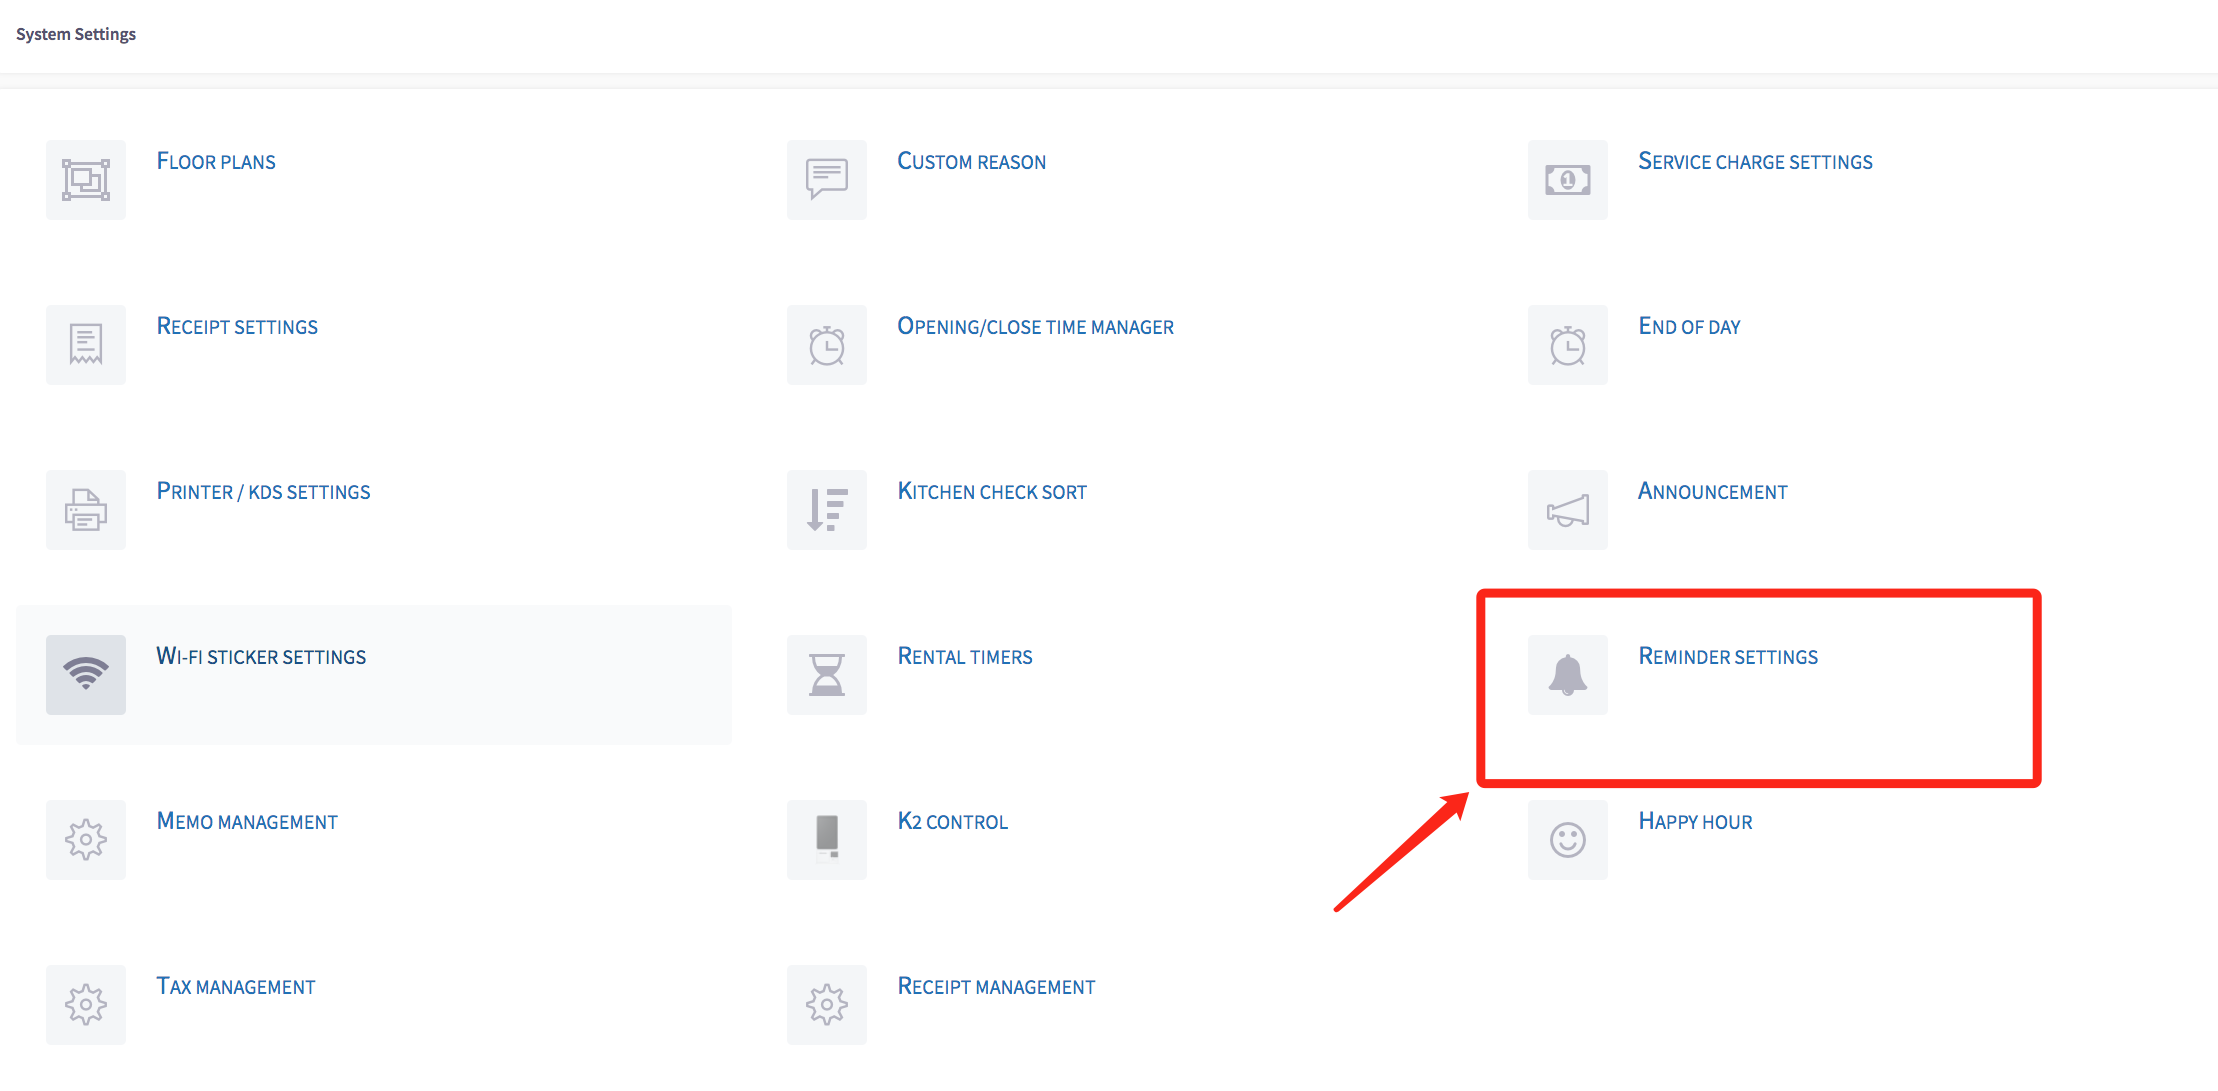
You will be shown the reminder settings.

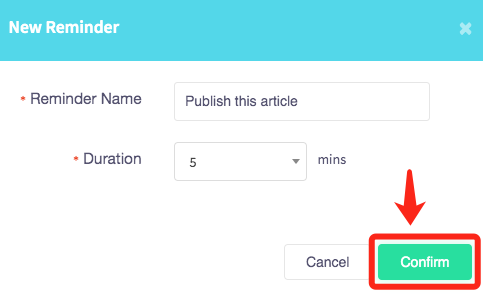
Press add new to make a new reminder.

A box will appear with a name and time to fill in.
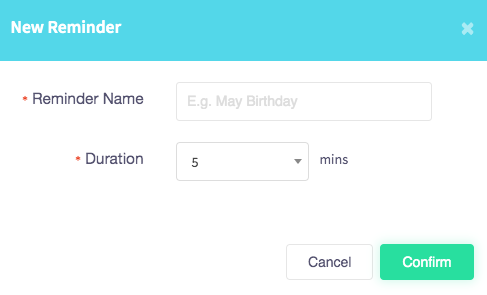
Once you have filled out your reminder, press confirm to save.
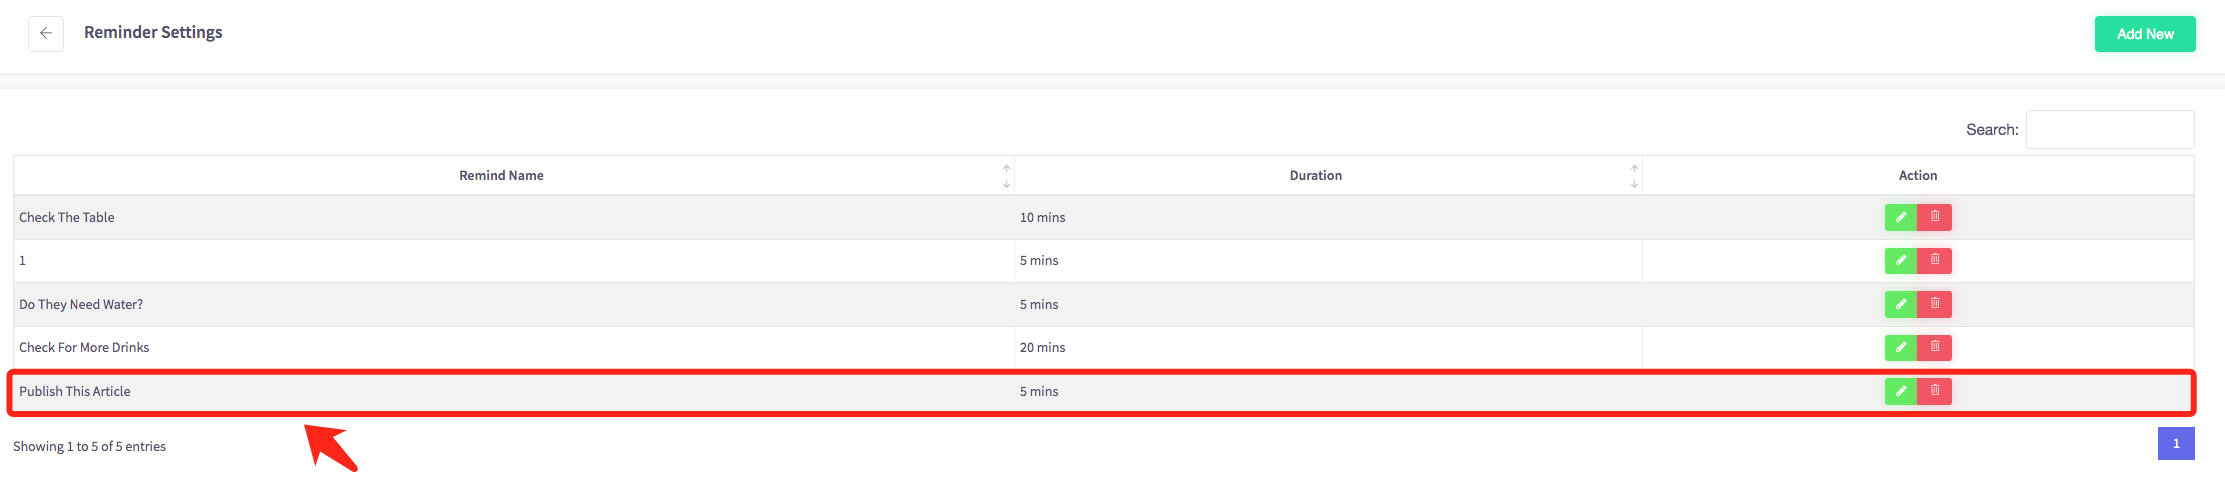
This will now appear in the reminders.
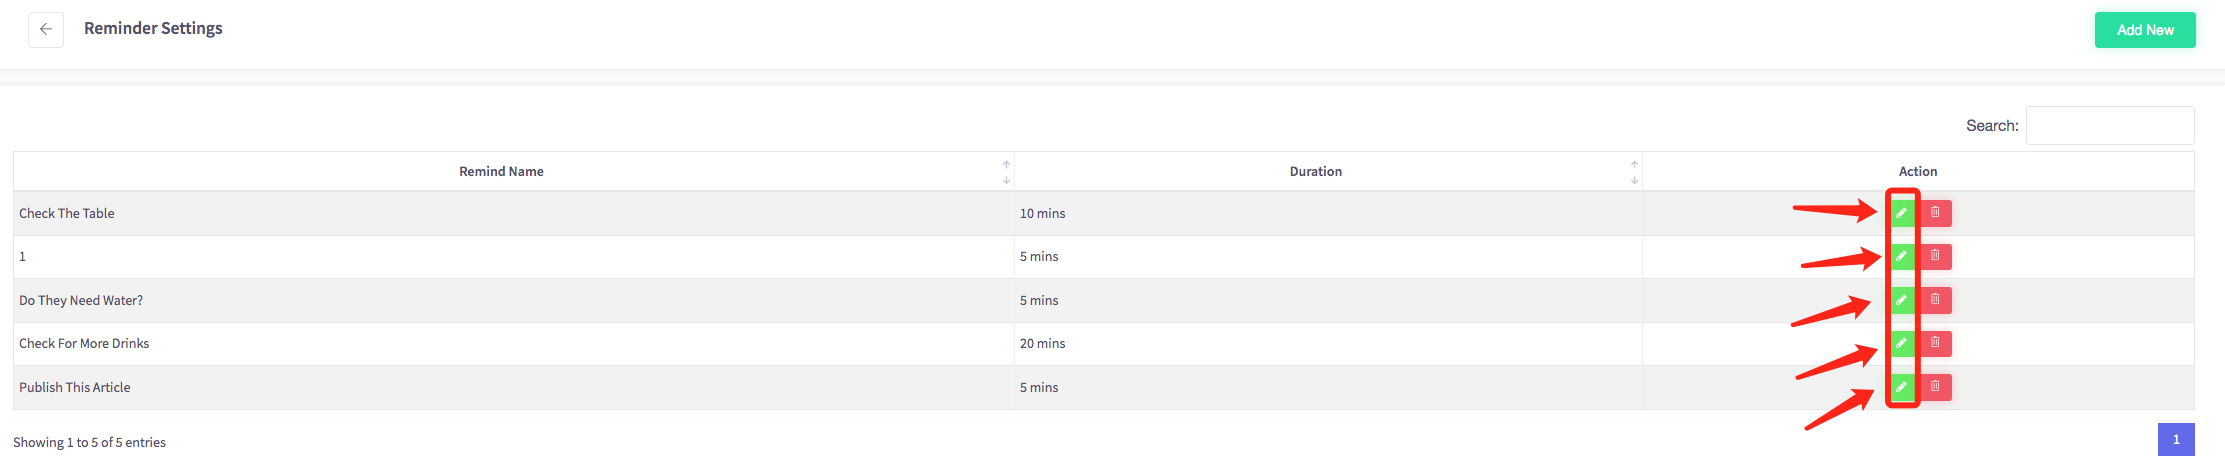
If you would like to edit the reminder, press the green button next to it.
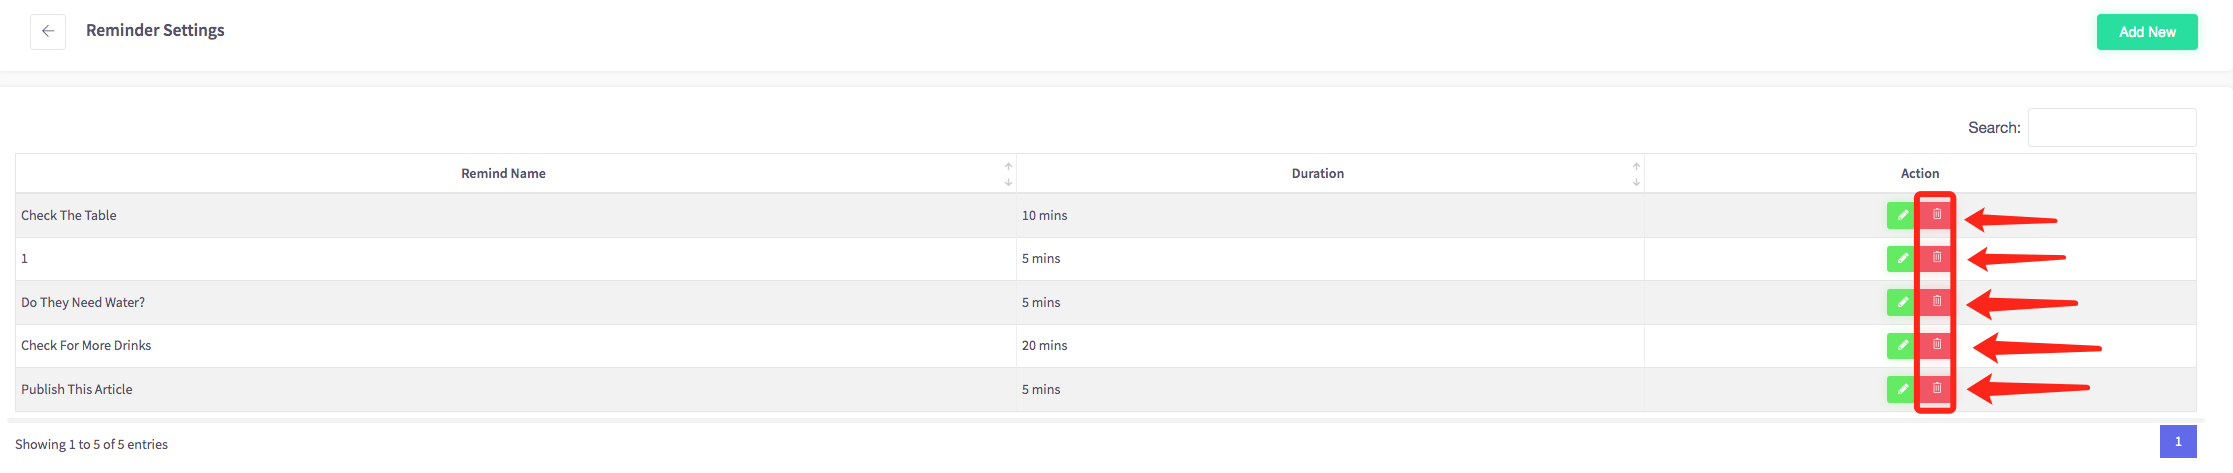
If you would like to delete your reminder, press the red button next to it.
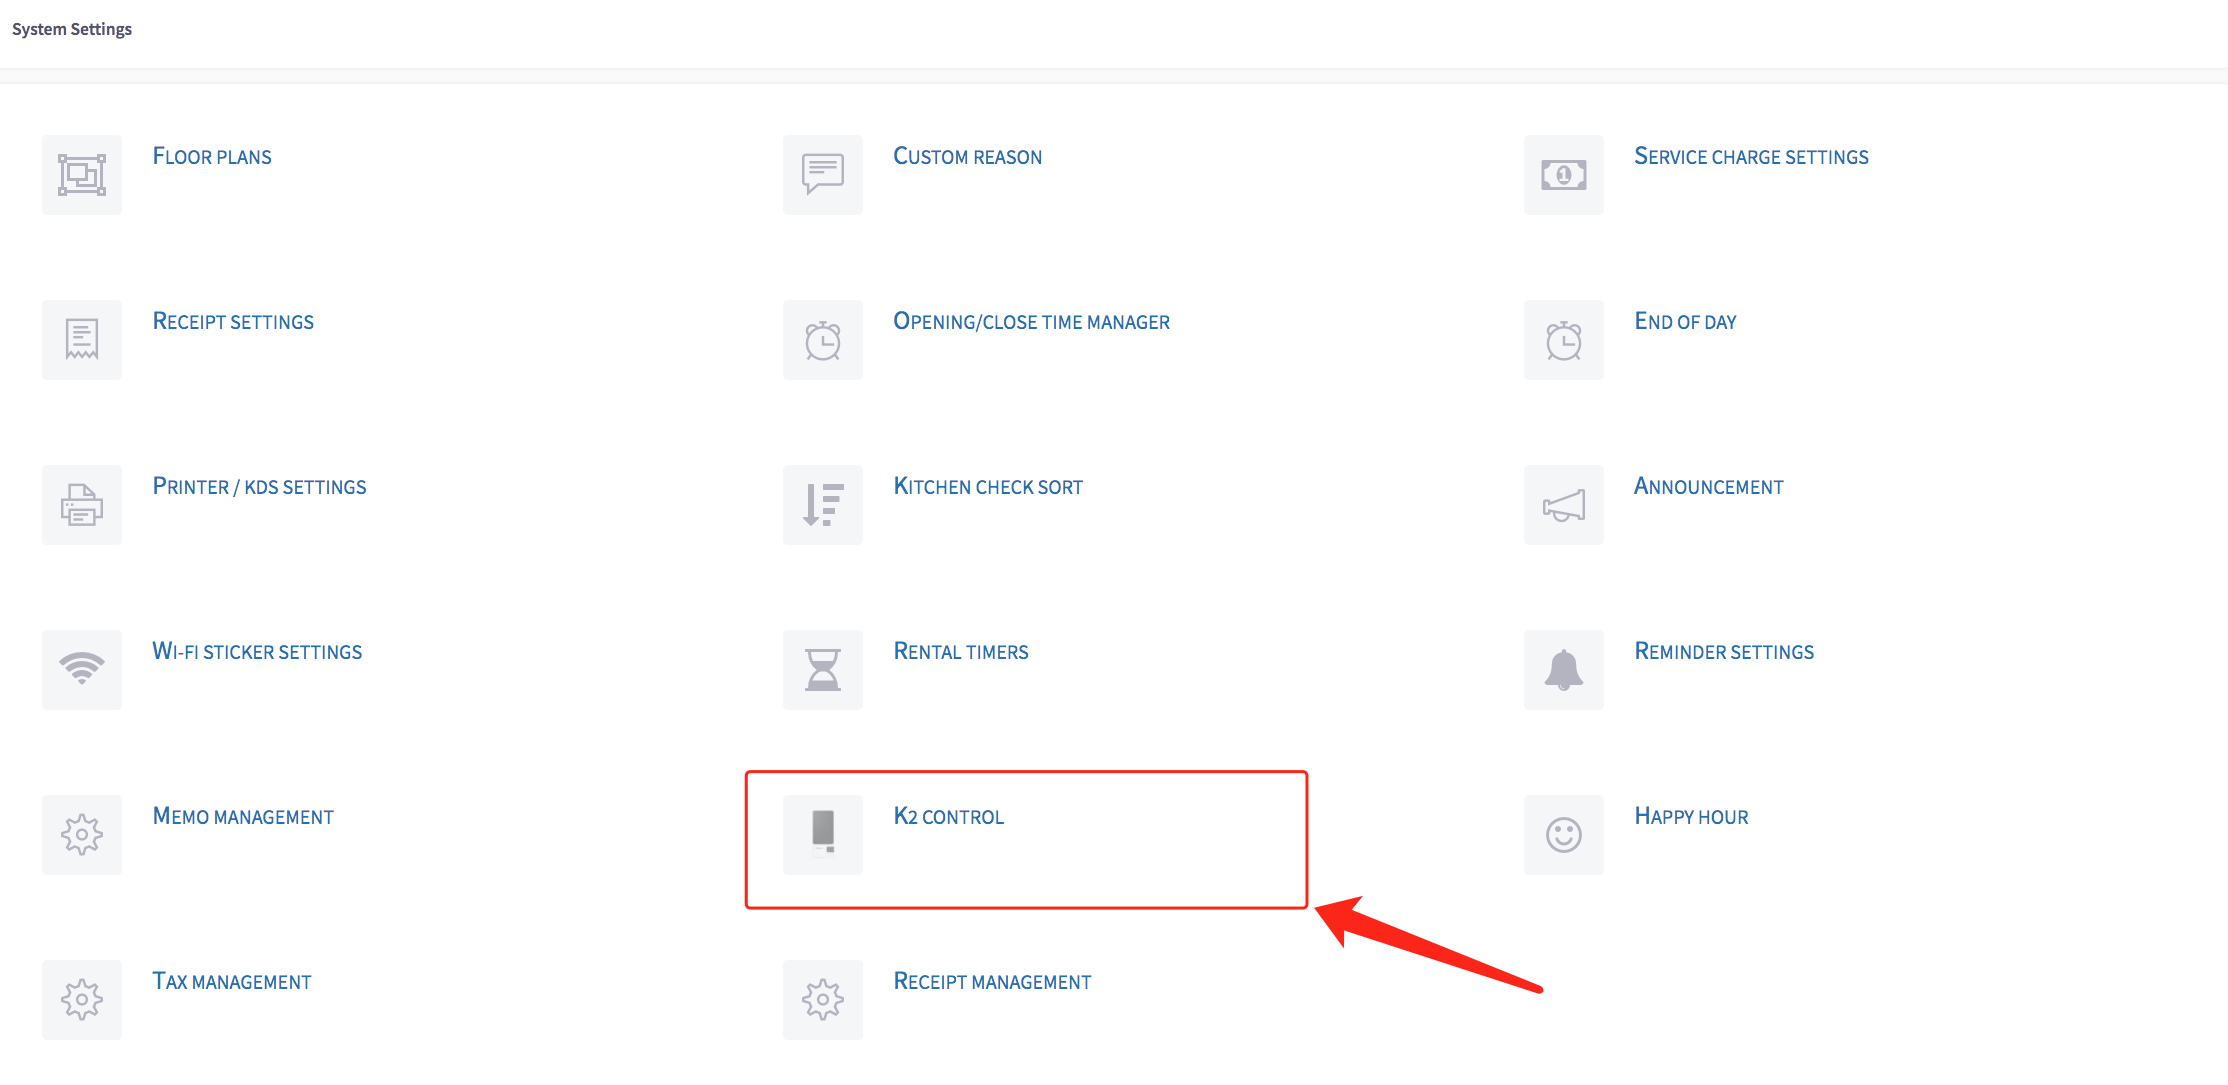
How to turn a Kiosk on and off remotely
This guide will show you how to turn a Kiosk on and off remotely on your Cloud HQ.
Once you have logged on scroll down to "System Settings" on the left-hand side, then the 'K2 Control' option on the menu.
This will show the K2 Settings menu, shown below.
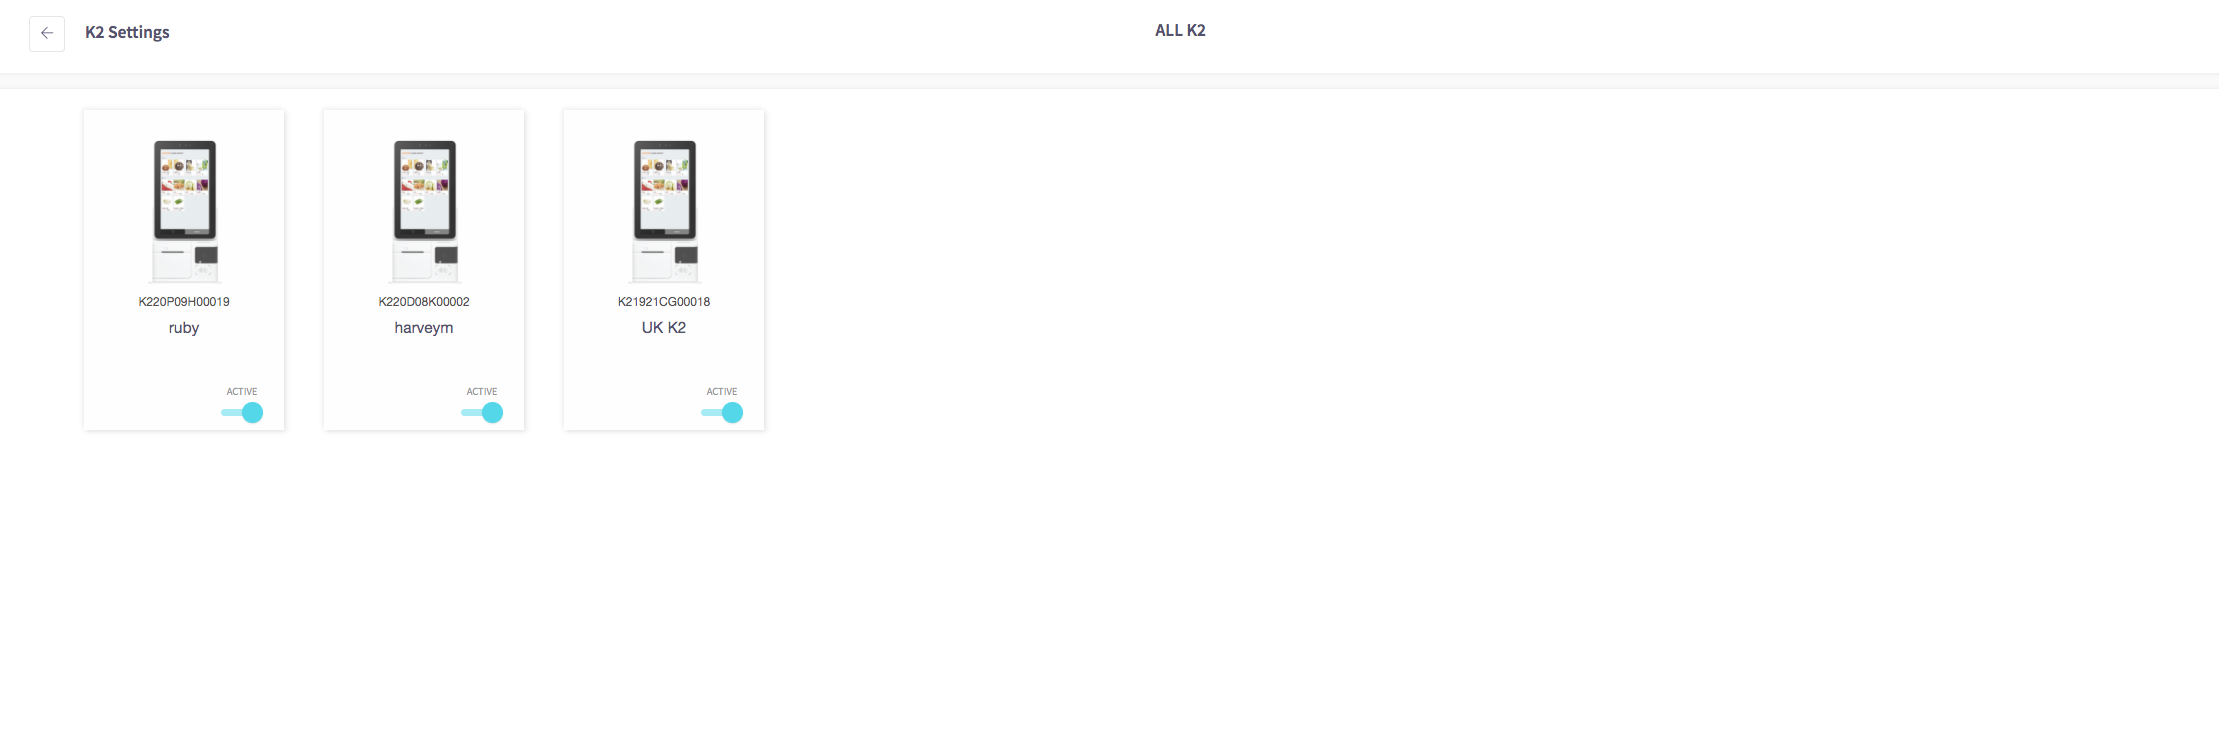
Here you can see all of the Kiosks are turned on remotely, represented by the blue toggle.
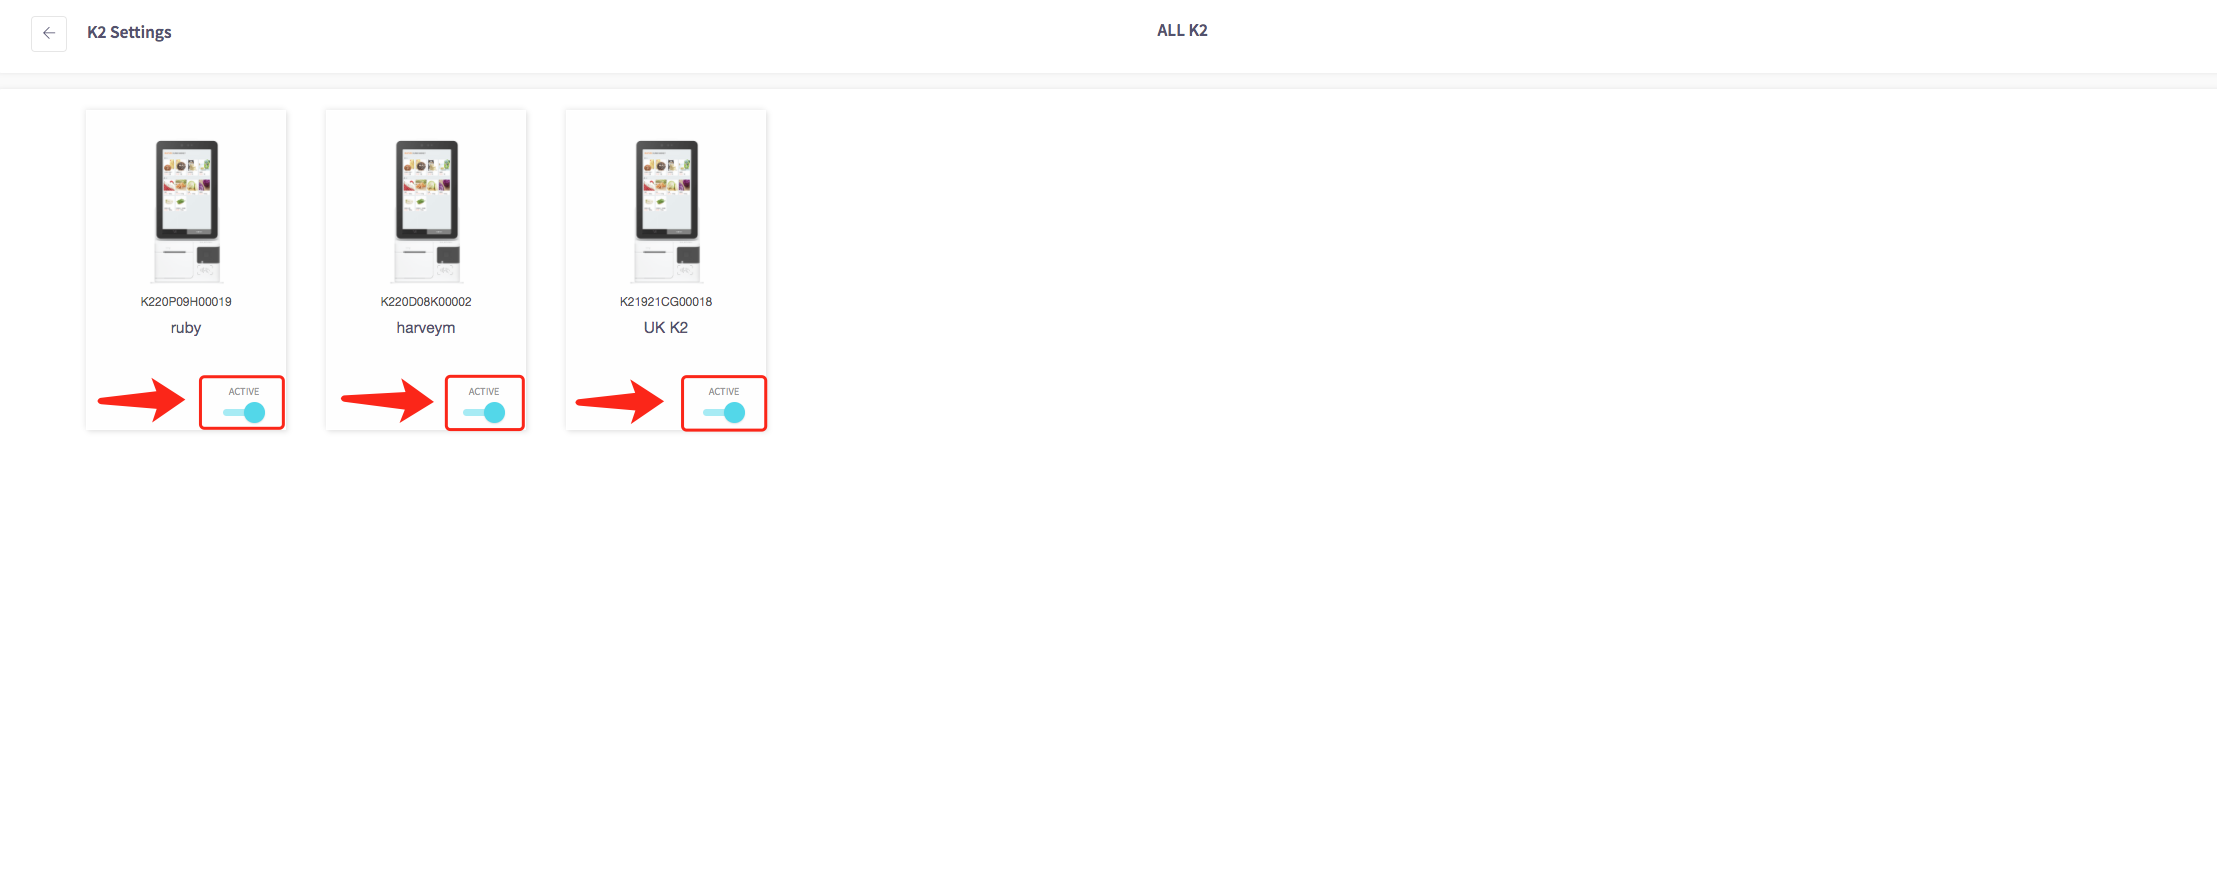
To turn the kiosks off simply click on the toggle and the toggle should turn grey and the screens of the kiosks should turn black.
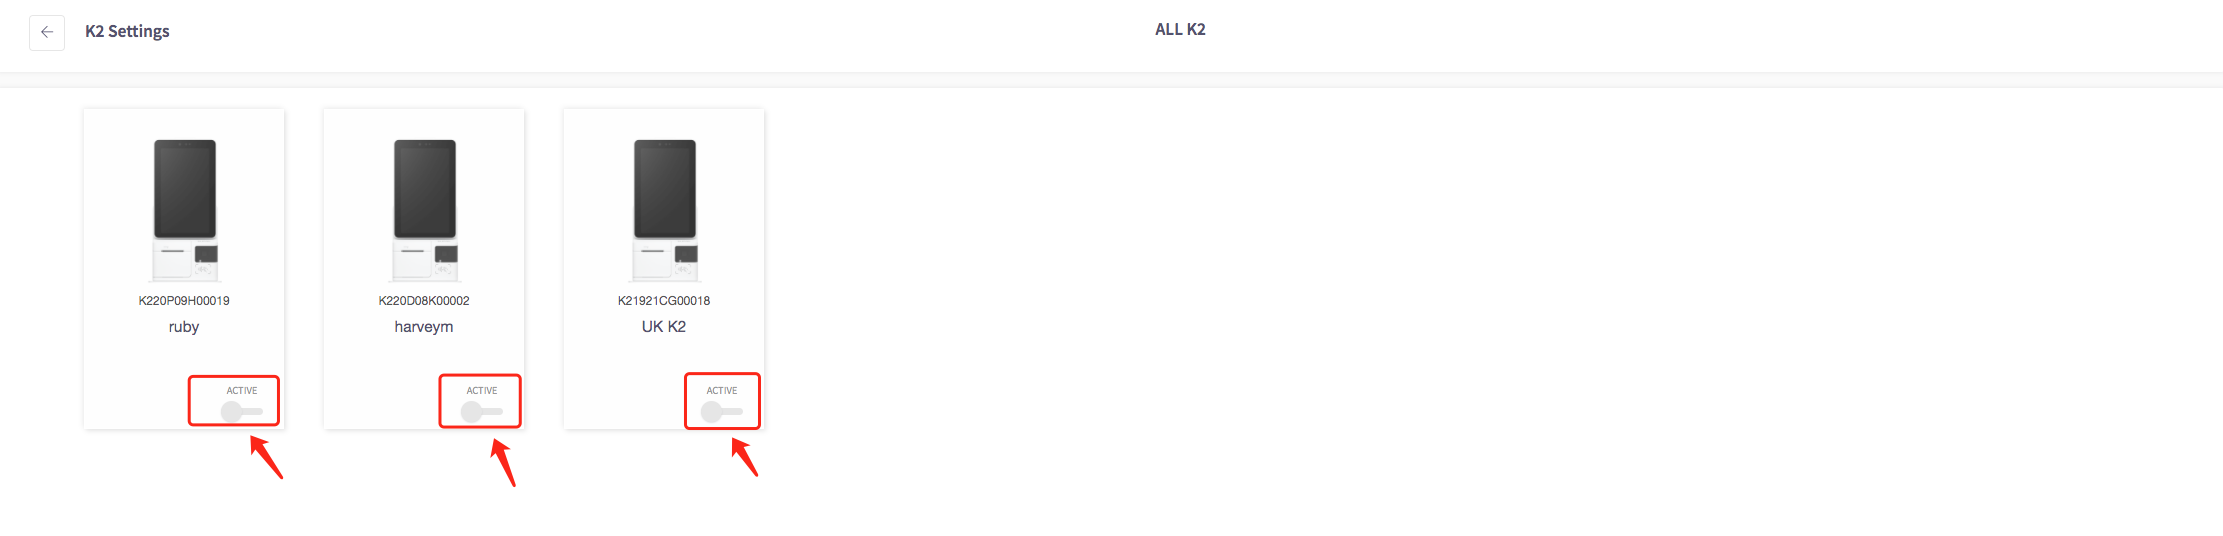
To turn them on again simply press the toggle.

How to add an announcement
This guide will show you how to add an announcement on your Cloud HQ.
Once you have logged on scroll down to "System Settings" on the left-hand, then the 'Announcement' option in the menu.
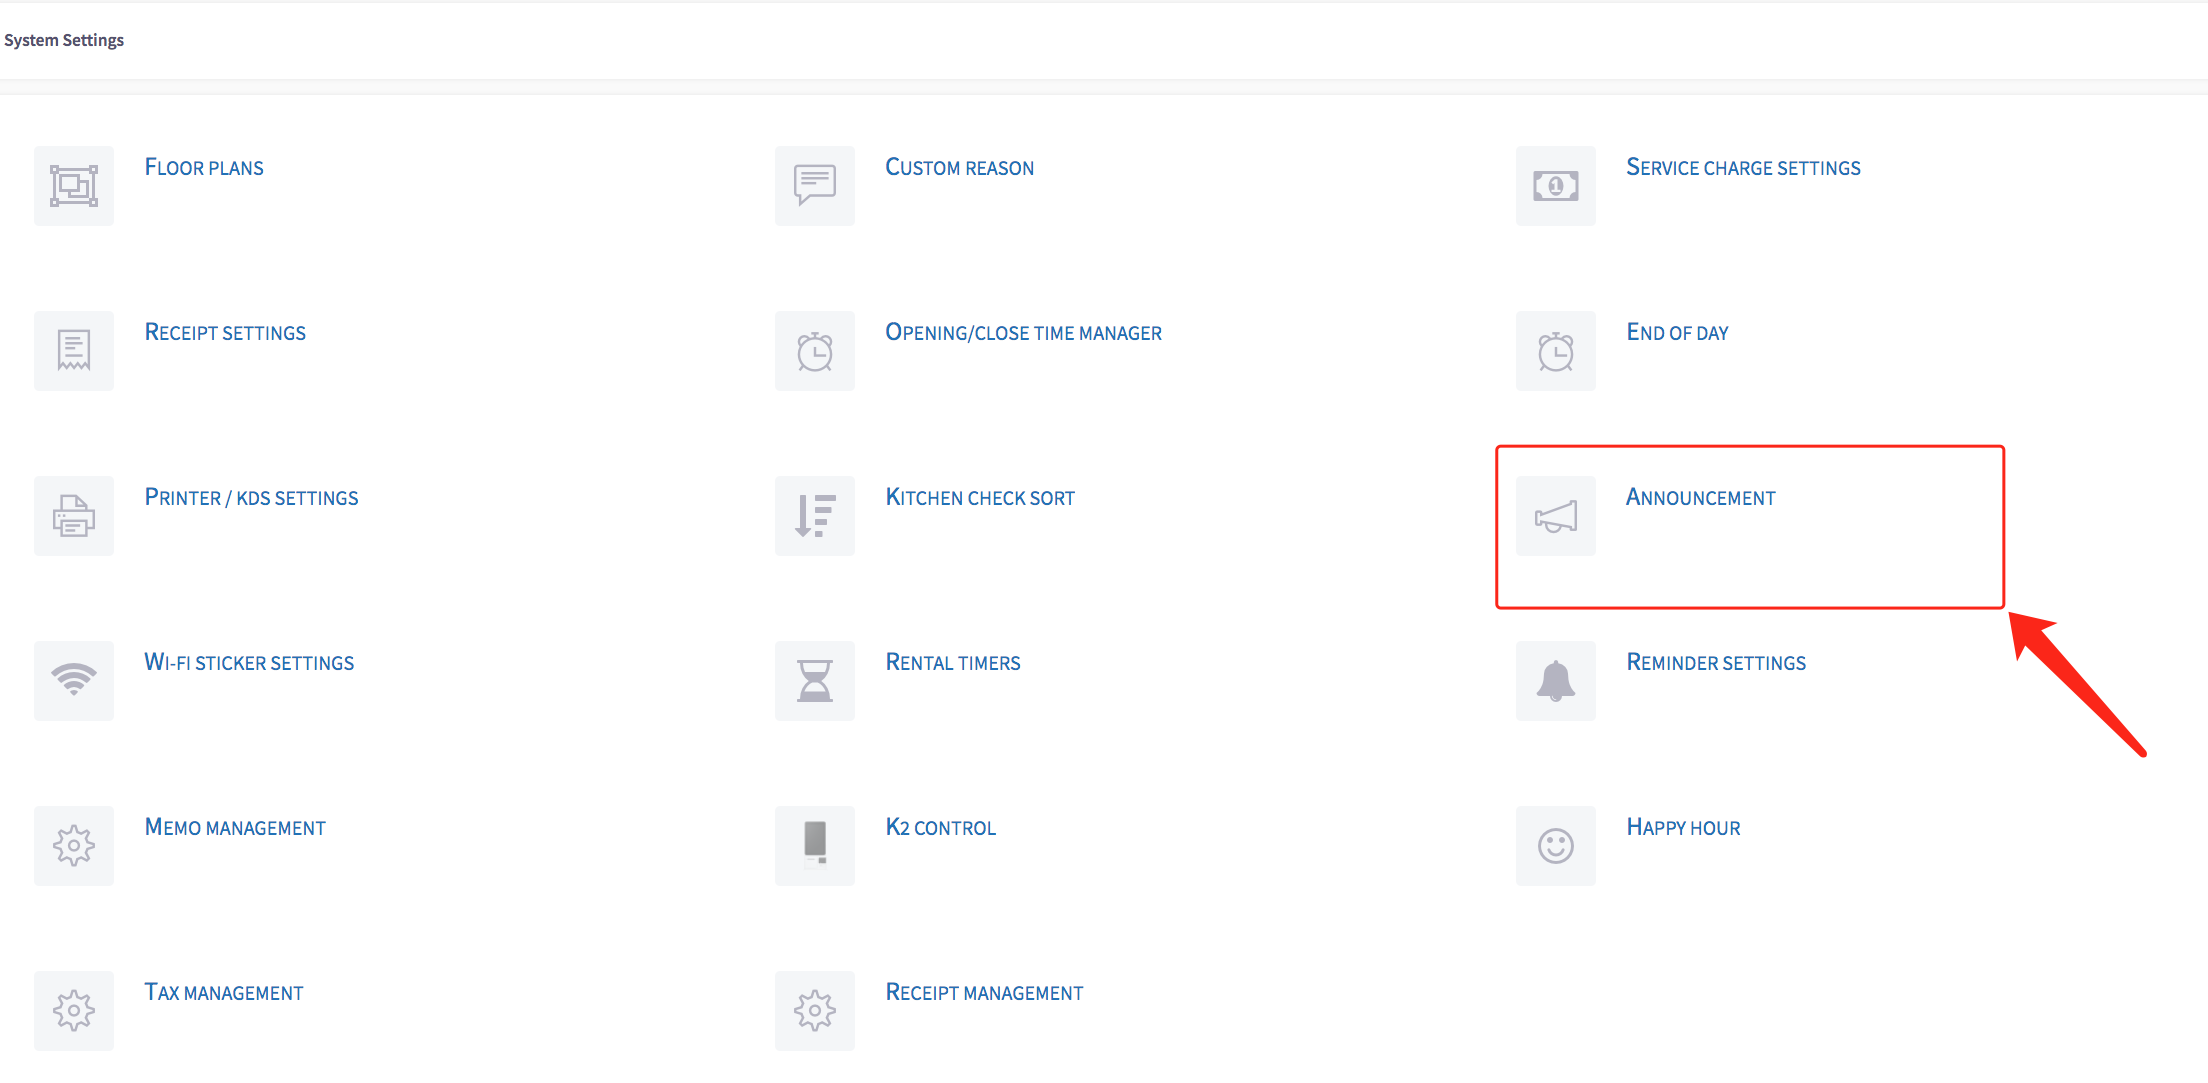
The announcement list menu should appear, shown below.

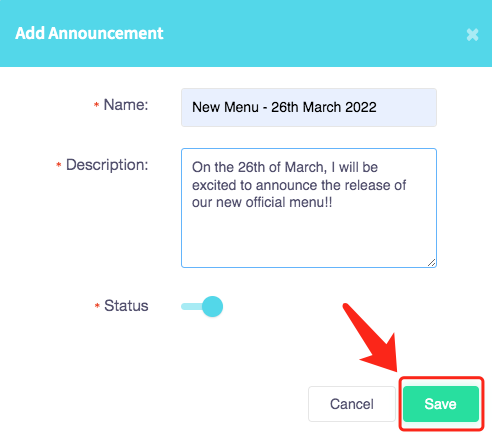
Then press the green "Add Announcement" button.

This menu will pop up, fill in details such as the name of the announcement, the description of the announcement and the status of the announcement.
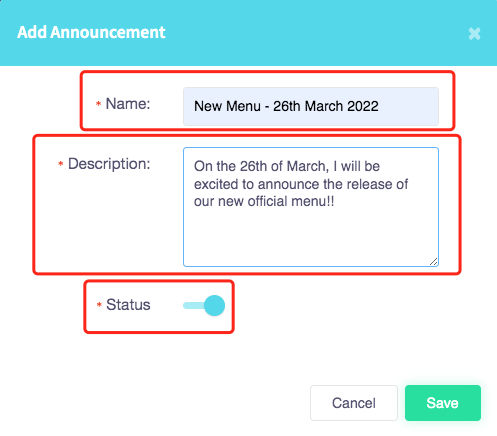
When completed click the green "Save" button at the bottom of the menu.
The announcement will be added to your Announcement list. You can only display one announcement at a time.

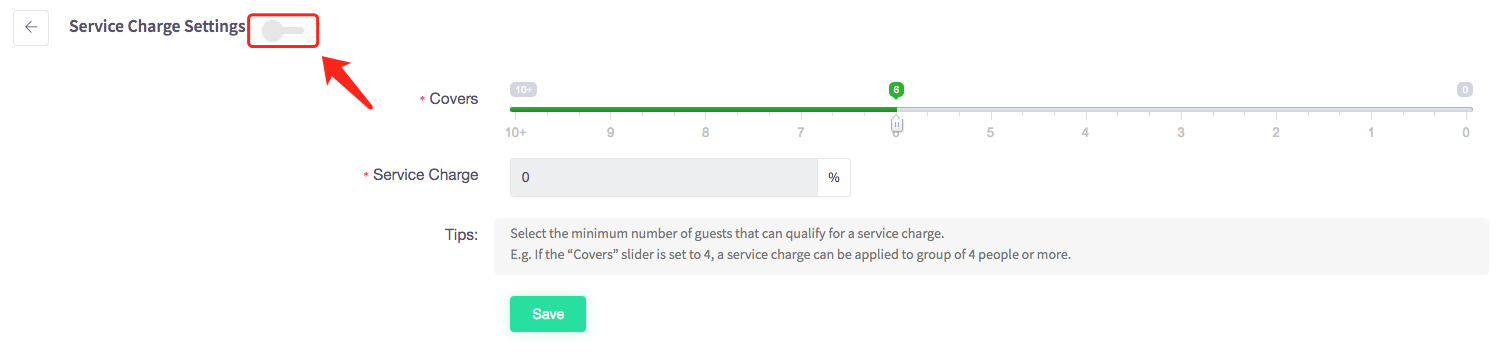
How to enable service charge
This guide will show you how to enable service charges on your Cloud HQ.
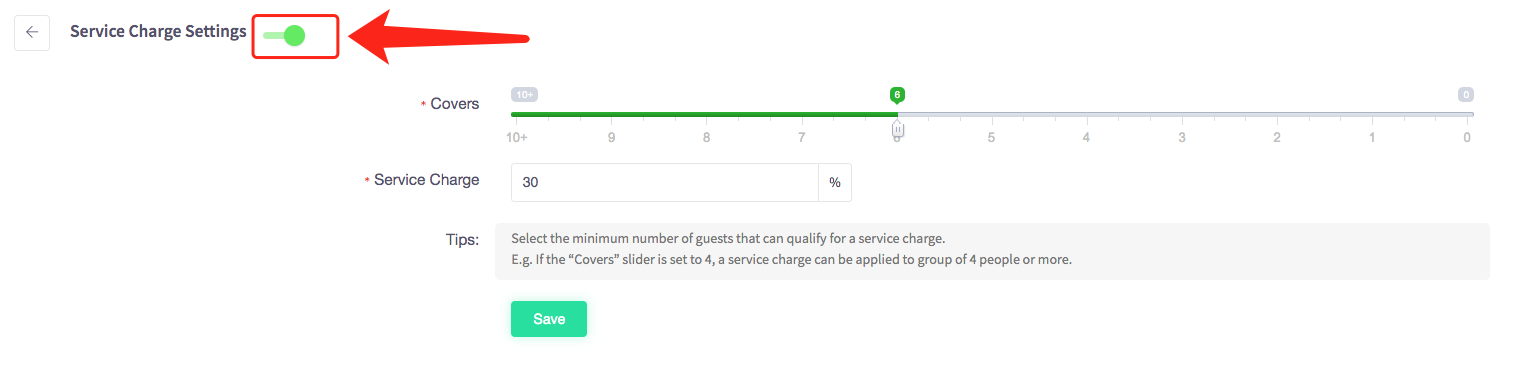
Once you have logged on scroll down to "System Settings" on the left-hand side and then the 'Service Charge Settings' option on the menu.

This service charge settings menu should appear, shown below.
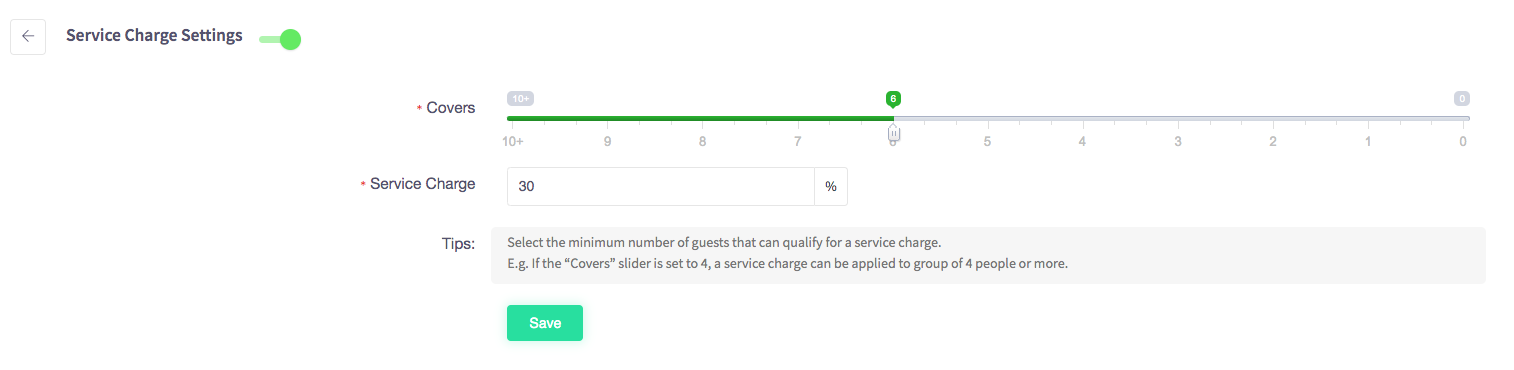
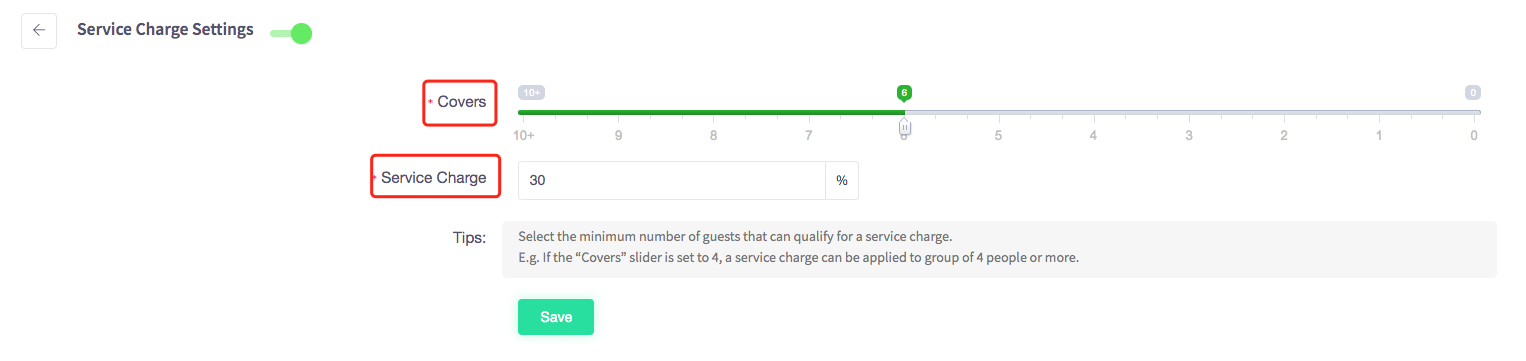
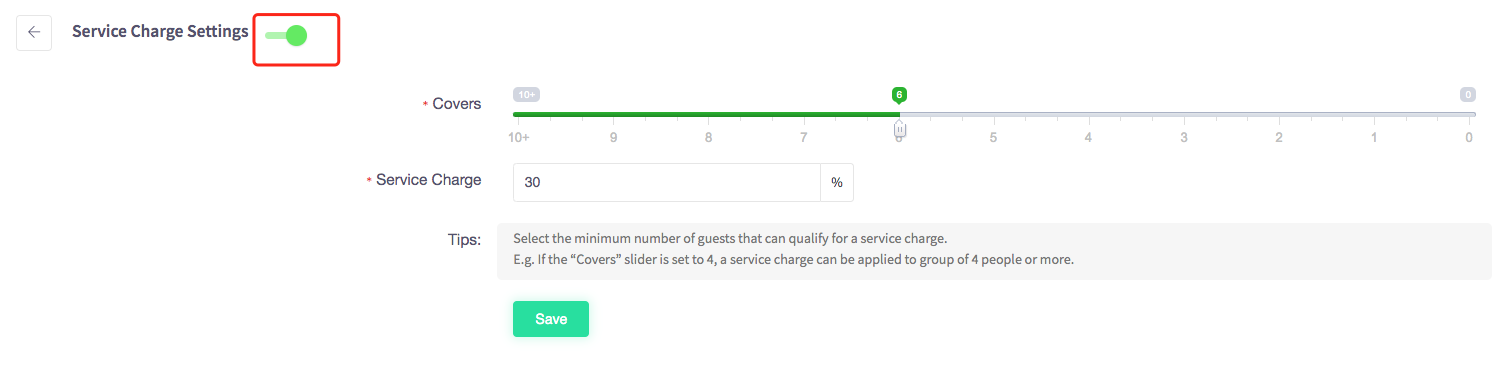
You can see that the service charge is enabled through the green toggle.
You can select the number of covers you would like to service charge and by what percentage.
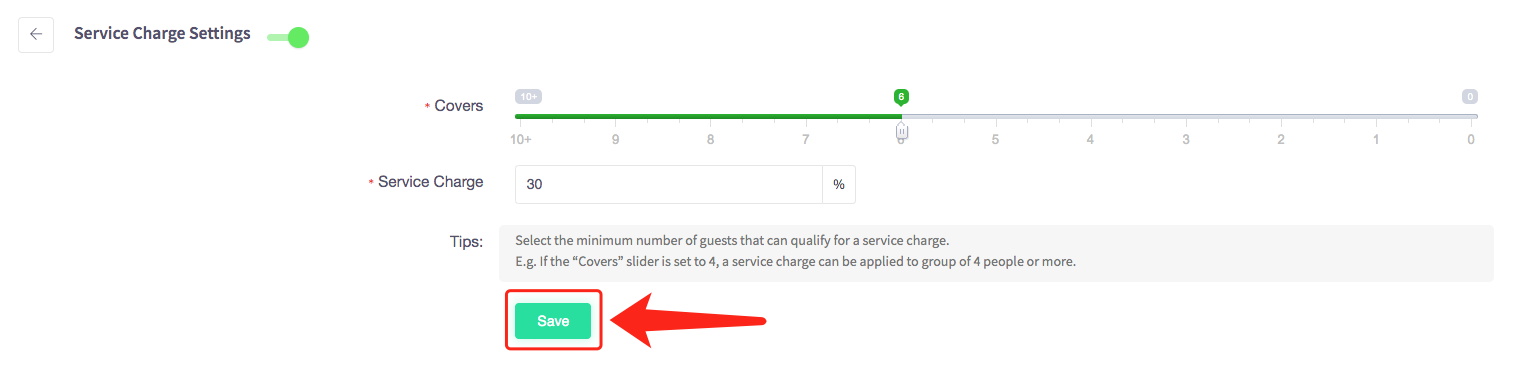
Once you have completed this press the green save button.
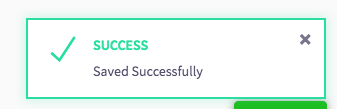
A green message will pop up saying it has been saved successfully.
To disable the service charge, simply press the green toggle next to the service charge settings. This will turn grey to indicate that the service charge has been disabled.
To simply enable service charge again, press on the toggle and it will turn green to indicate service charge is enabled.
How to edit a receipt
This guide will show you how to edit a receipt on your Cloud HQ.
Once you have logged on scroll down to "System Settings" on the left-hand side and then the 'Receipt Settings' option in the menu.
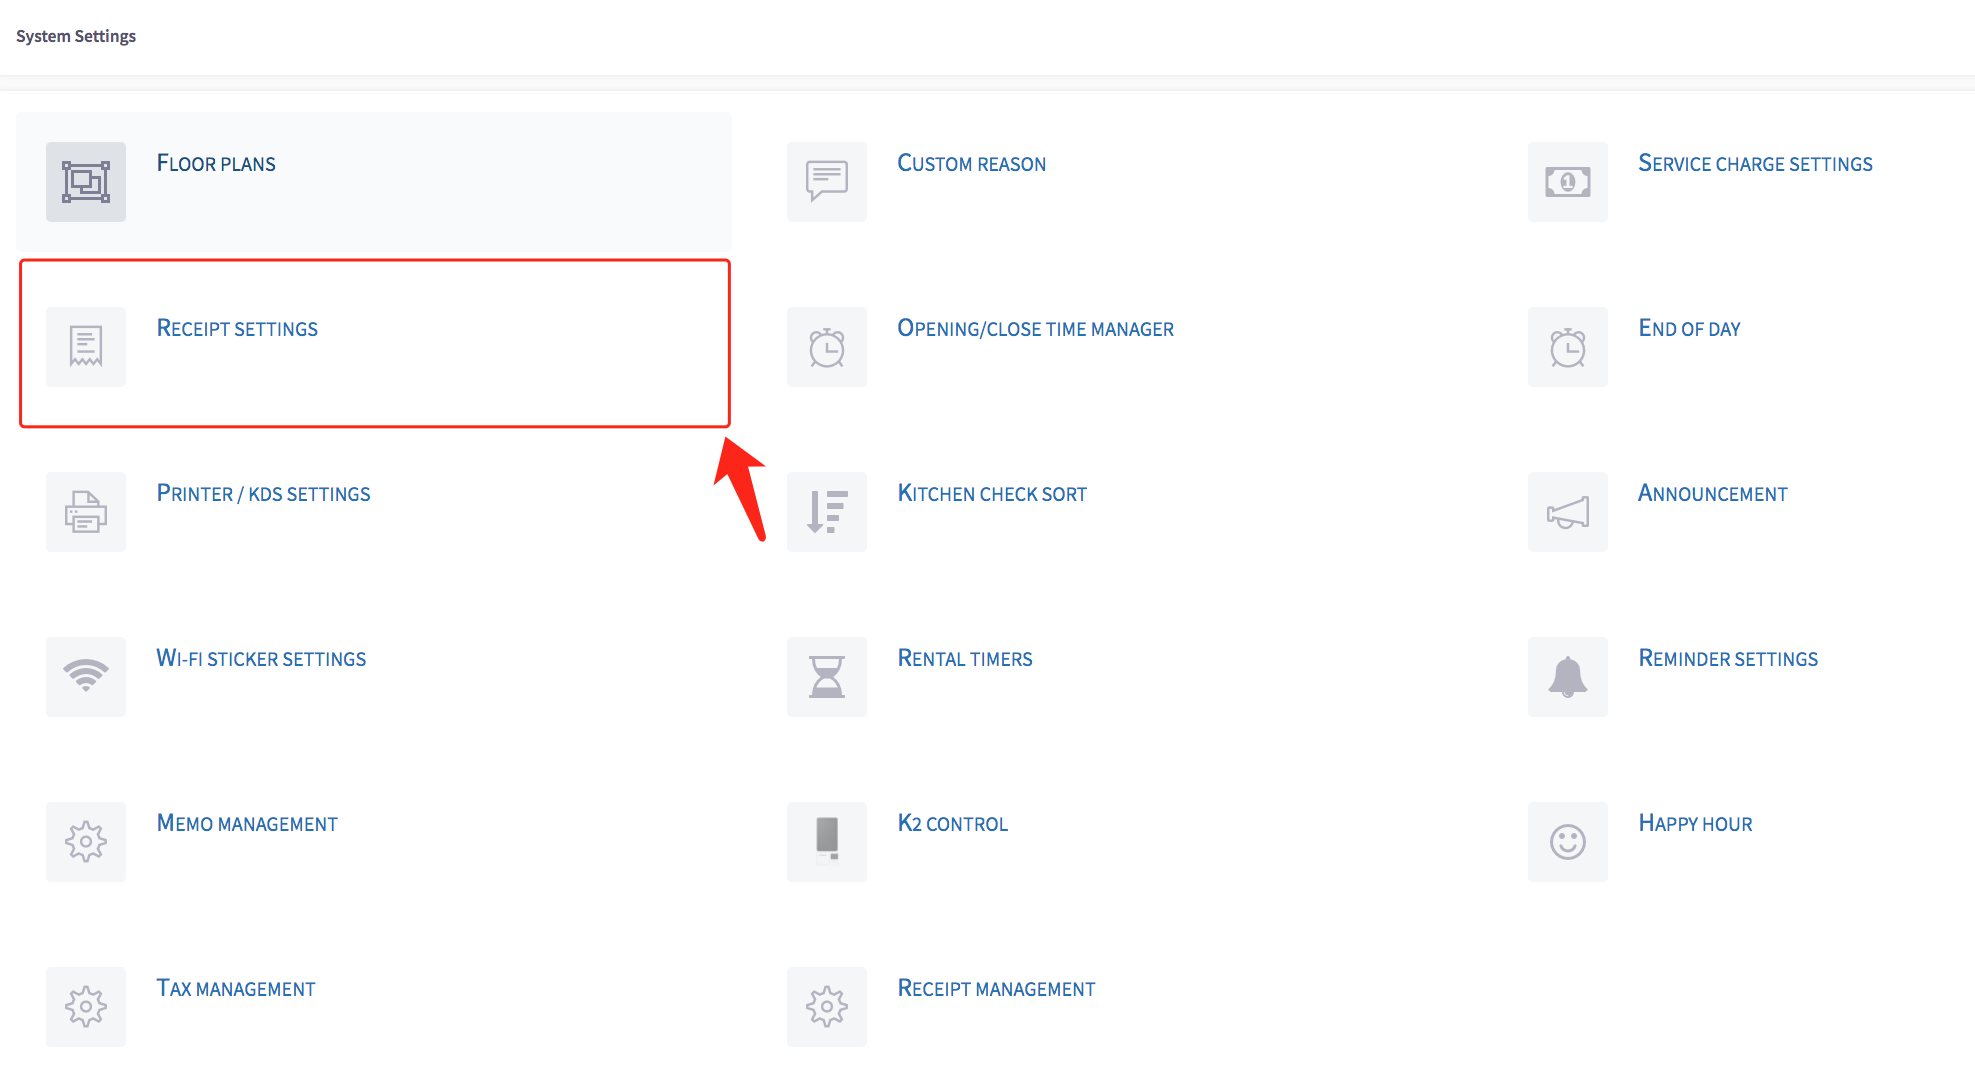
The receipt settings menu should appear, shown below.
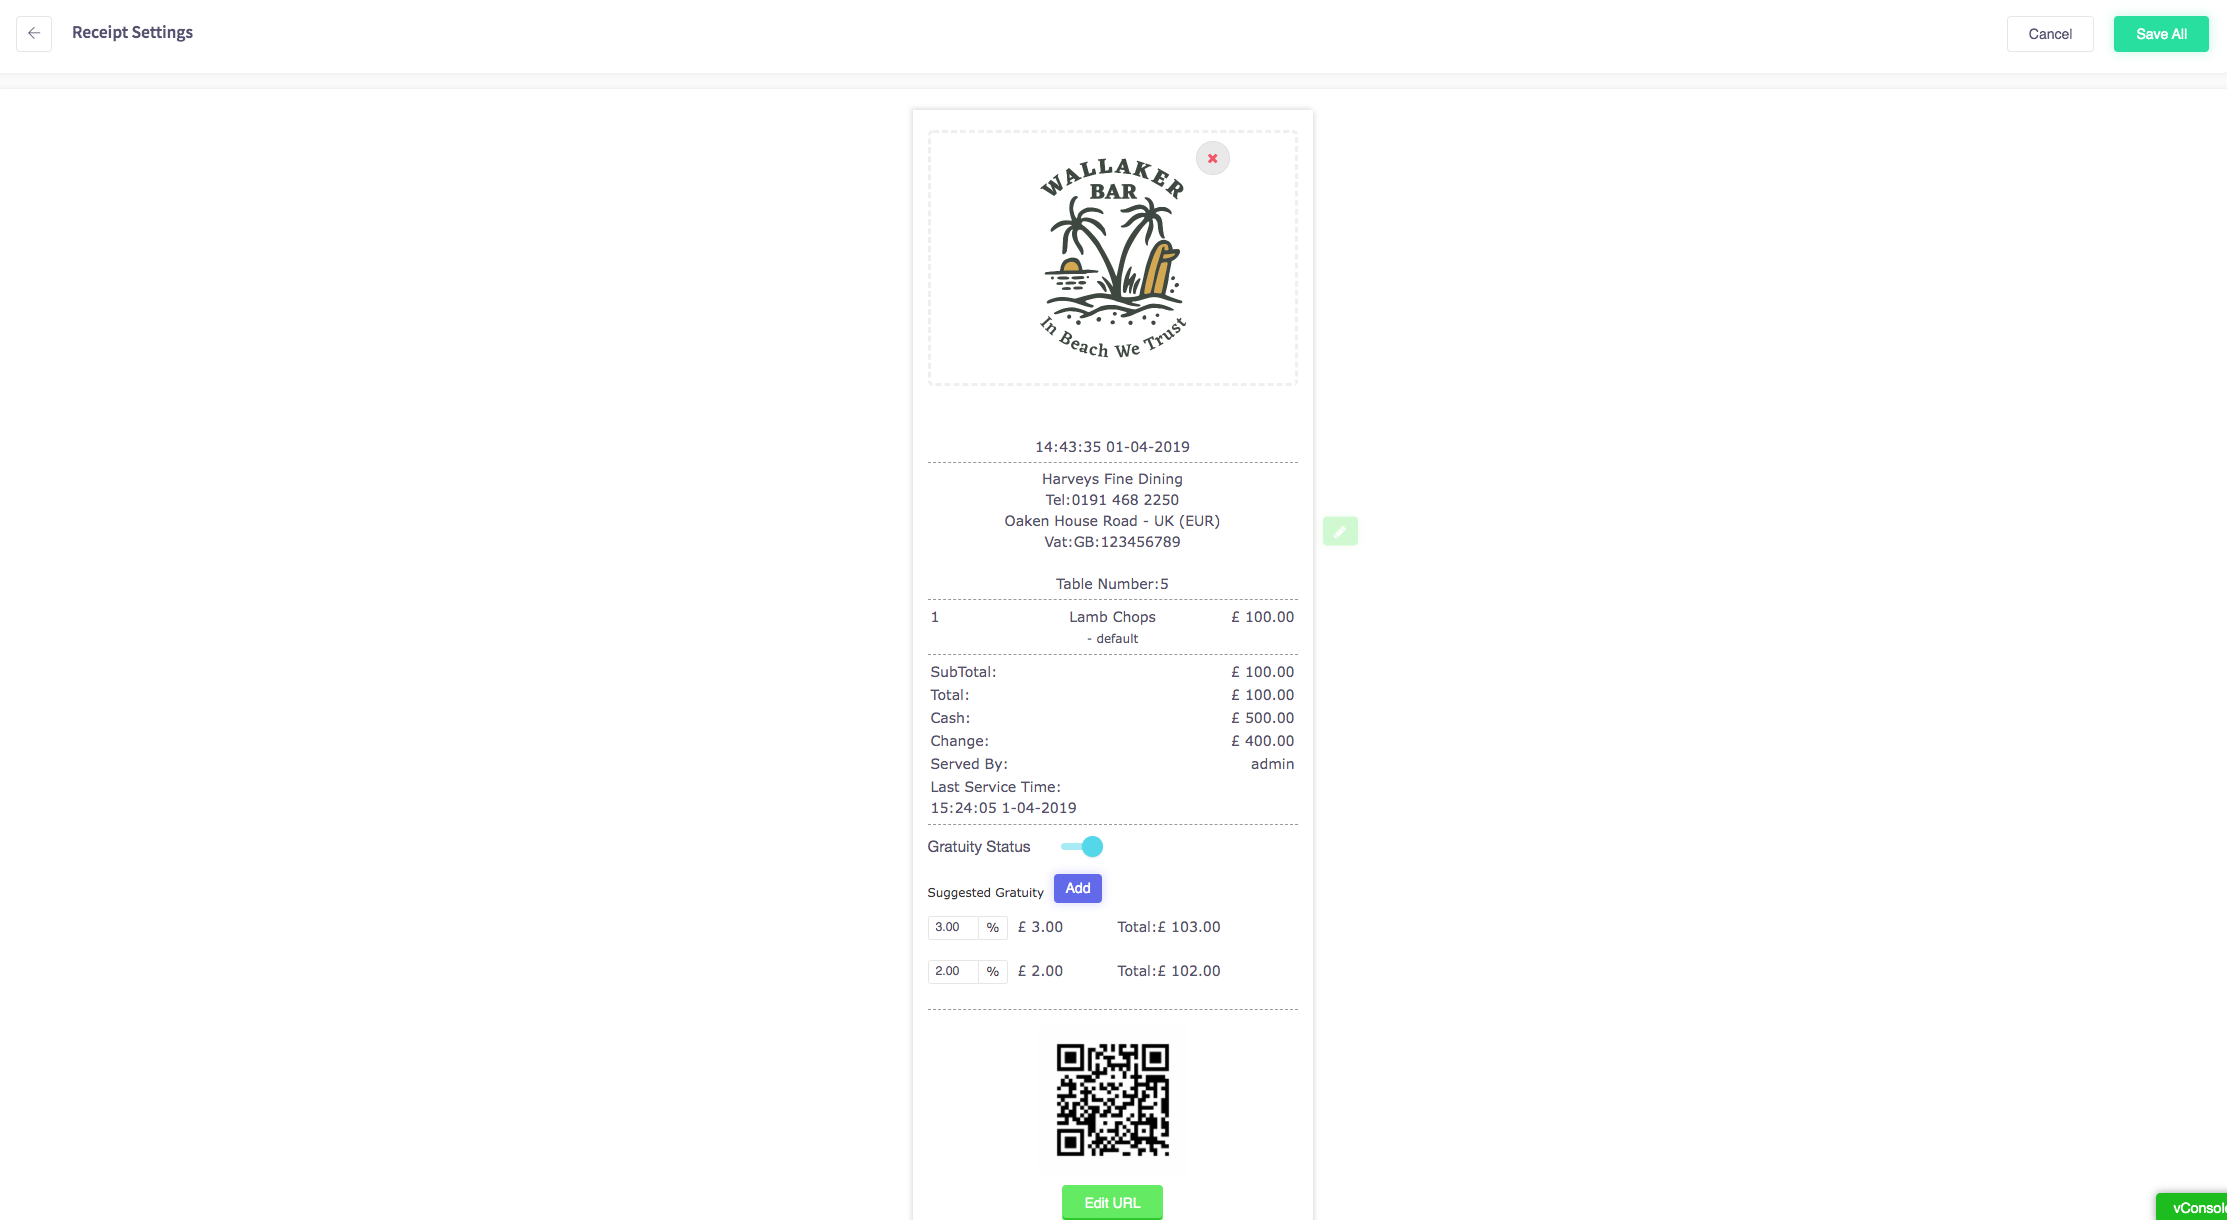
By hovering over the image it gives you an option to upload an image, this allows you to edit or add a logo at the top of the receipt.
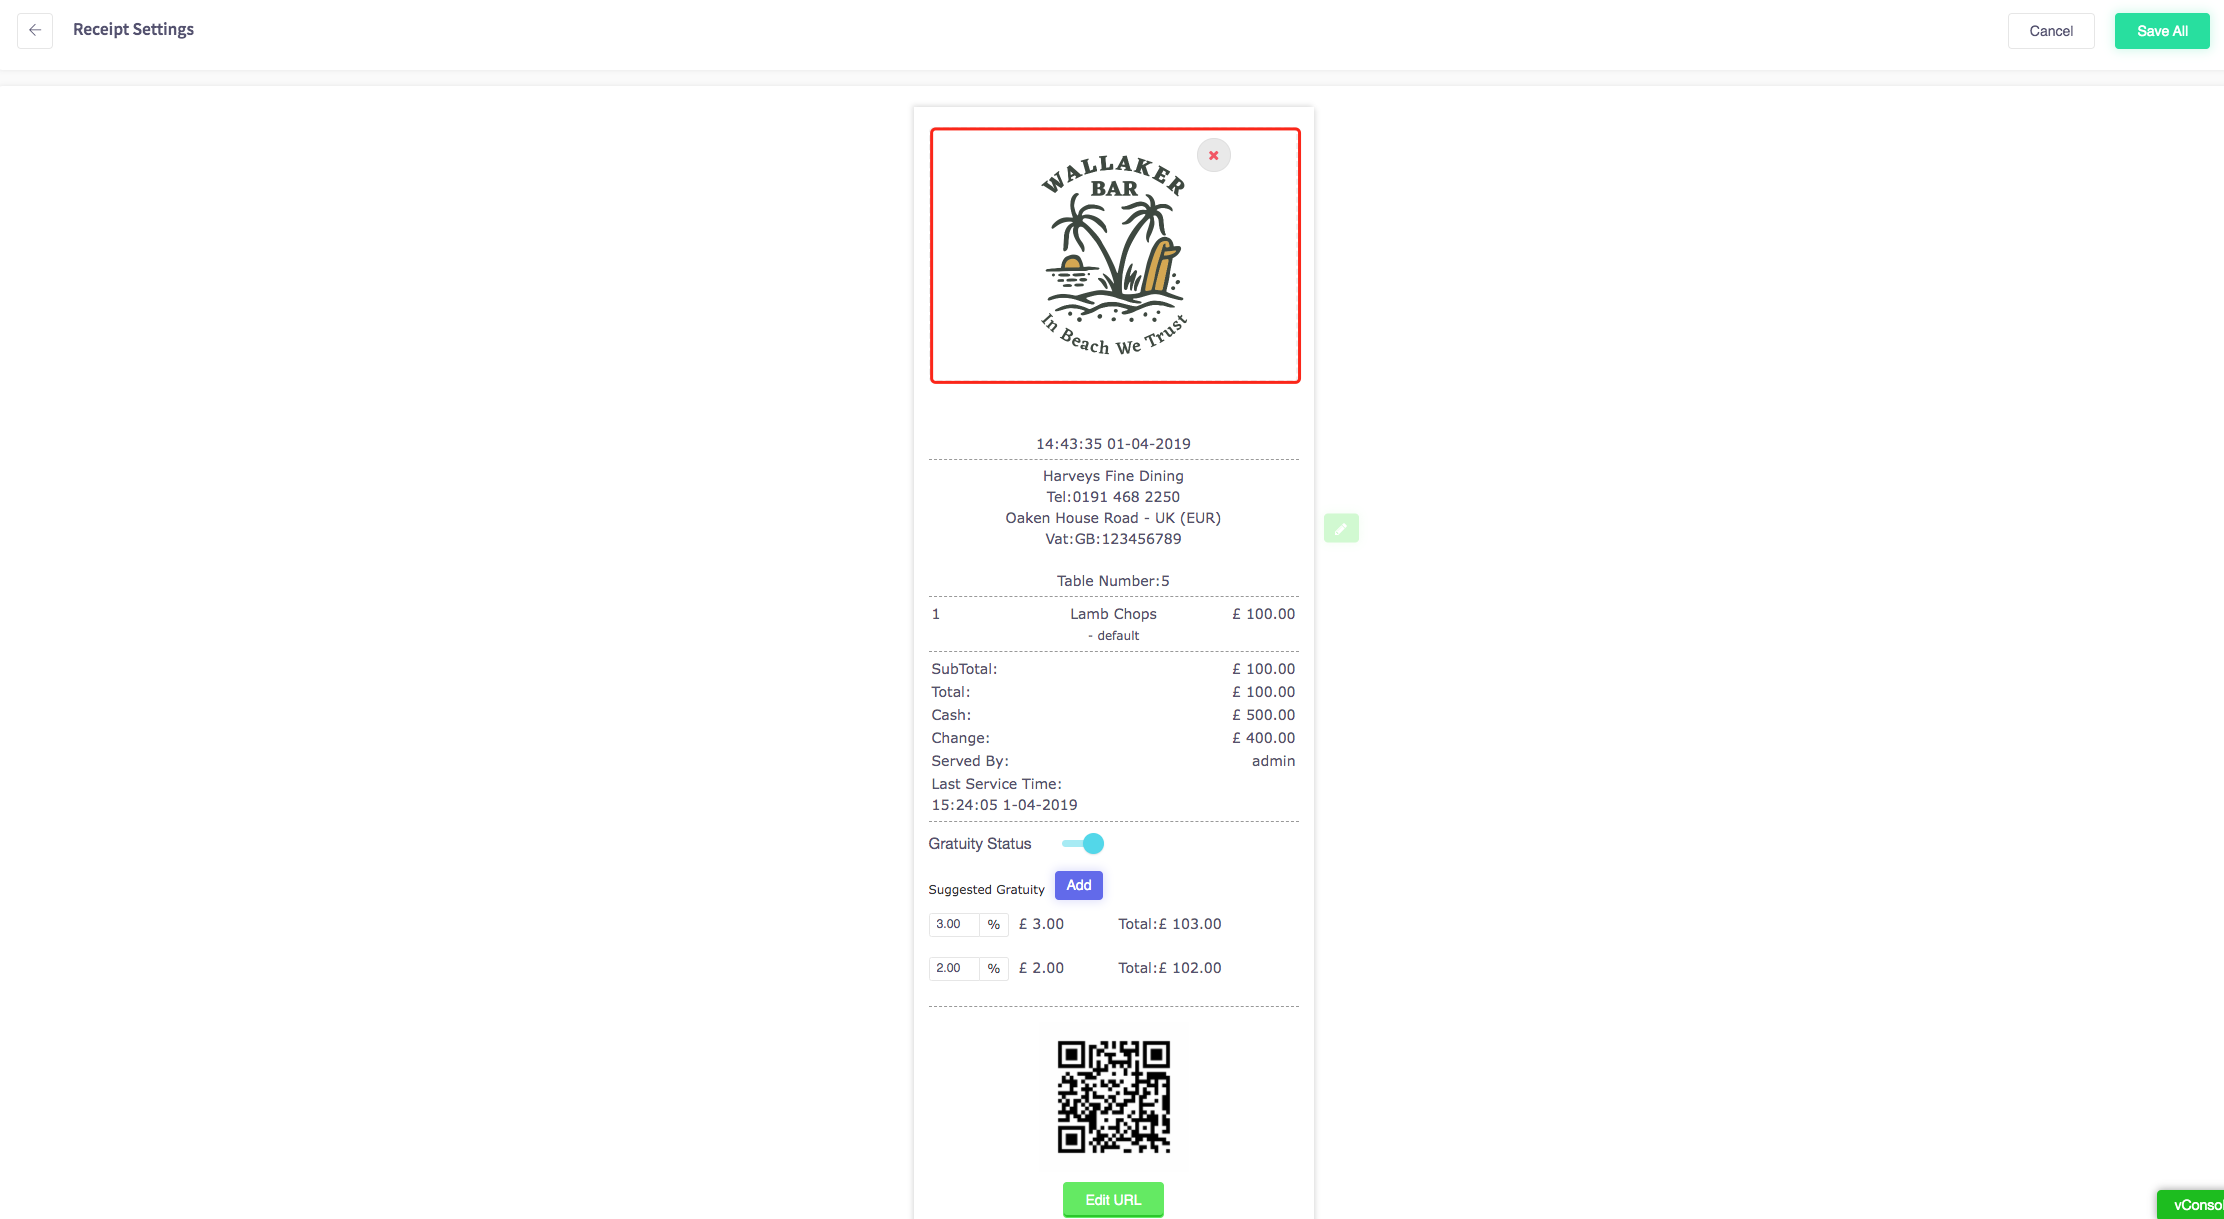
To edit any business information such as address or phone number, simply press the green edit icon on the right-hand side of the receipt.
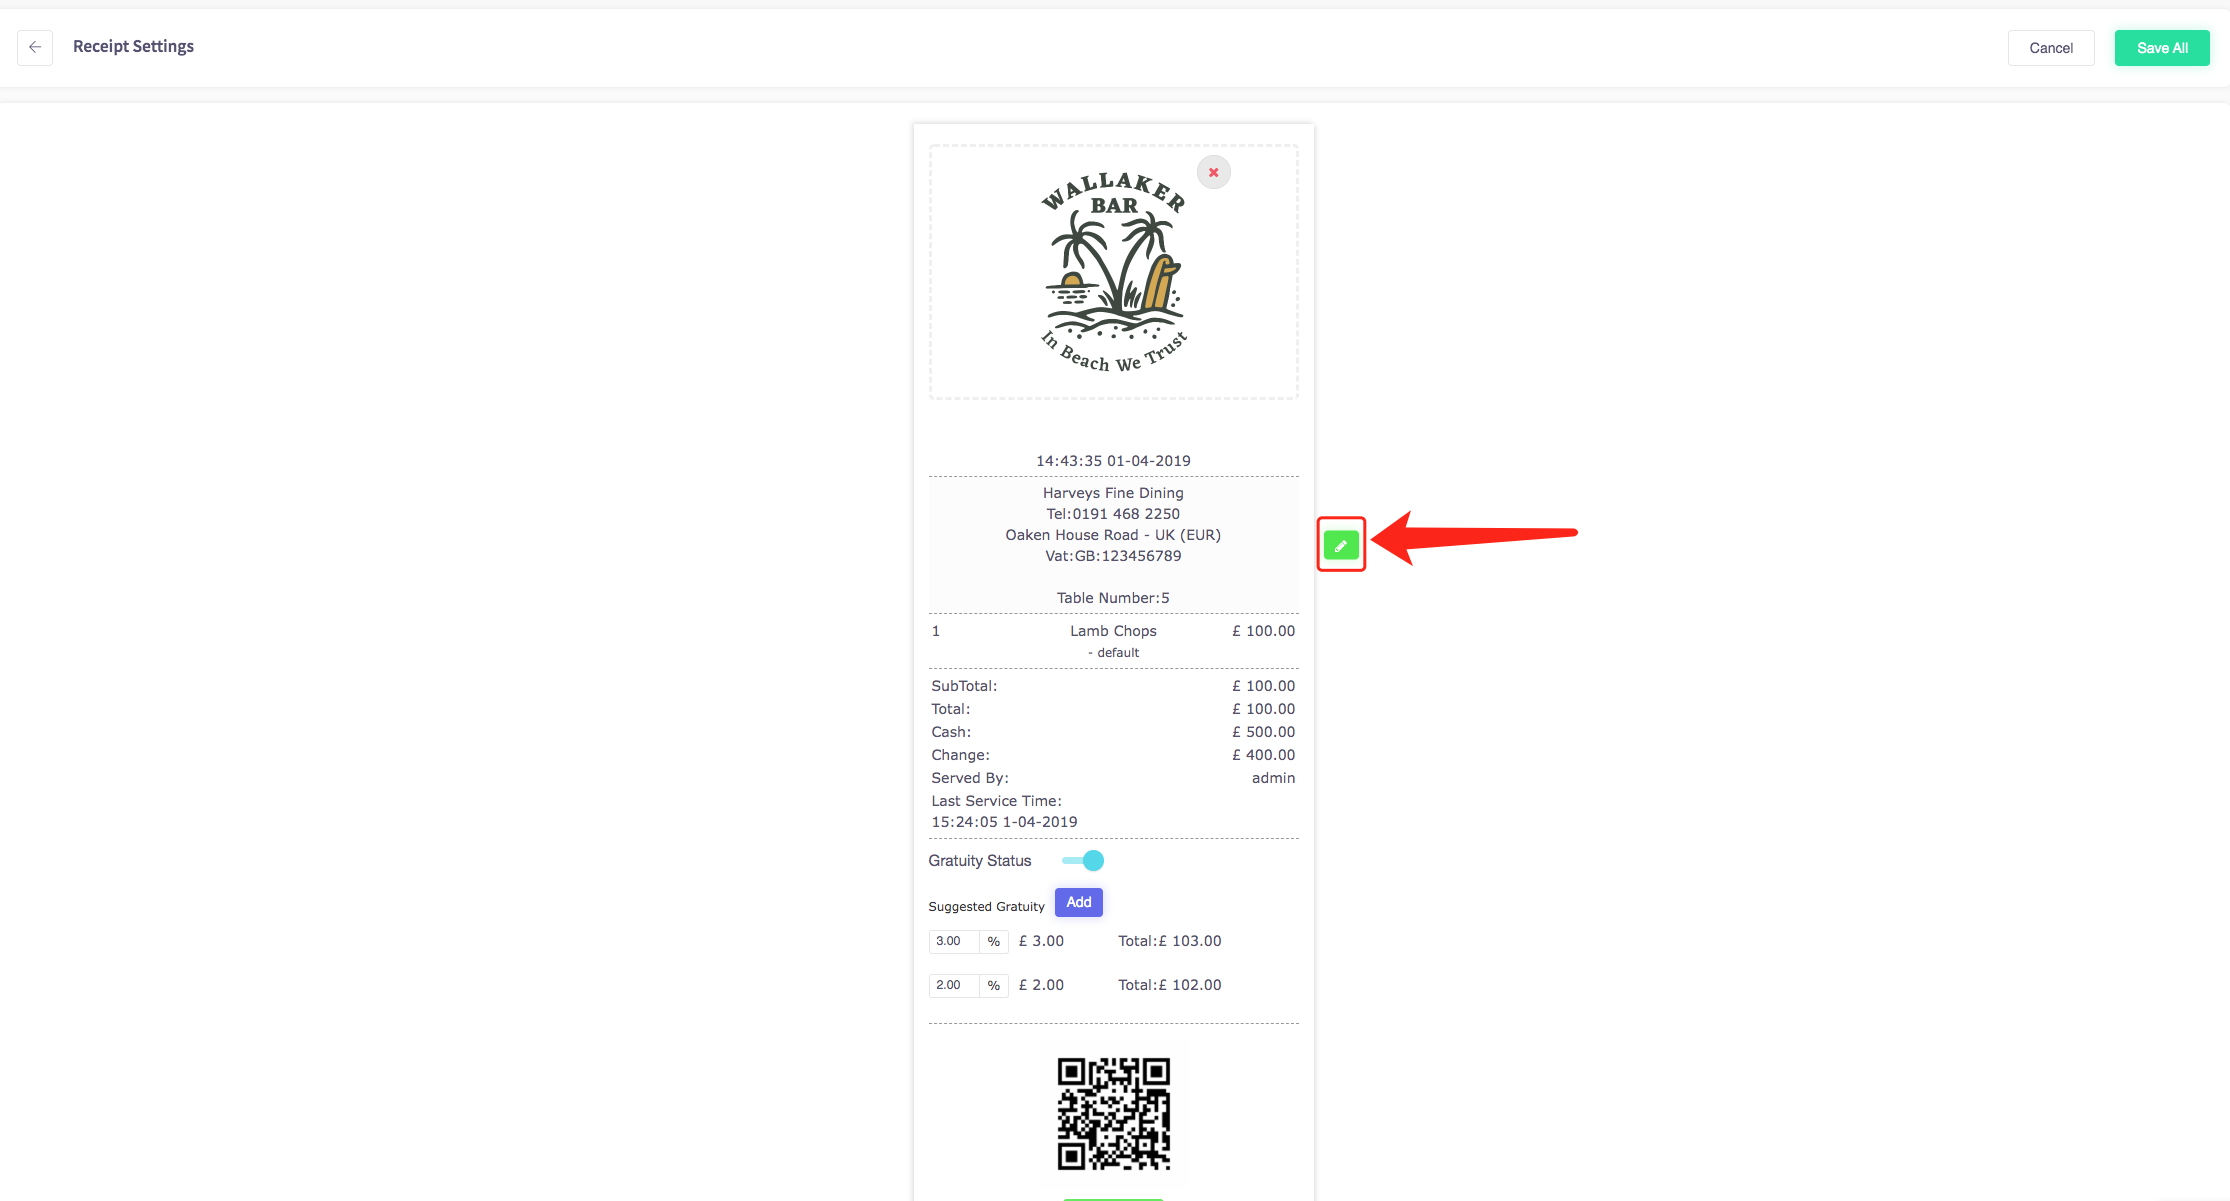
This menu will appear where it asks for your business telephone, your address as required fields and an optional field to add is your VAT number. When you have filled in the required fields press the save button and this will be updated on your receipt.

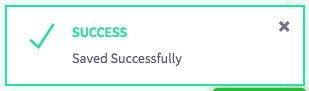
A confirmation will appear once save has been pressed.
You also have the option to edit the QR code on the menu by clicking the edit URL button.
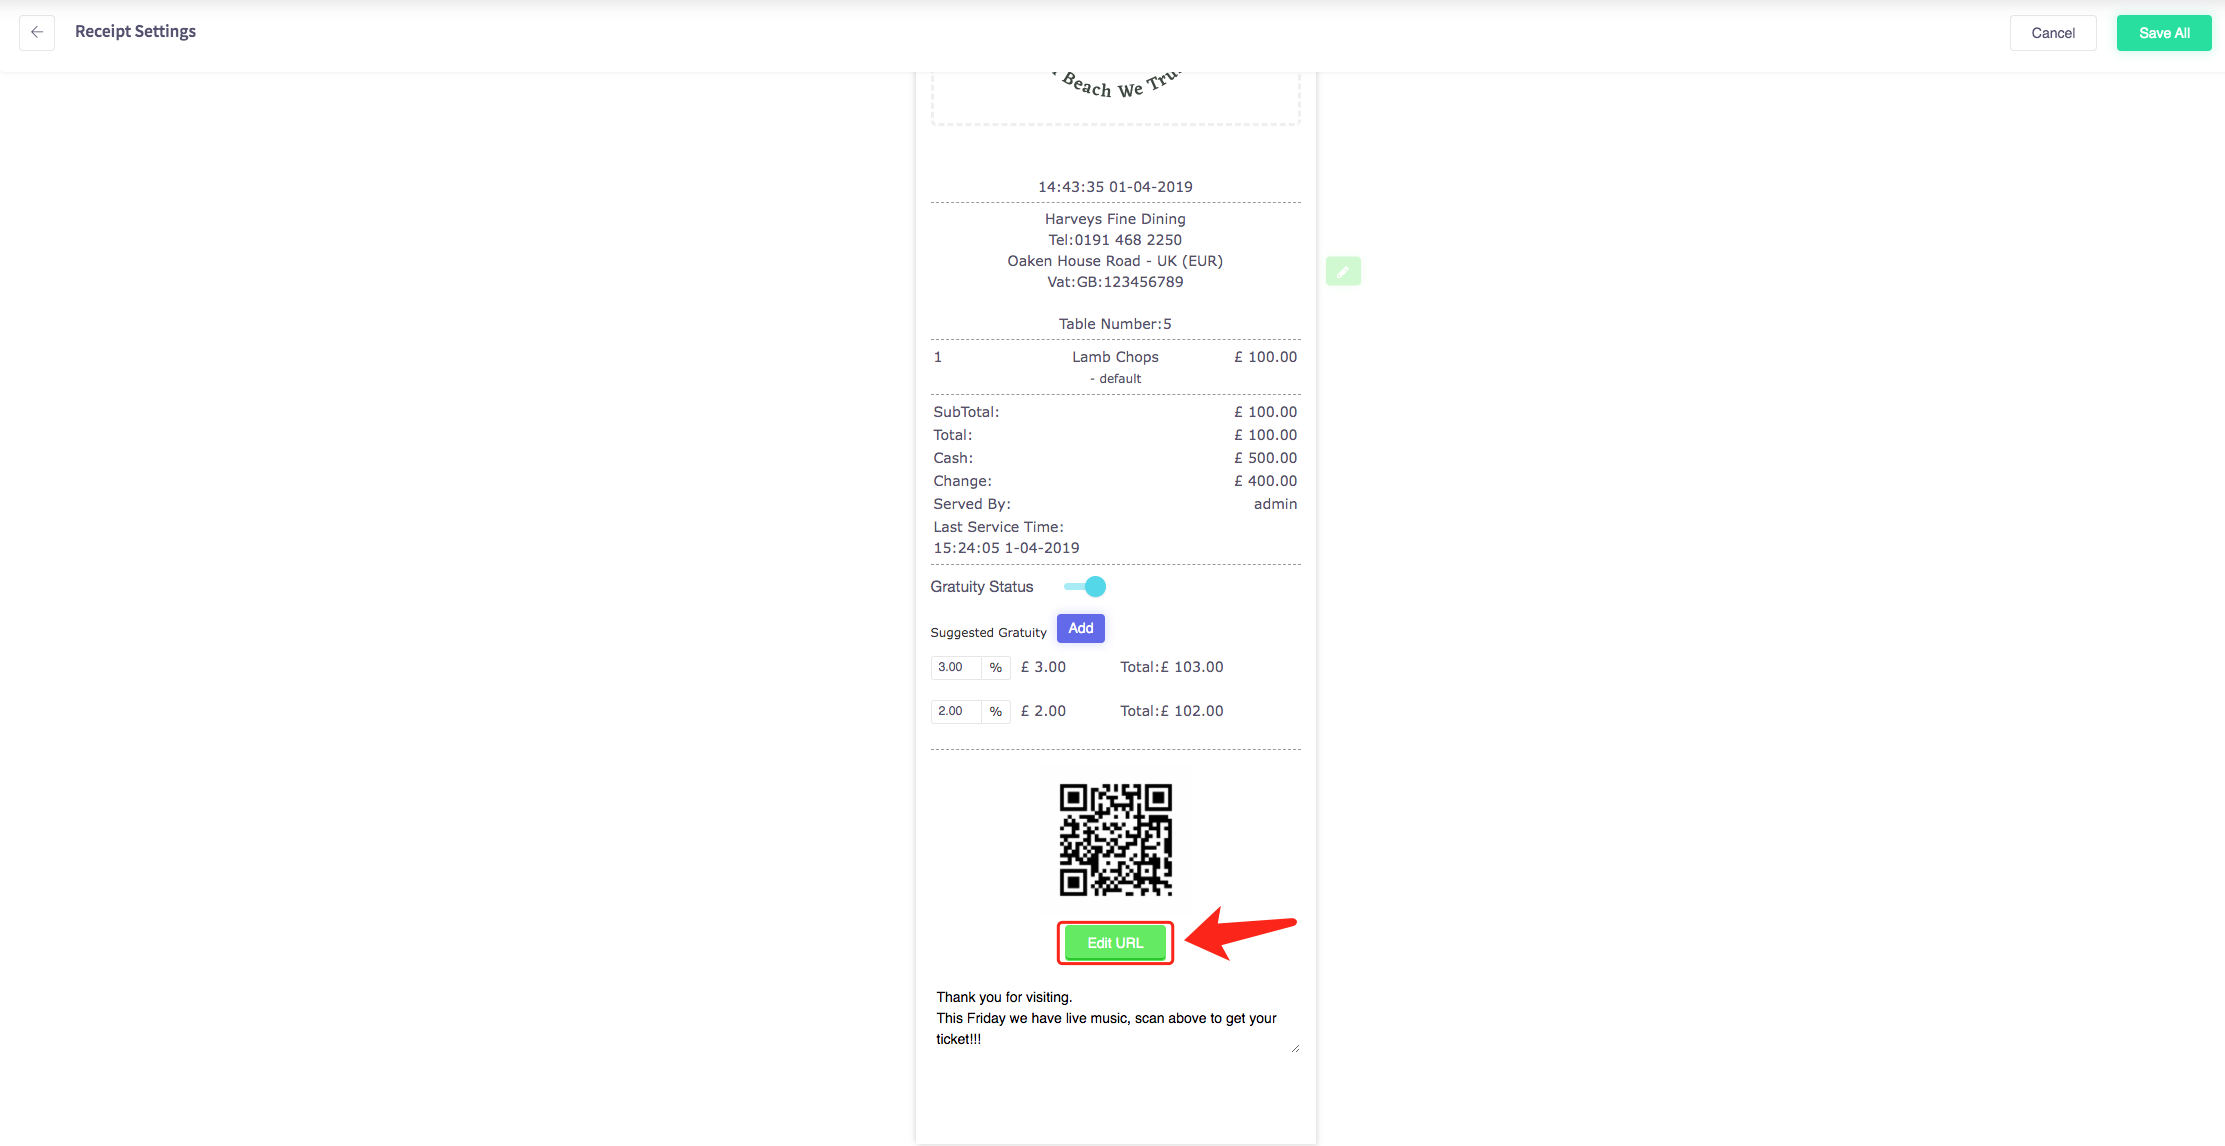
Input a URL you would like to use for your business and press the green to confirm button.
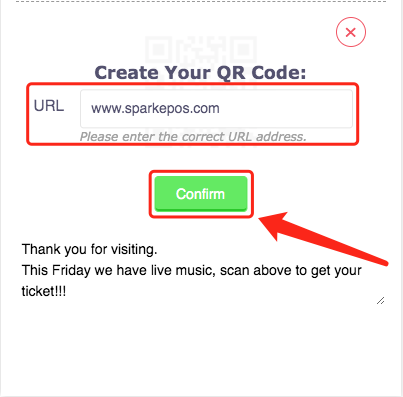
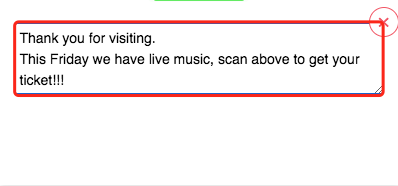
You also have an option at the end of the receipt to add some additional text for example we have added the message:
"Thank you for visiting.
This Friday we have live music, scan above to get your ticket!!!"
Once you have completed editing your receipt press the green "Save All" button at the top right of the screen..
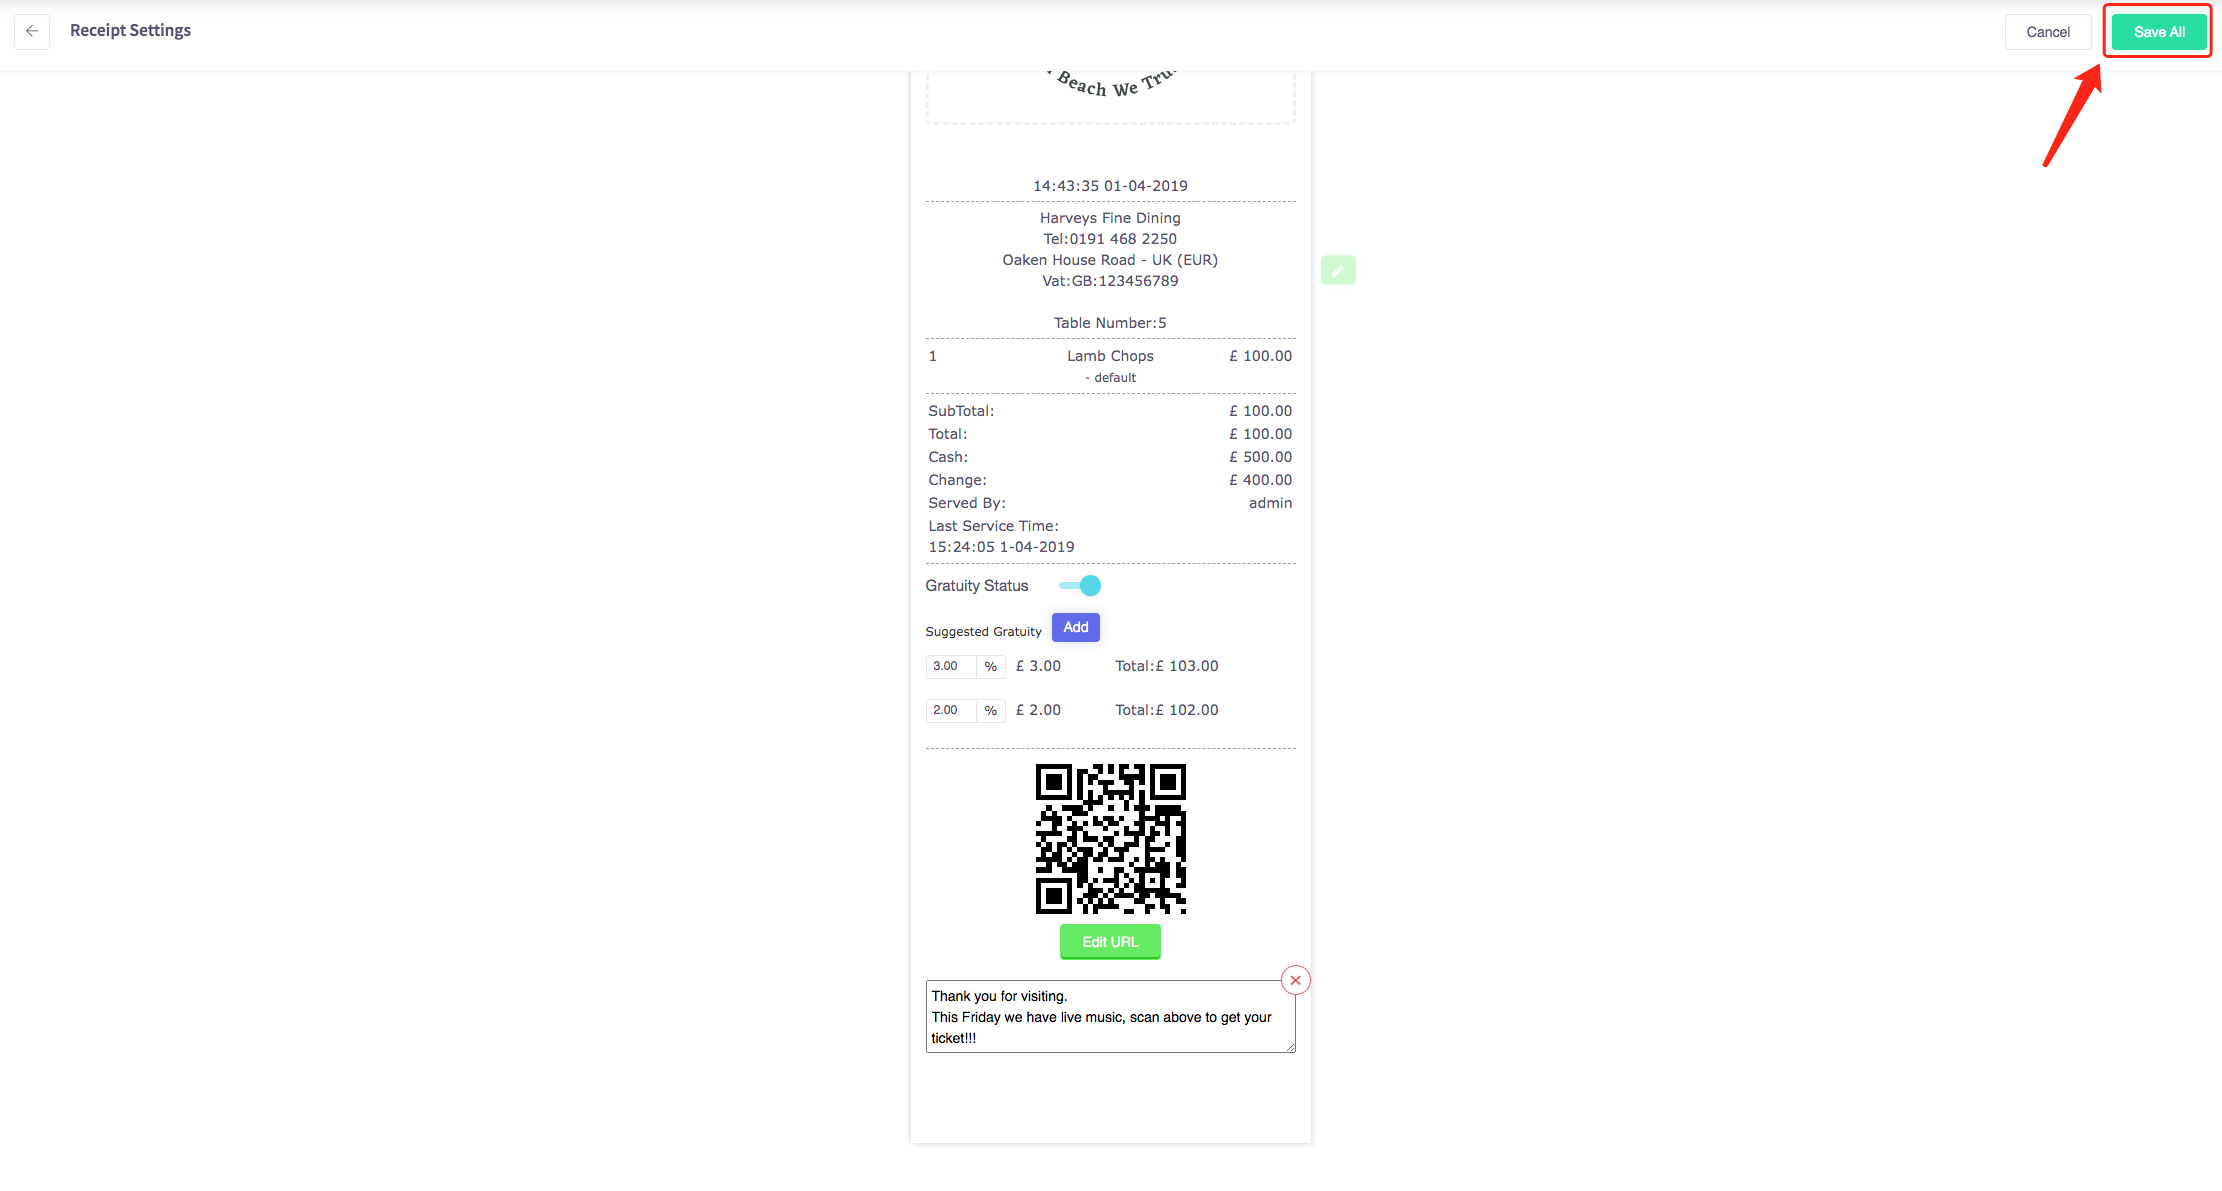
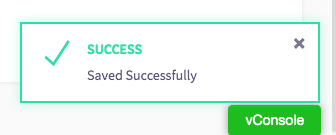
A confirmation will appear once save all has been pressed.
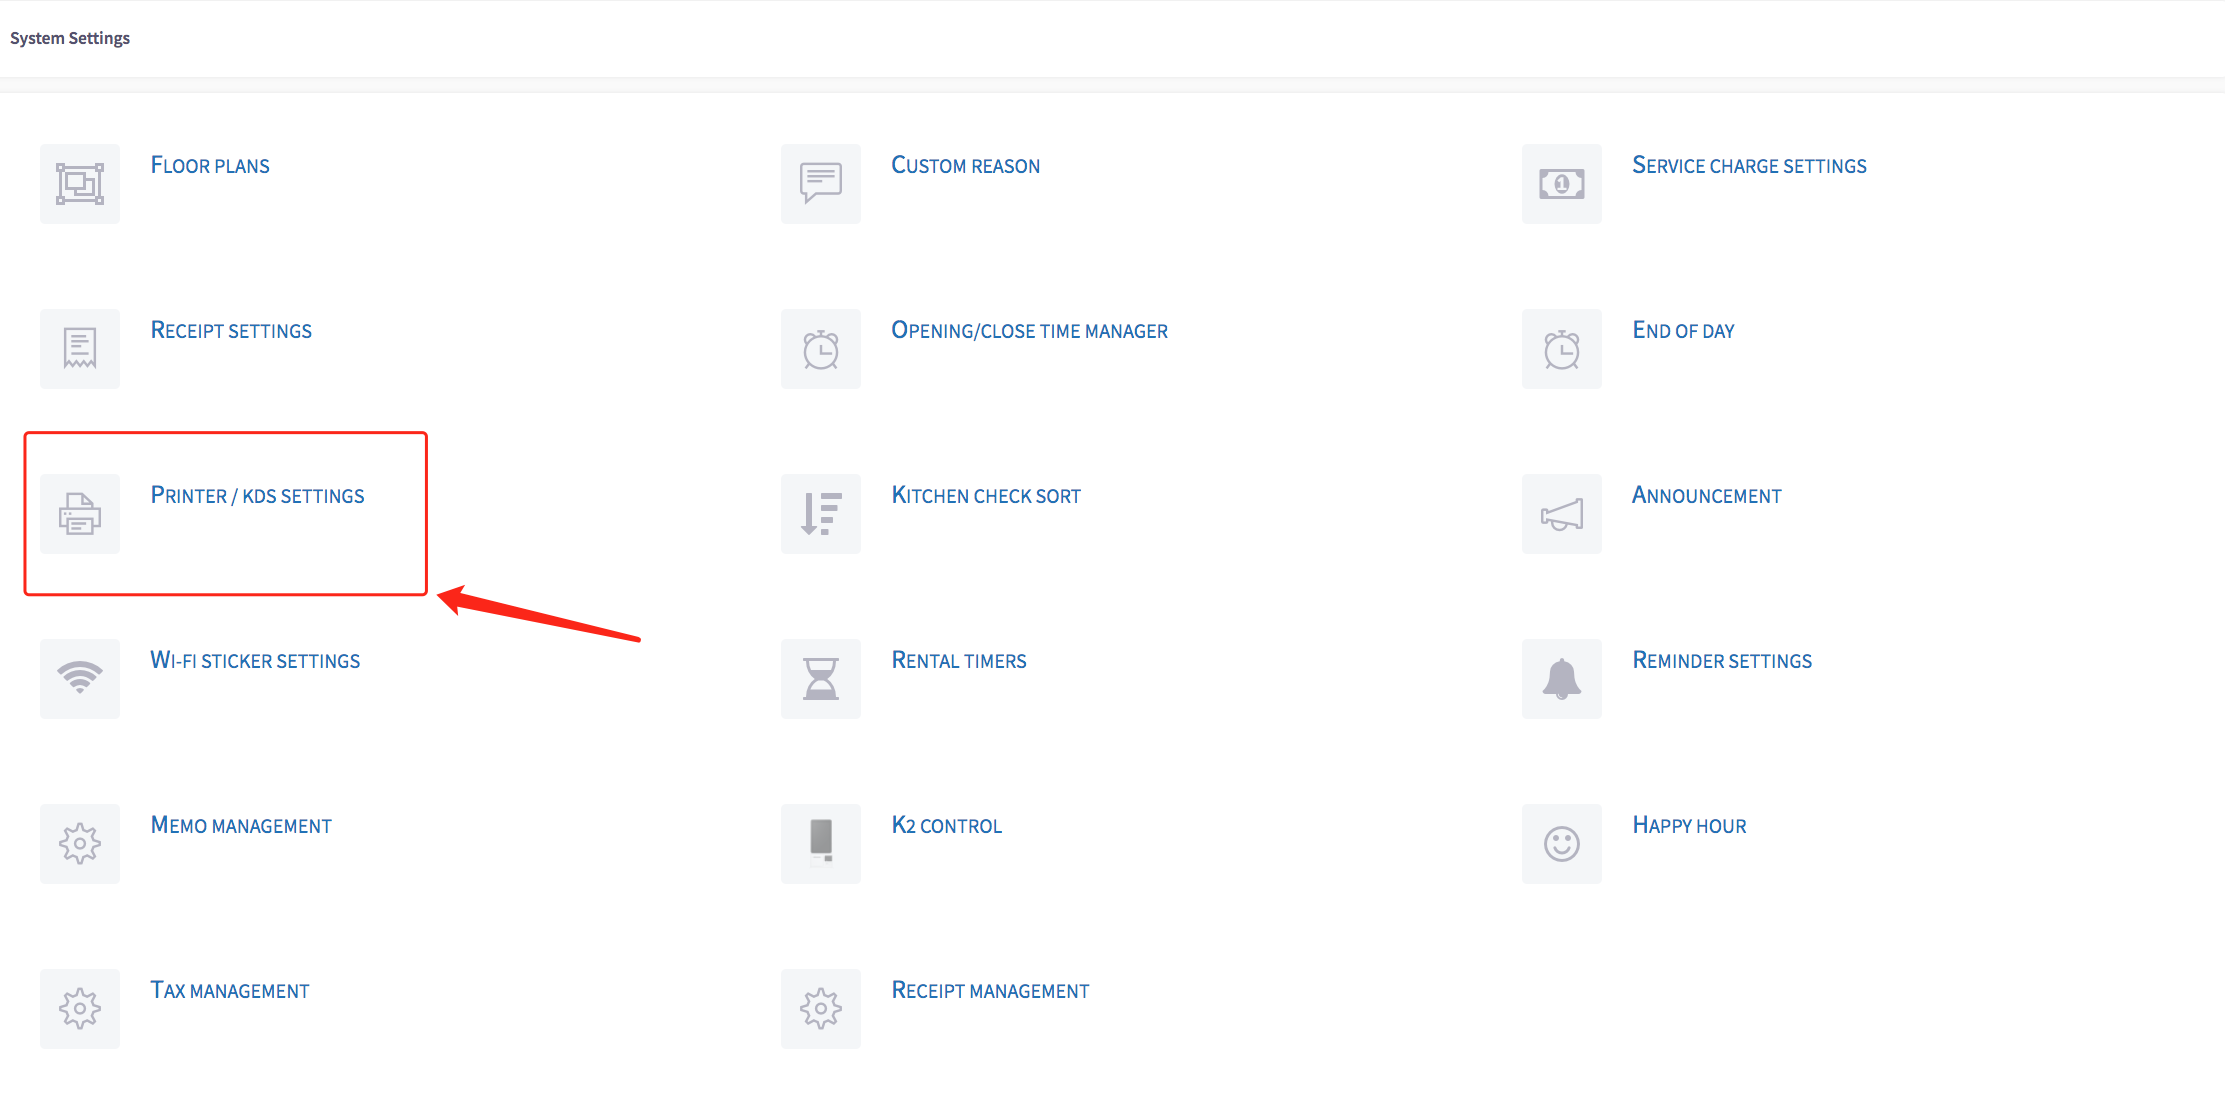
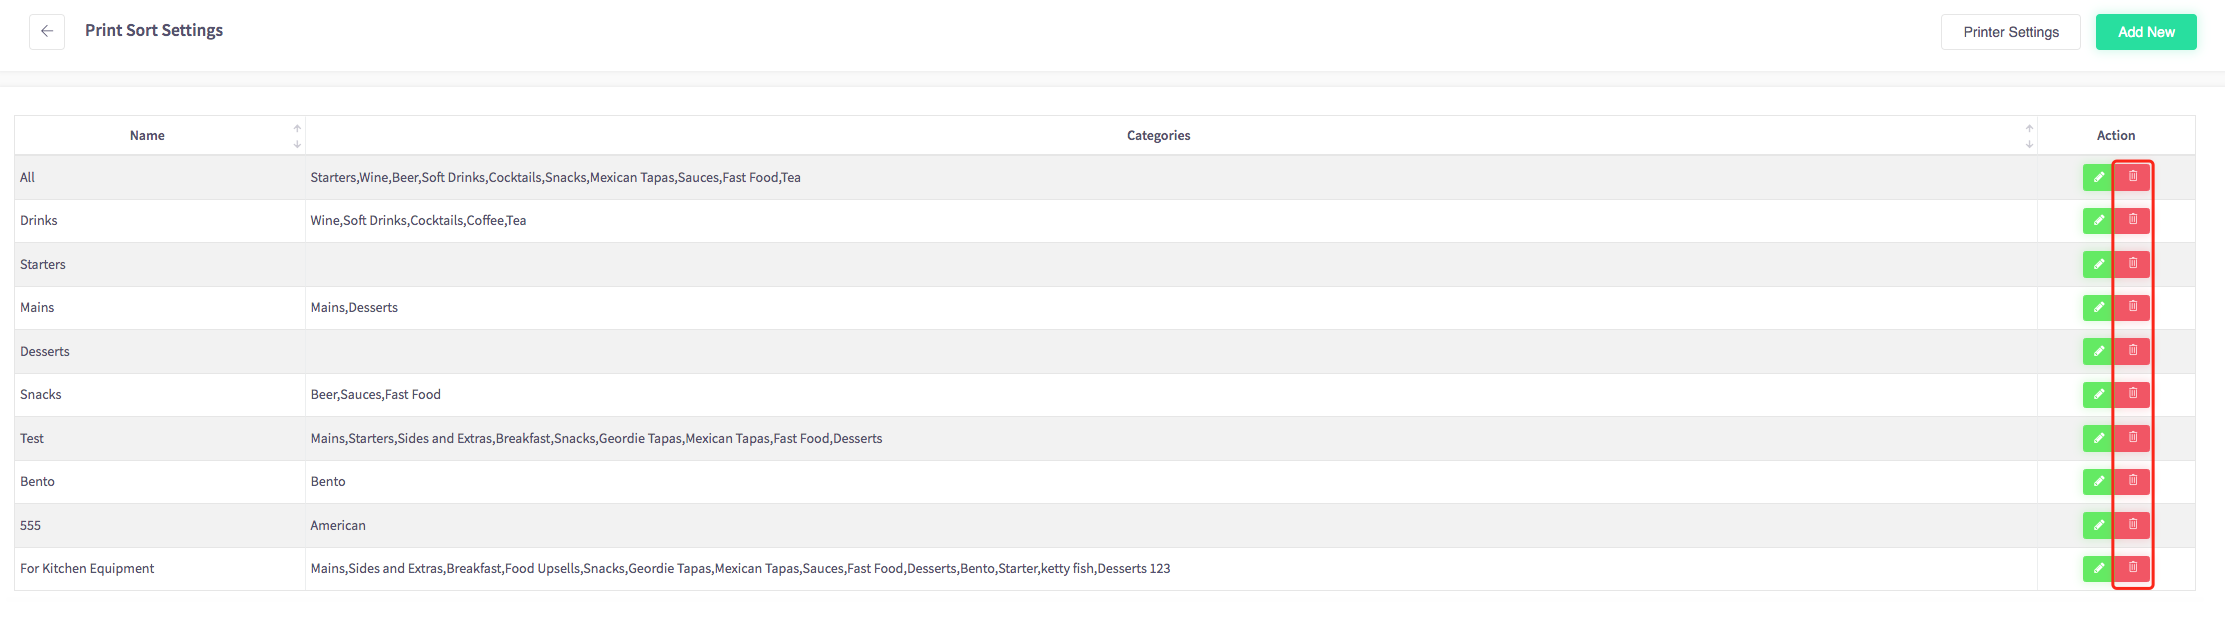
How to view categories and courses.
This guide will show you how to view categories and courses (For example Main or Starter) on your Cloud HQ.
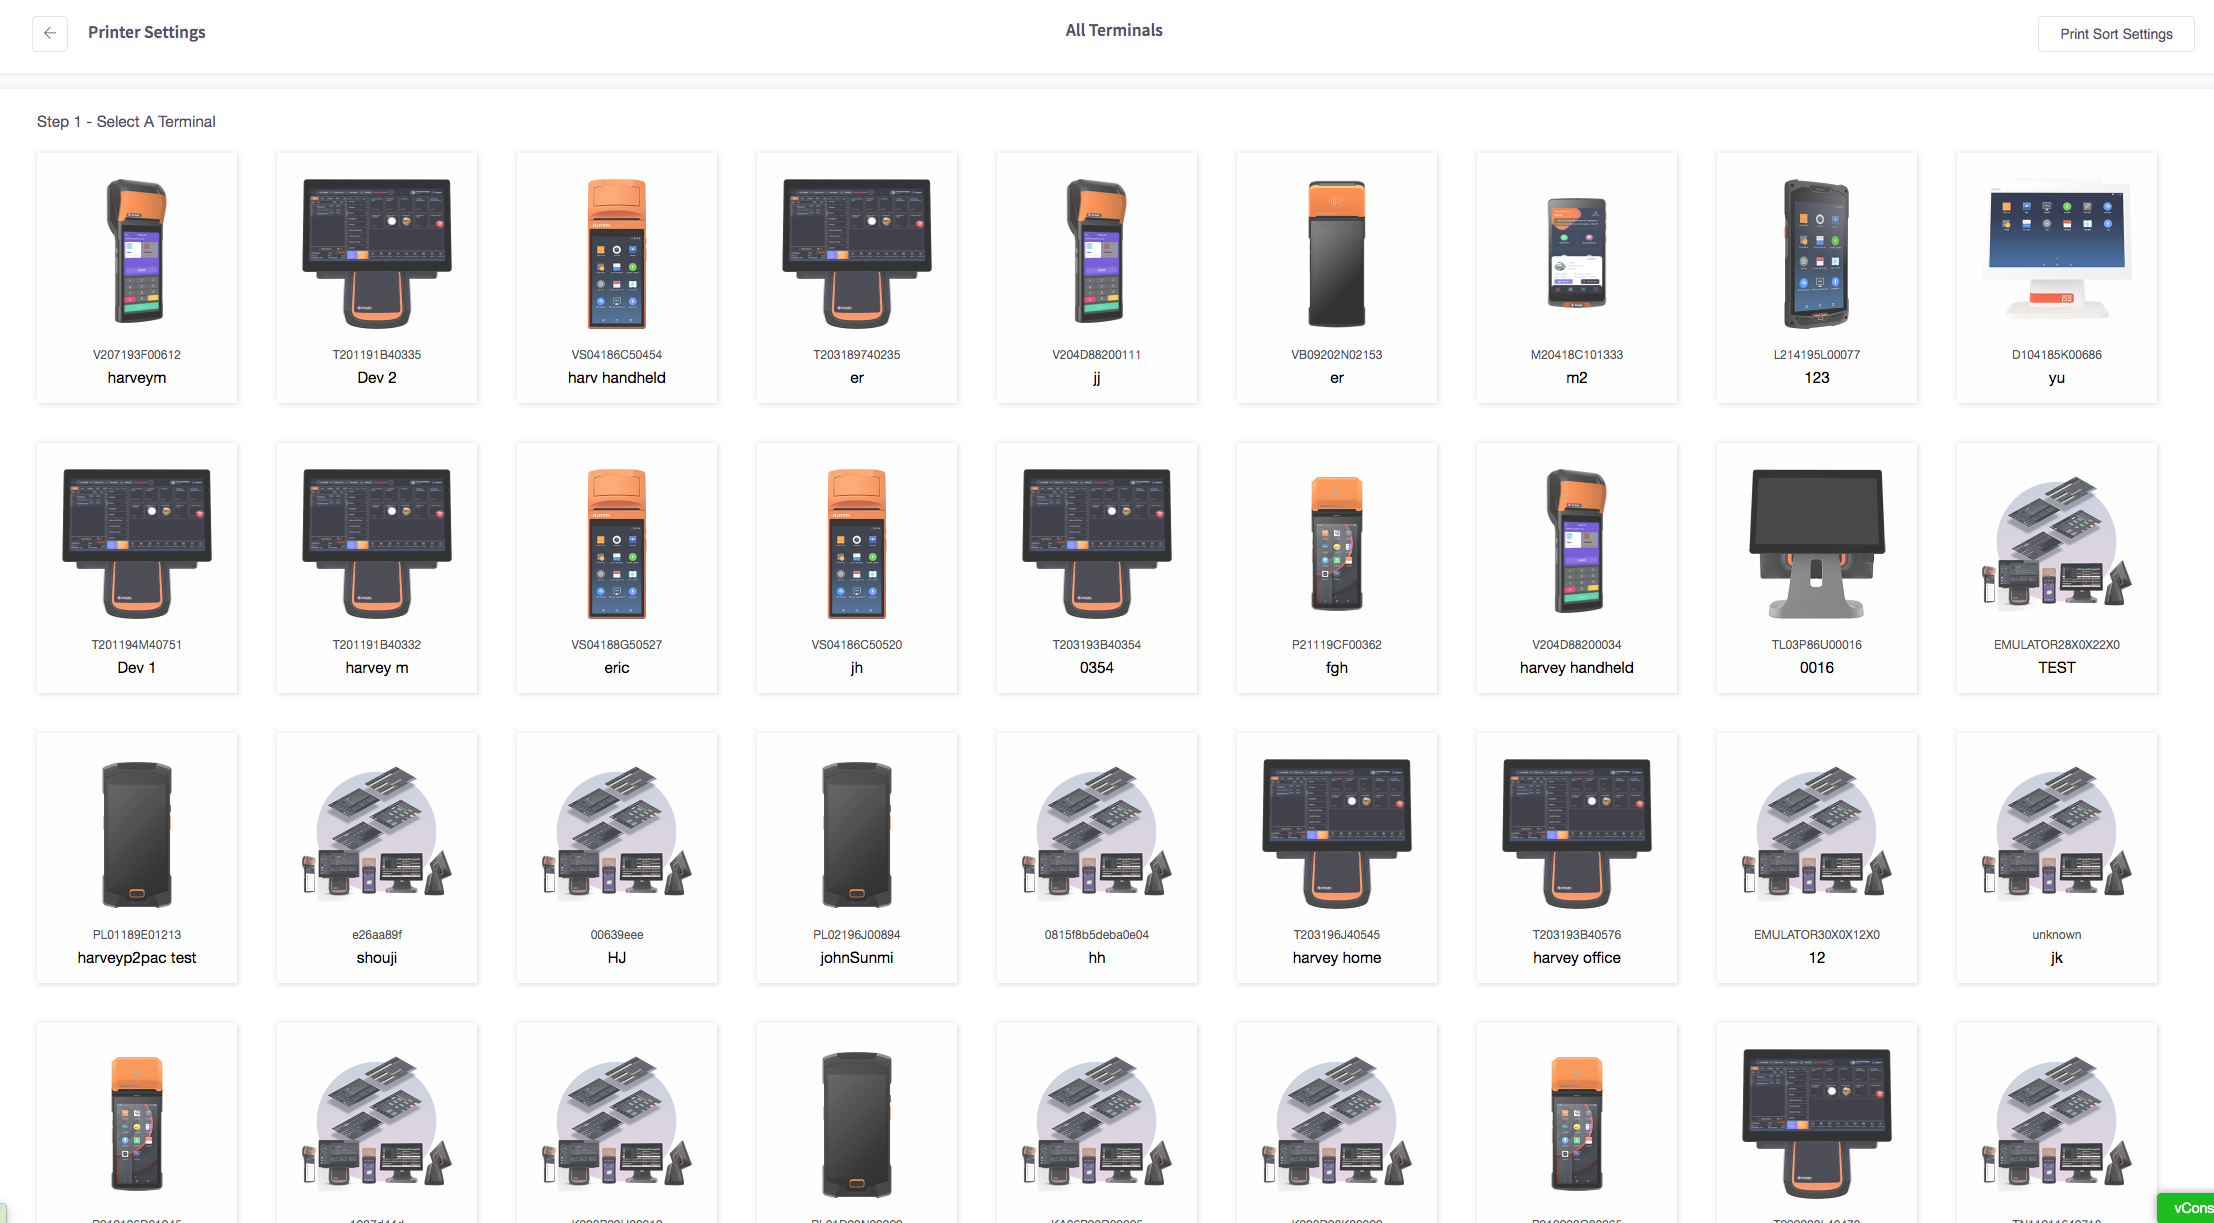
Once you have logged on scroll down to "System Settings" on the left-hand side and then the 'PRINTER / KDS SETTINGS' option in the menu.
Printer settings should appear, shown below.
Then select the "Print Sort Settings" button in the top right of the screen.
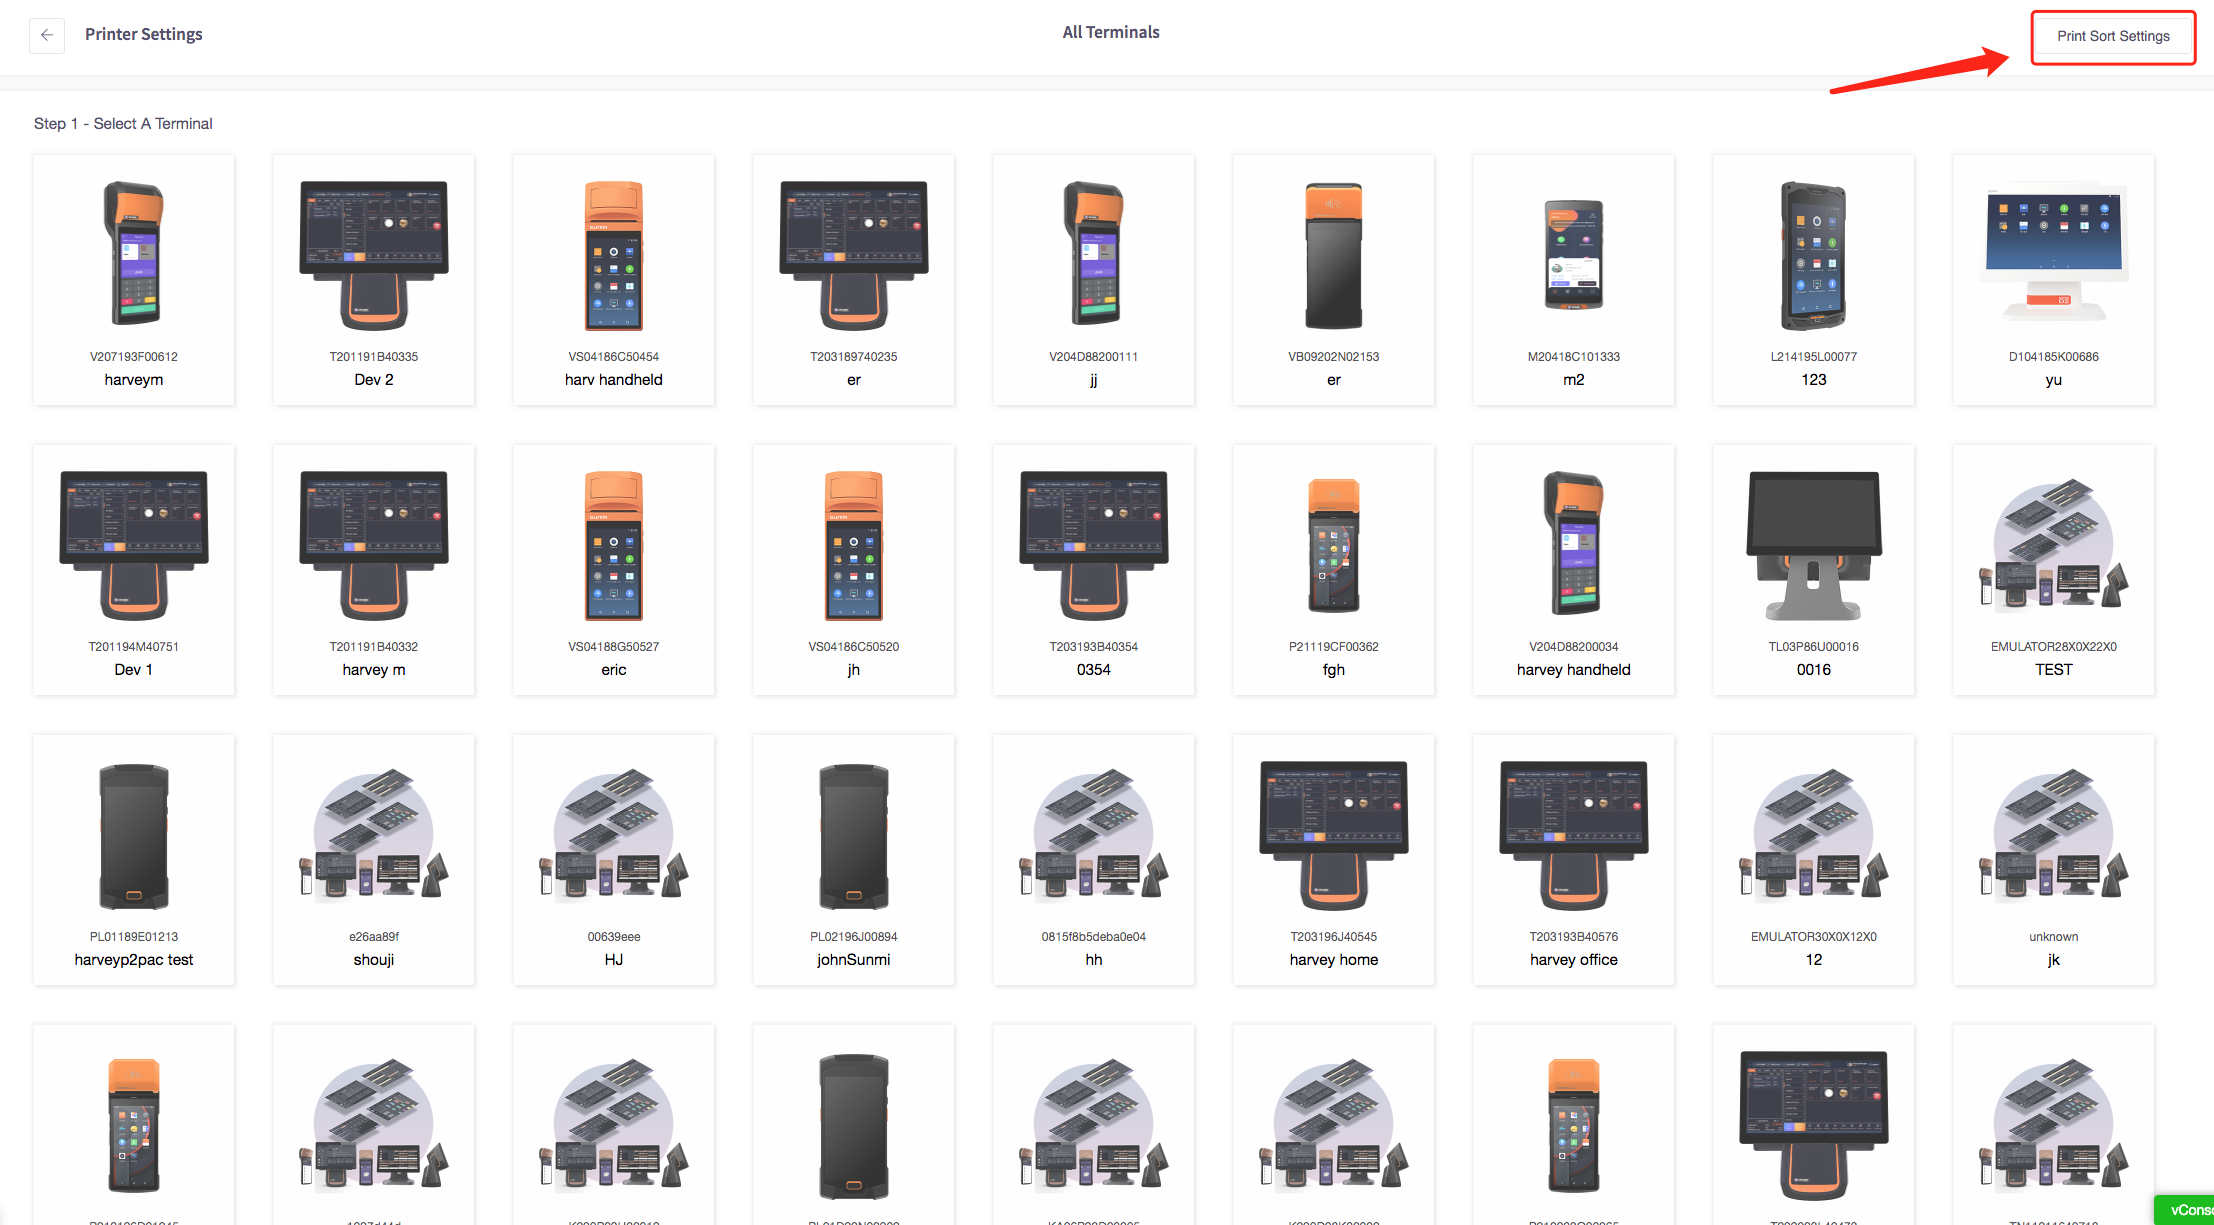
This shows the printer sort settings. This is where it shows all the courses.
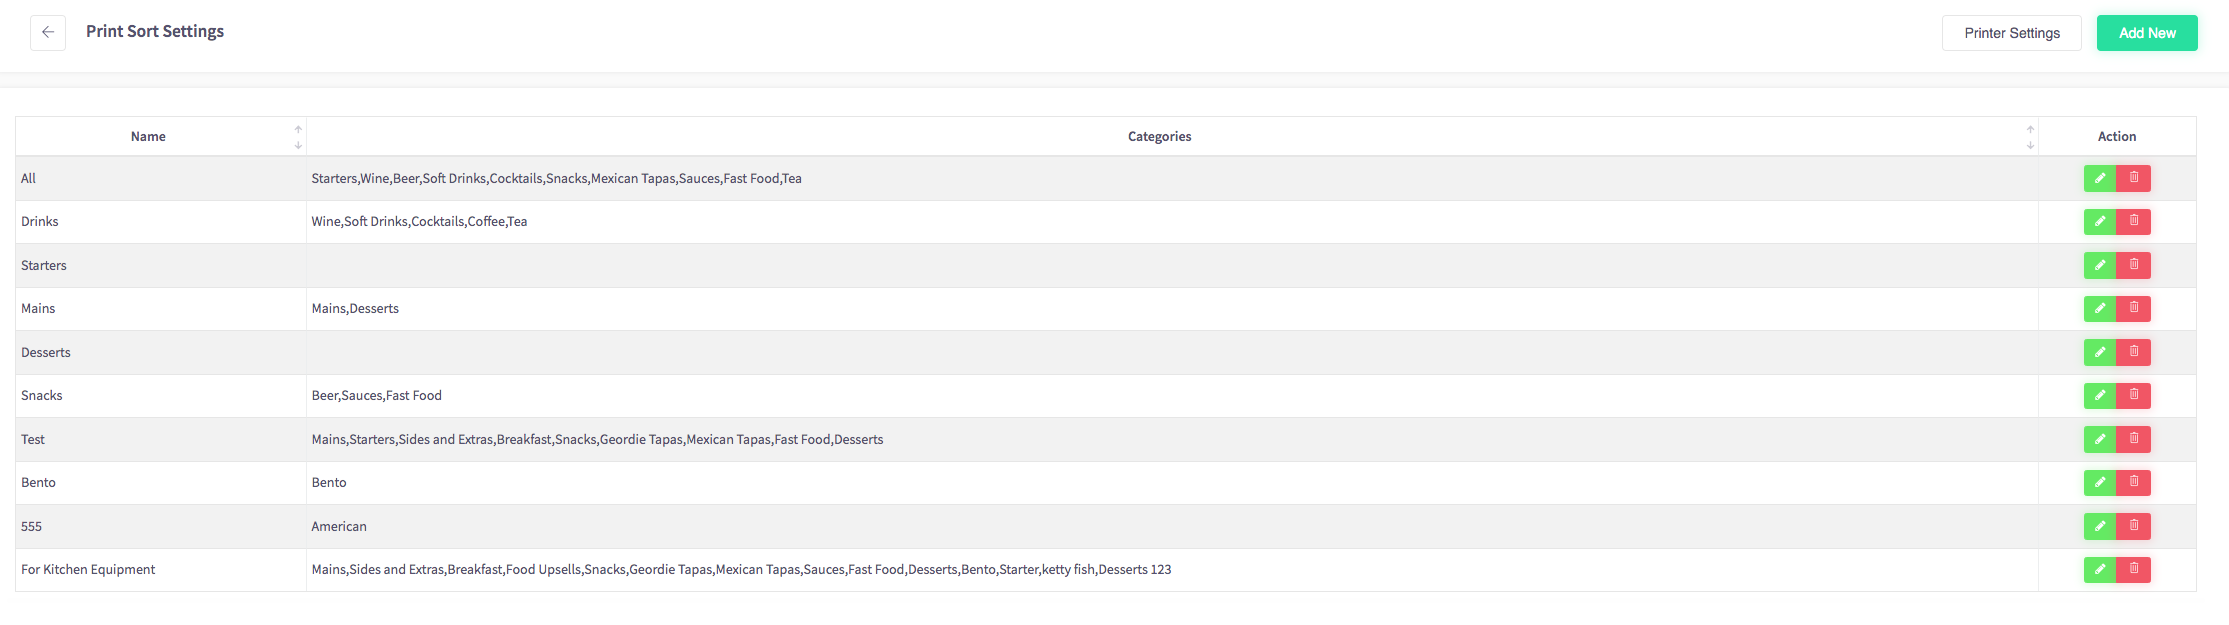
Using this green pencil icon you can edit the categories.
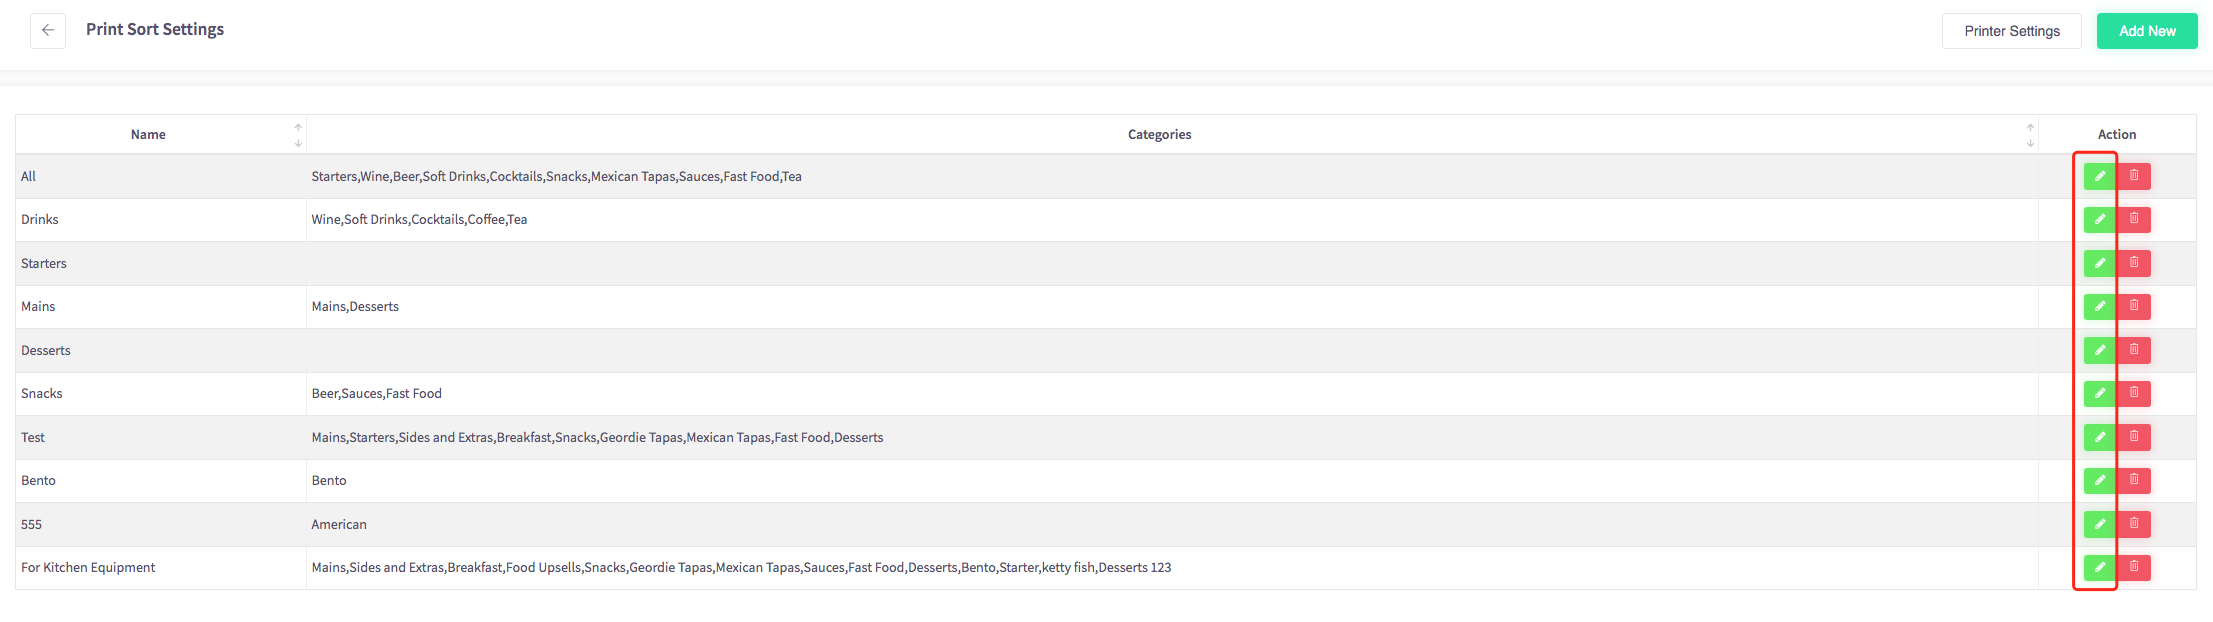
Using the red bin icon you can delete categories.
How to select what days your business opens
This page will show you how to select what days your business opens on your Cloud HQ.
Once you have logged on scroll down to "System Settings" on the left-hand side and then the 'Opening/Closing Time Manager' option in the menu.
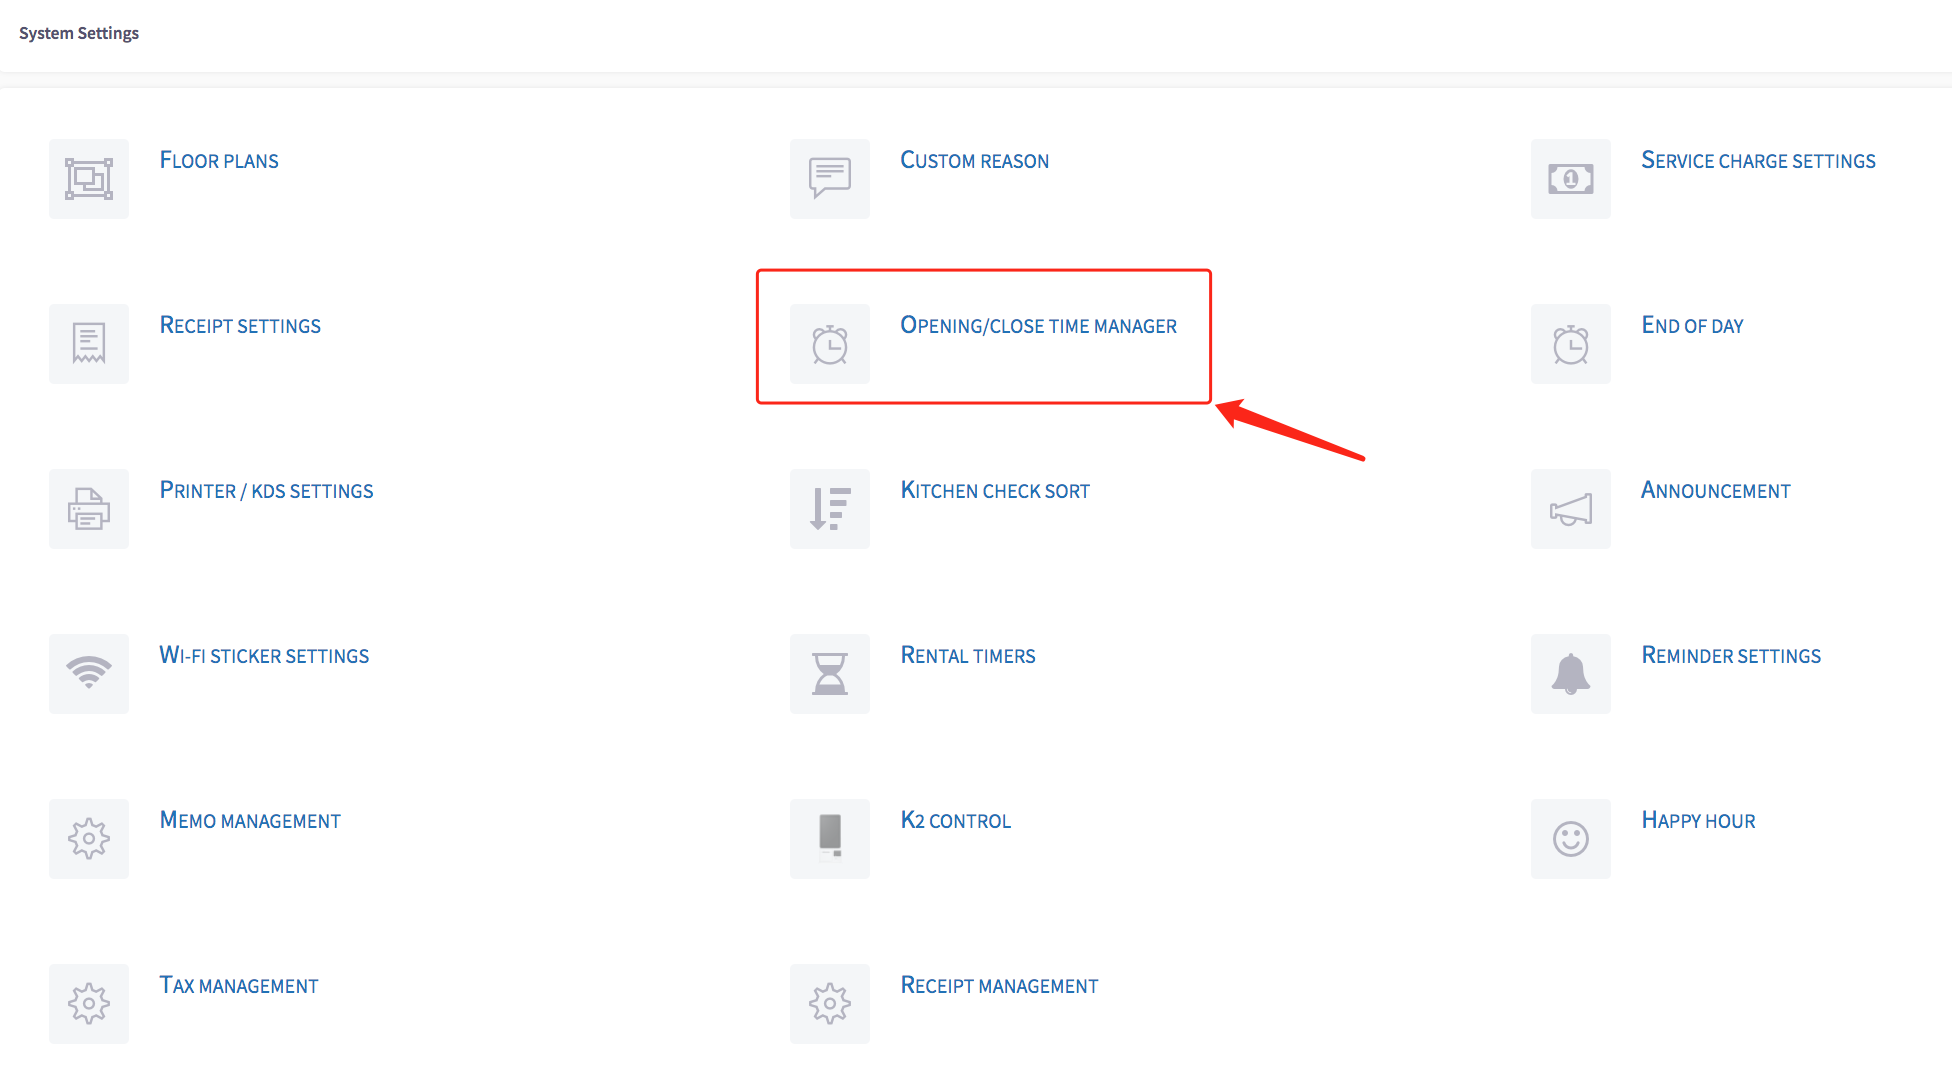
The business hour's settings menu should appear, shown below.
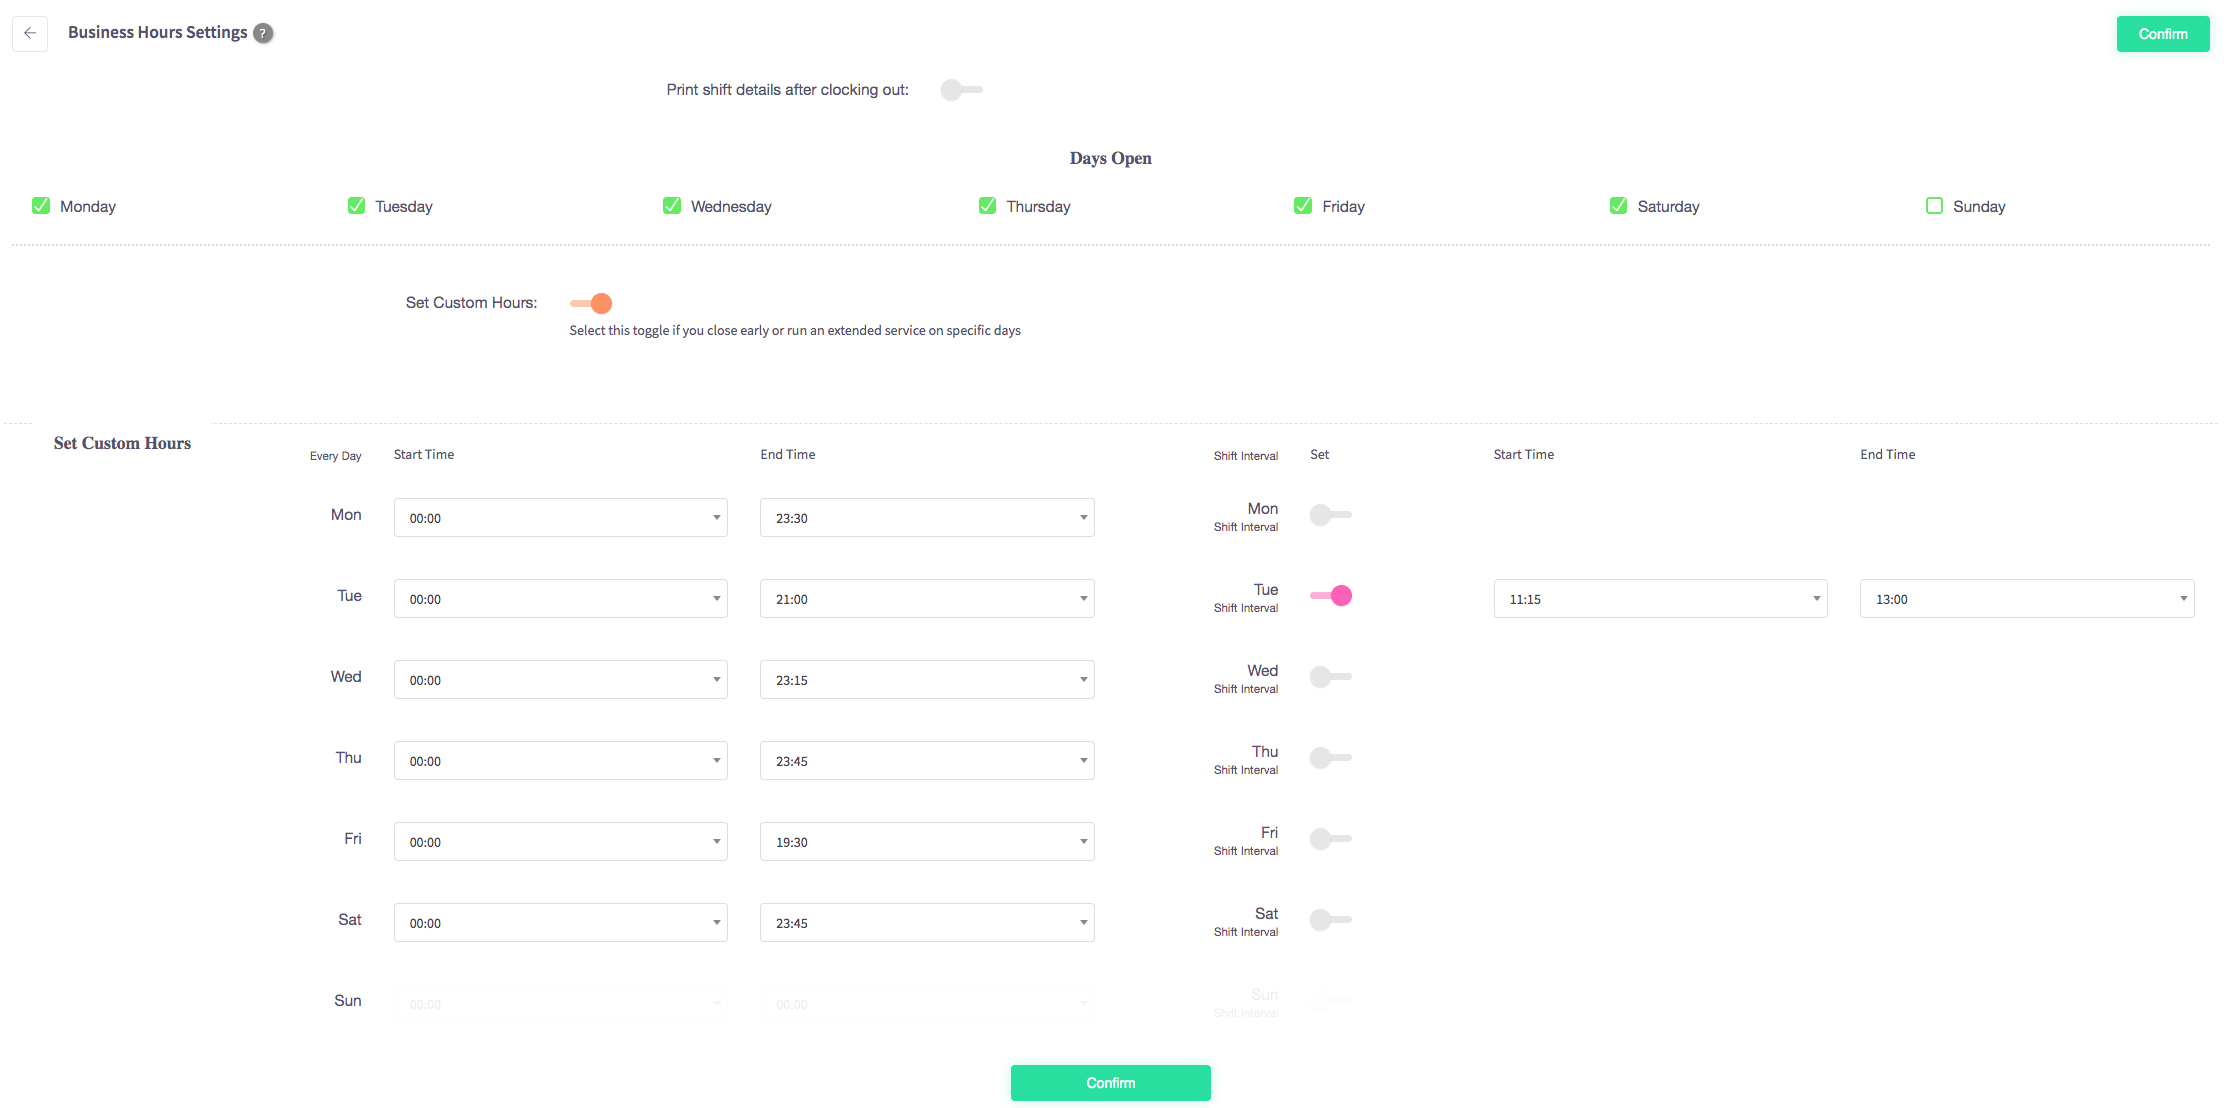
By clicking on the green boxes next to the days of the week you can select what days your business is open.
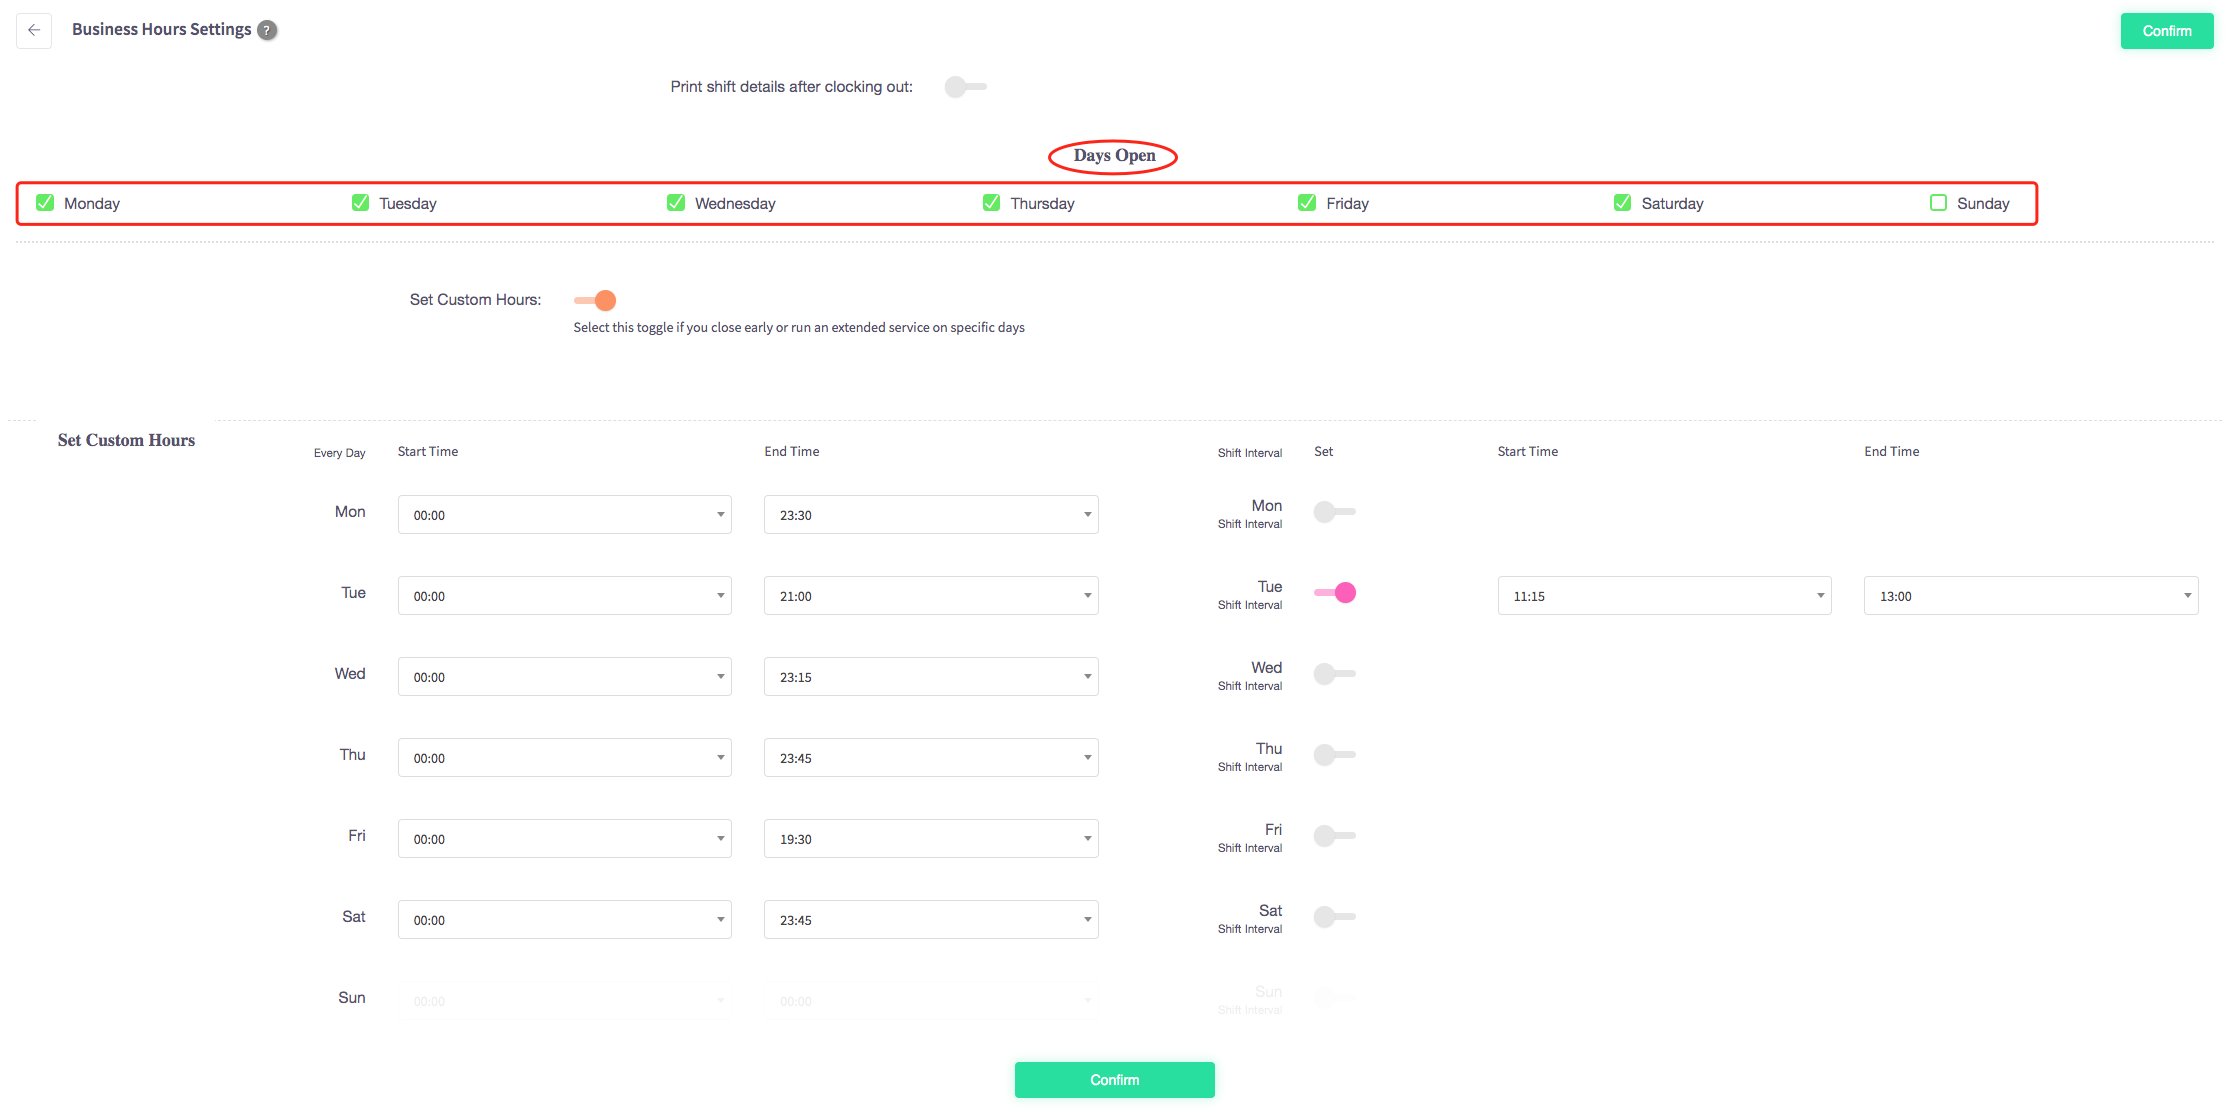
As you can see I have set my business to open Monday-Saturday, and be closed on Sundays. Once you have selected the days that your business is open press the green "Confirm" button in the top right corner of the screen.
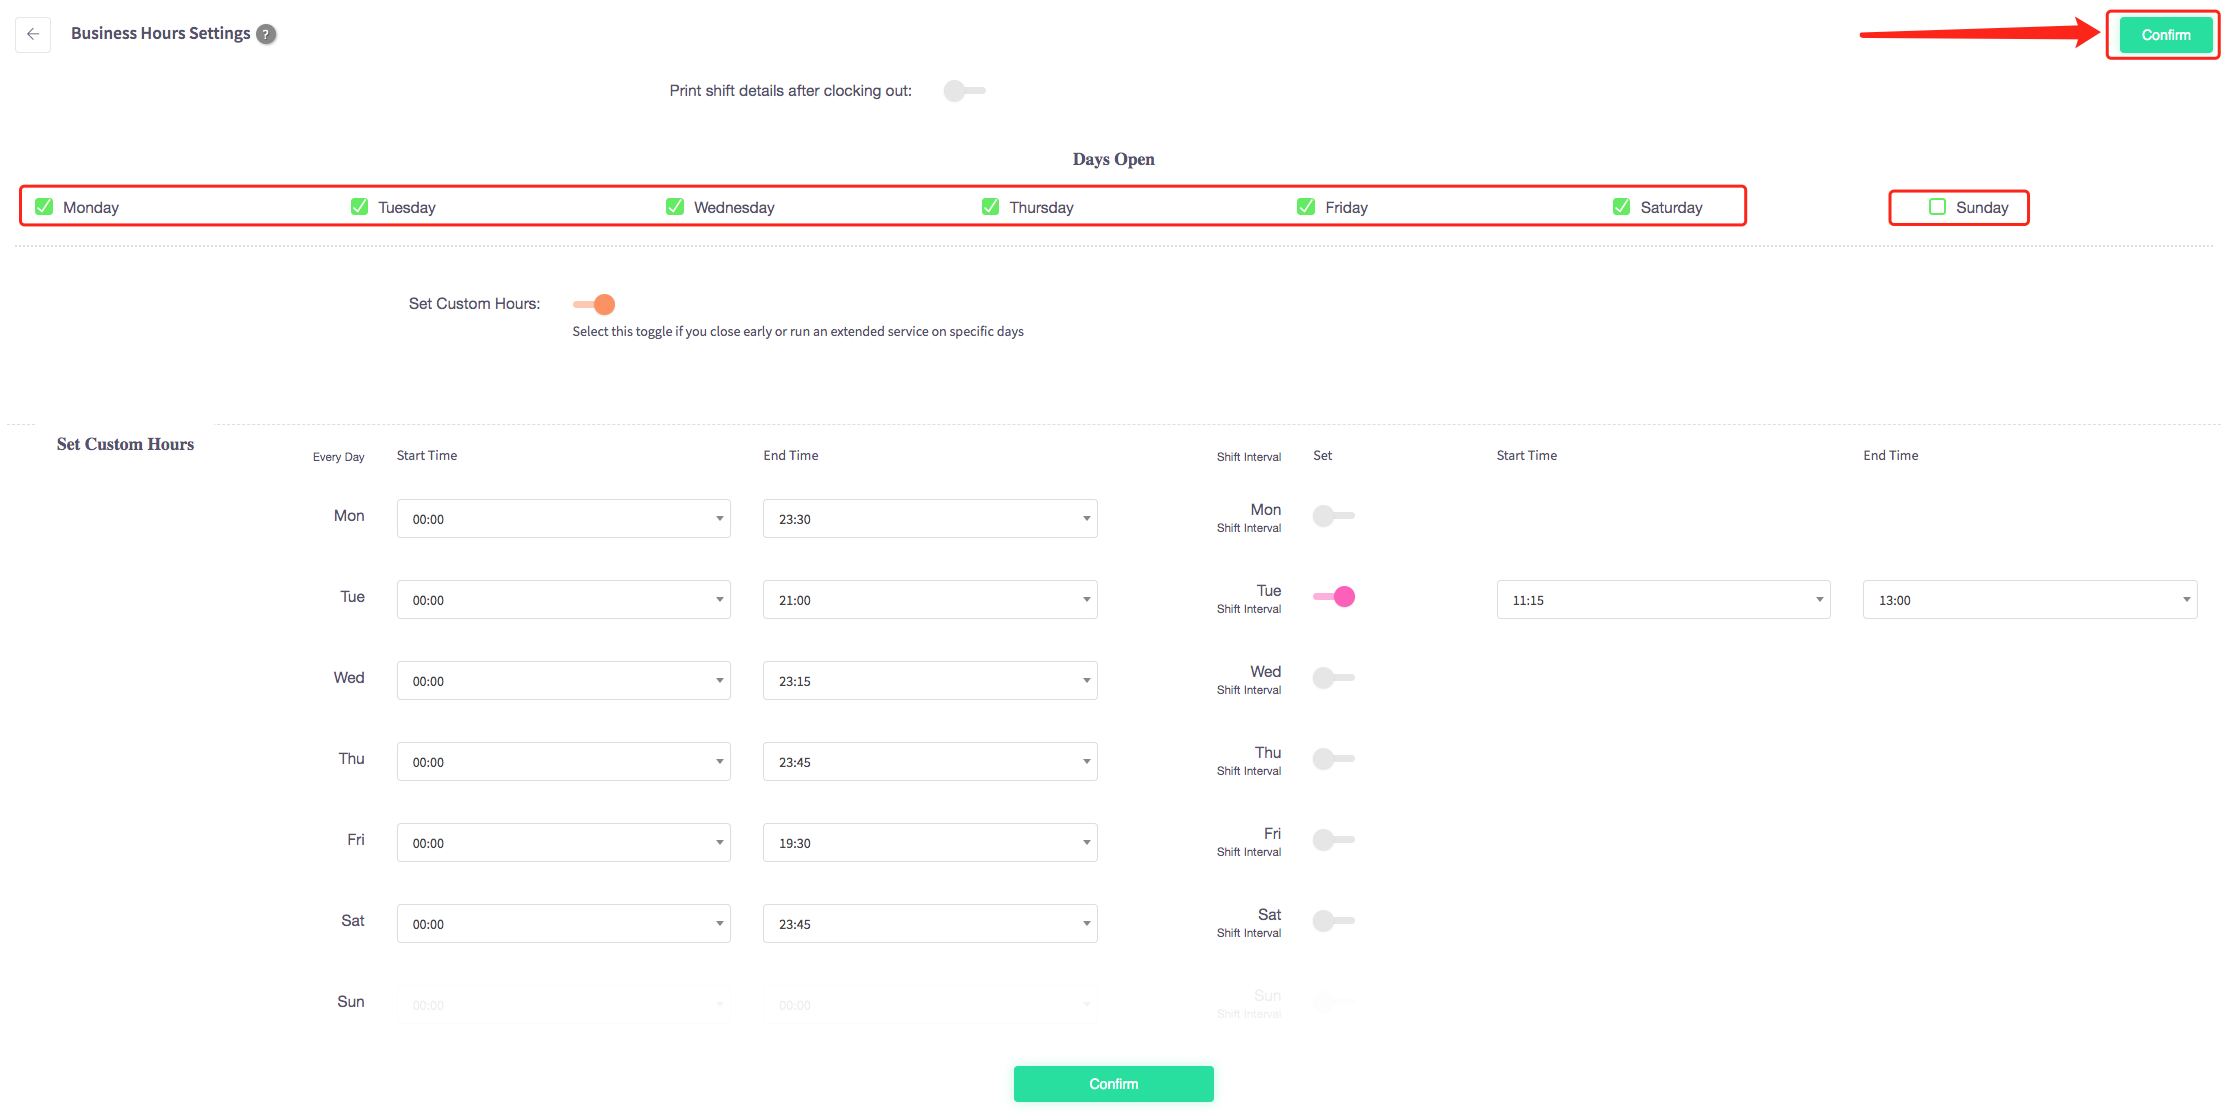
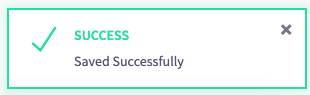
A confirmation will appear once the confirm button has been pressed.
How to add an end of day time
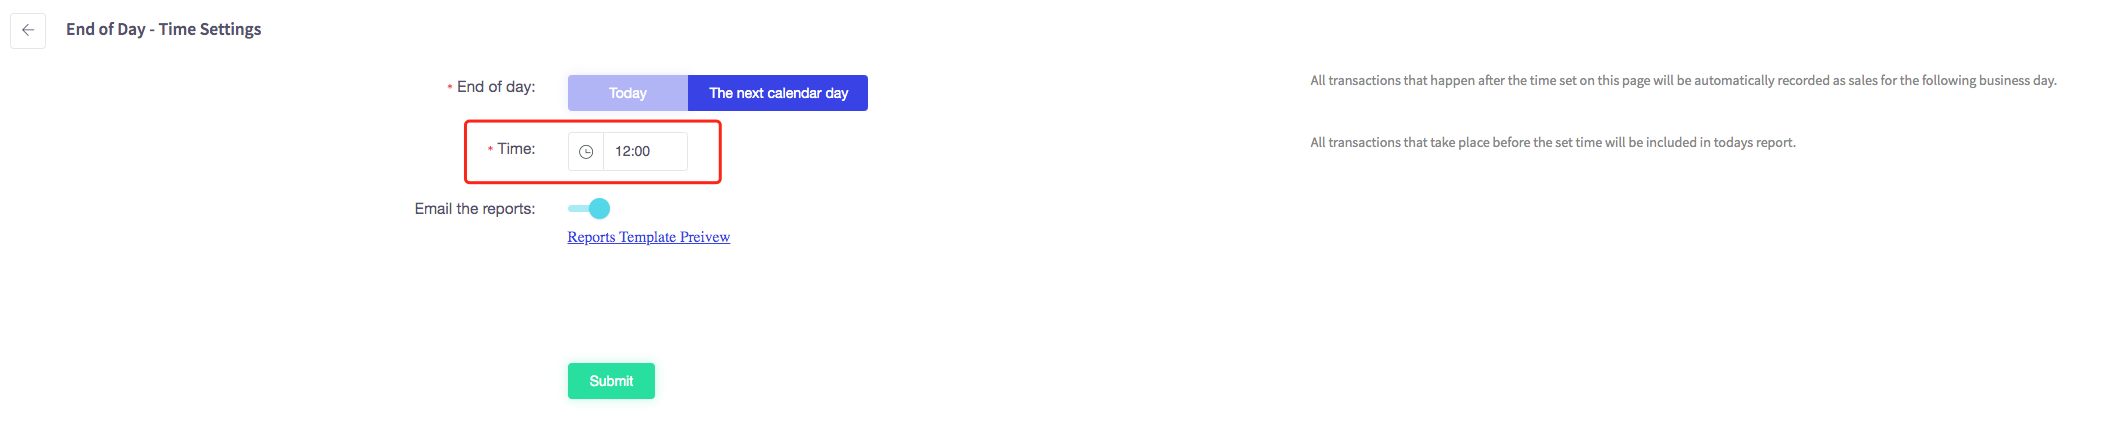
This guide will show you how to add an end of day time to your Cloud HQ.
Once you have logged on scroll down to "System Settings" on the left-hand side and then the 'END OF DAY' option in the menu.

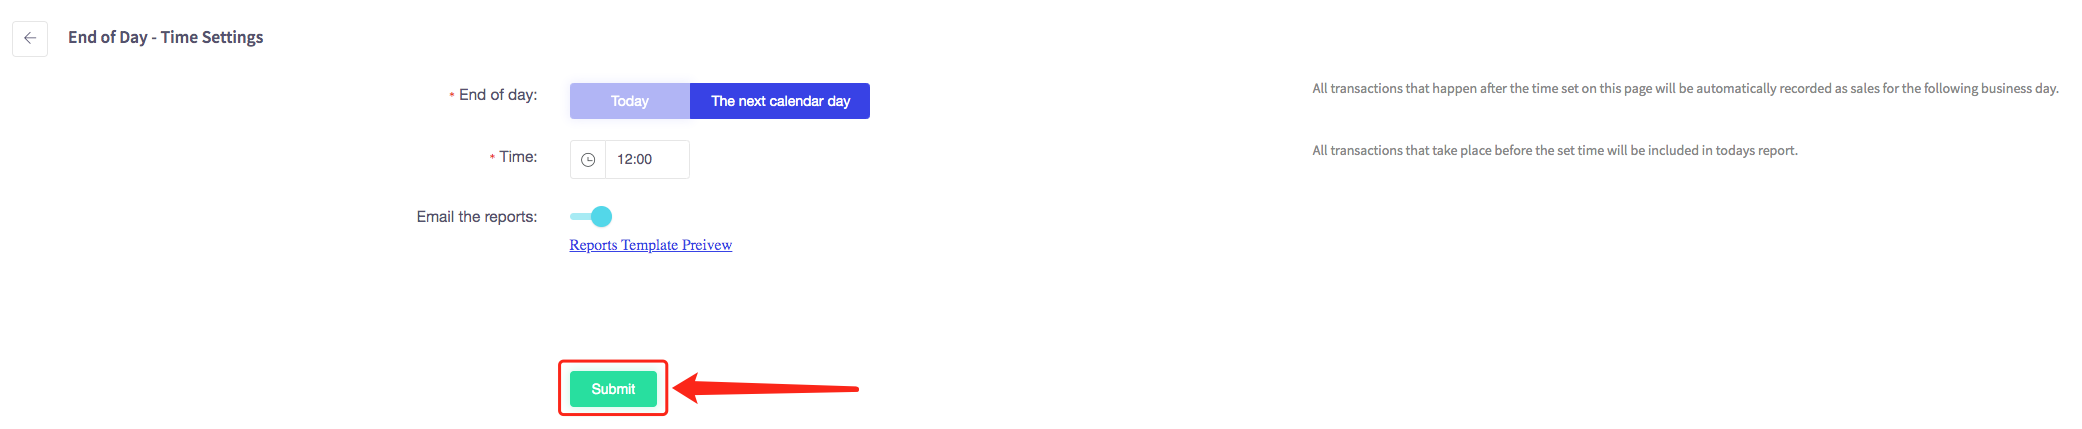
The end of day - time settings menu should appear, shown below.

Firstly select when you would like your end of the day to be whether it is today or the next calendar day.
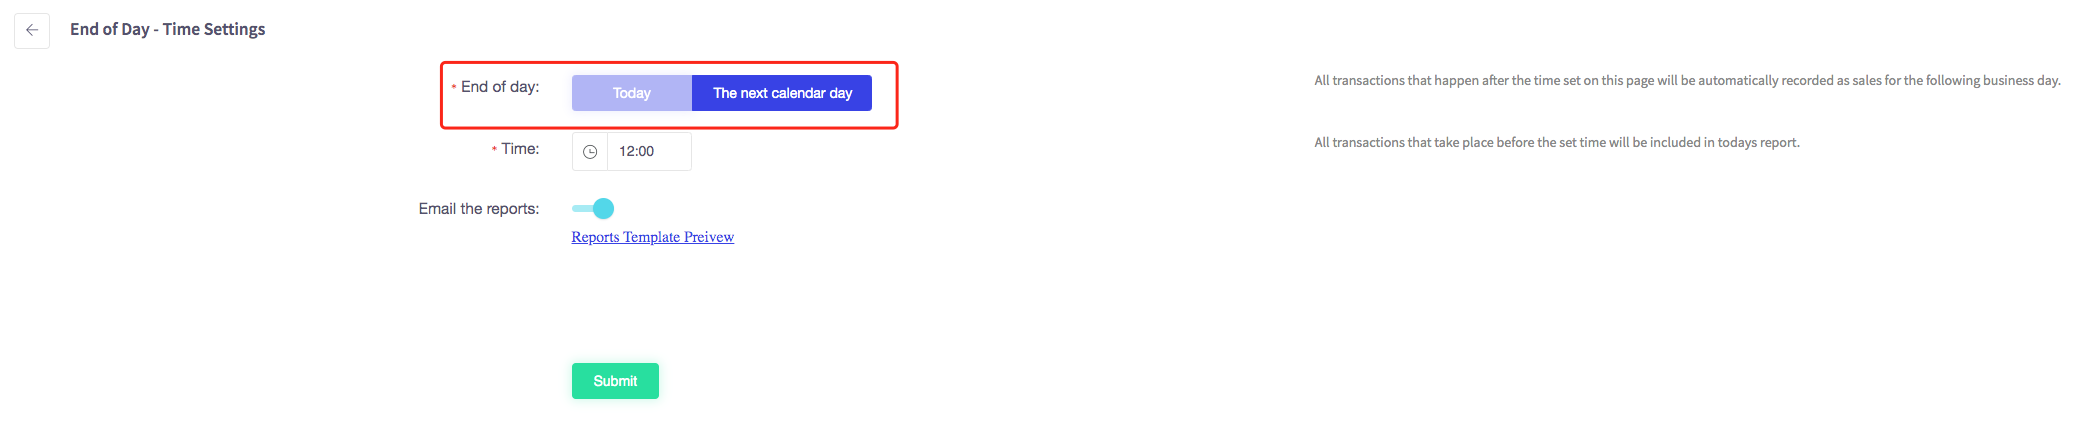
Then select what time you would like your end of the day to be.
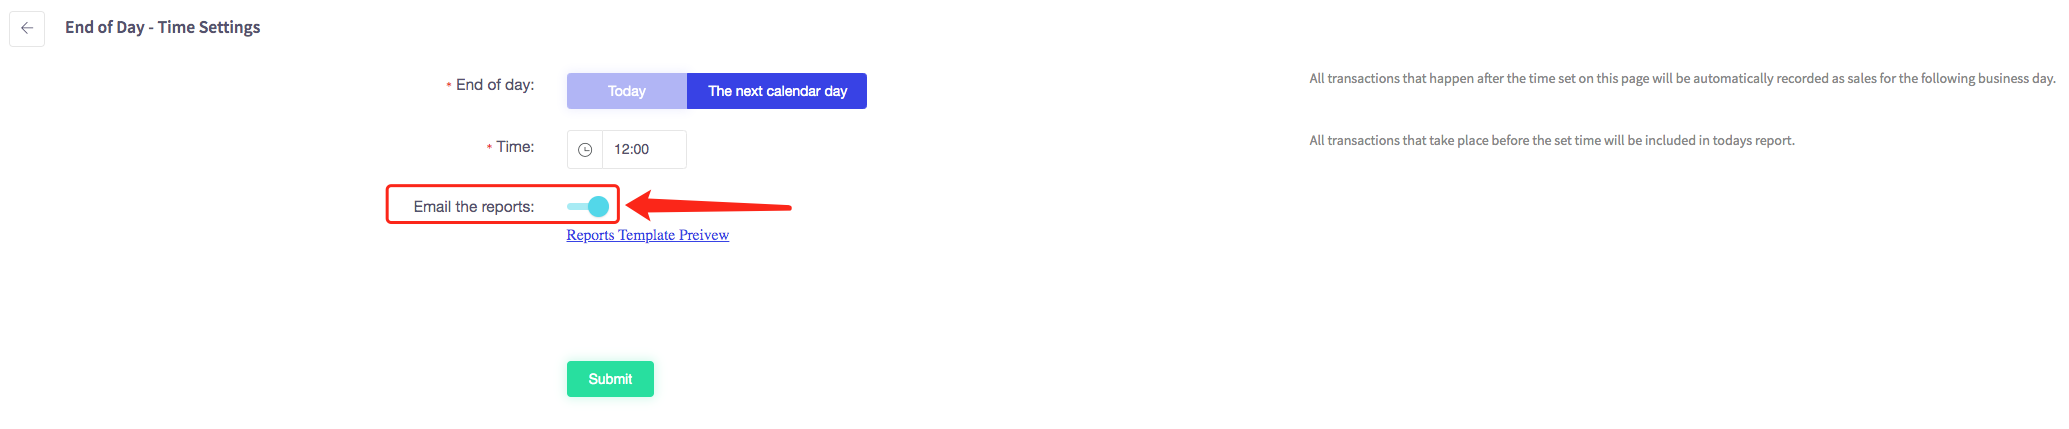
Operators also have an option whether they would like to email the end of day reports which they can turn on and off using the toggle.
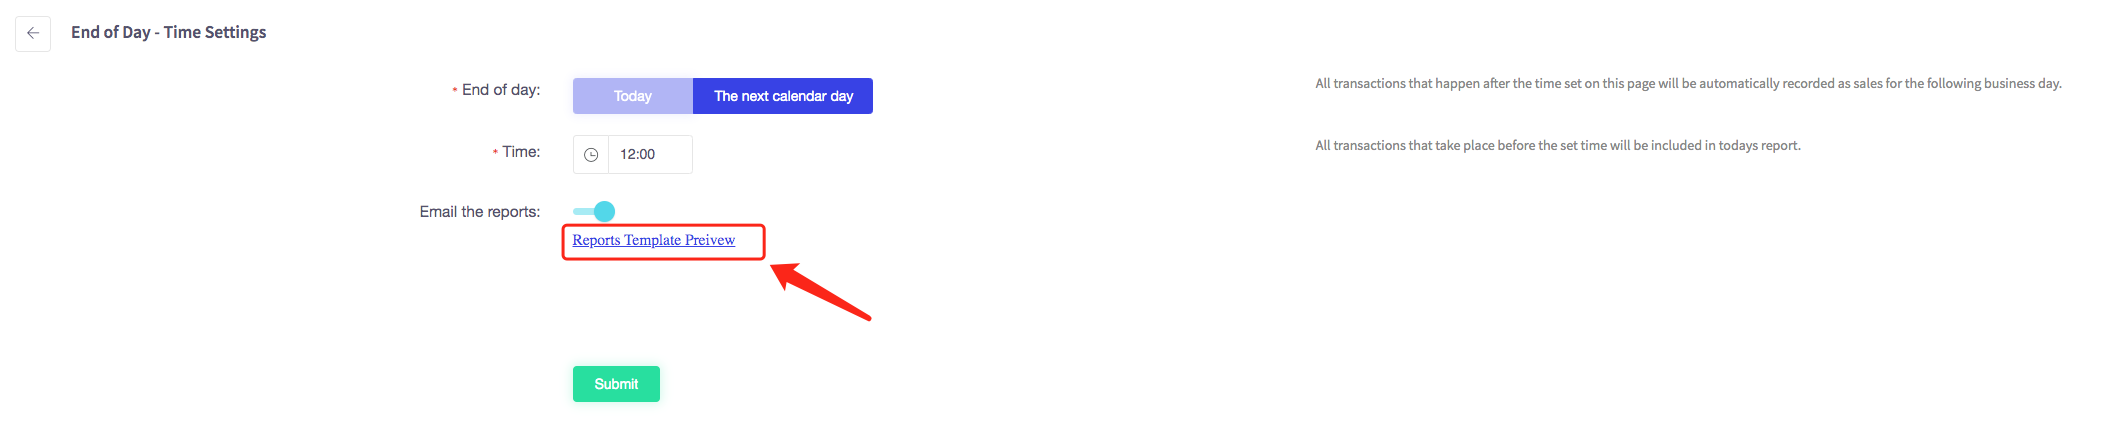
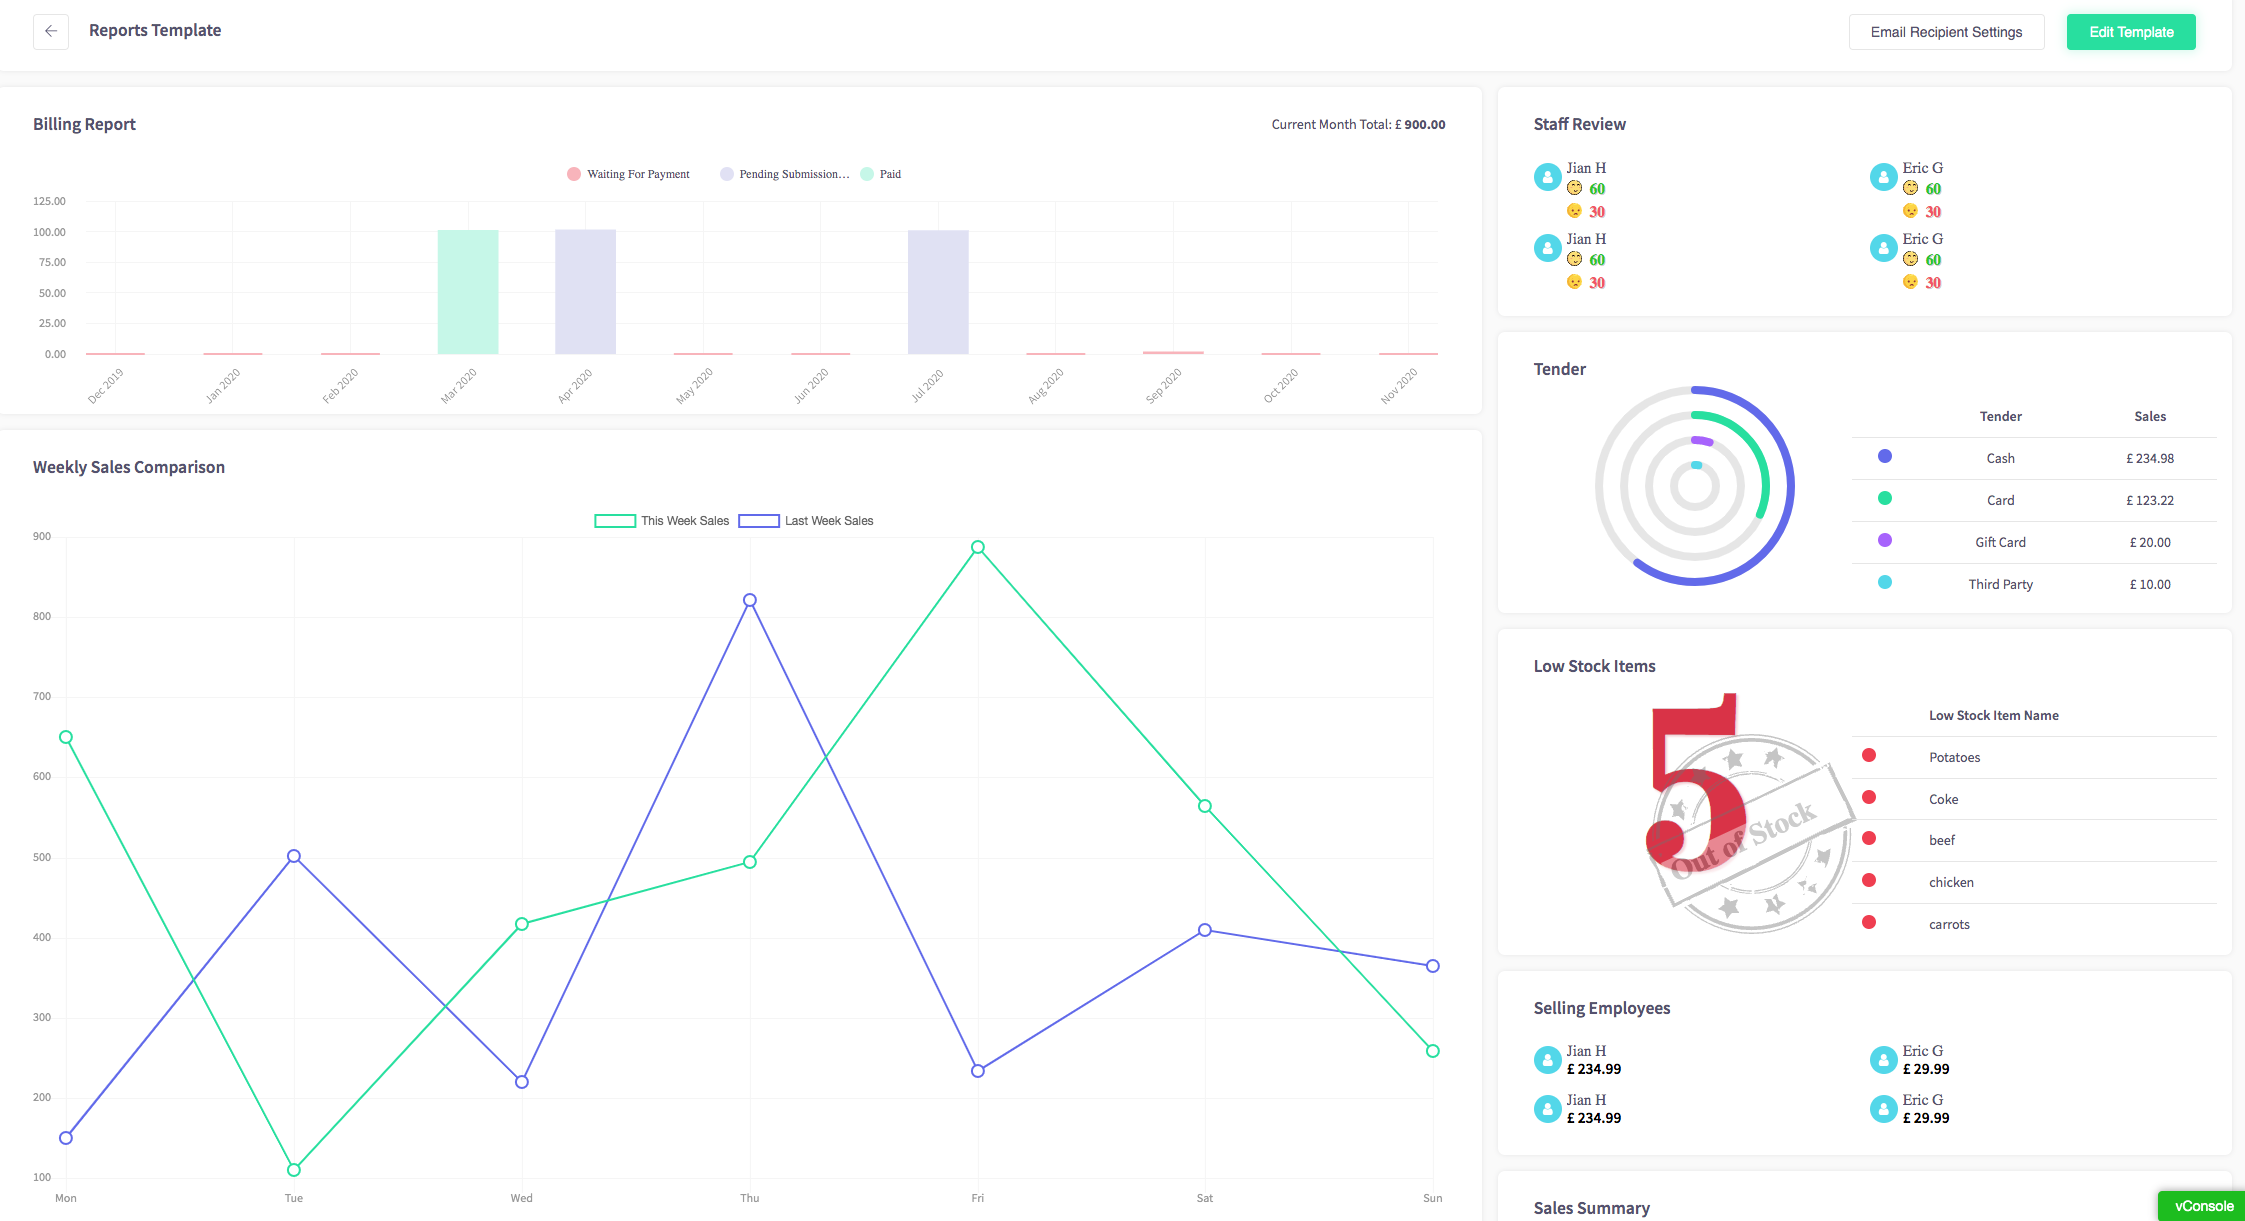
There is also an option to preview the email template, which once clicked brings you to the Report template which show statistics on the business. For example Billing Report and Weekly Sales Comparison.
Once you have filled in all the information about your business at end of day time press the green "Submit" button at the bottom of the page.
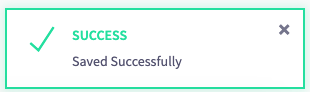
A green confirmation message will appear, saying that it has been saved successfully.
How to configure a printer
This guide will show you how to configure a printer in the back office.
Firstly, click 'System Settings', on the left-hand side, then press the 'PRINTER / KDS SETTINGS' option in the menu.
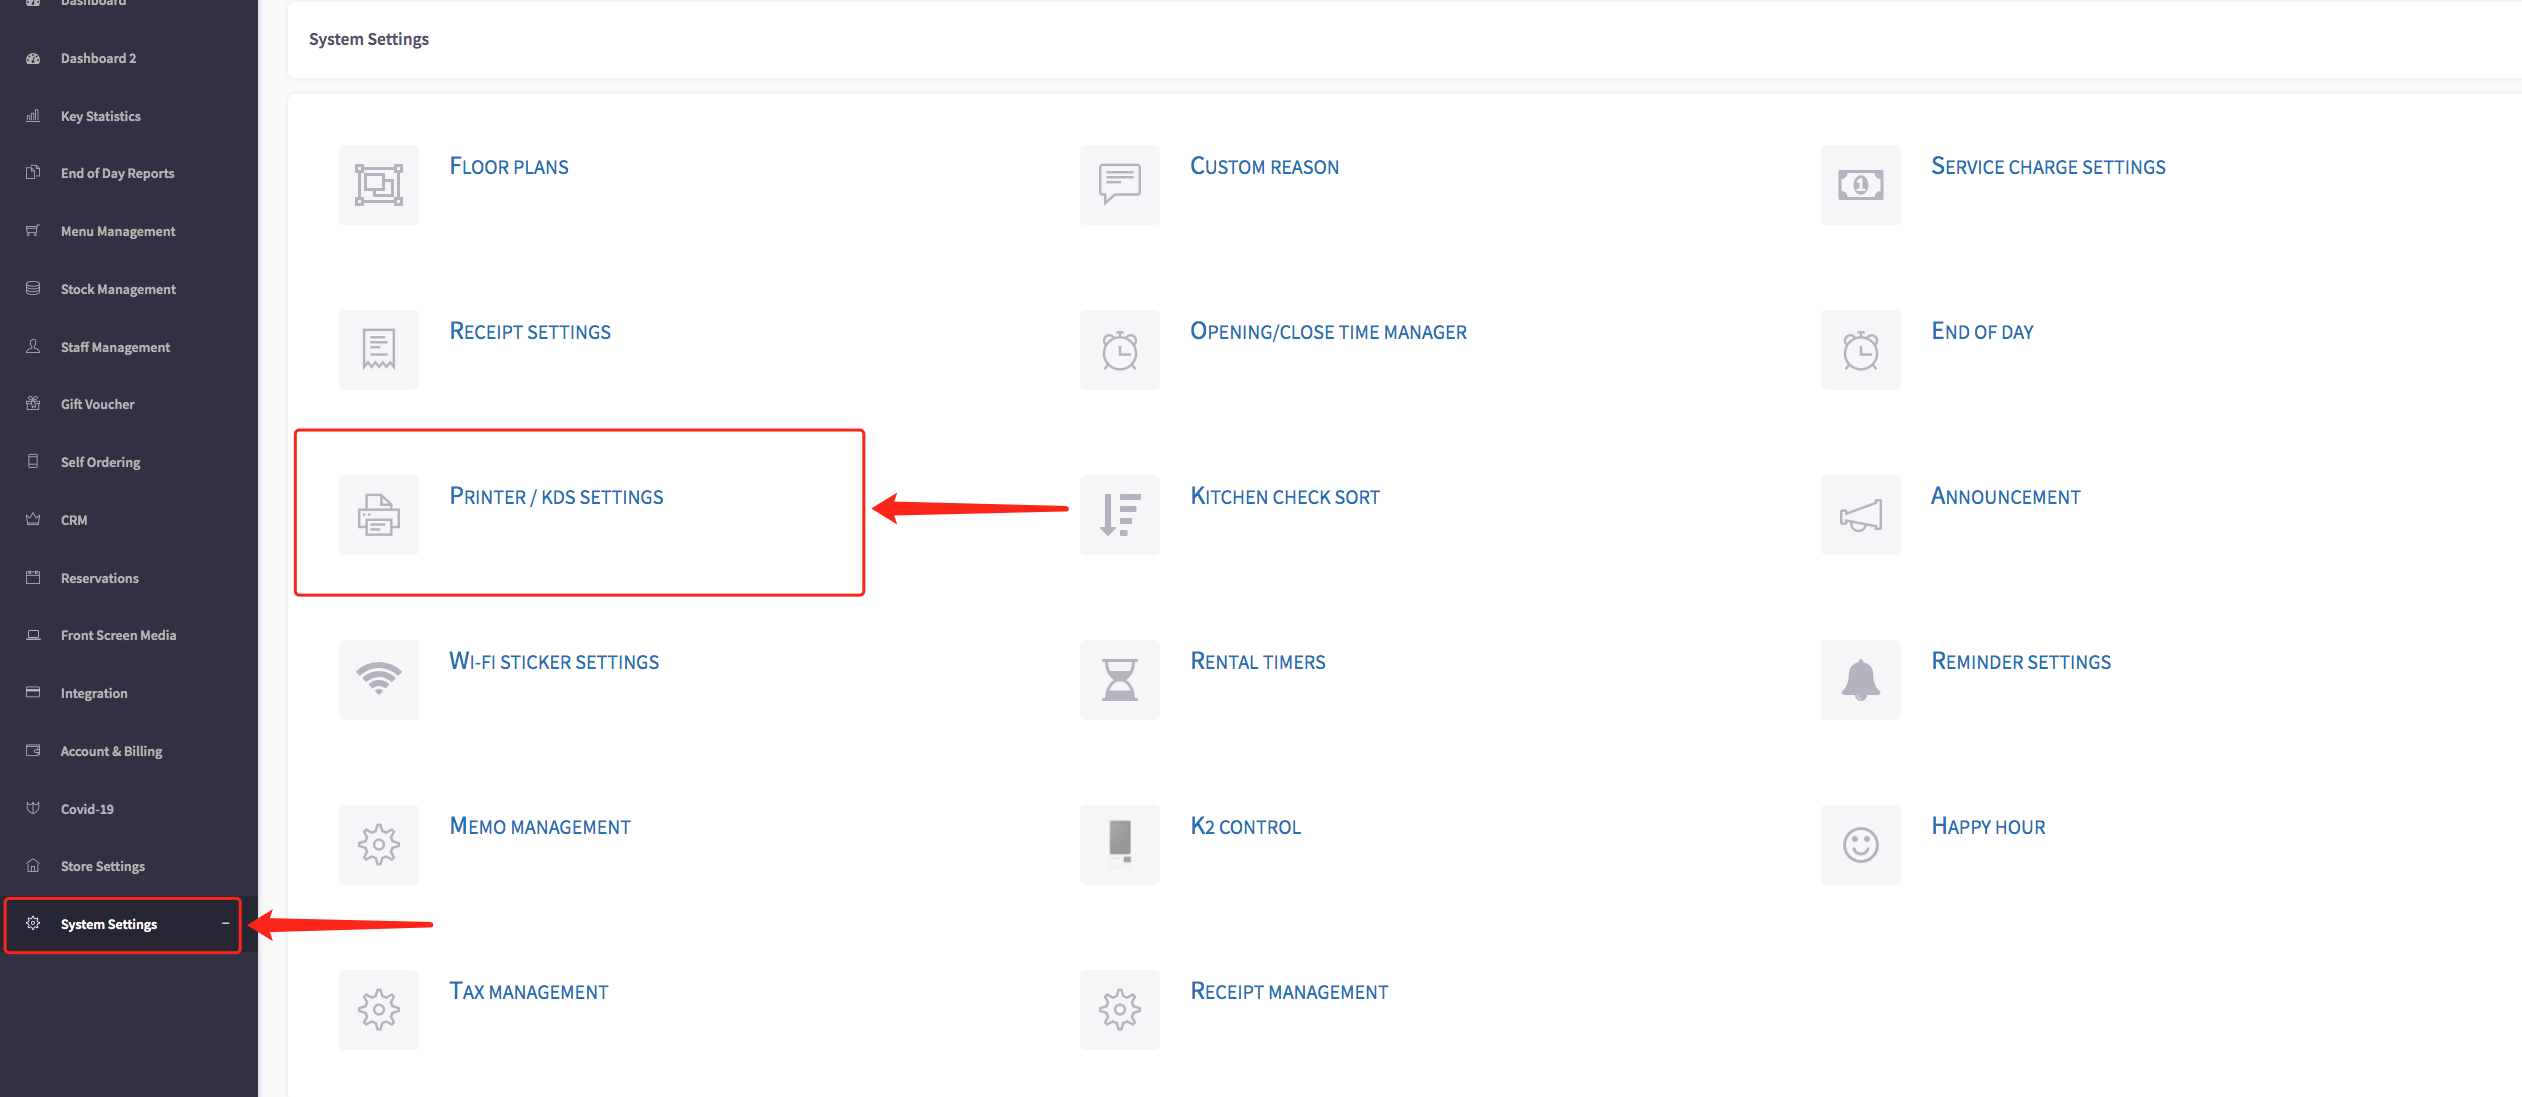
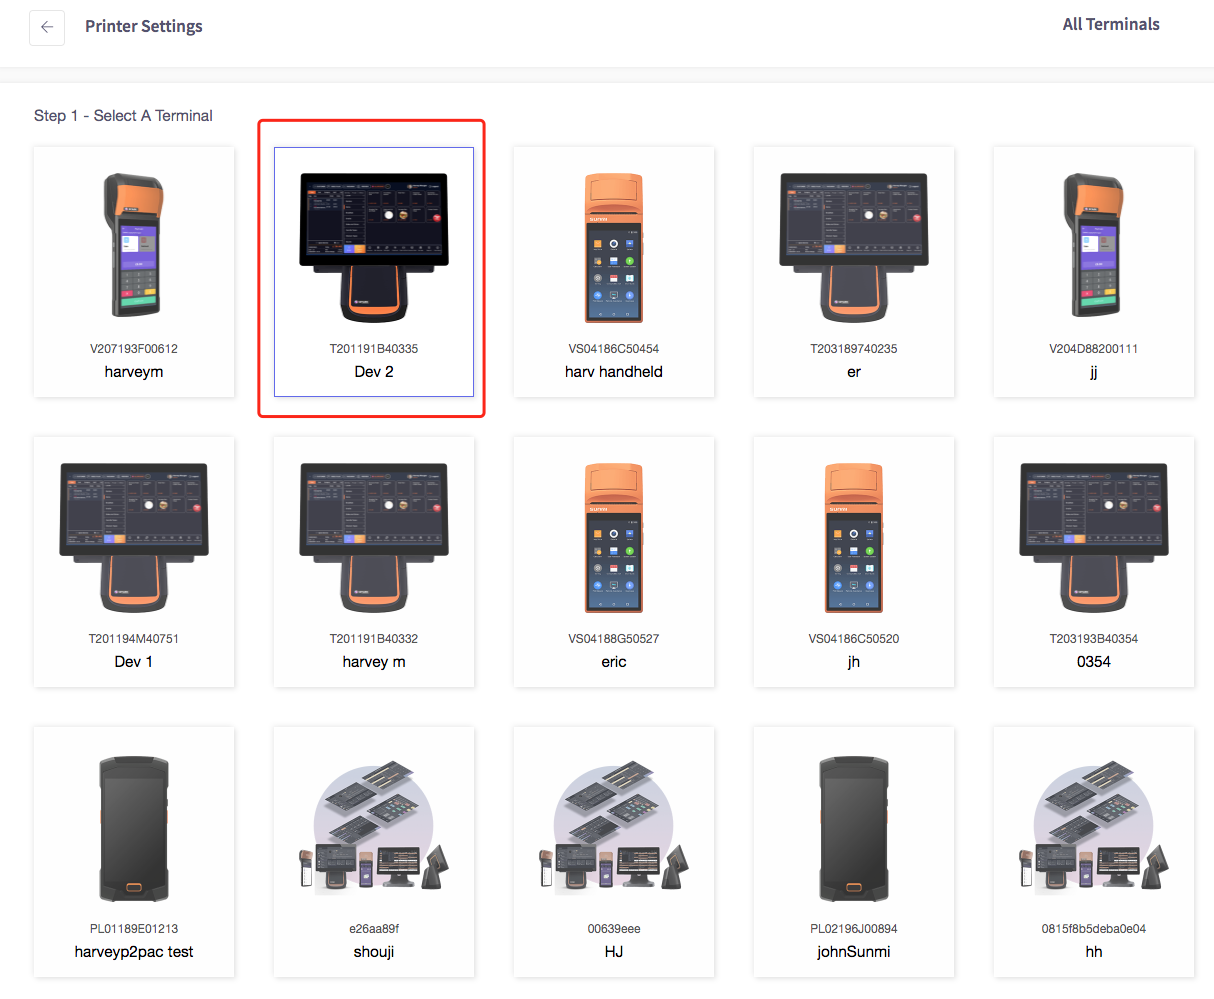
This will then take you to the printer settings, shown here.
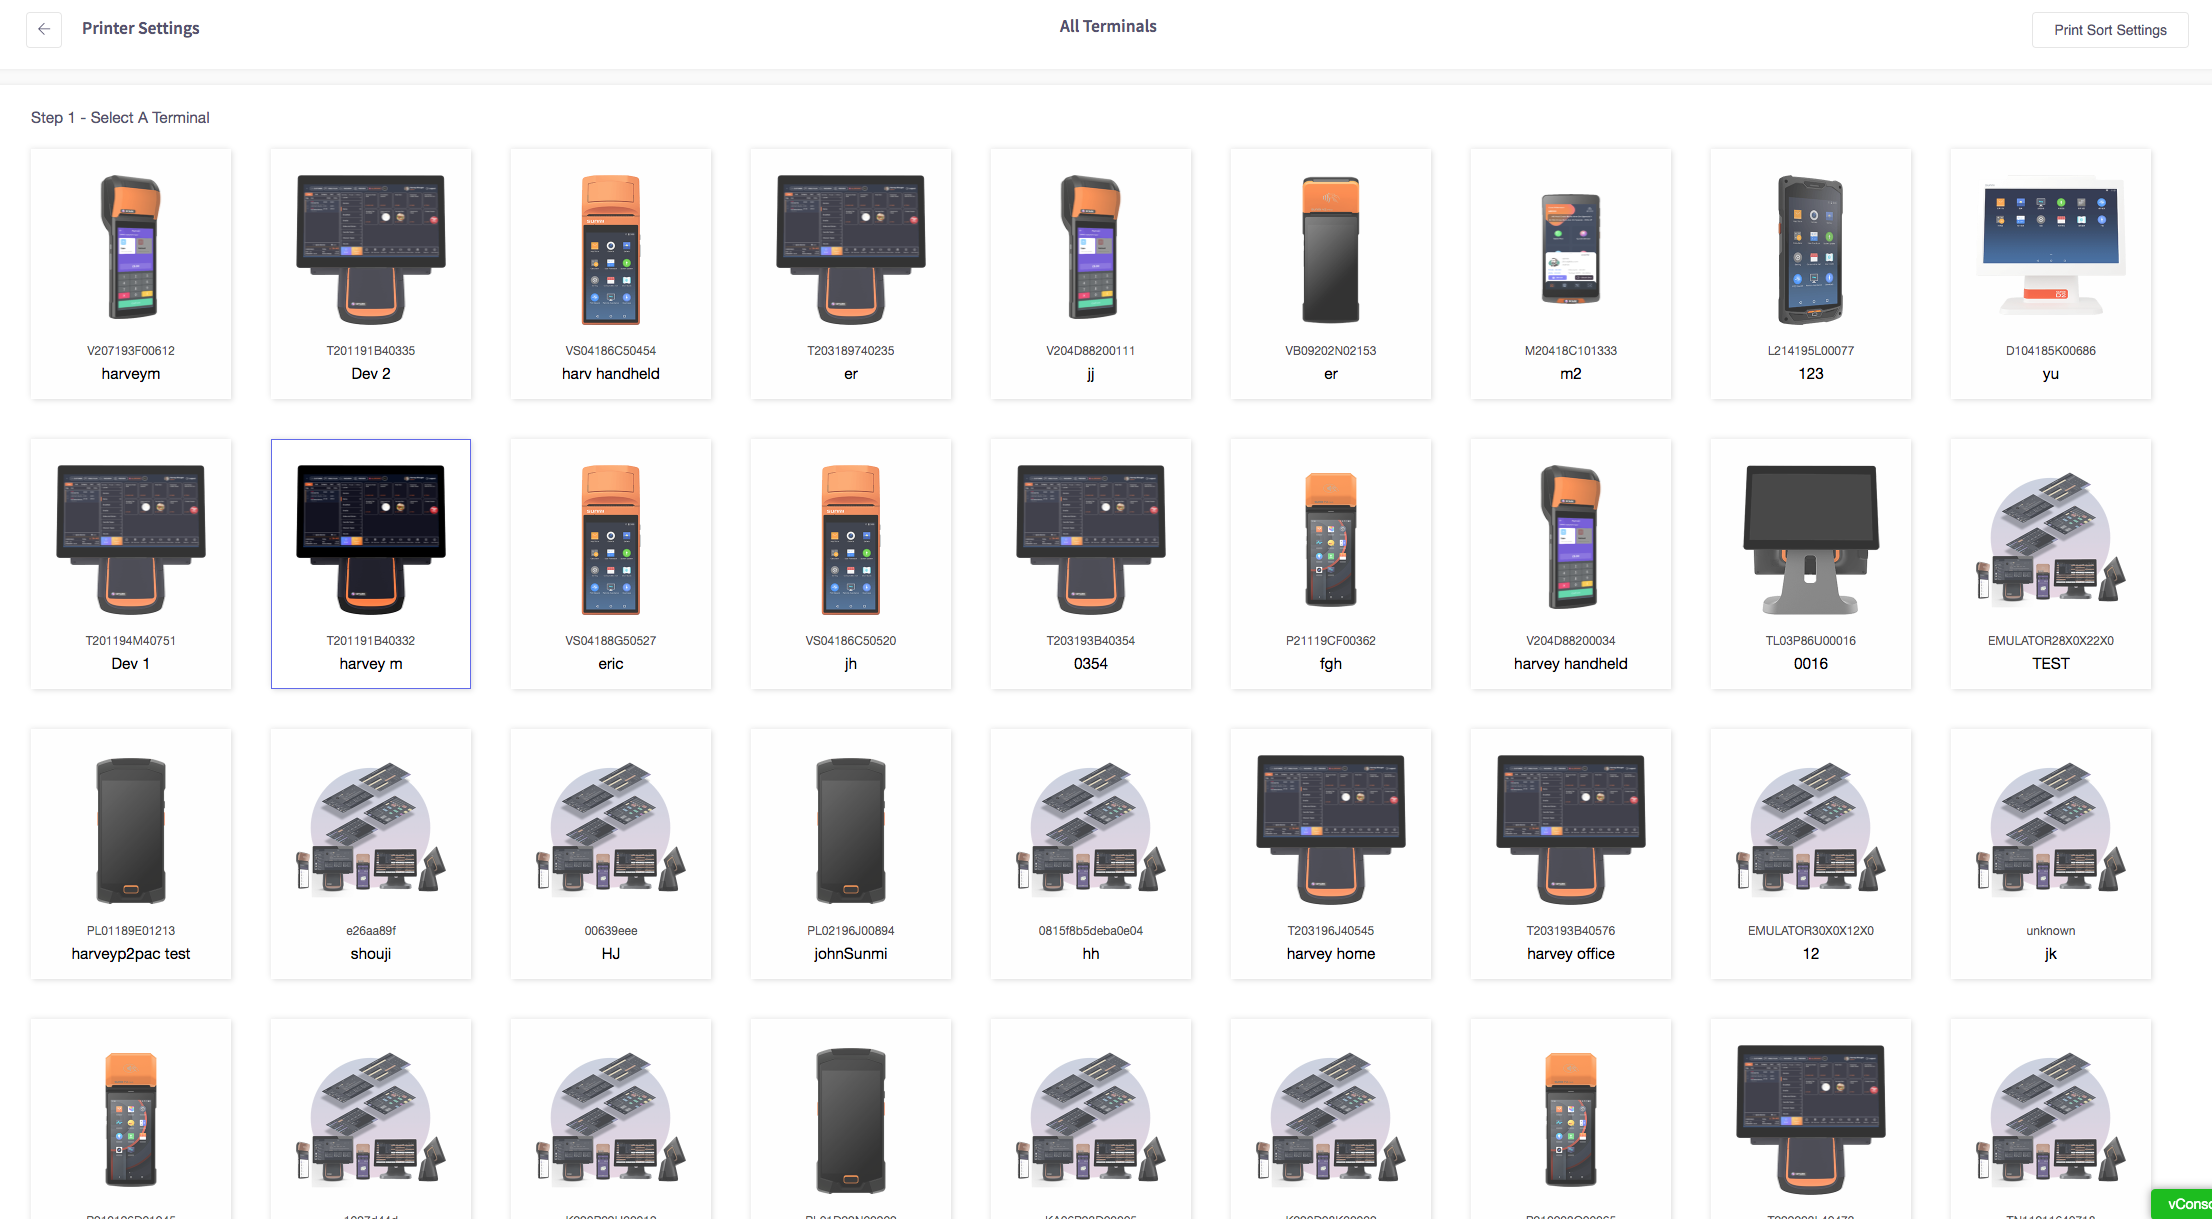
To select an option in the settings, you can simply just click on a product. For example this T2, called "Dev 2".
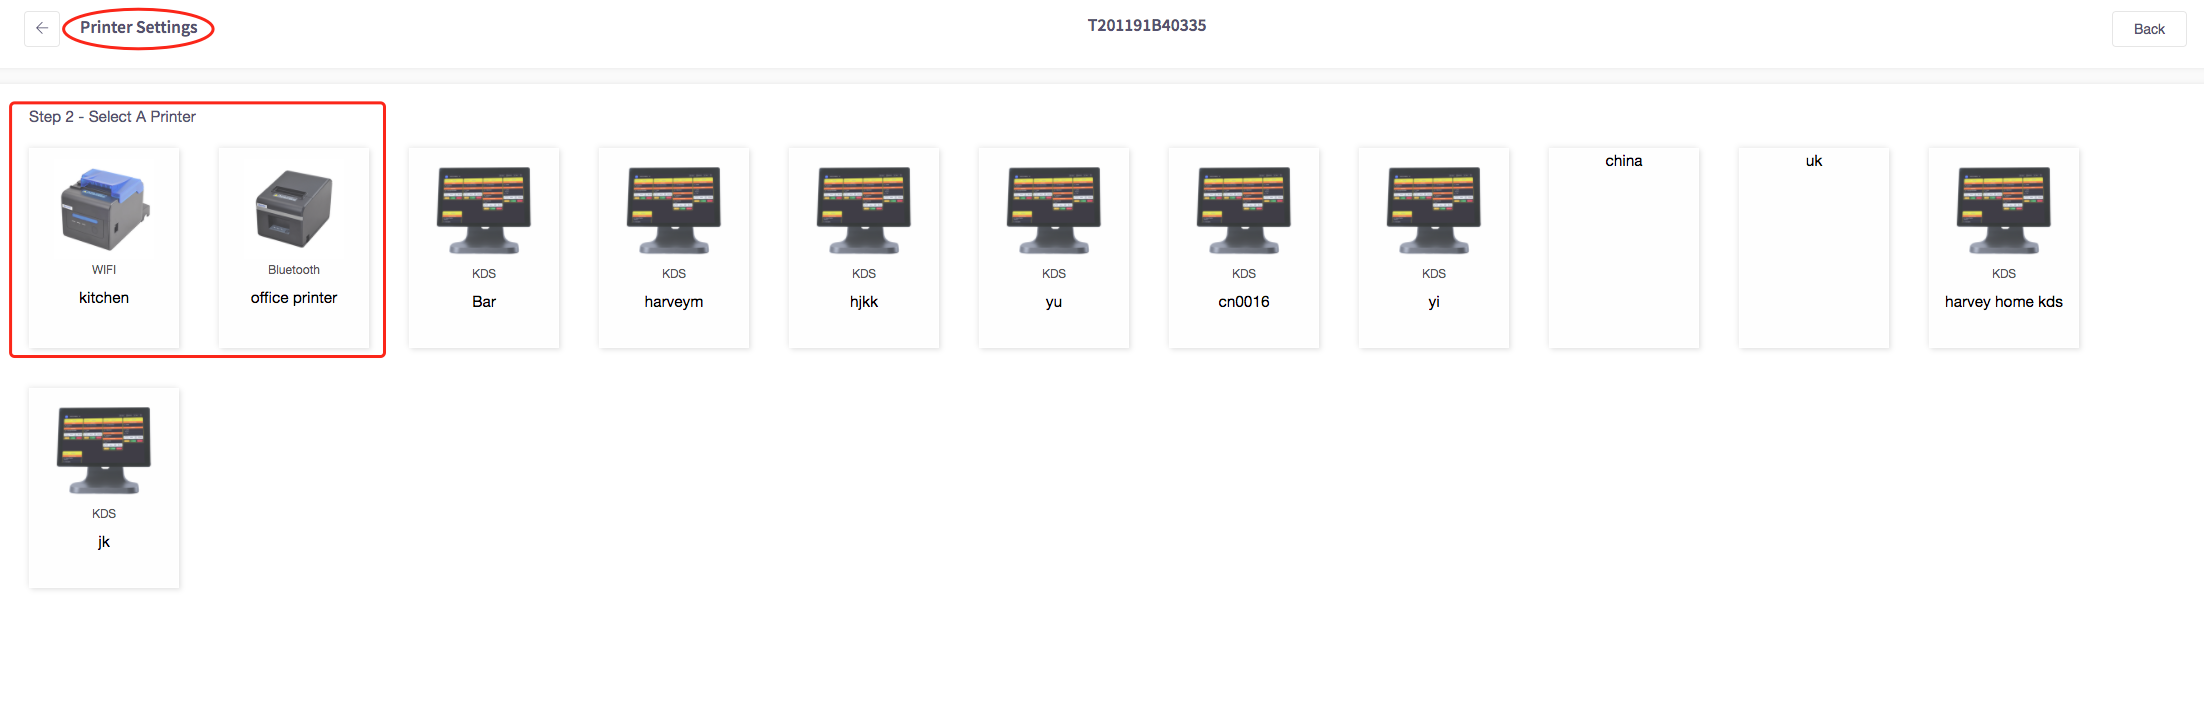
Now it will take you to the printer page, where you can select a printer.
Then you will see a printer configuration page, where you can select options that you can include in the printer.
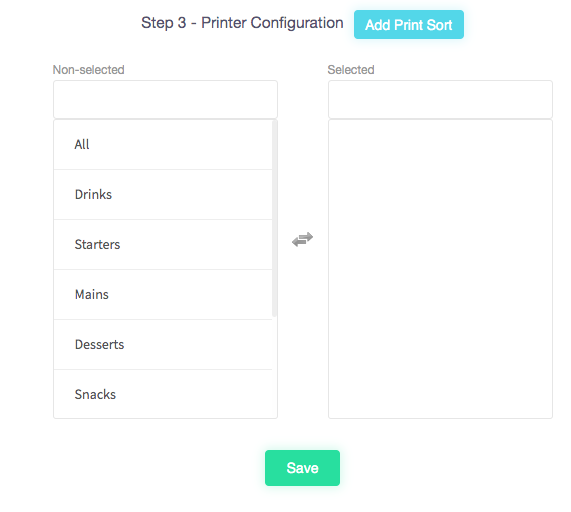
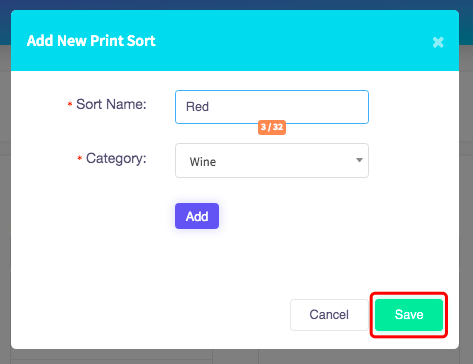
If you would like to add a new print sort you can click the button, shown here.

You can add a new sort name, and select a category for this. To select a category, you can click the dropdown arrow, shown here.
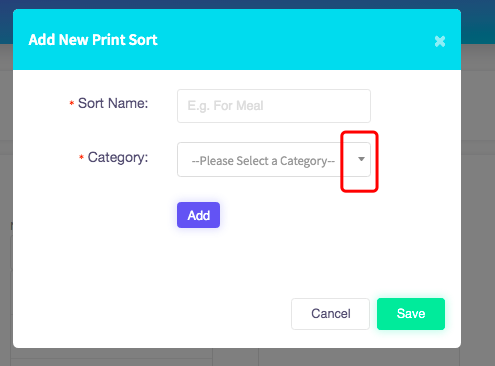
Once you have selected the category, you can click the 'Save' button.
Now it will appear in your non-selected section, shown here to the left.
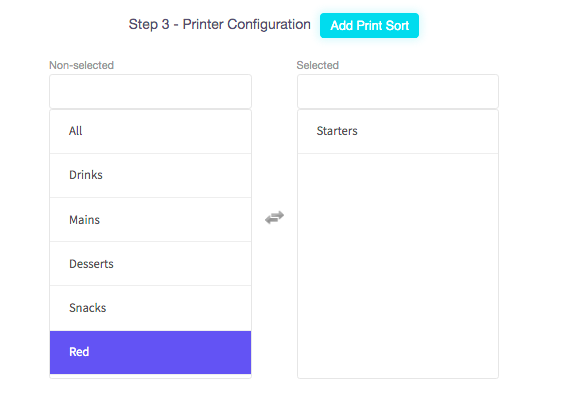
To select a category from the non-selected section, you can simply click on the section you would like to add. For example, I have moved 'Starters' to the selected section.
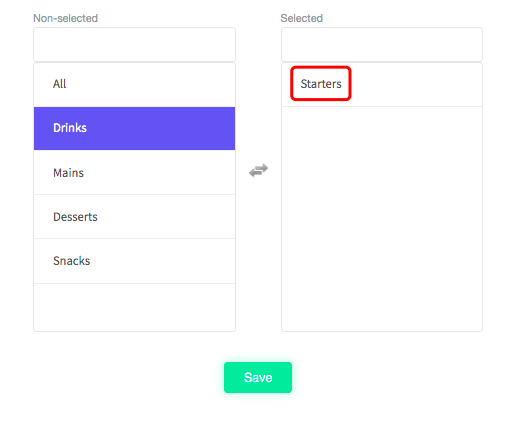
Once you have made all of the changes you needed, you can click 'Save'.