- Dashboard Walkthrough
- How do you add Staff Members
- How do you set Staff Permissions
- How to create Menu Categories
- How to create Menu Items
- How to create Single Upsells
- How to create Group Upsells
- How to create Preferences
- How to add Allergens
- Floor Plan
Before you do anything, make sure you login into your store account SparkEpos
Once you have logged on this is the main dashboard, shown here.
This is fully customisable to fit your business. This top row shows key statistics of your businesses earnings.

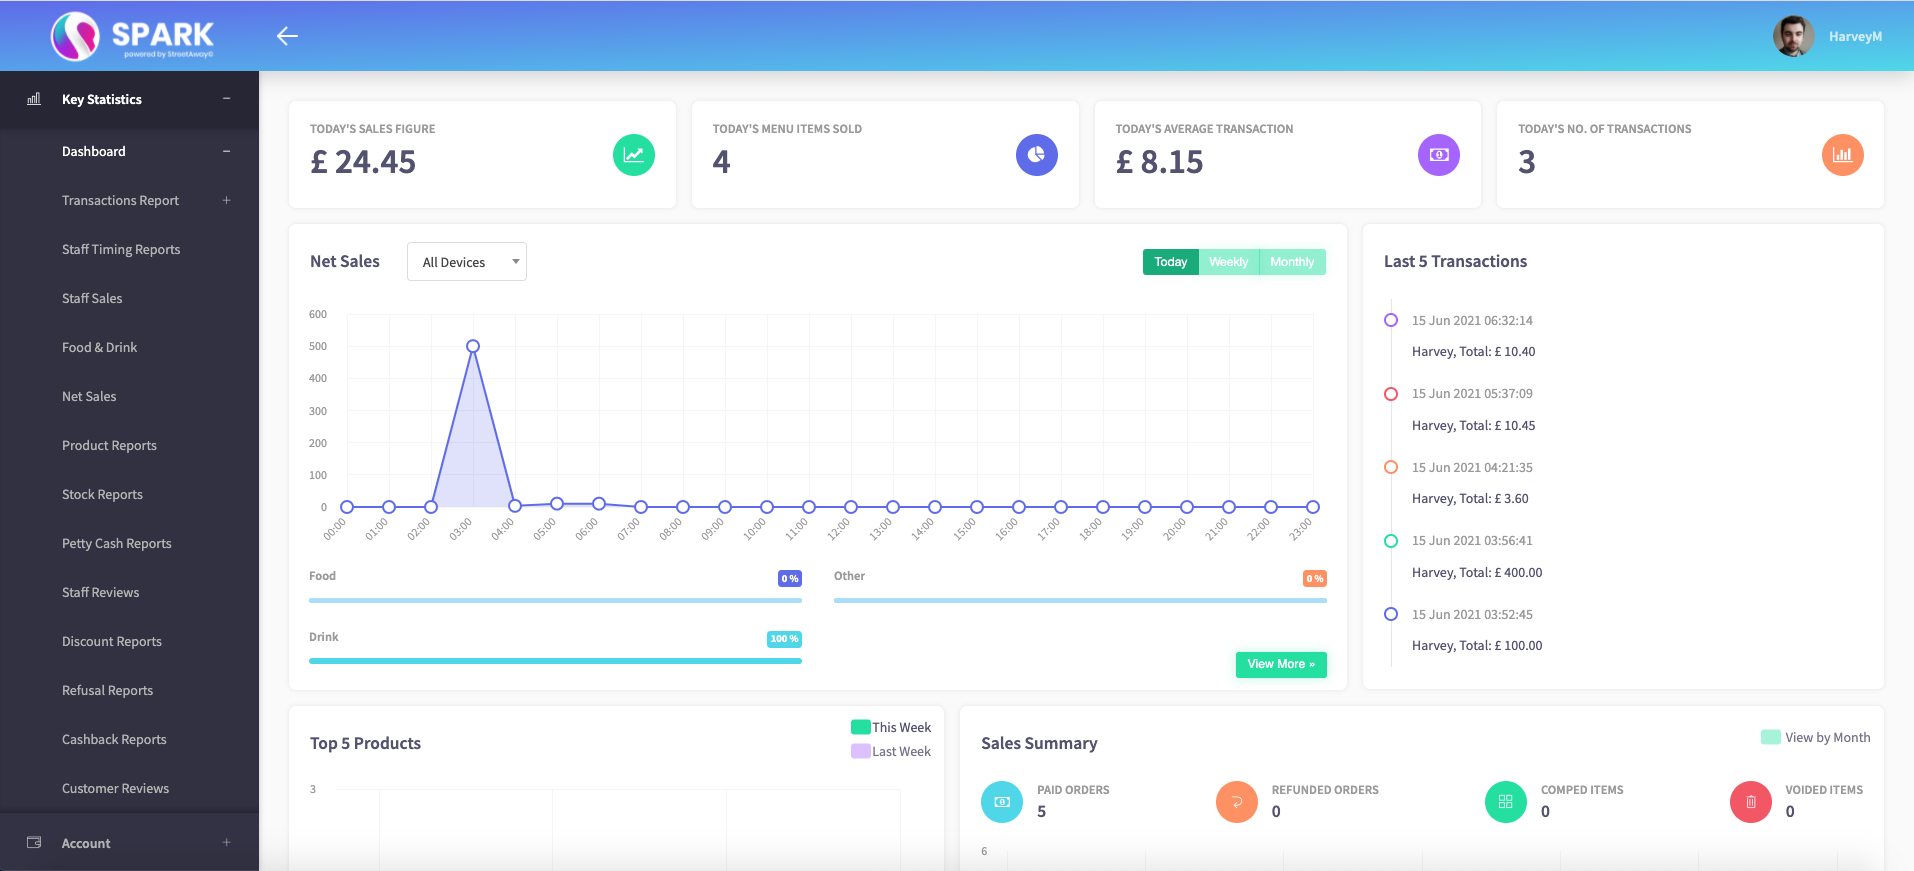
This first statistic shows how much money you have made from sales today.
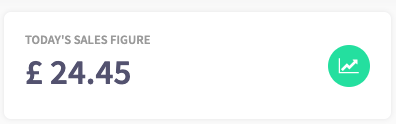
This second statistic shows how many items from your menu that your business has sold.
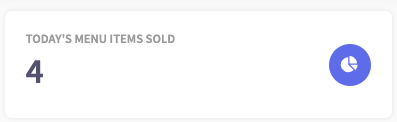
This third statistic shows today's average transaction rate.
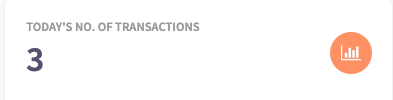
And the fourth shows the number of transactions that have been taken today.
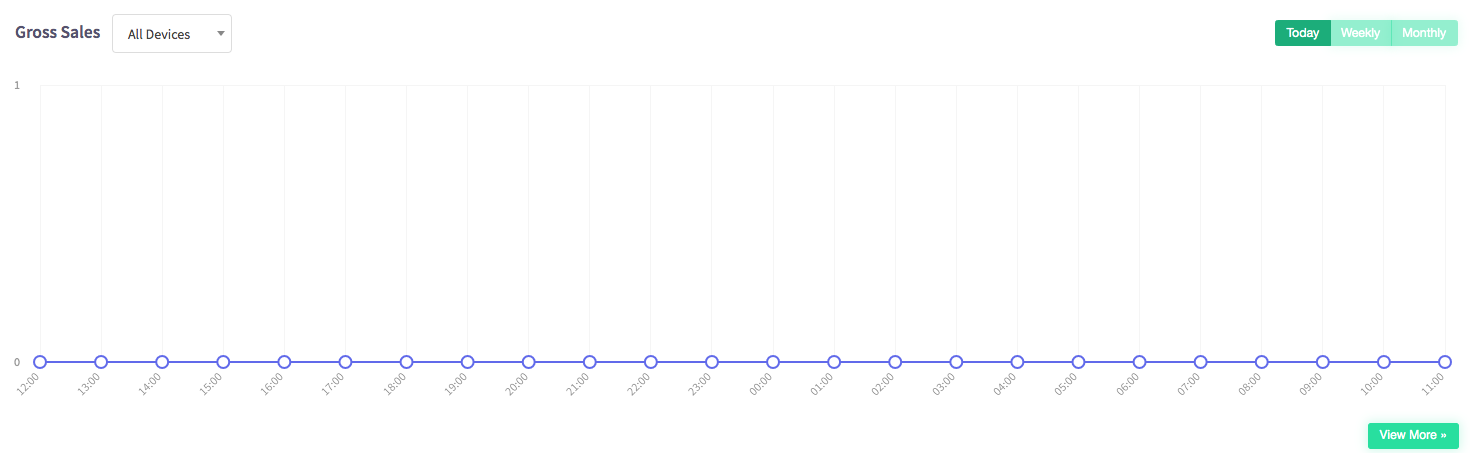
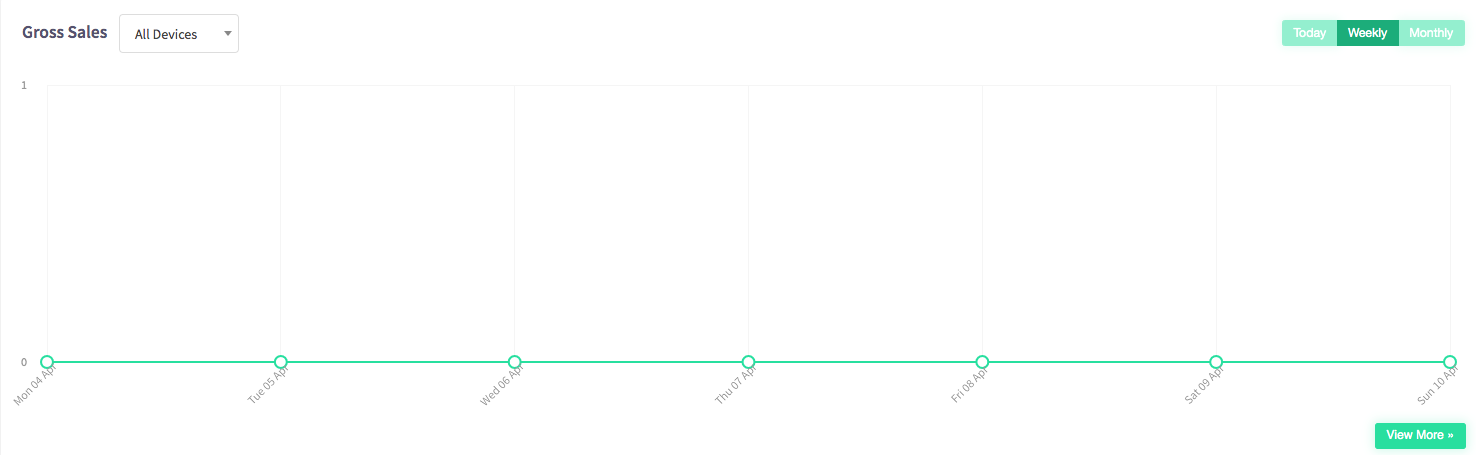
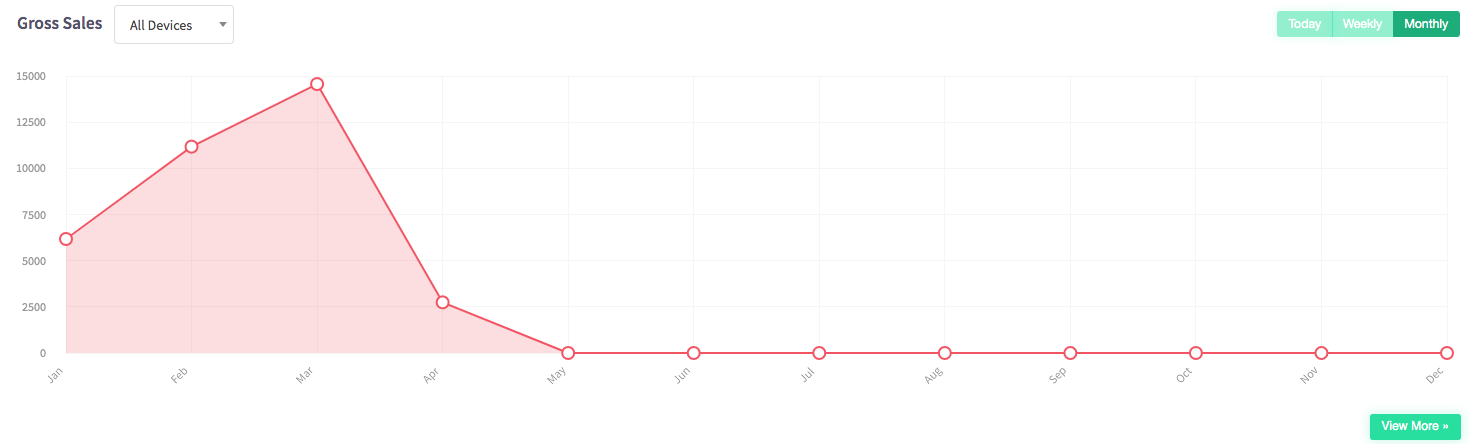
This graph here shows your gross sales in a timeline view showing what time food, drink or other items have been purchased.
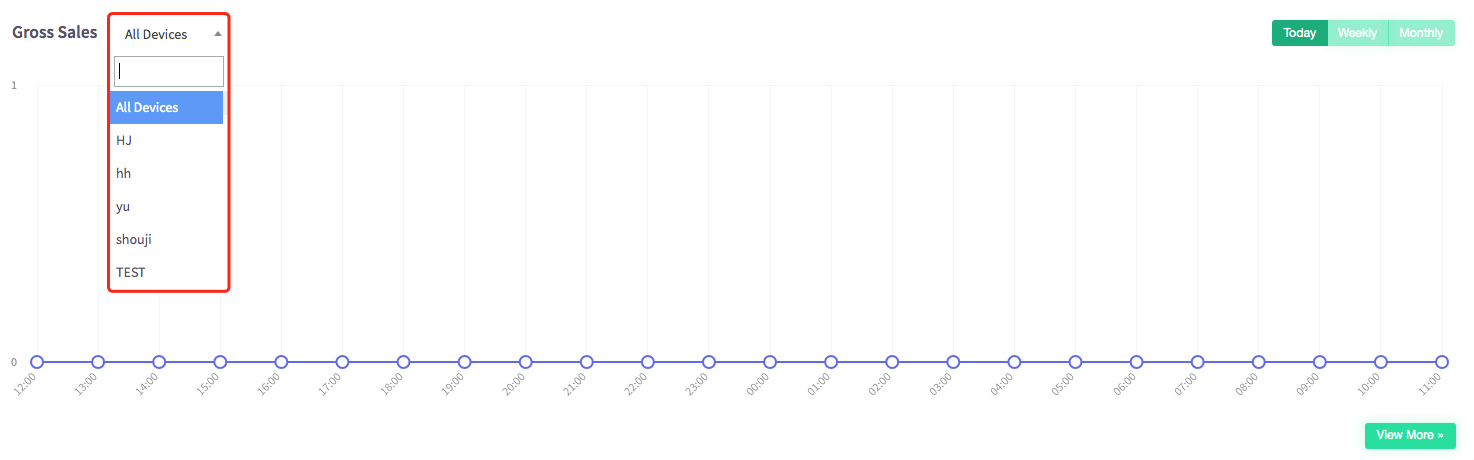
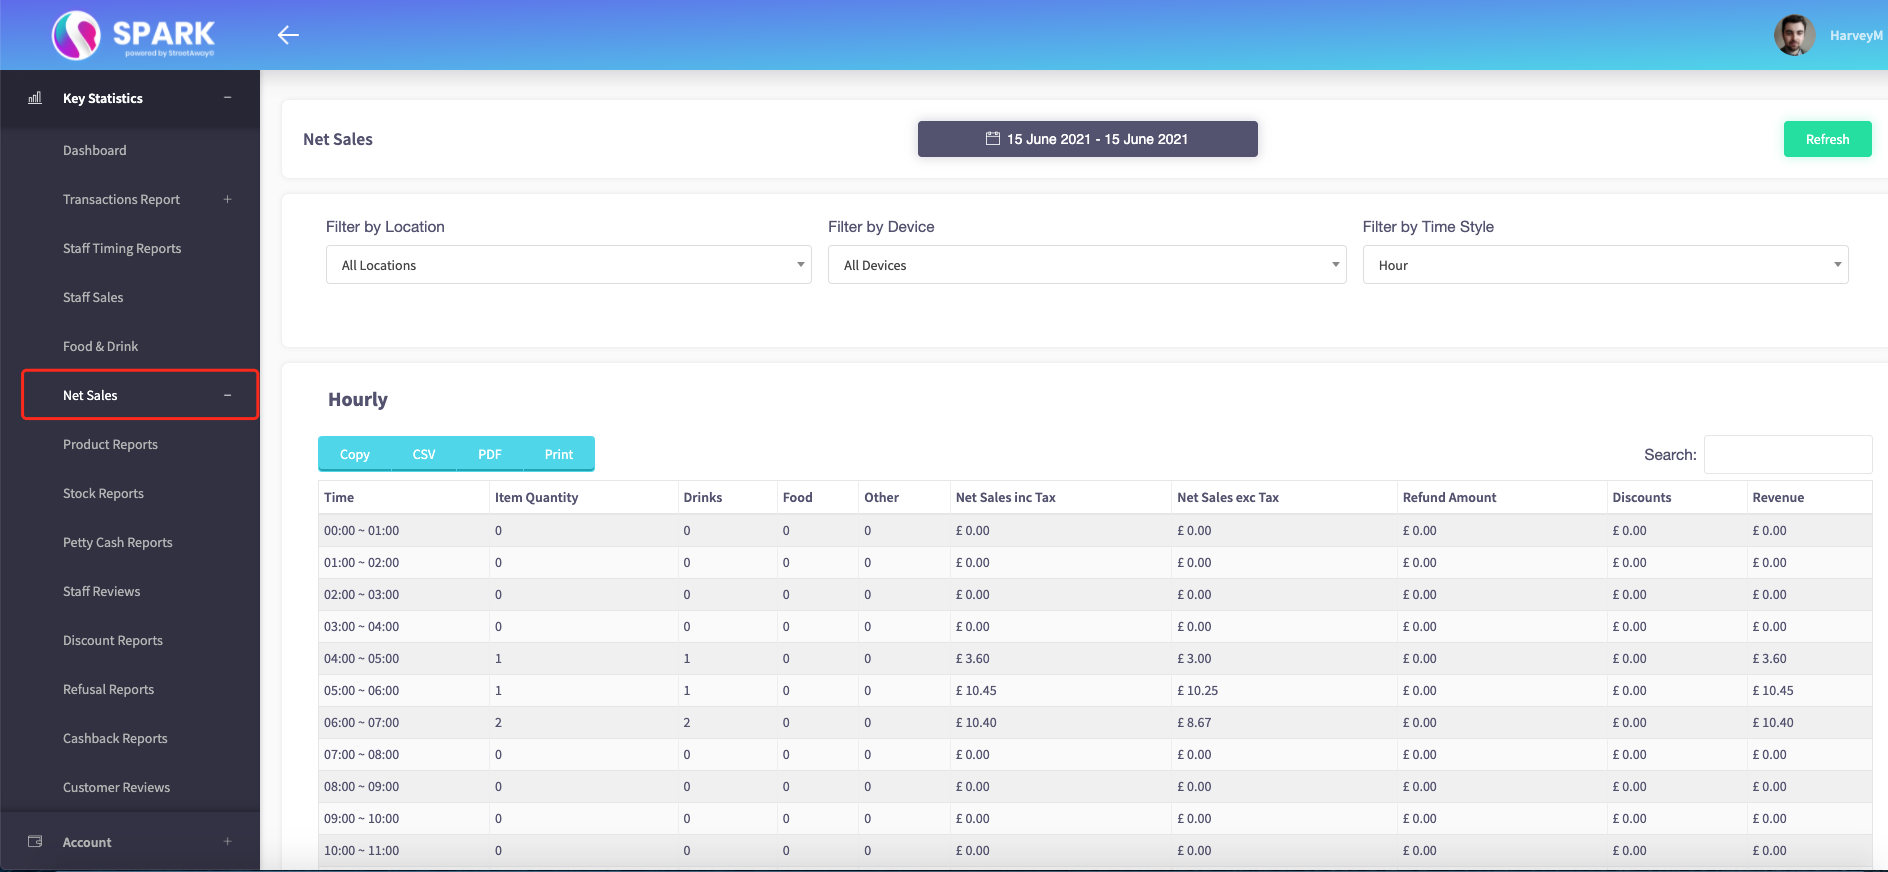
You can monitor your net sales by device type by selecting the drop-down menu next to the net sales. Where you can monitor all devices or select specific ones.
By using the top right bar, you can choose which net sales you would like to see, whether it's today, weekly or monthly. You can track your nets sales by 'Today'.
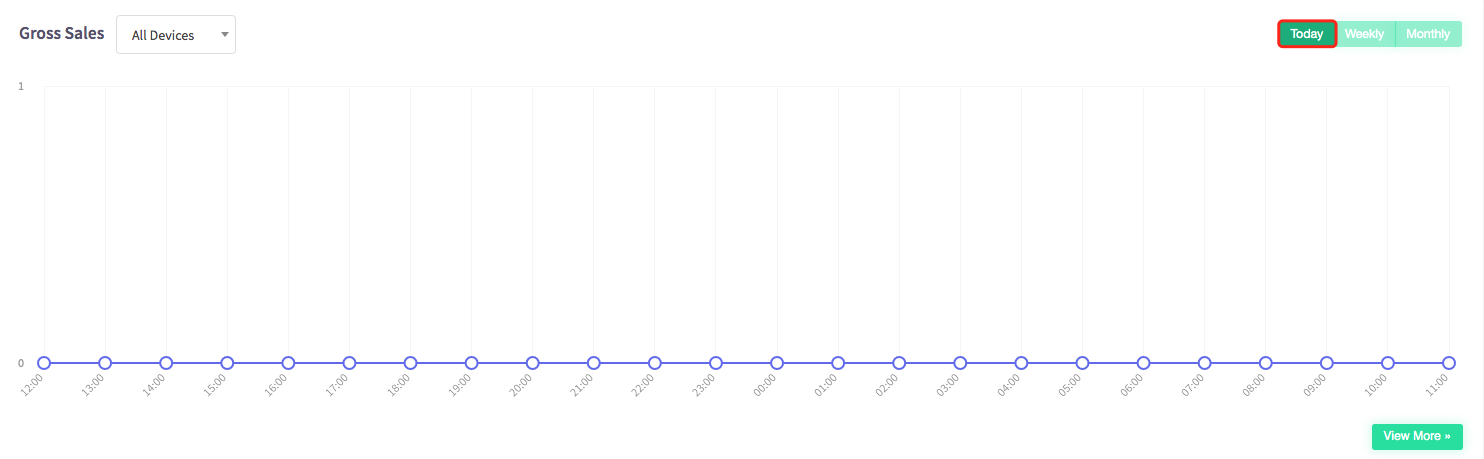
Weekly
or Monthly.
The view more button on the bottom right side of gross sales.
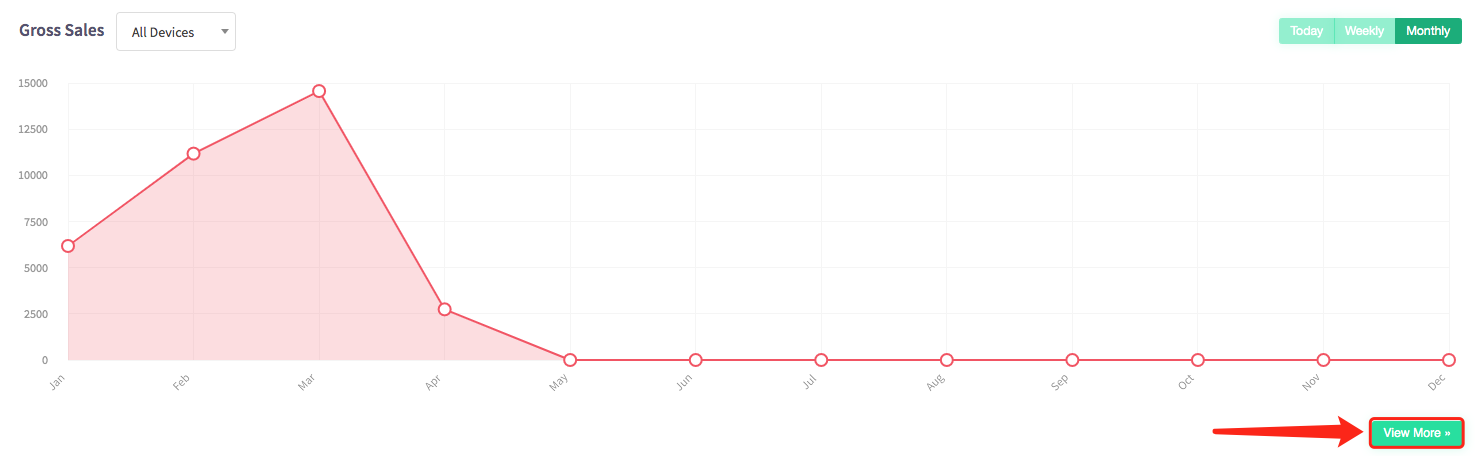
This will take you to your net sales page on the website.
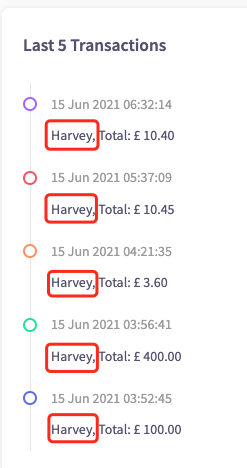
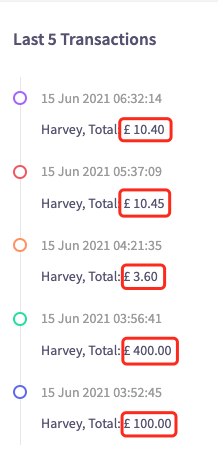
On the right-hand side of the dashboard, it shows the 5 latest transactions.
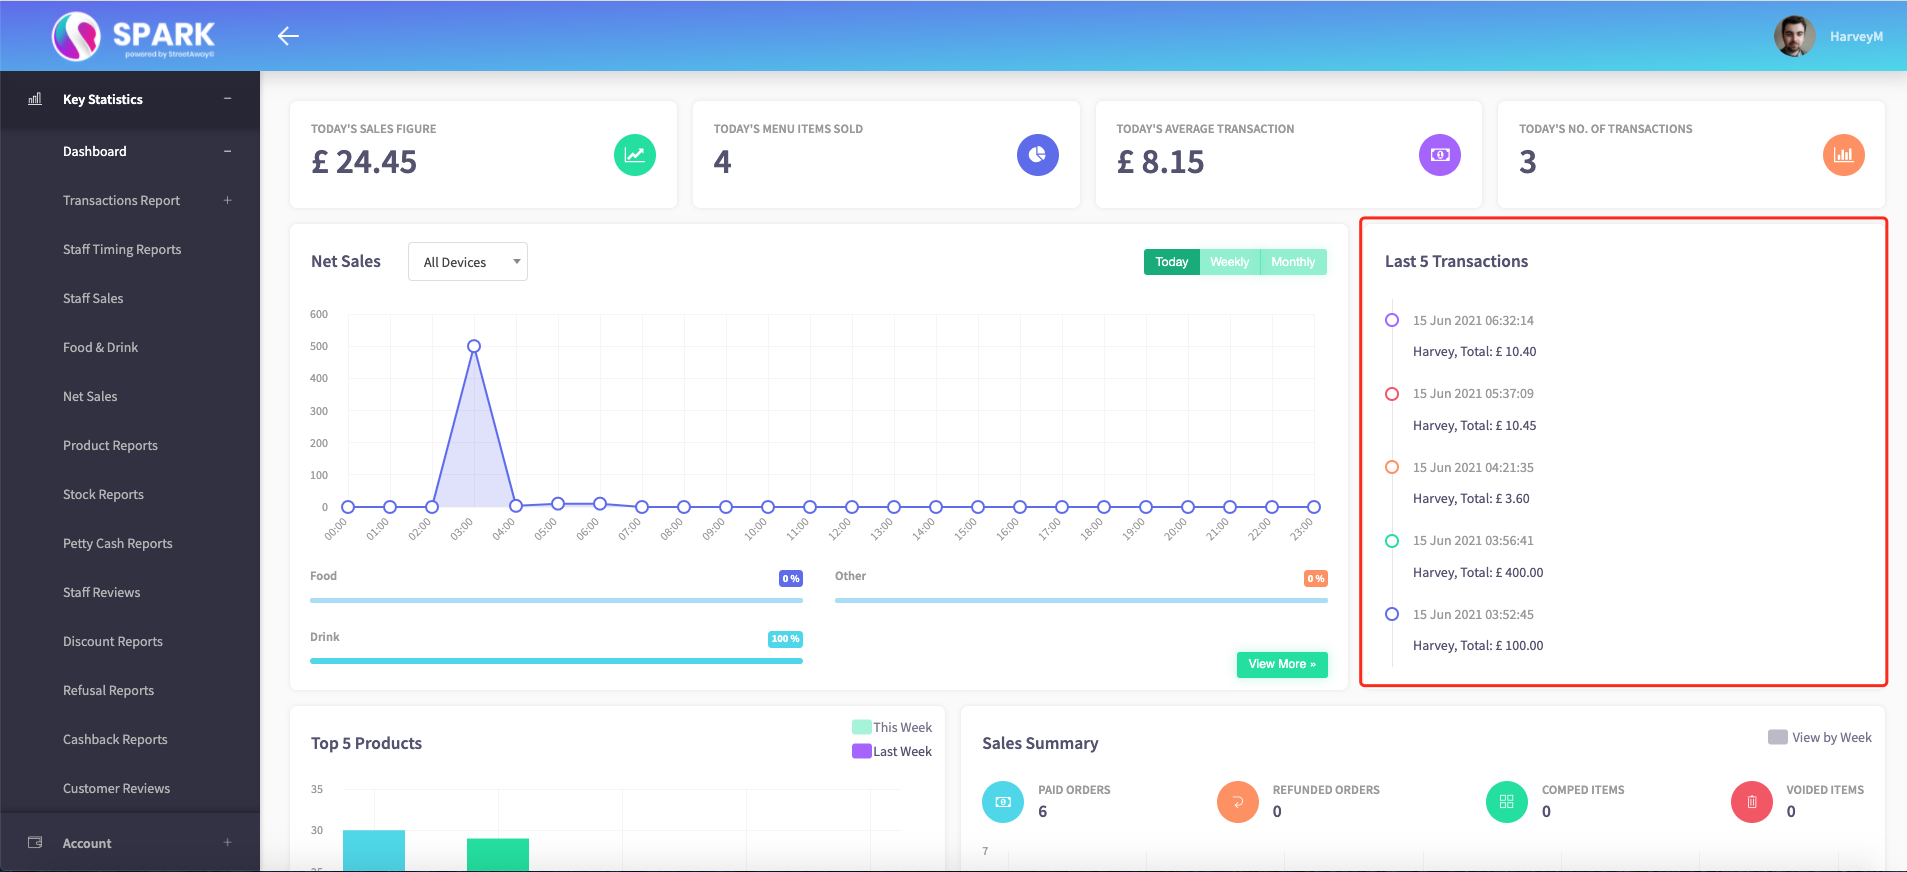
It shows the date and time the transaction was taken. 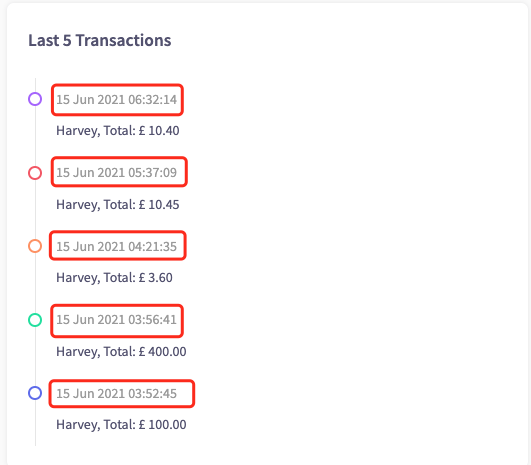
The member of staff that took the transaction.
And how much money they took from each transaction.
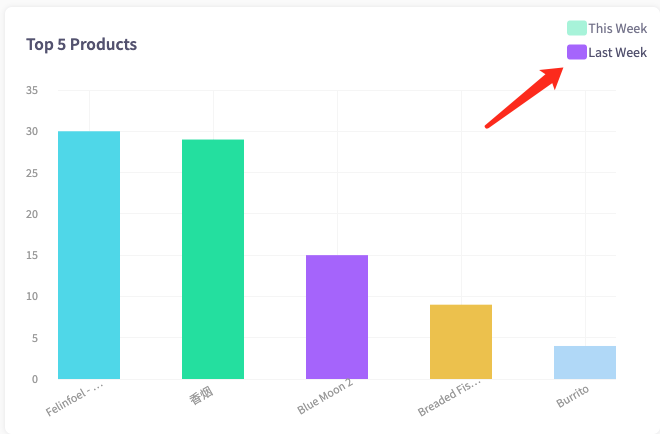
Scrolling down the dashboard you will see the top 5 products that your business sells.
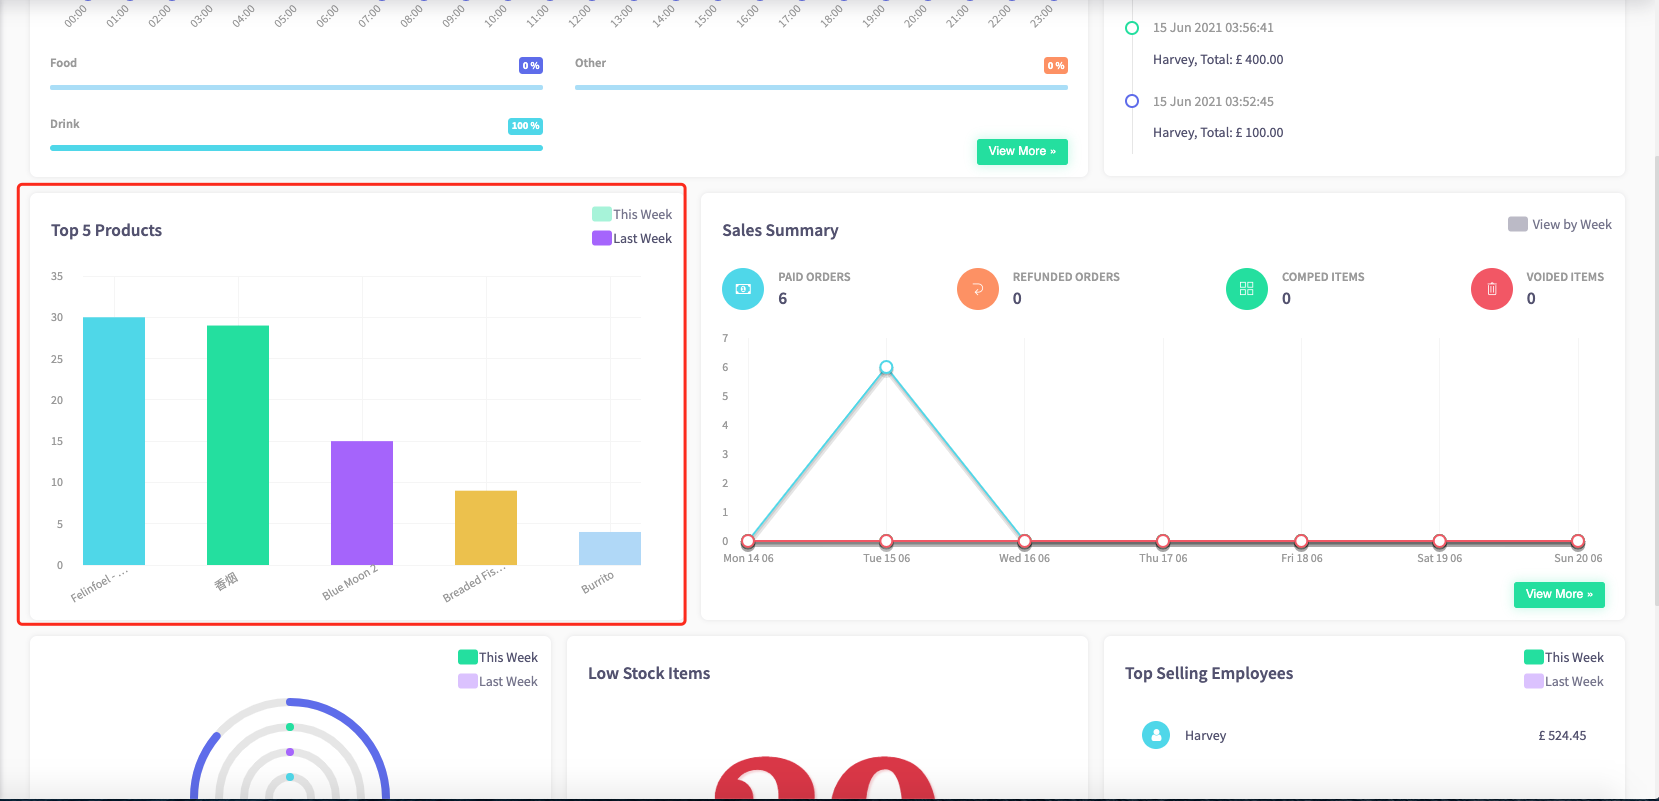
At the top right of the screen, you can change the view of the graph and see your top 5 products for this week.

Or last weeks.
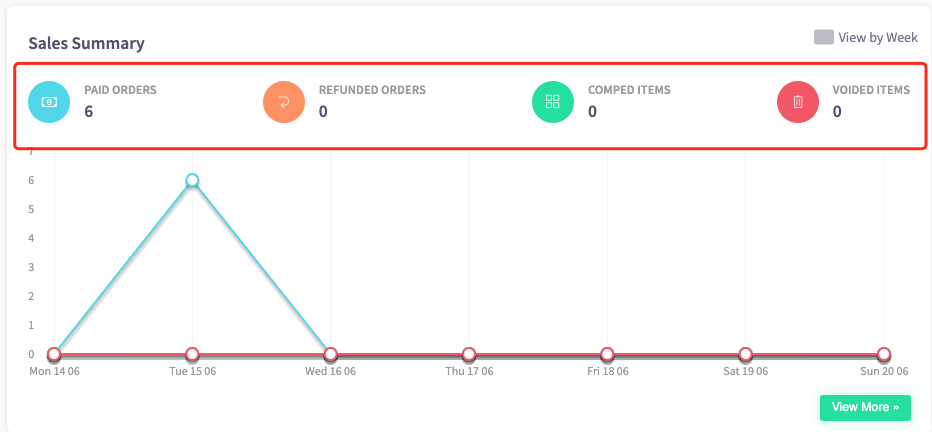
The next menu shows the sales summary.
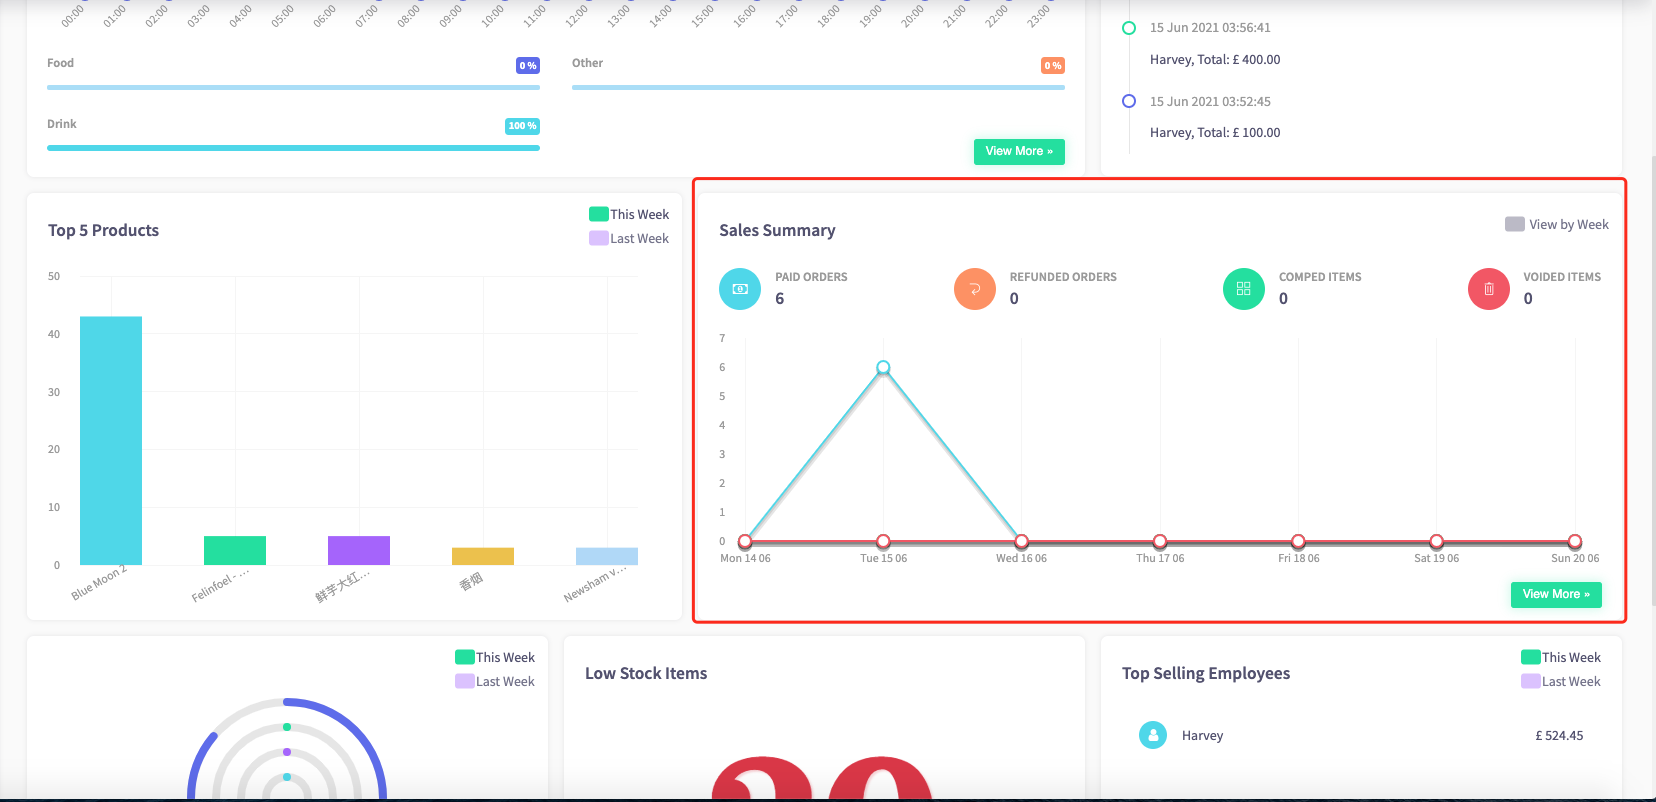
Across the top here shows the amount of paid orders, the number of refunded orders, comped items and voided items which can be shown in the graph below.
You can change the view of this graph from a weekly view to a monthly view by clicking on the grey square at the top right corner, this will turn green once pressed.
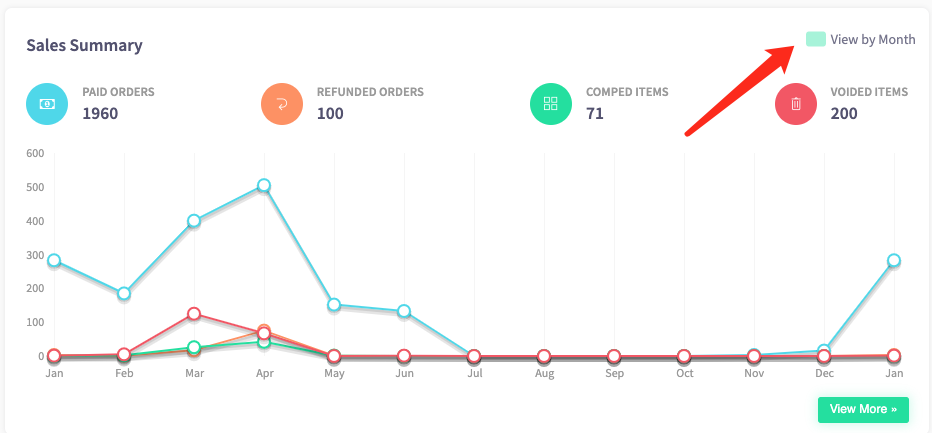
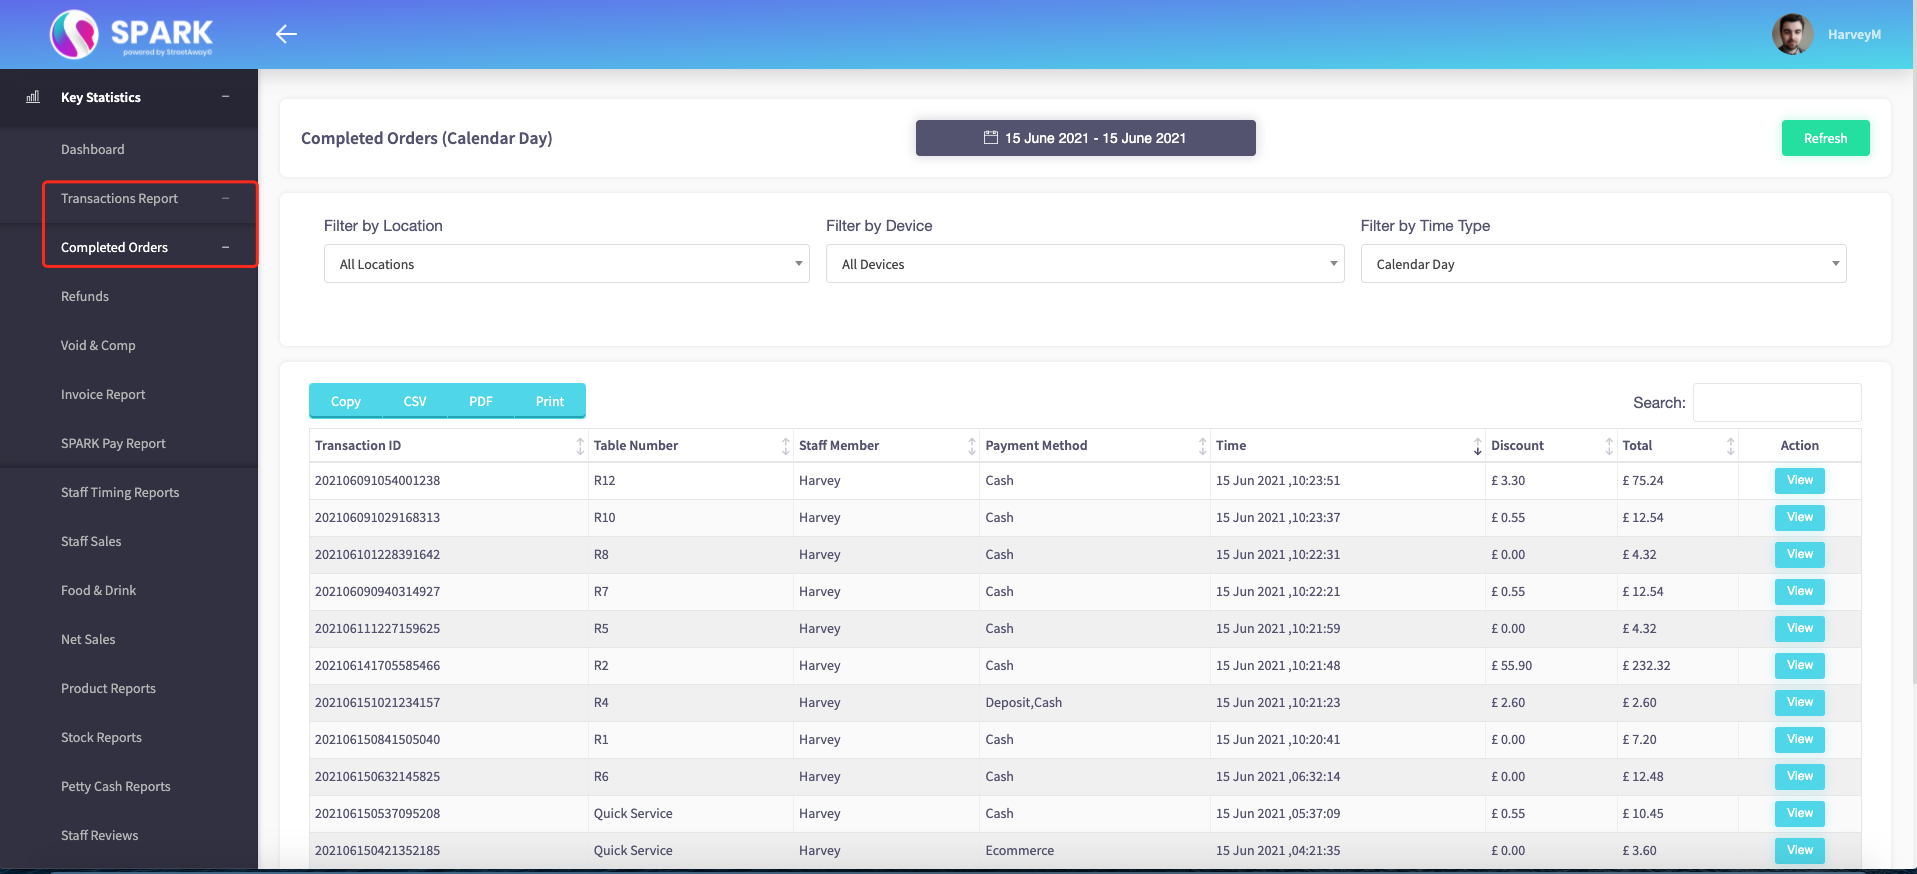
The "View More" button at the bottom right of the sales summary
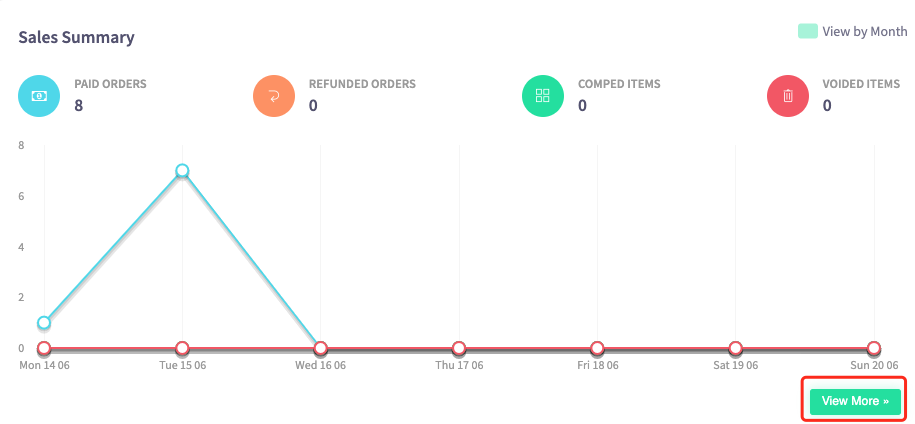
Takes you to the transaction report - 'completed orders' section of the webpage.
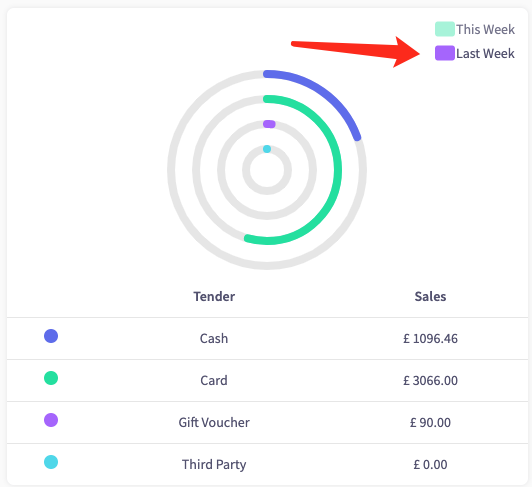
When you scroll further down on the dashboard, you will see a graph of payment types.
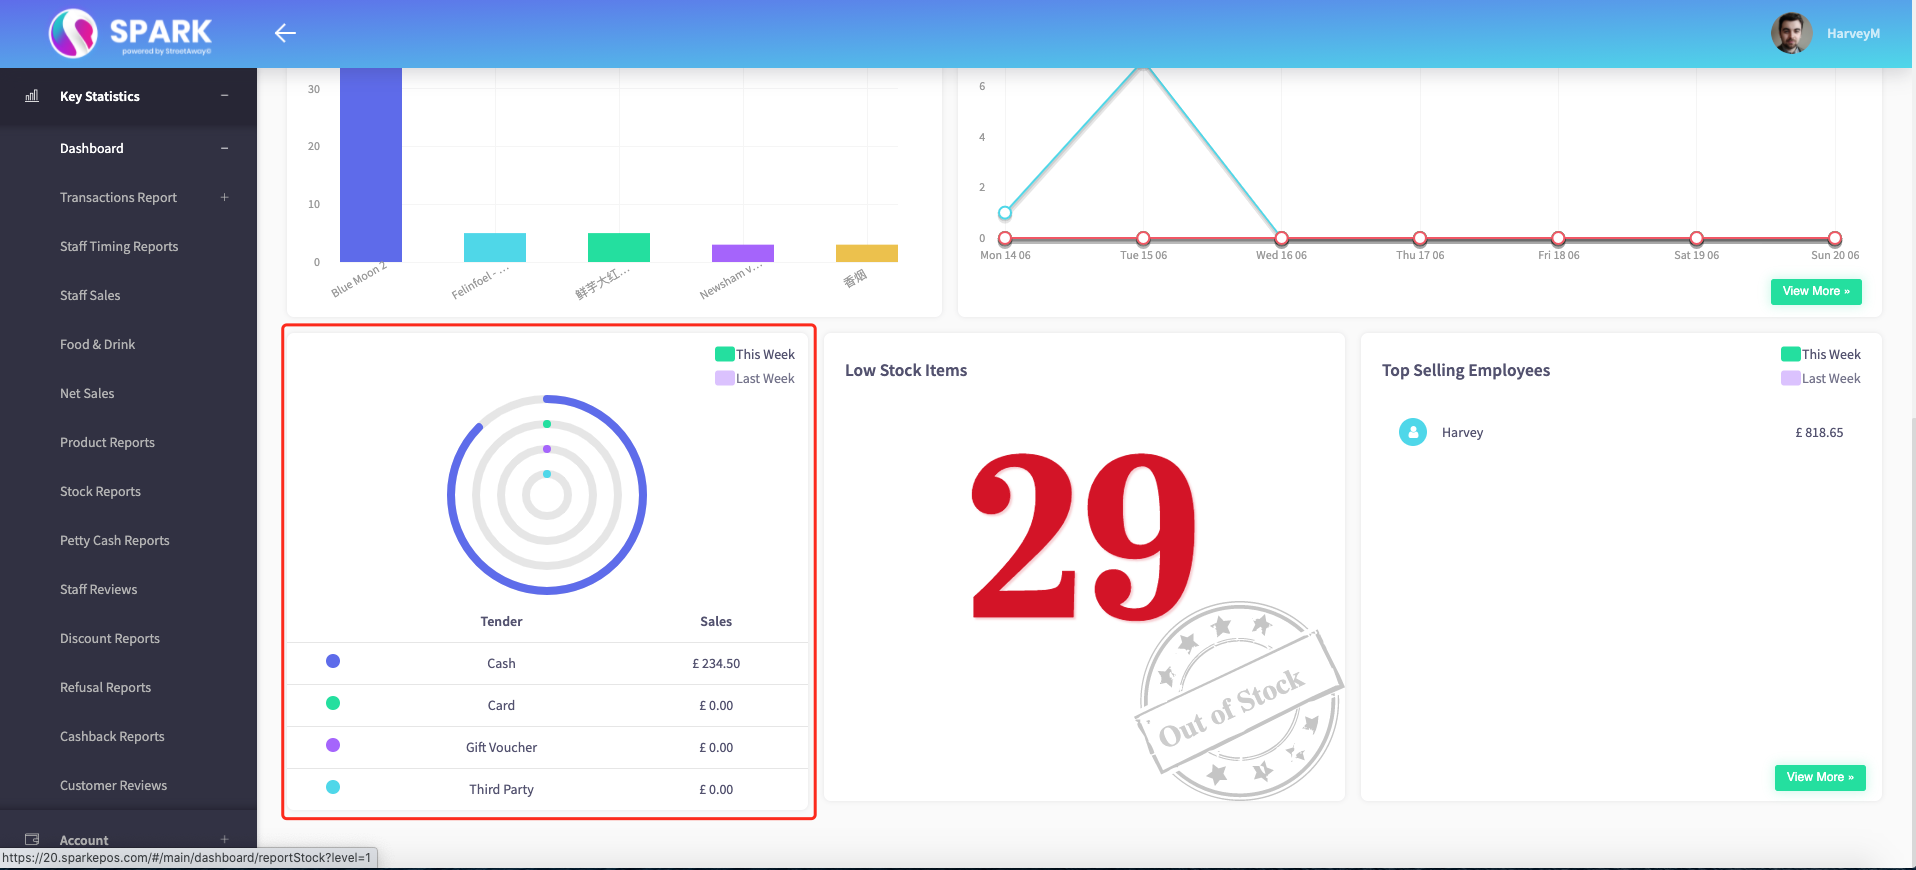
This is where operators can see whether customers have paid by cash, card, gift voucher, or third party.
You can view this graph from this week's statistics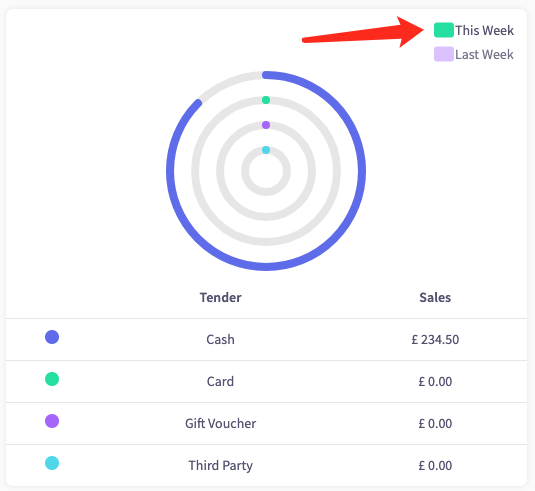
Or Last weeks.
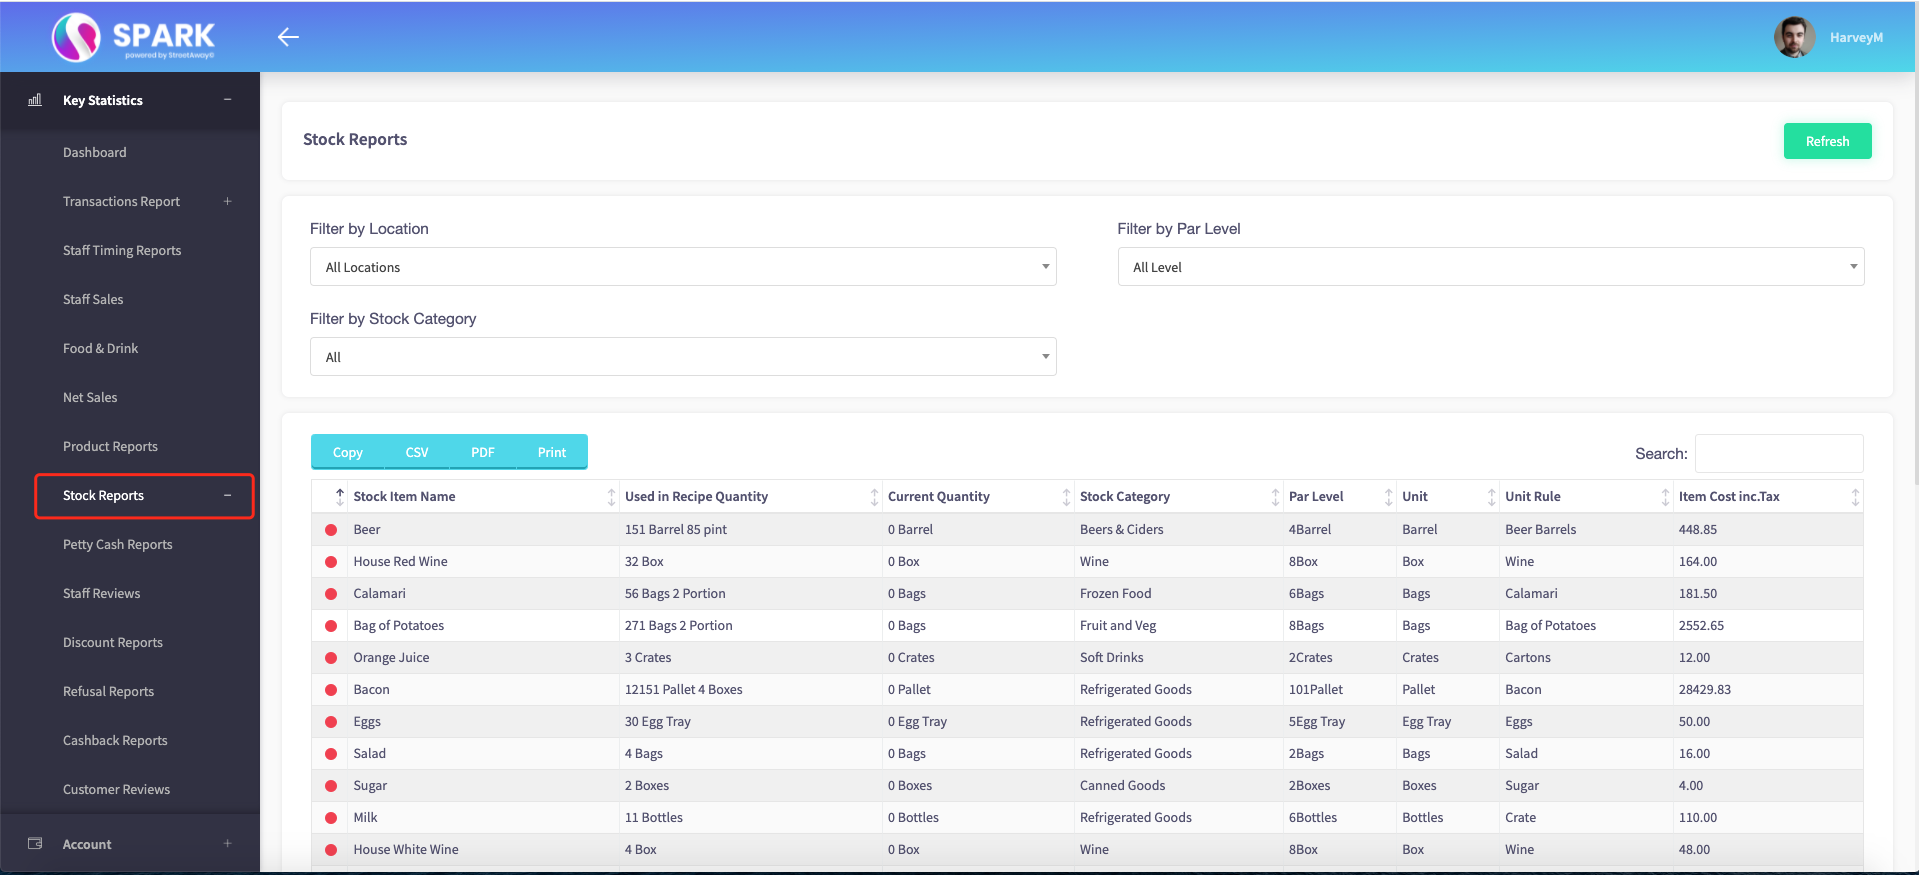
The next section of the dashboard shows low stock items.
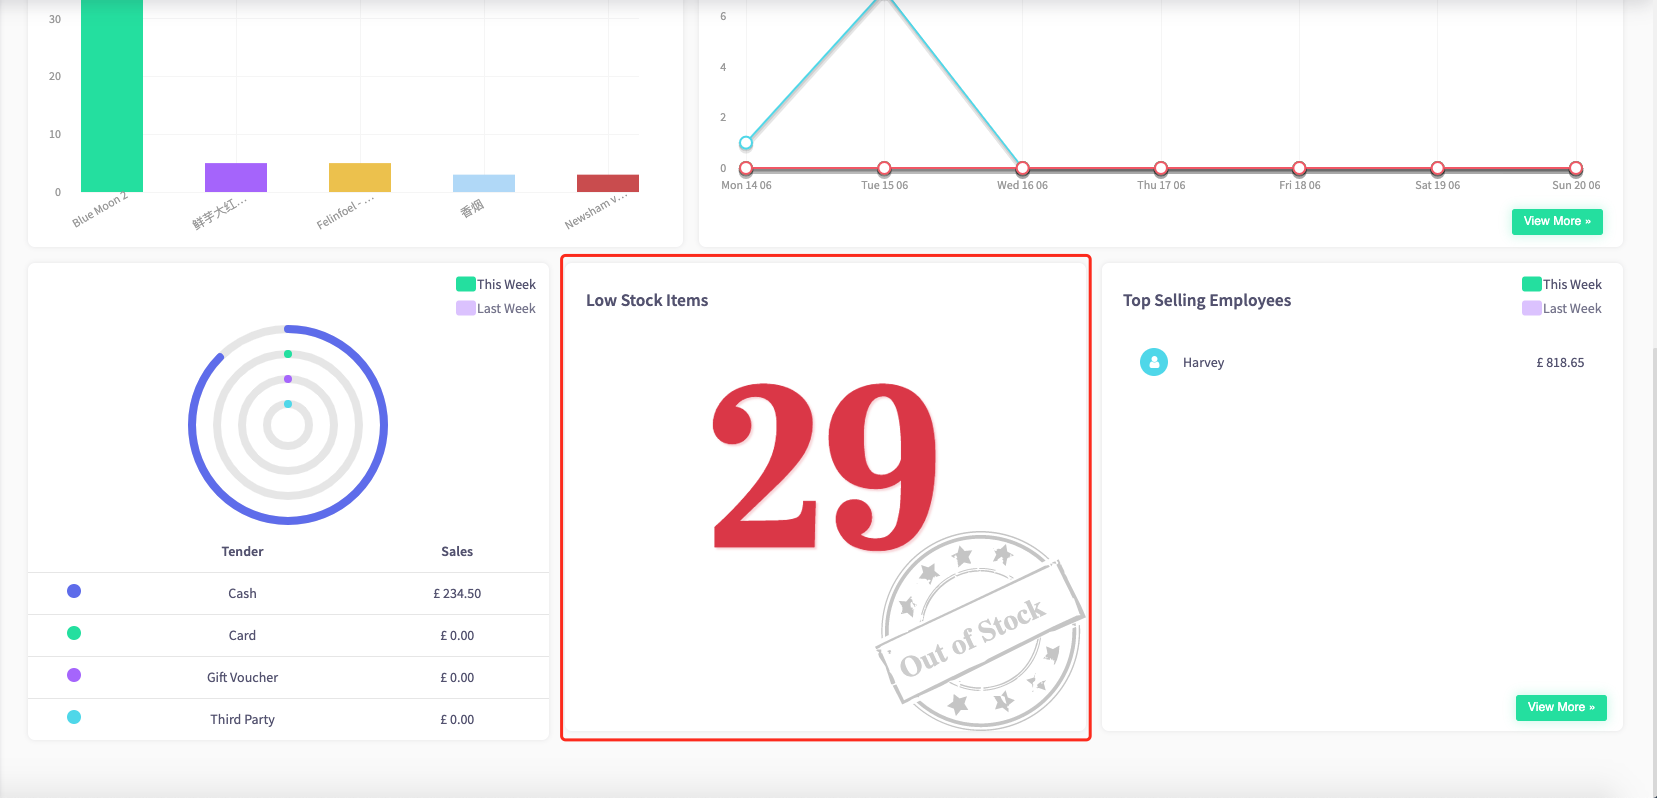
When clicking on this menu, it will take you to the stock reports section of your Cloud HQ.
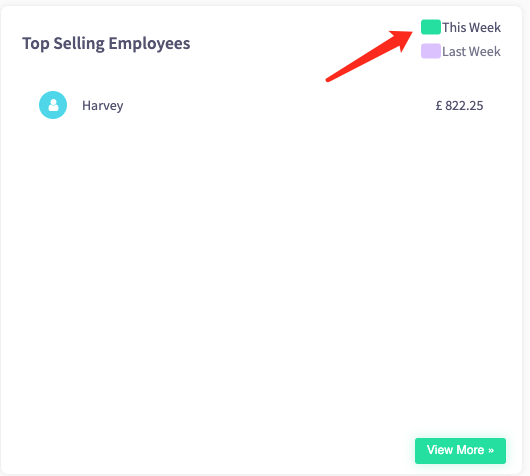
The last menu on our dashboard shows our top-performing employees.
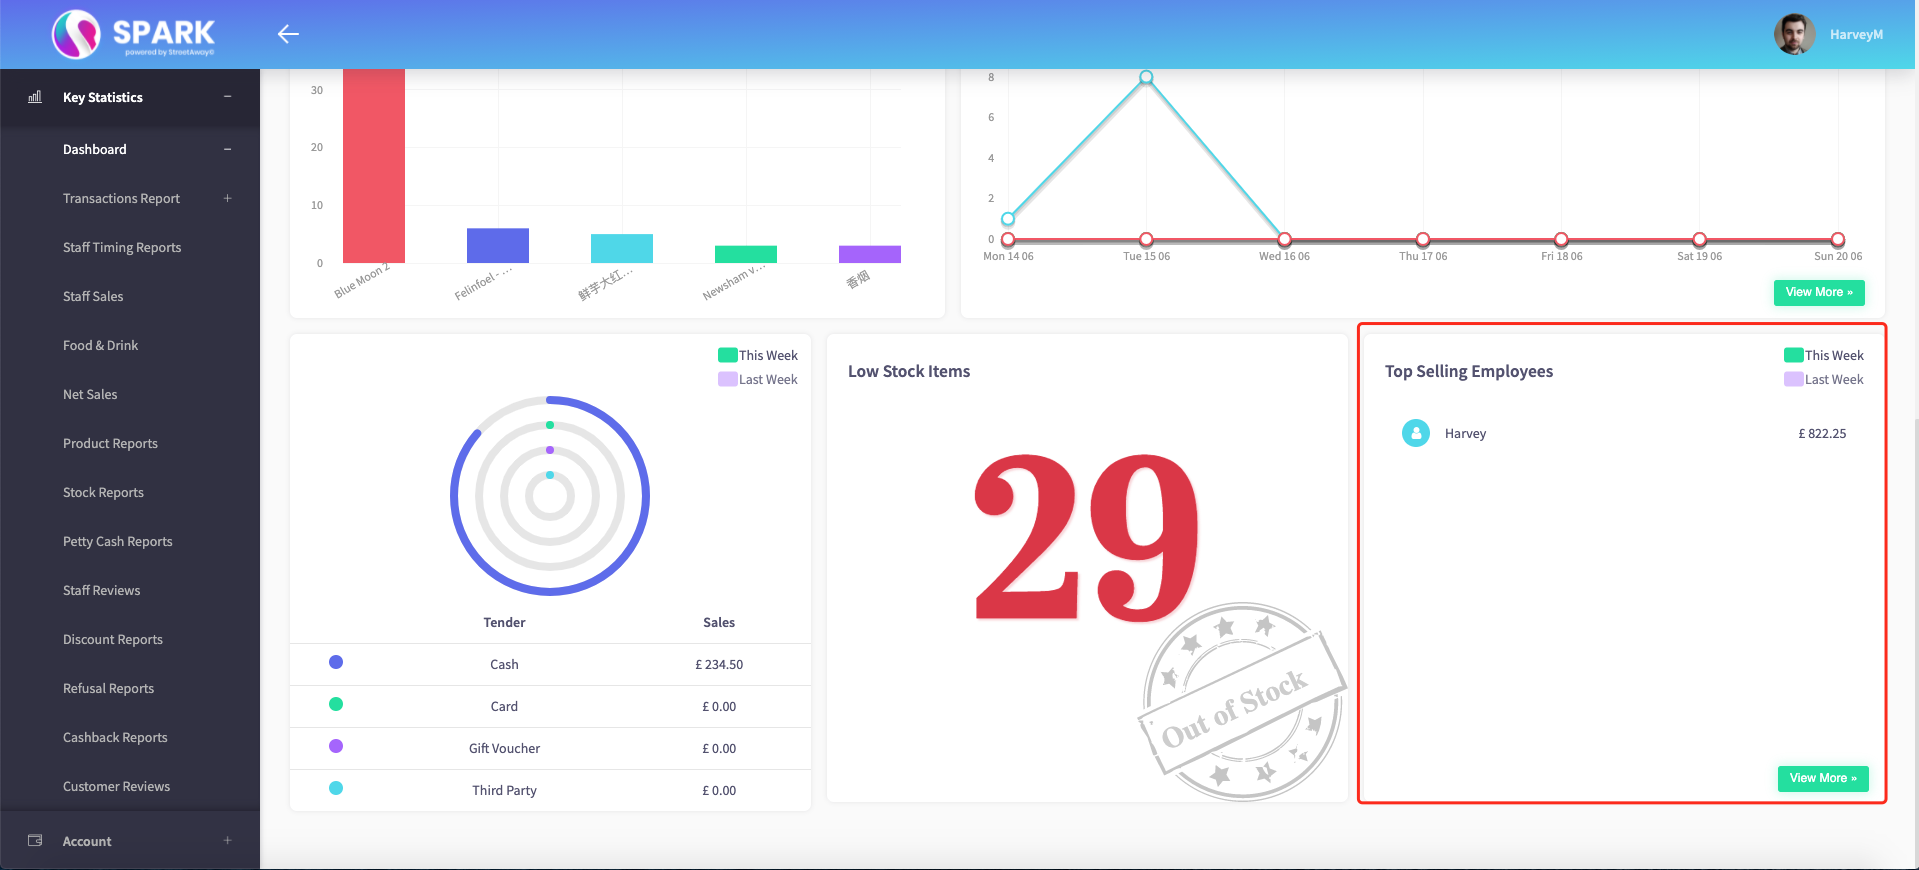
You can view this menu from this week's top-performing employees
Or Last week top-performing employees.
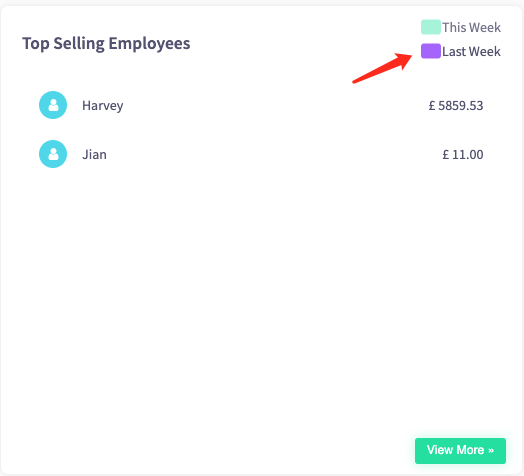
The "View More" button at the bottom right of the menu

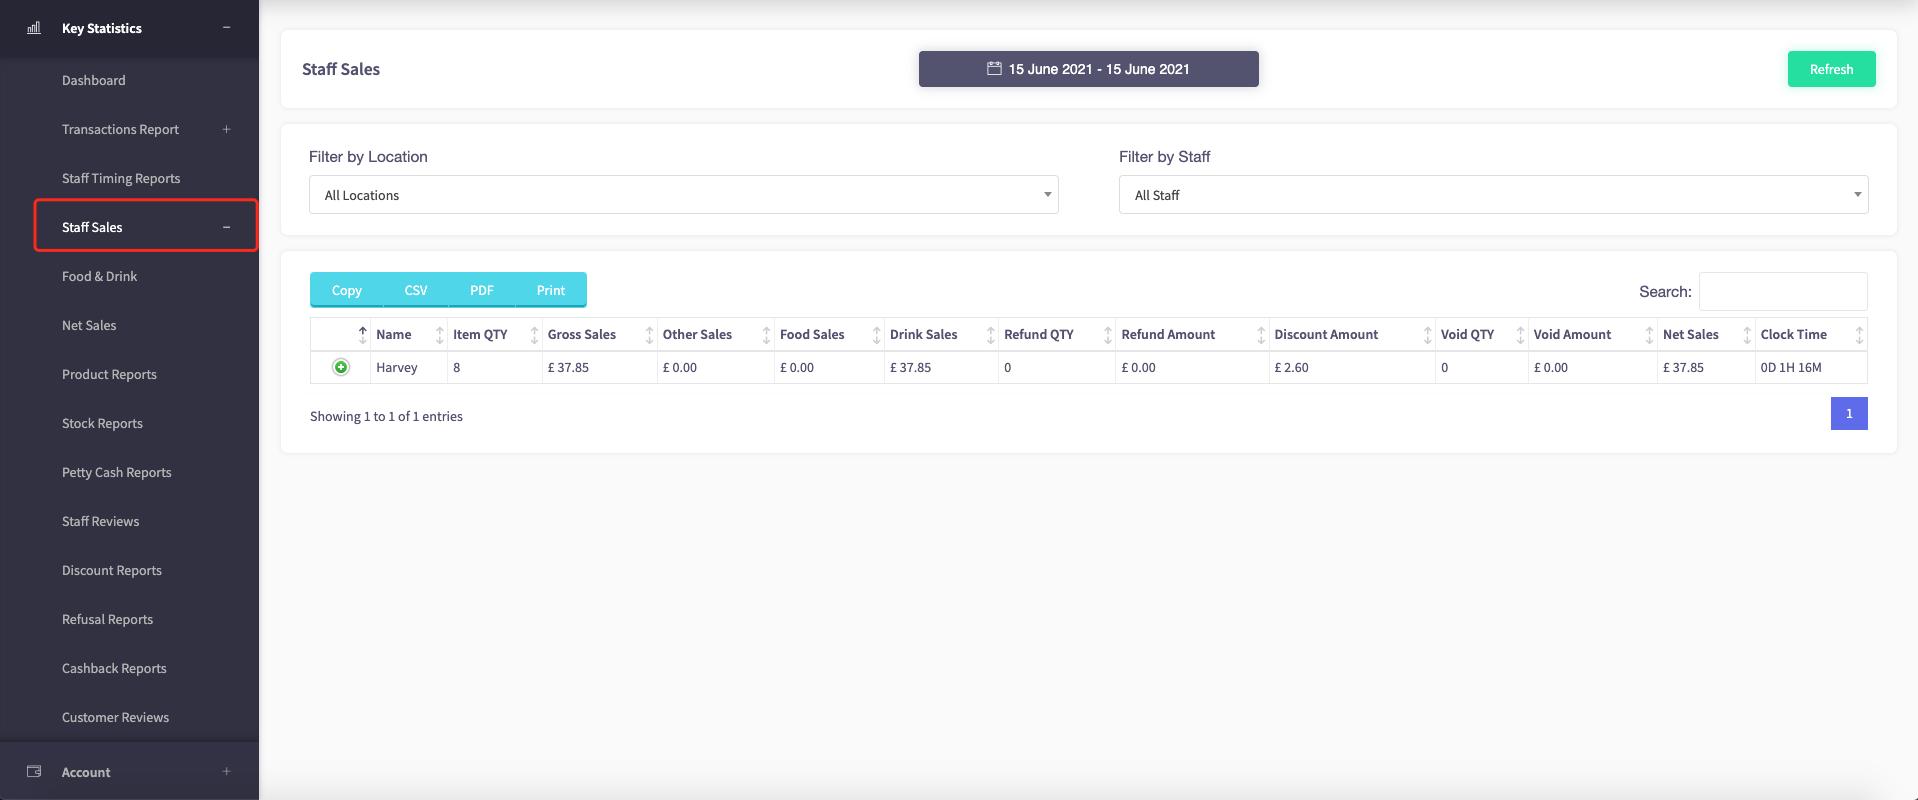
Takes you to the staff sales section of your Cloud HQ.
How do you add staff members?
This guide will show you how to add staff members to your Cloud HQ
To find out how to add a staff member, click here.
How do you set Staff Permissions
This guide will show you how to set staff permissions to your Cloud HQ
To find out how to set Staff Permissions, click here.
How to create Menu Categories
This guide will show you how to create menu categories on your Cloud HQ.
To find out how to create a 'Menu Category', click here.
How to create Menu Items
This guide will show you how to create Menu Items on your Cloud HQ.
To find out how to create a 'Menu Item', click here.
How to create a single upsell
This guide will show you how to create a single upsell on your Cloud HQ.
To find out how to create a 'Single Upsell', click here.
How to create a group upsell
This guide will show you how to create a group upsell on your Cloud HQ.
To find out how to create a 'Group Upsell', click here.
How to create Preferences
This guide will show you how to create preferences on your Cloud HQ.
To find out how to create 'Preferences', click here.
How to add allergens
This guide will show you how to add allergens to your Cloud HQ.
To find out how to create 'Allergens', click here.
- How to create a floor plan
- How to create a room
- How to set table combinations
To find out how to create 'a floor plan', 'a room' or 'set table combinations'. Click here to look at everything you will need to know about the floor plan.