- How to add a table combination
- How to add an area
- How to add a table
- How to use the reservation toggle
- How to set the minimum and maximum capacity
Before you do anything, make sure you are logged into your store account SparkEpos
How to add a table combination
This guide will show you how to add a table combination to your Cloud HQ.
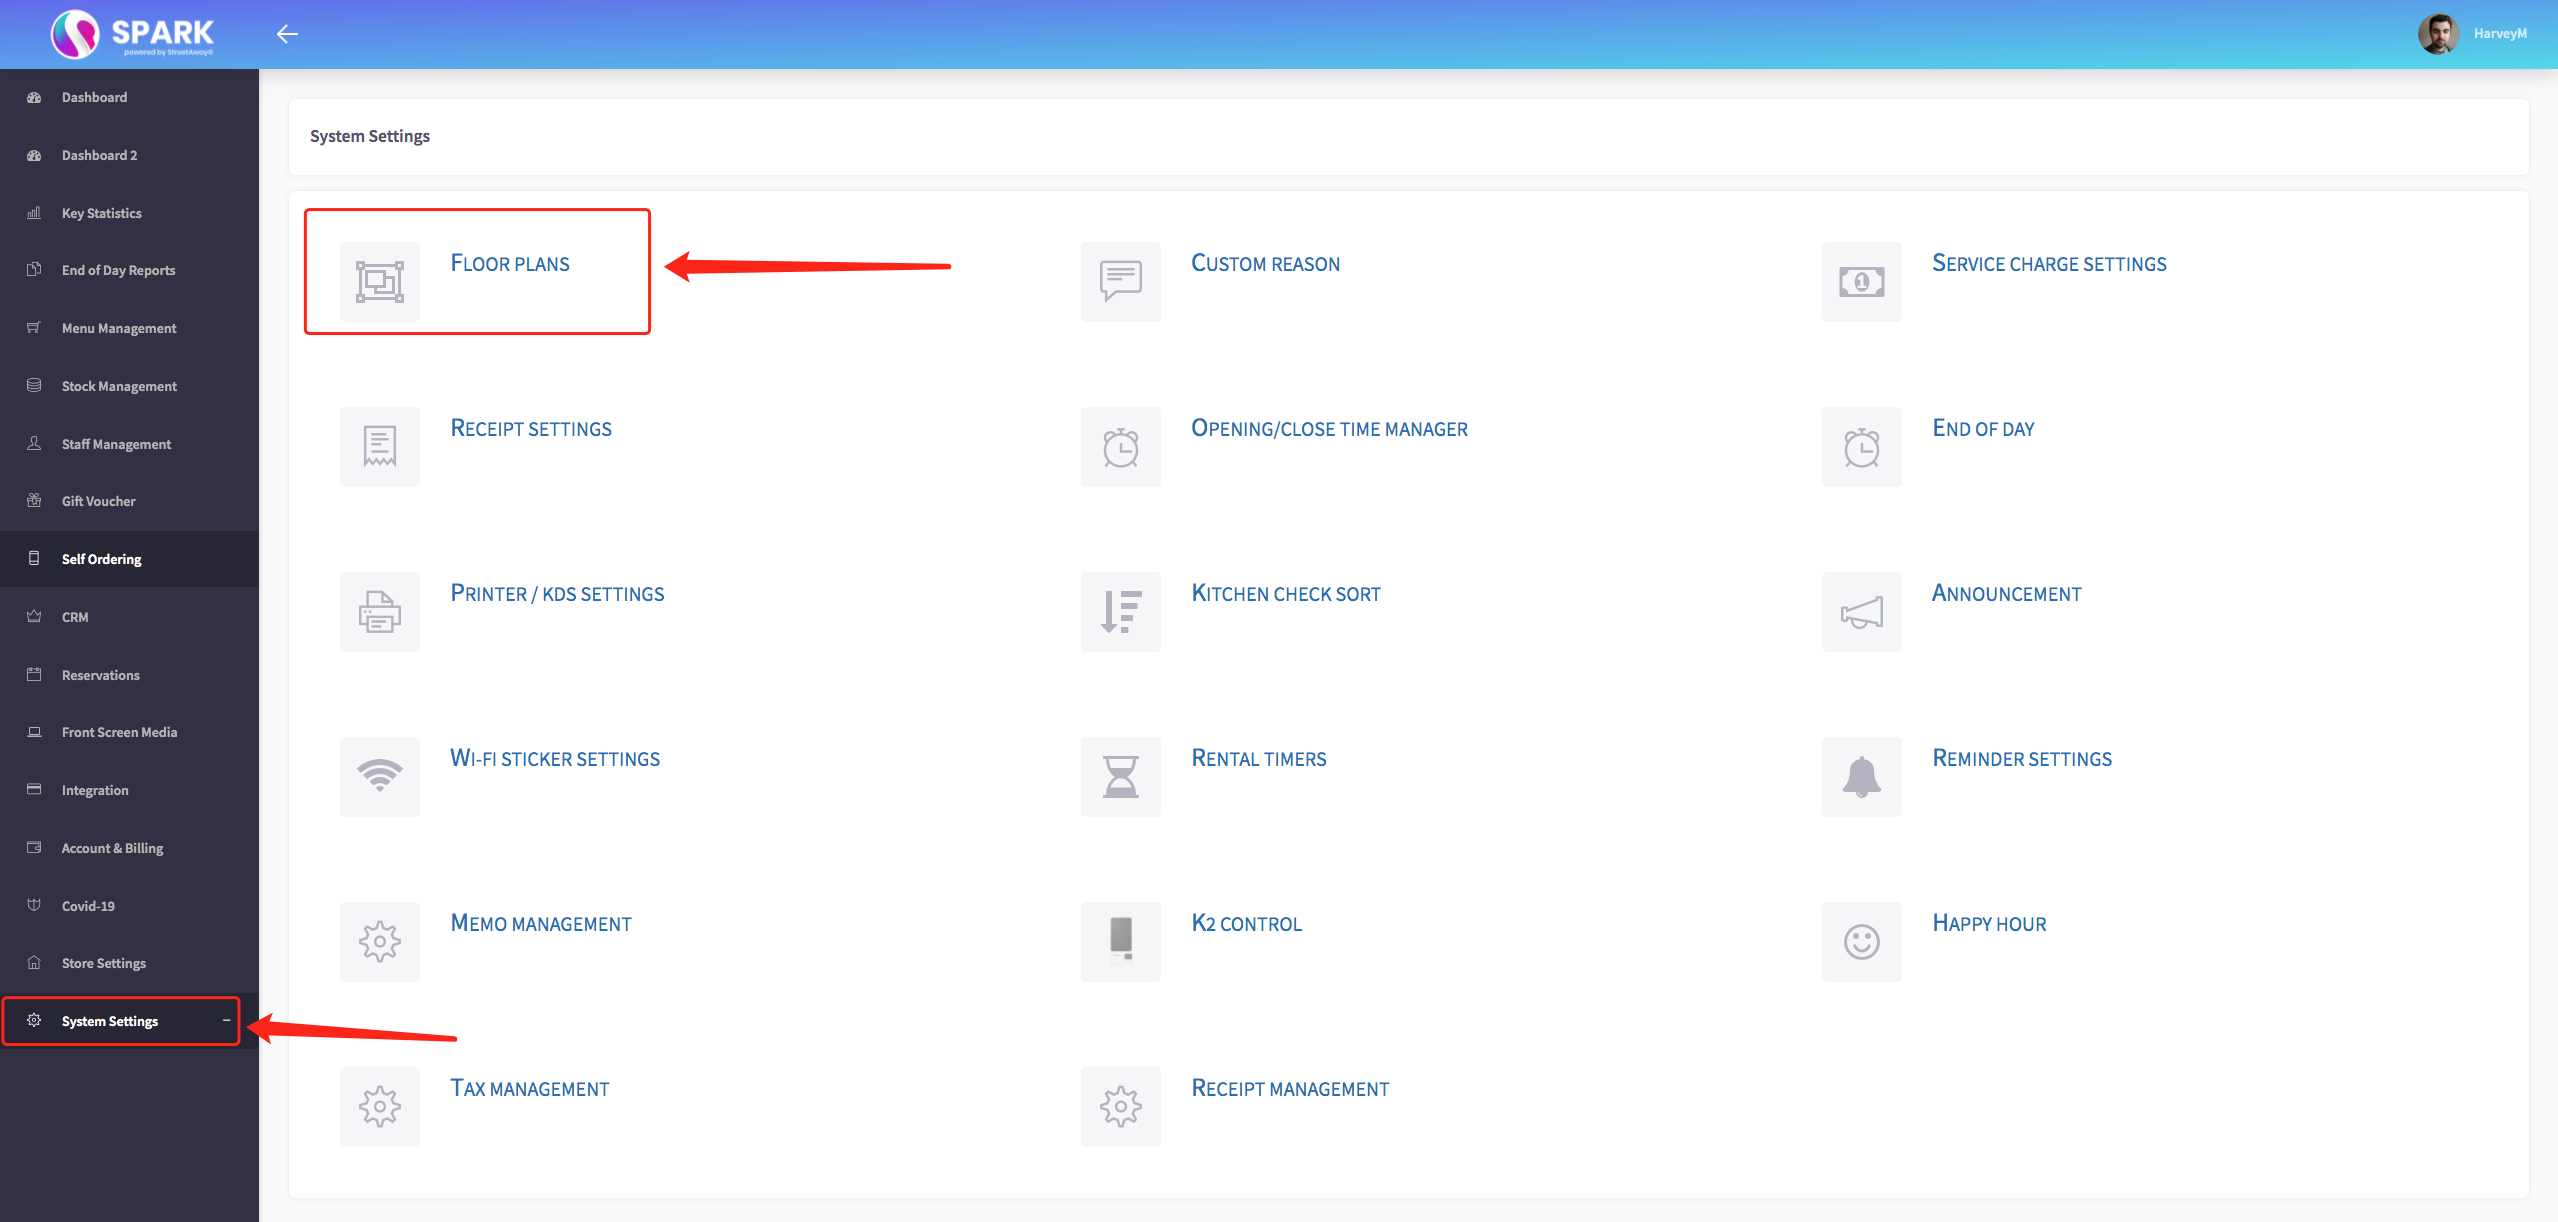
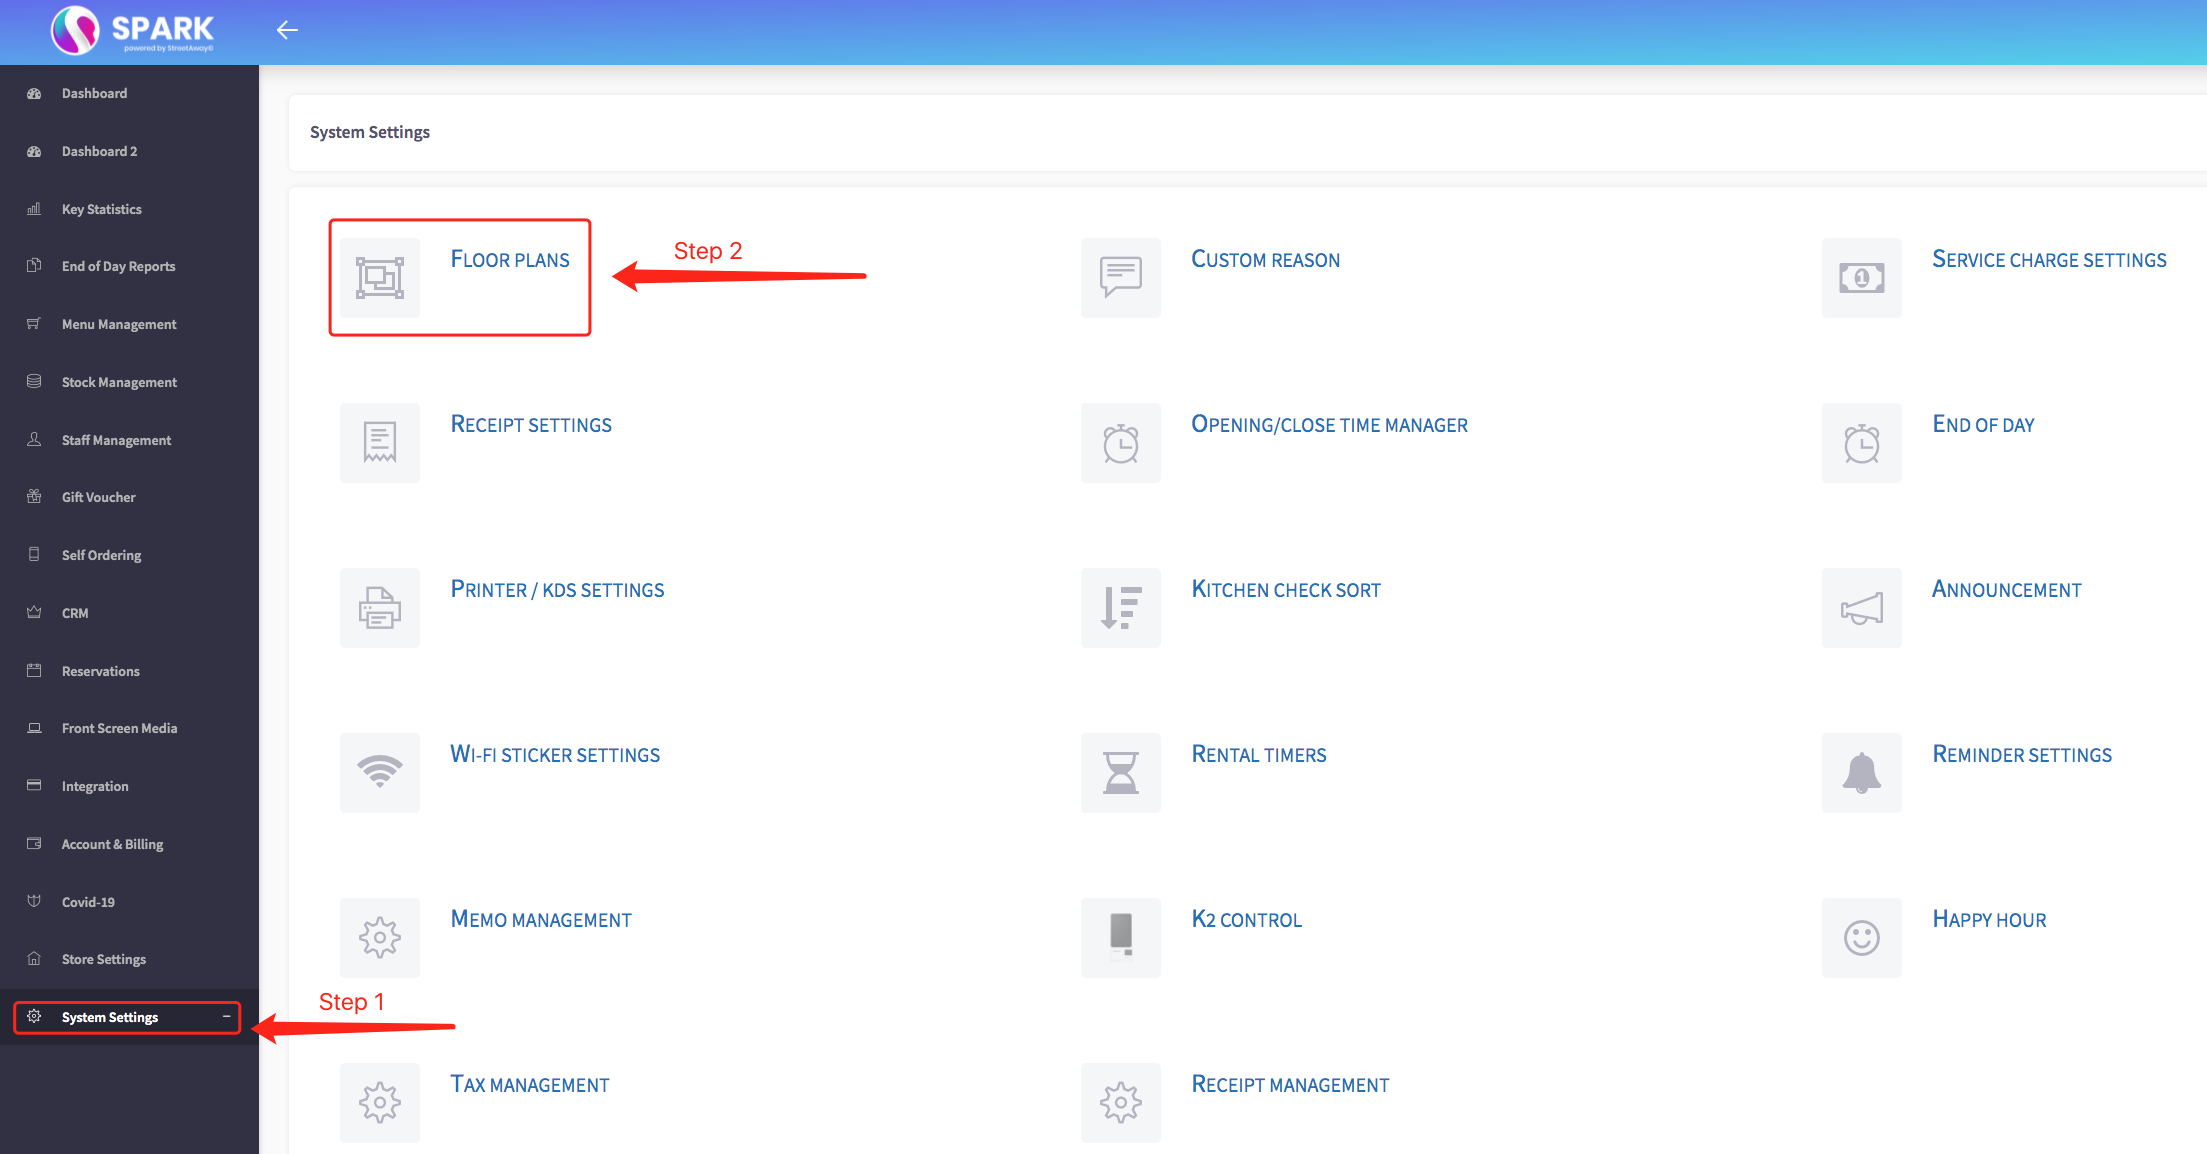
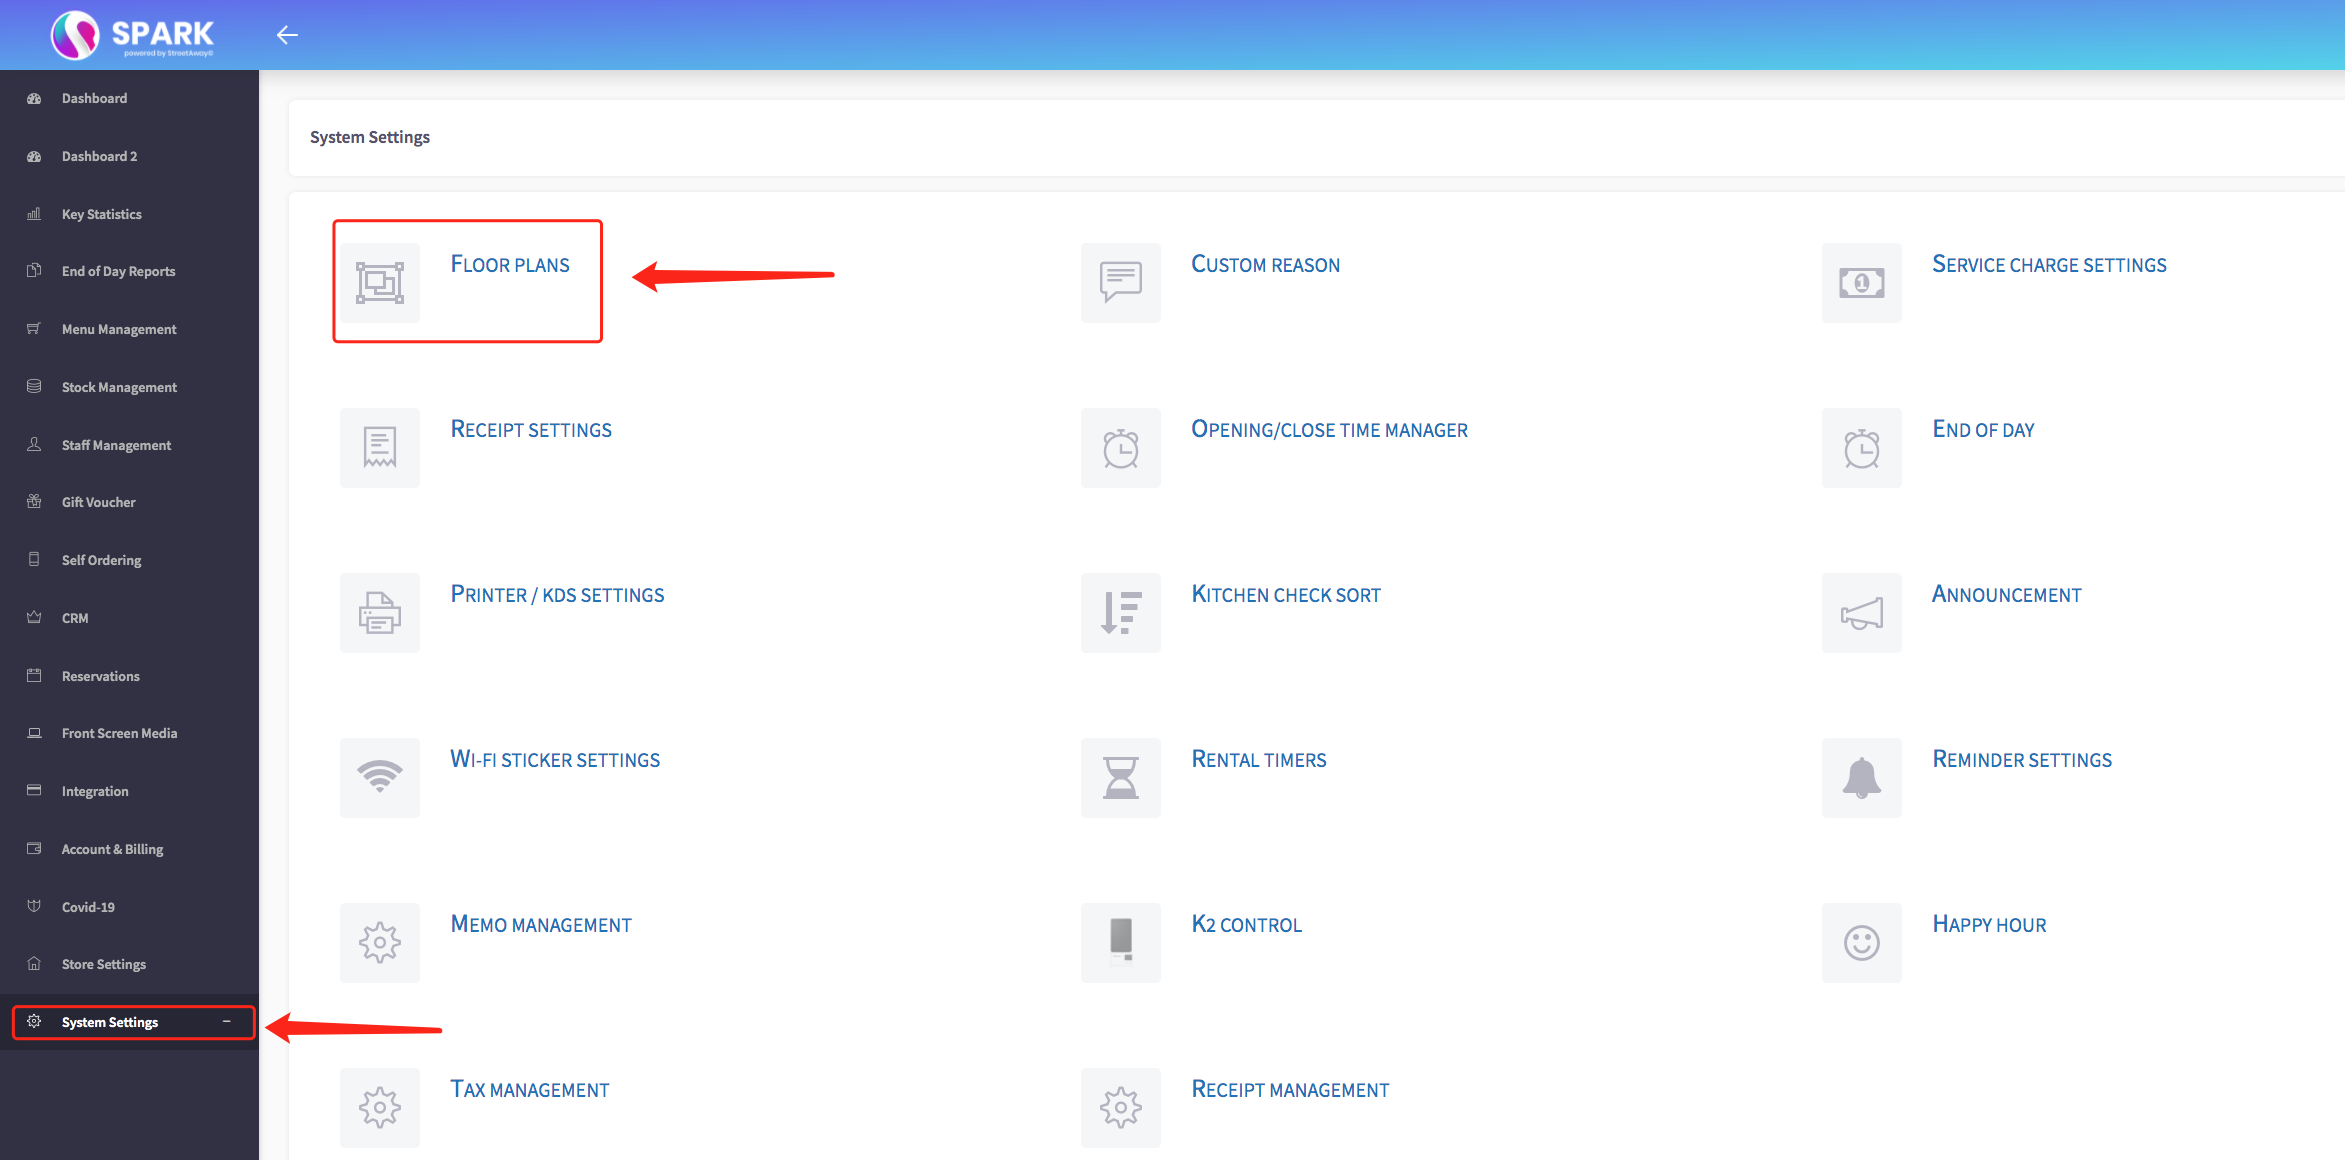
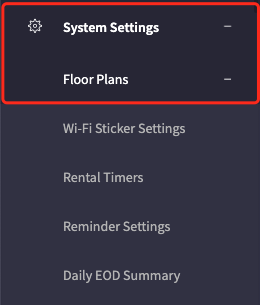
Firstly, scroll down to click on the 'System Settings' on the left-hand side, then the 'Floor Plans ' option in the menu.

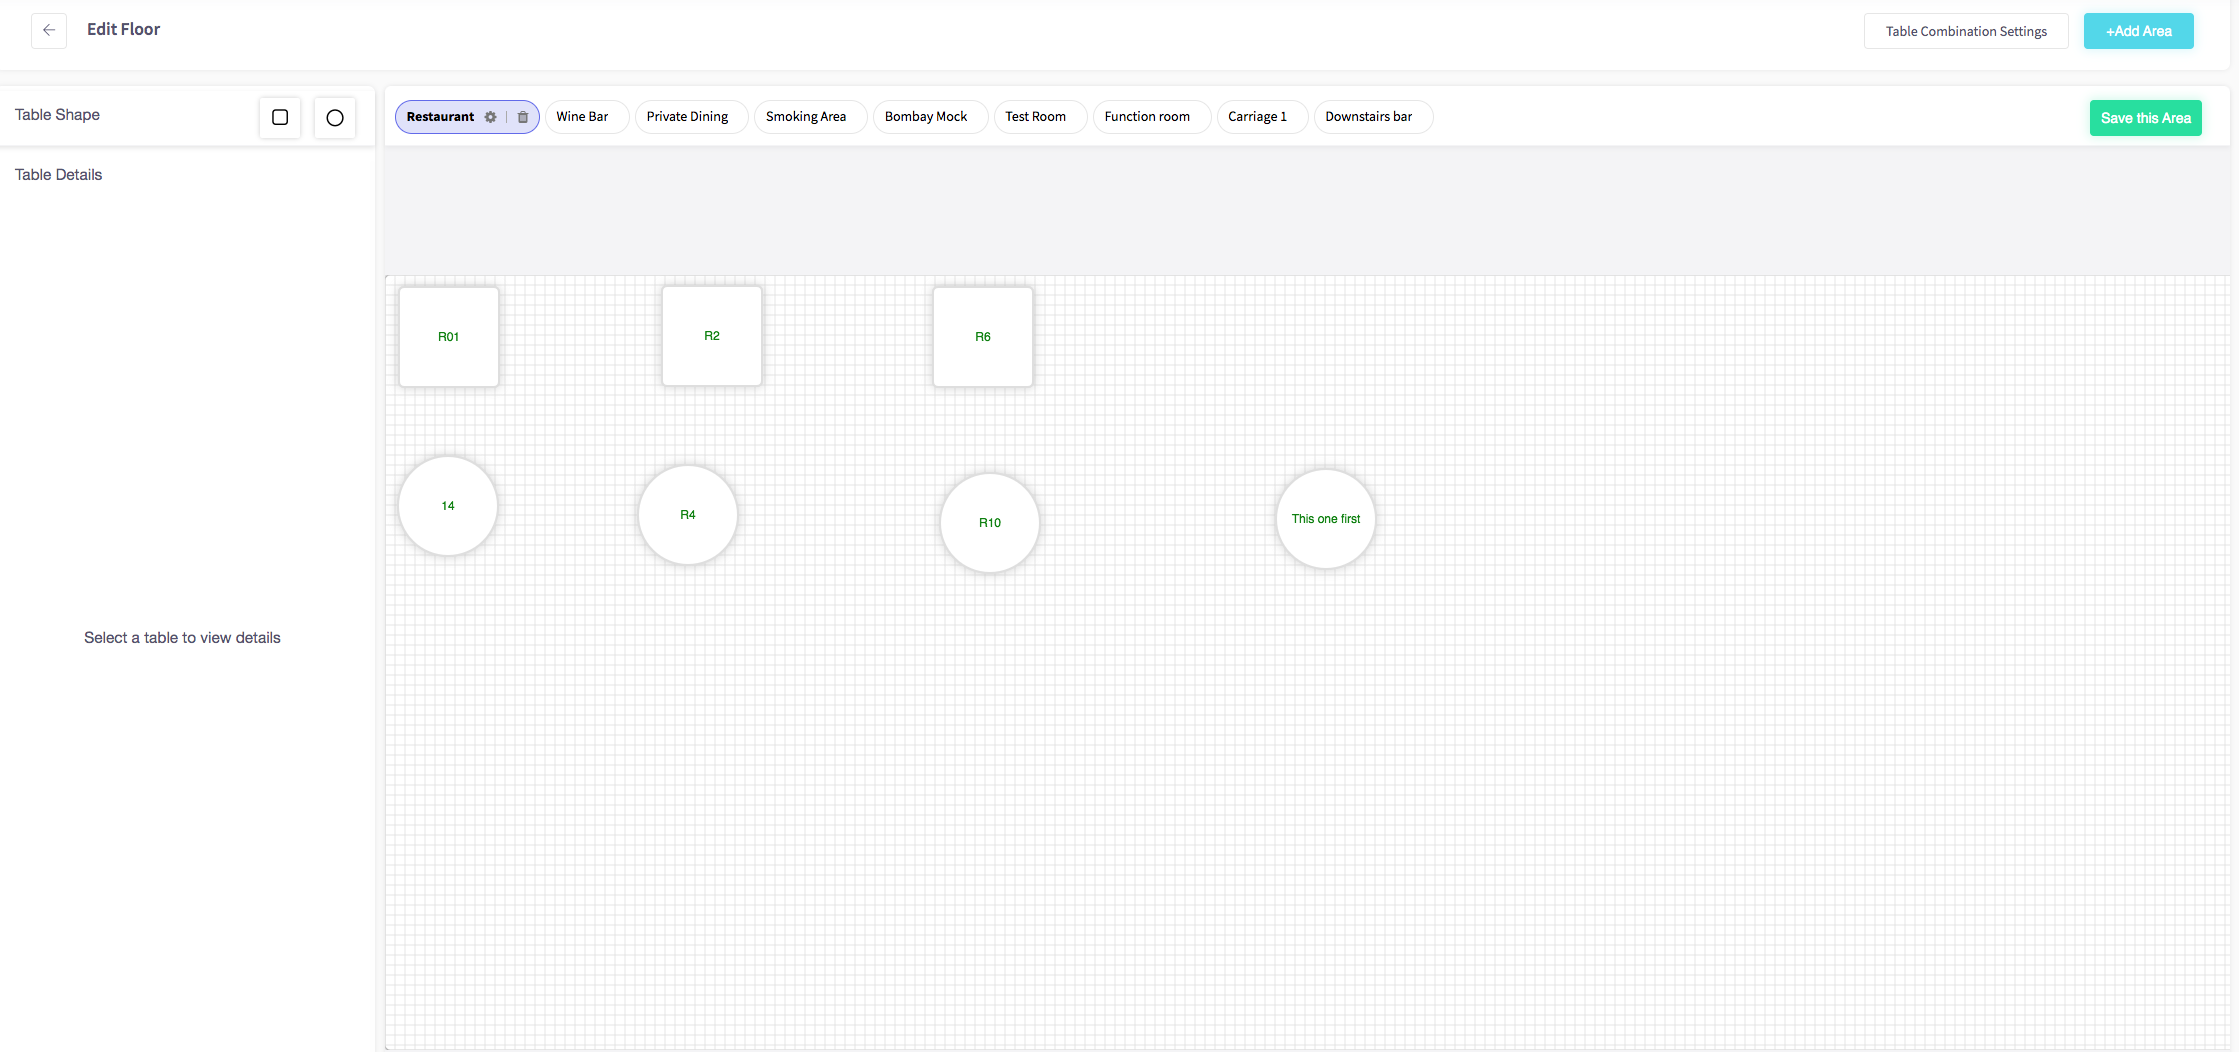
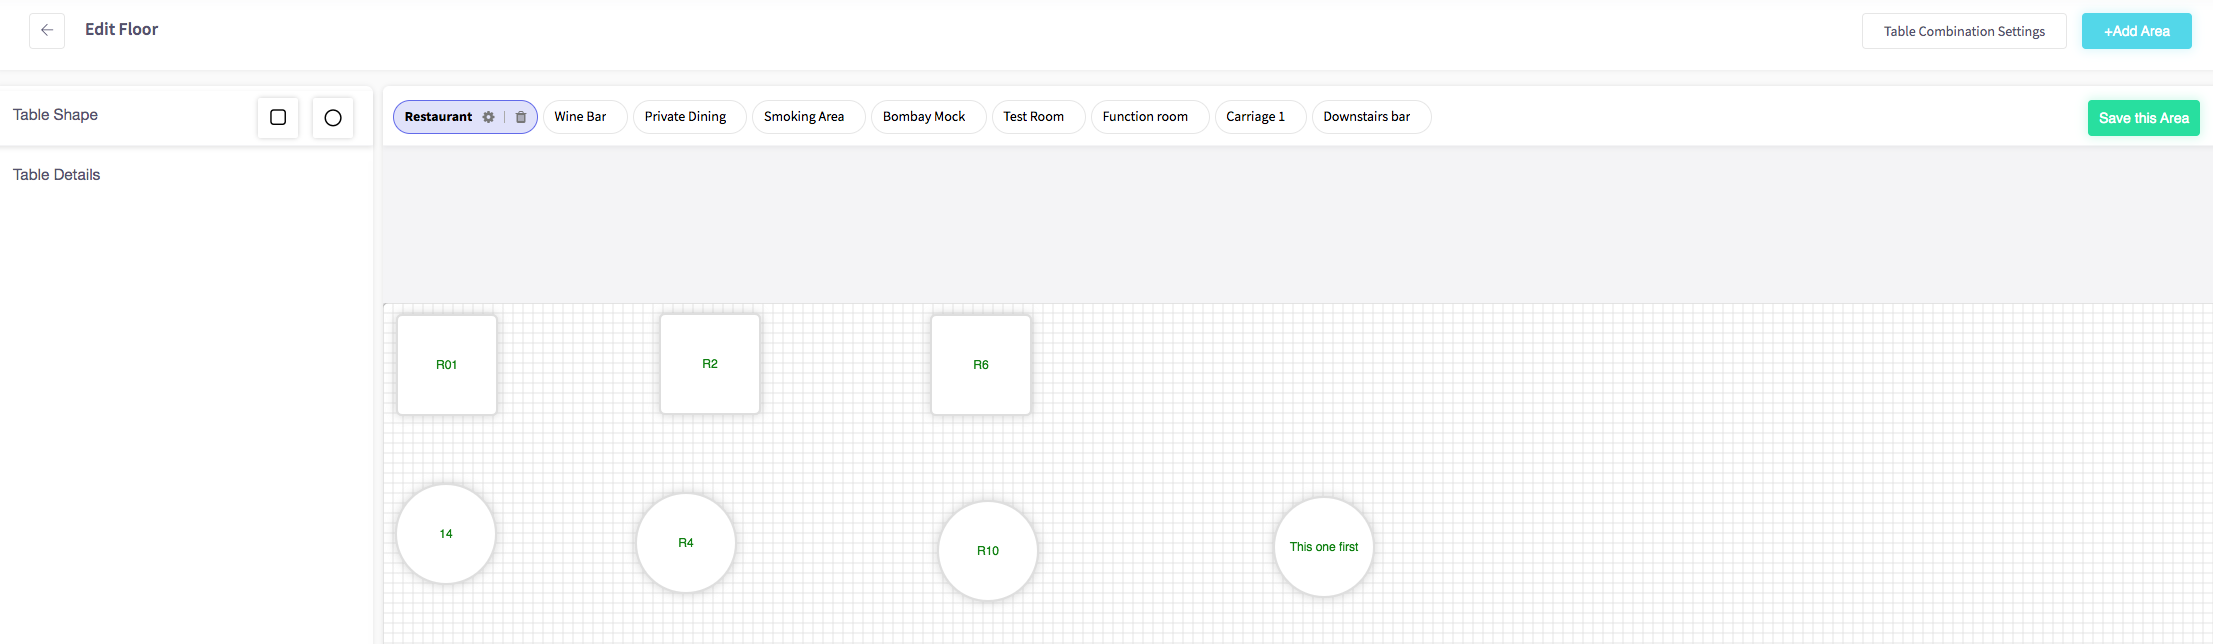
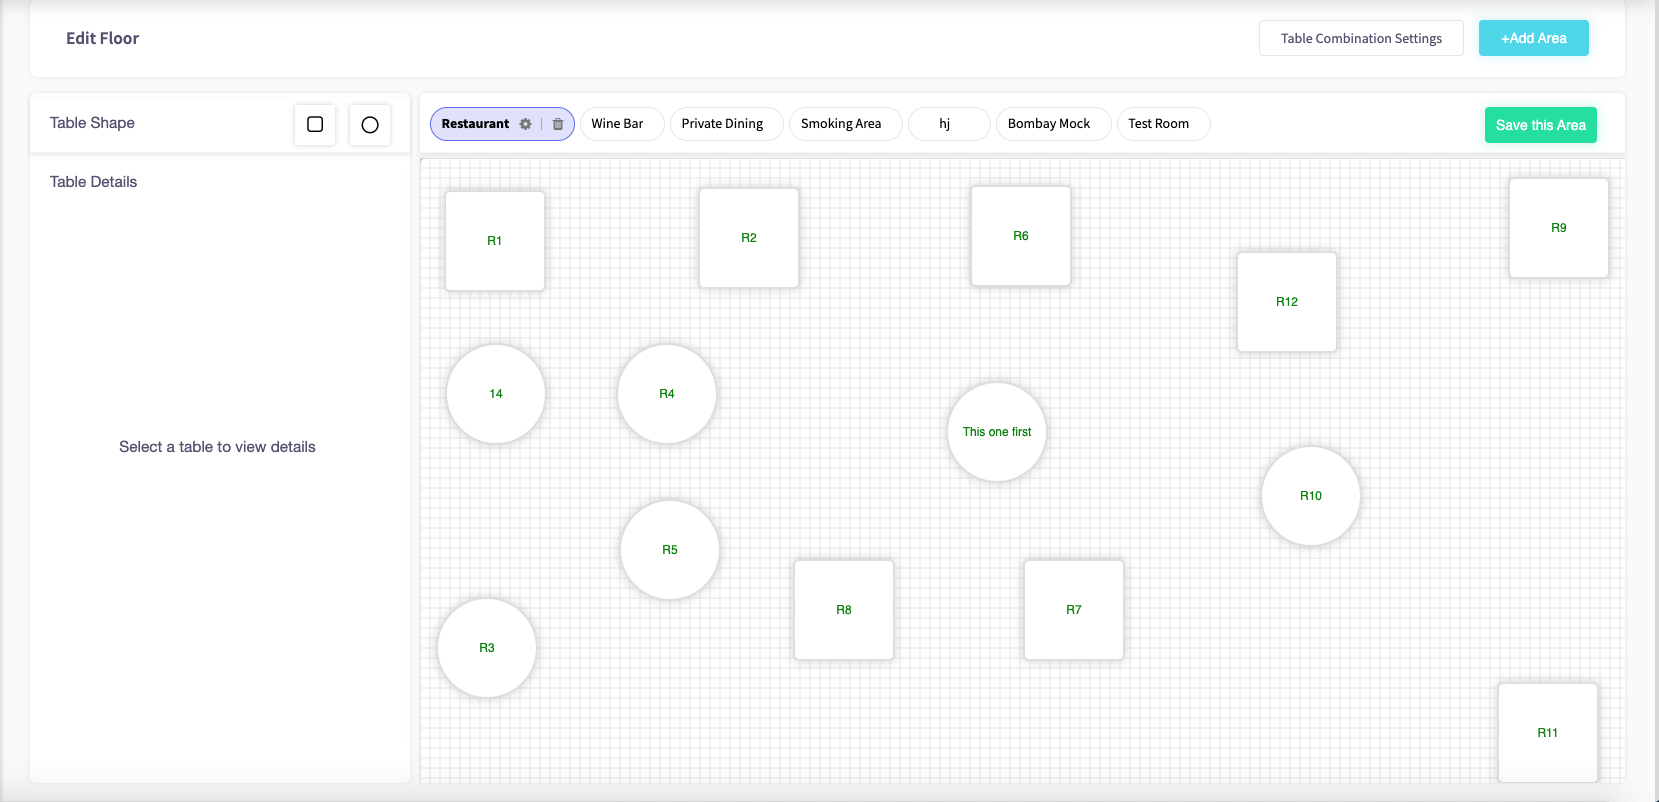
The edit floor menu should appear, shown below.
Then select the button "Table Combination Settings".
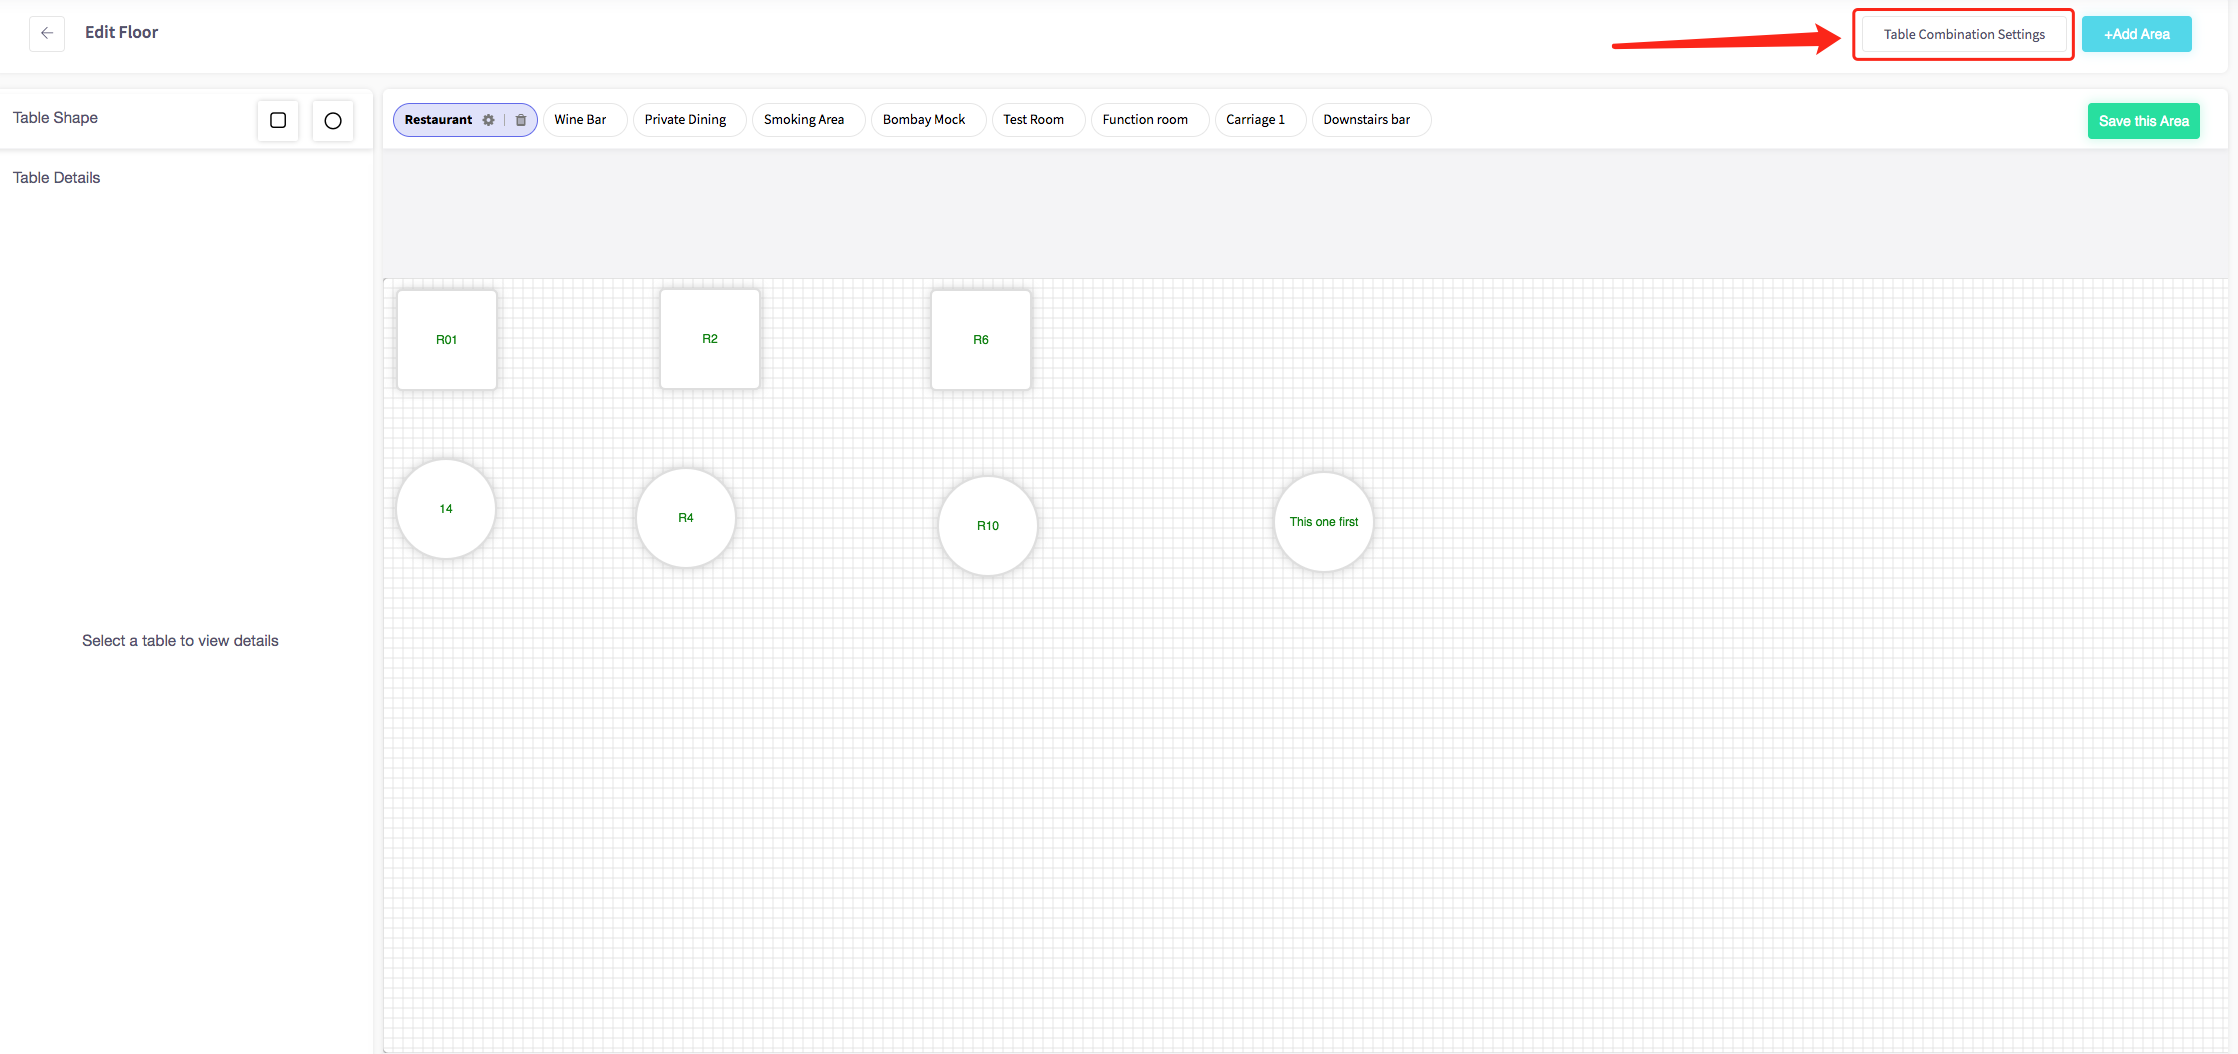
This menu will display, shown below.
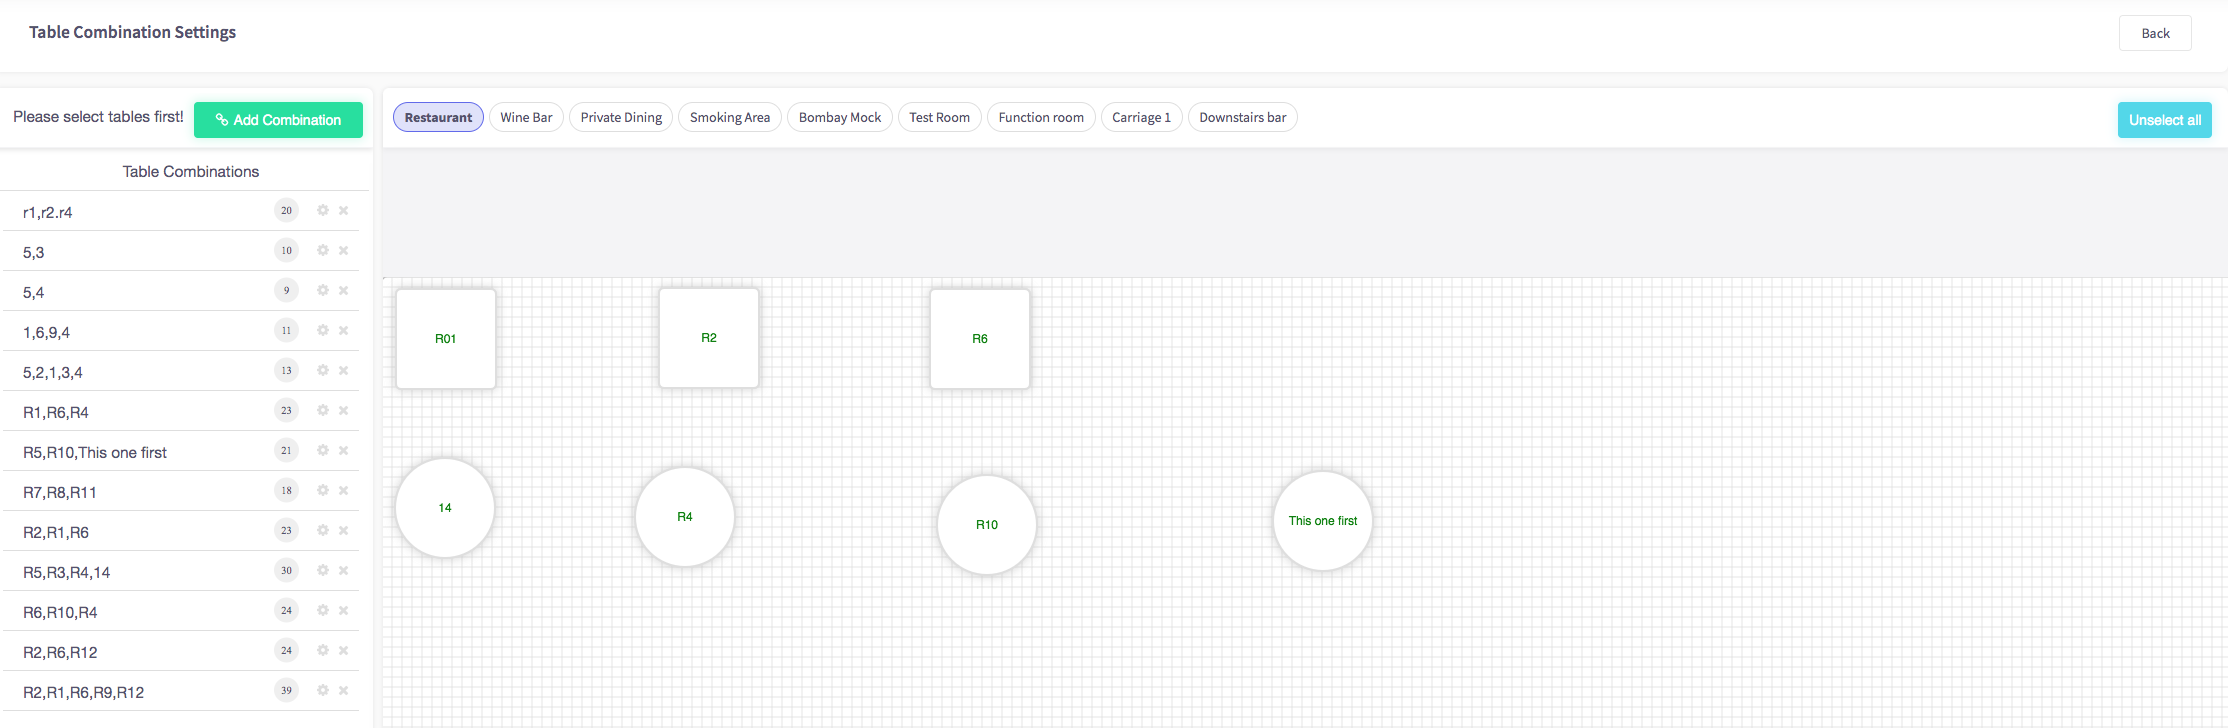
To add a new table combination click the green "Add Combination" button.
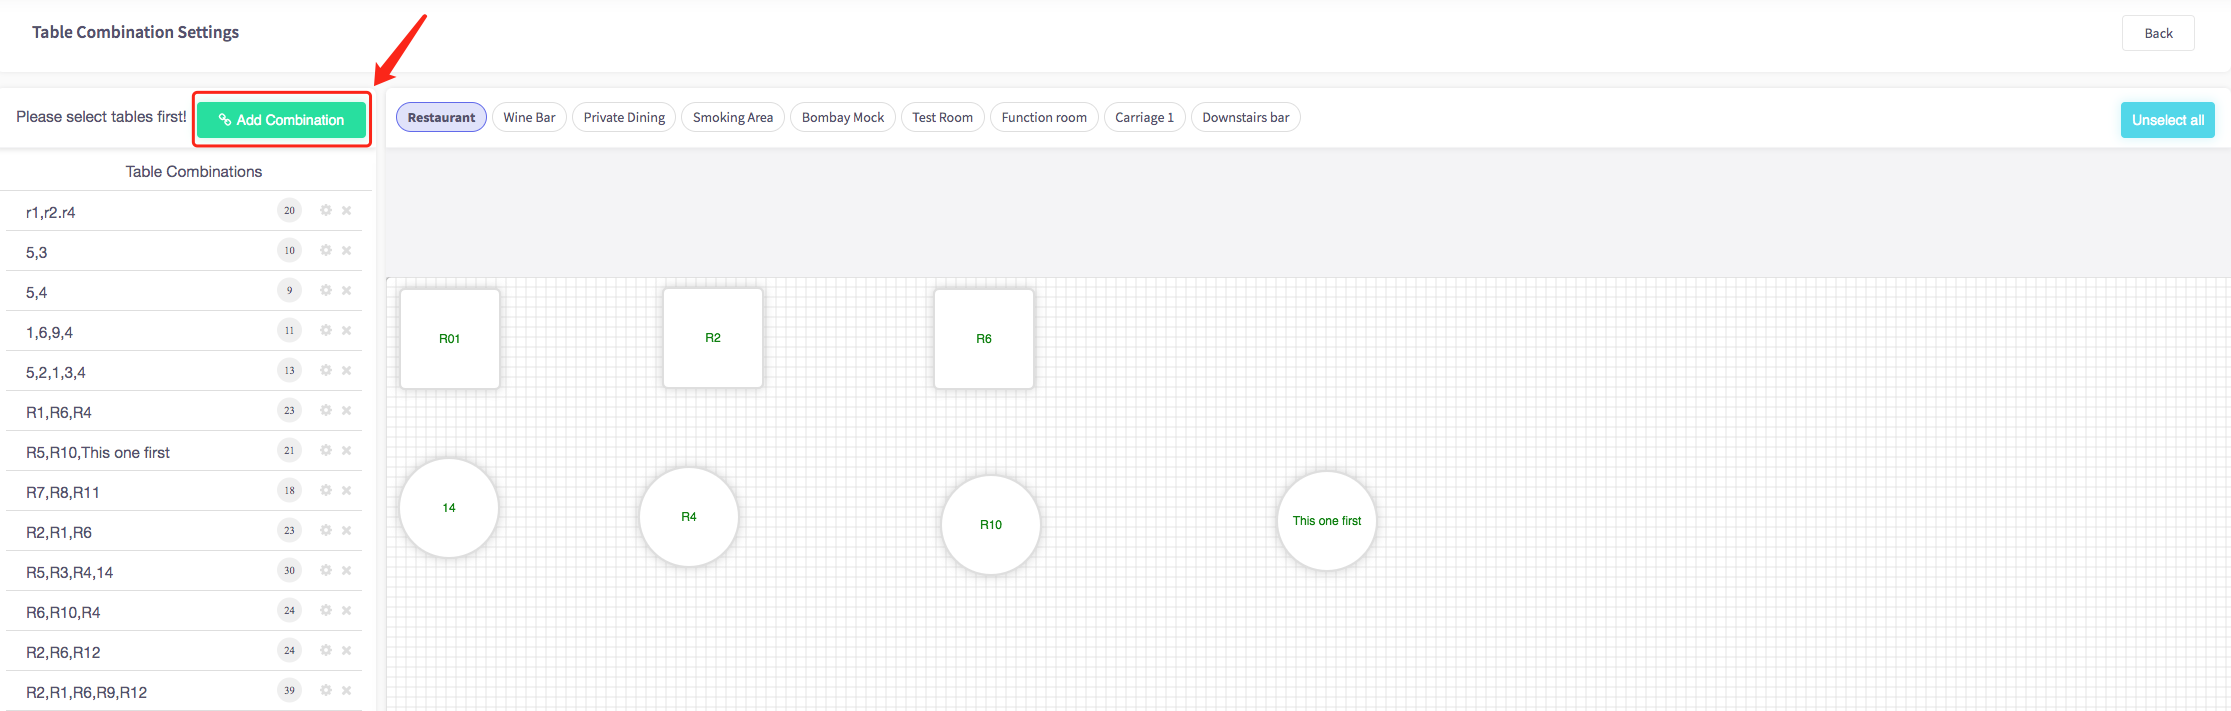
Select all the tables you would like to be in your table combination. One press will highlight the table ready for it to be combined with another. If you press a table accidentally simply press the table again to unhighlight it.
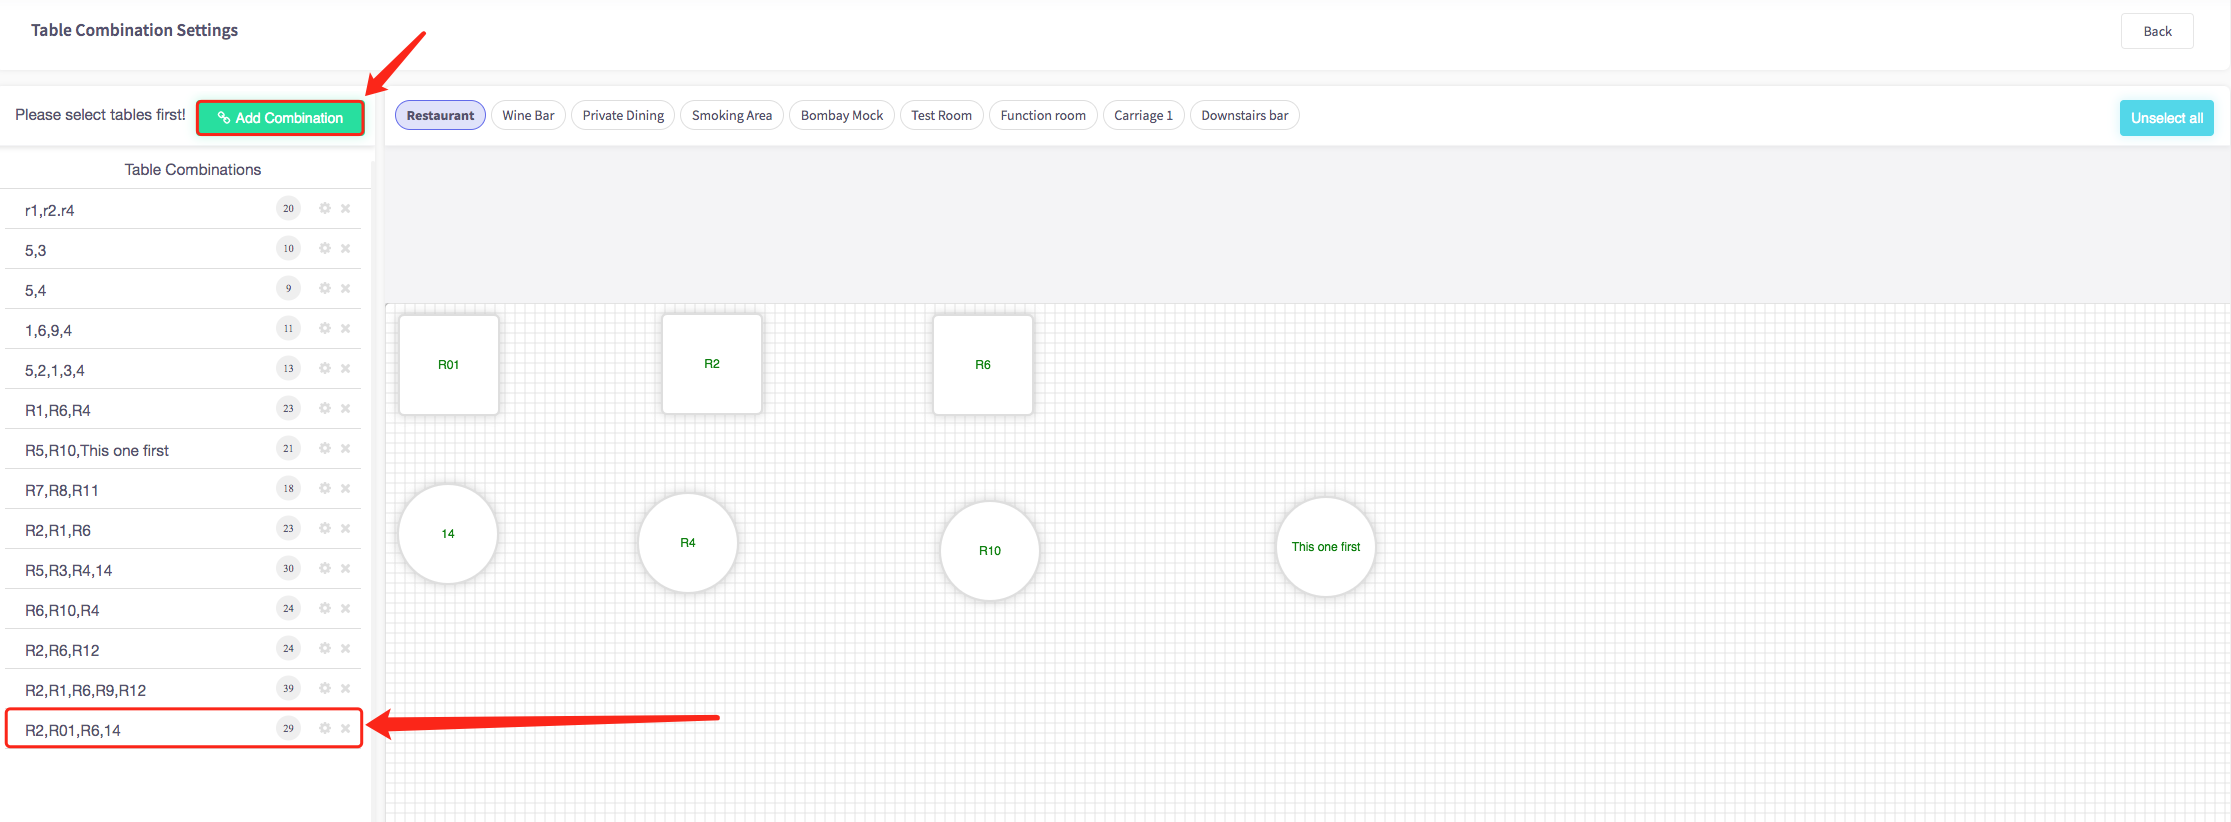
Press "Add Combination" again and your table combination will be added to the list of table combinations.
How to add an area
This guide will show you how to add an area to your Cloud HQ.
Firstly, scroll down to click on the 'System Settings' on the left-hand side, then the 'Floor Plans ' option in the menu.
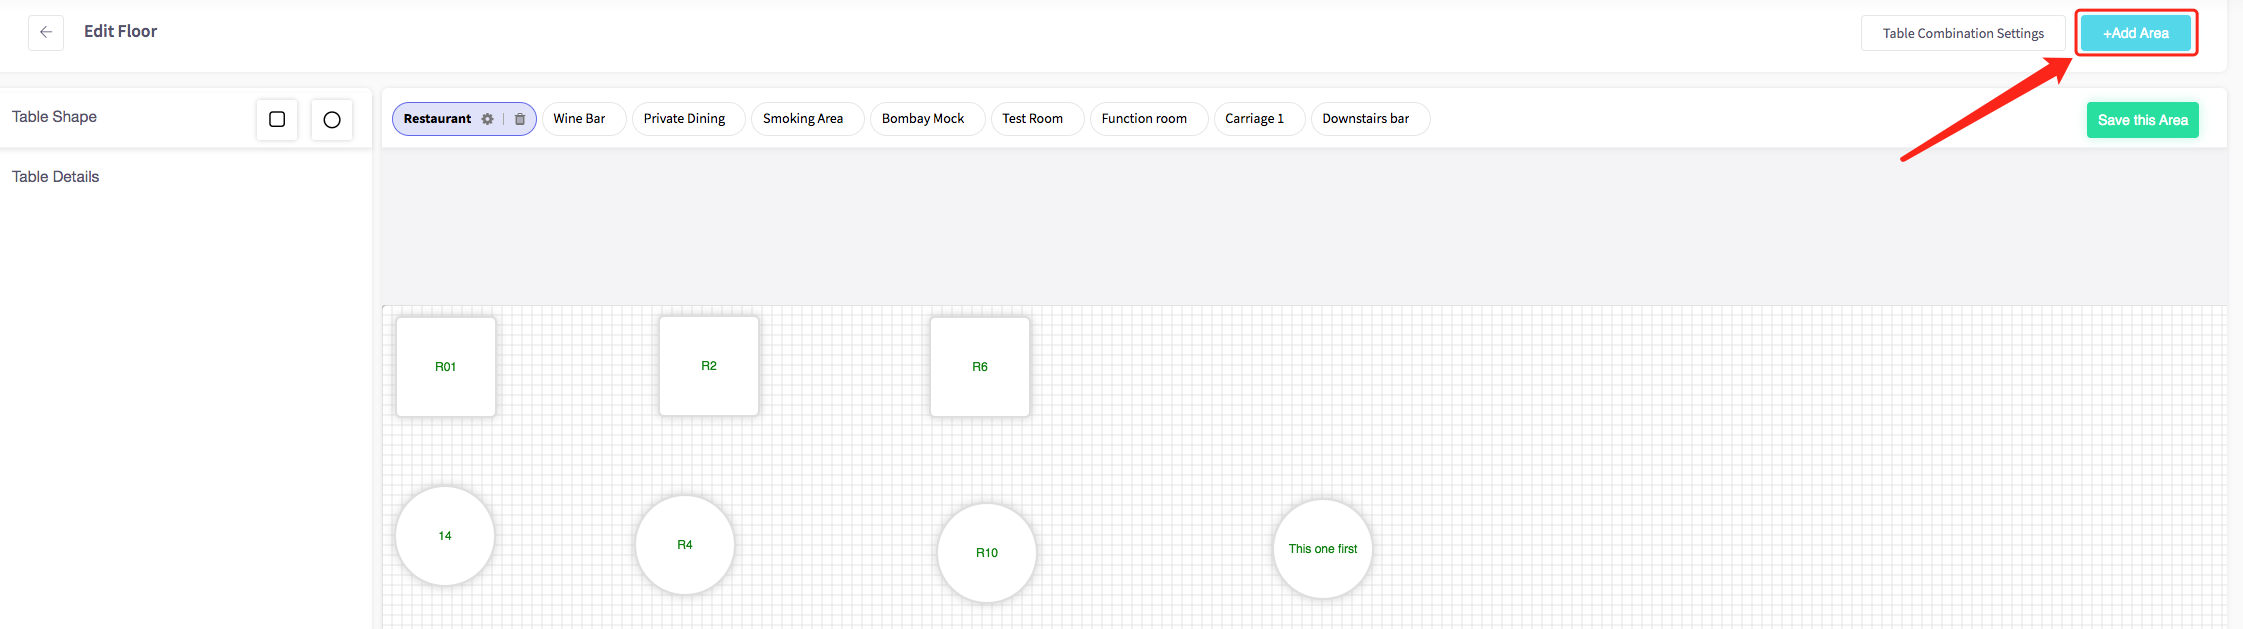
The edit floor menu should appear, shown below.
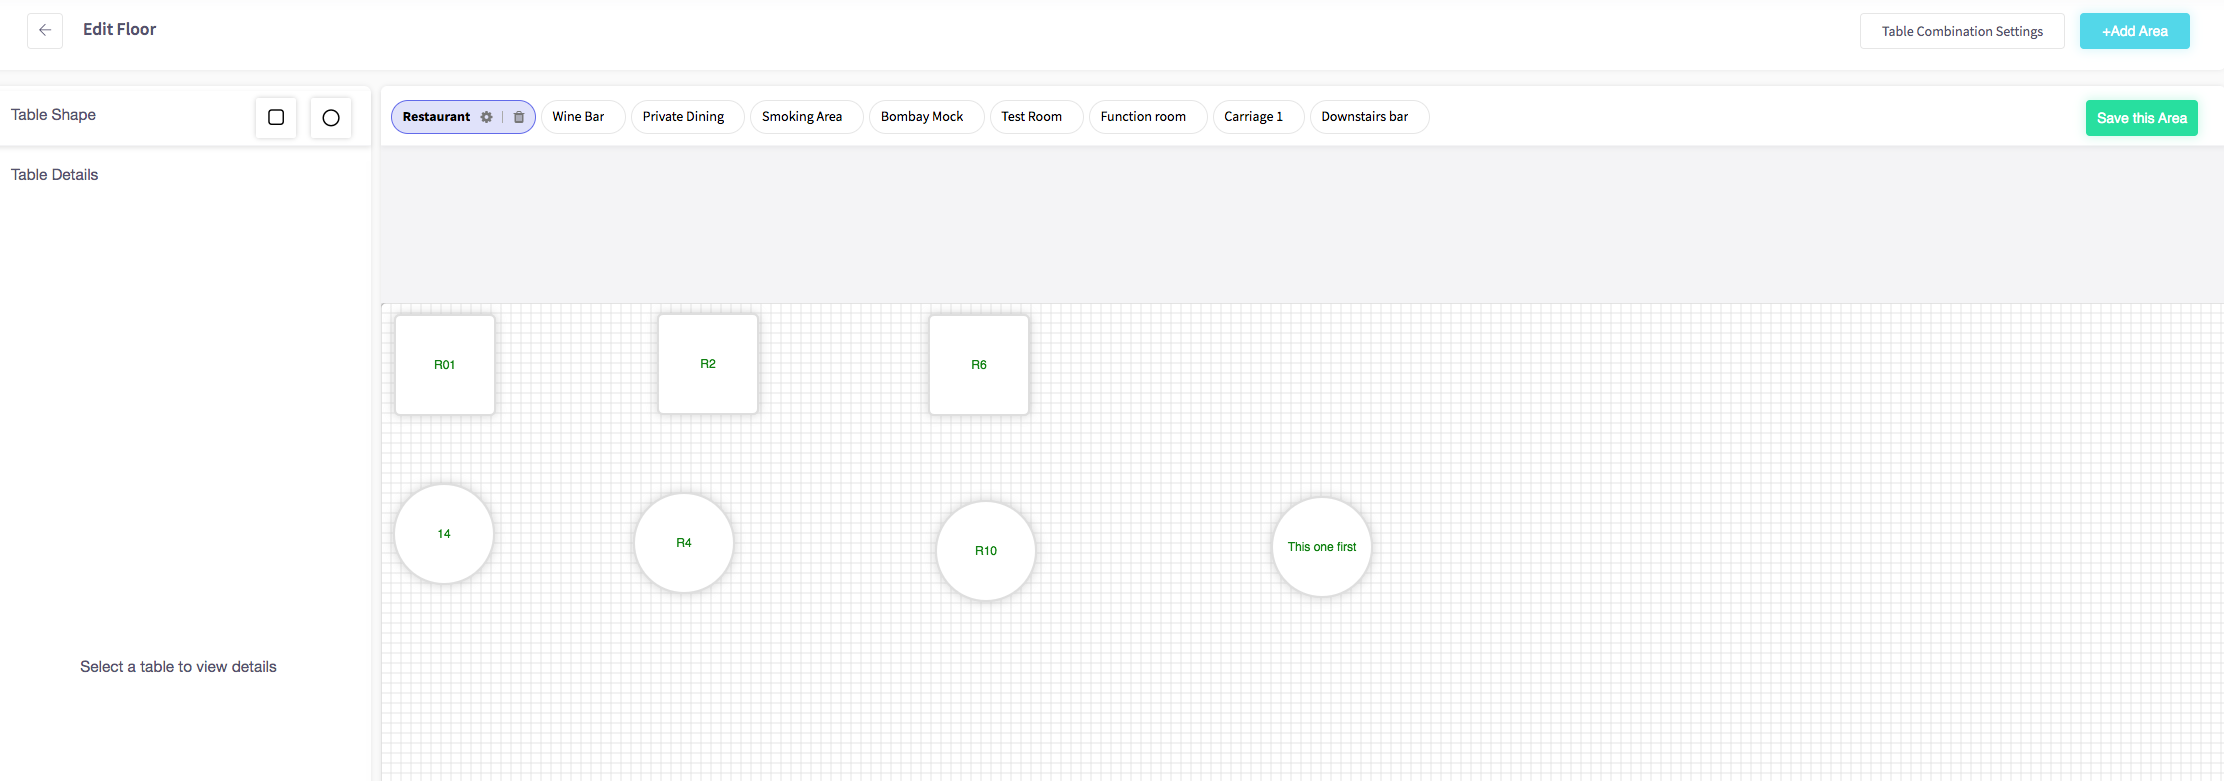
To add an area click the blue "+Add Area" button in the top right of the page.
Then name your room, and press "Confirm".
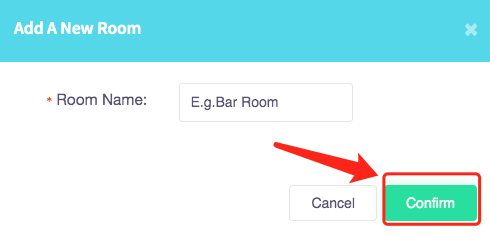
Your new room will be added to your floor plans.

How to add a table
This page will show you how to add a table to your Cloud HQ.
Firstly, scroll down to click on the 'System Settings' on the left-hand side, then the 'Floor Plans ' option in the menu.
The edit floor menu should appear, shown below.
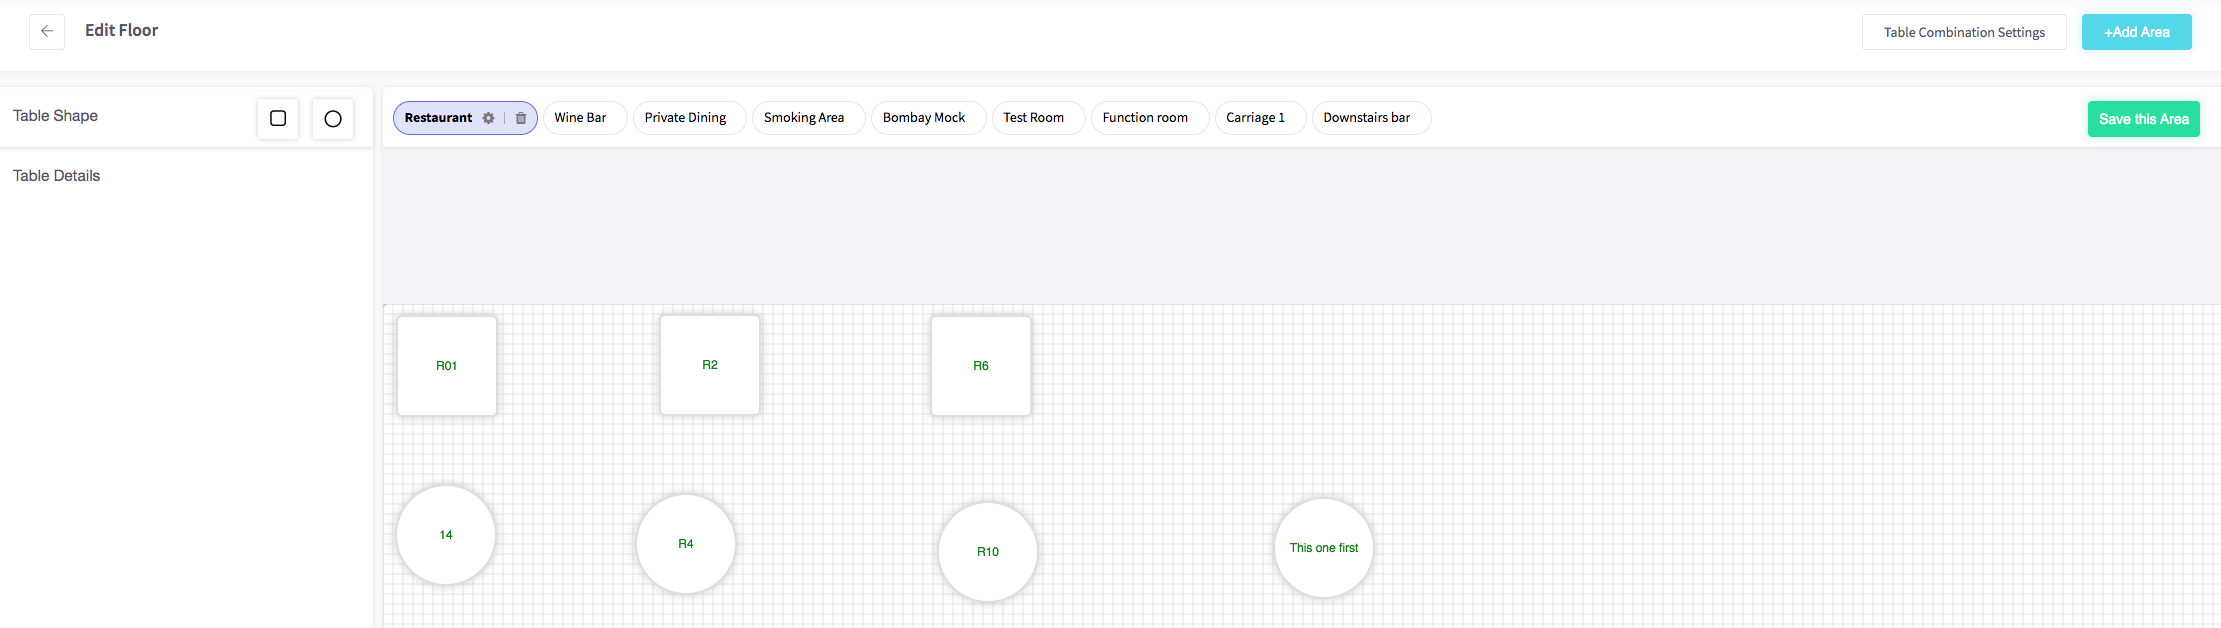
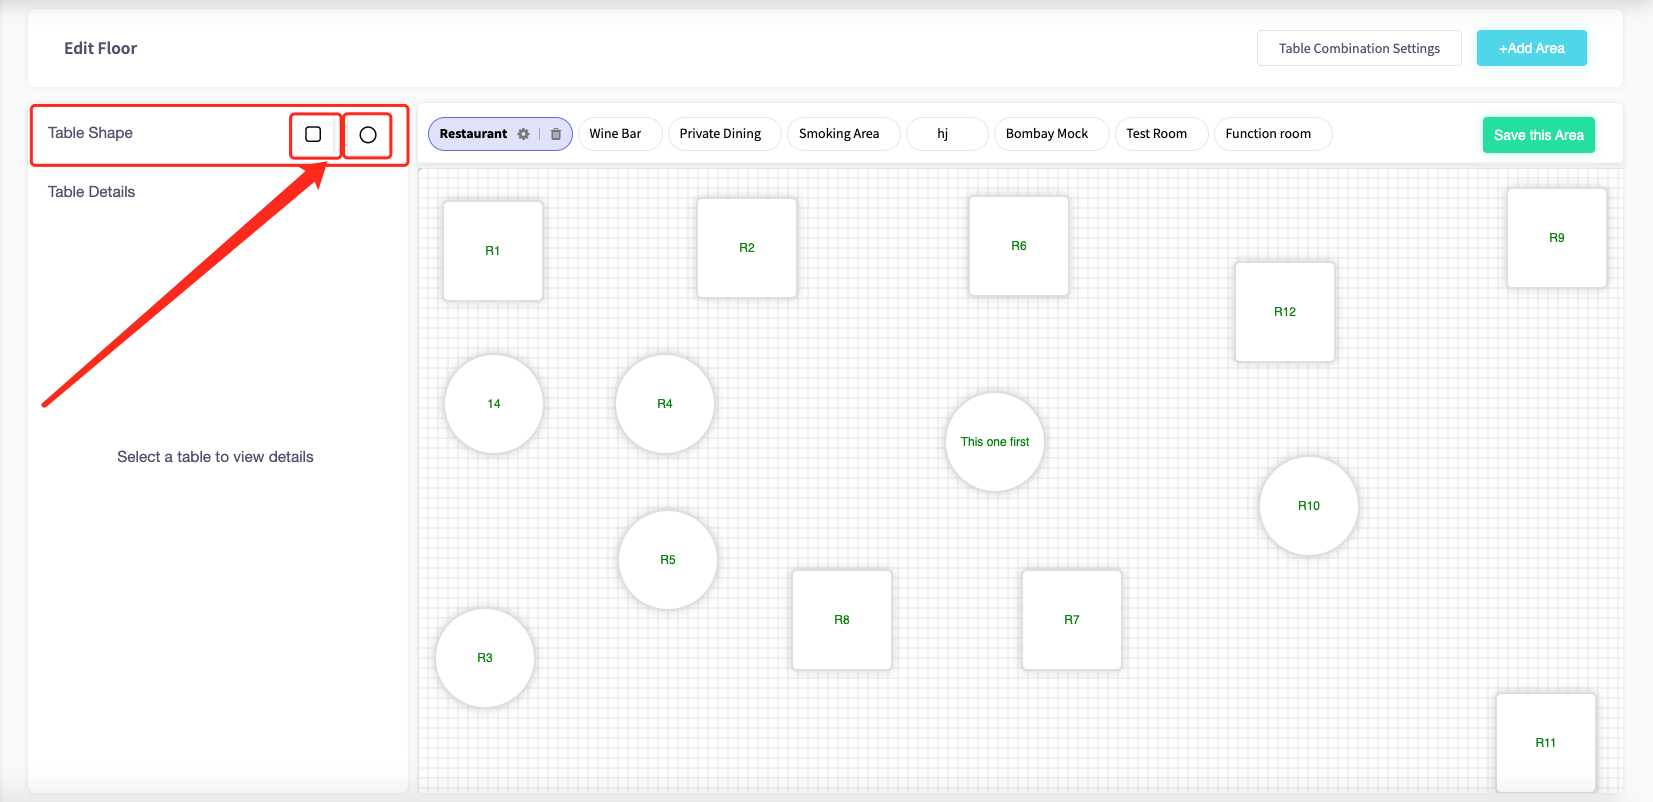
To add a table, choose your table shape either a square or a circle.
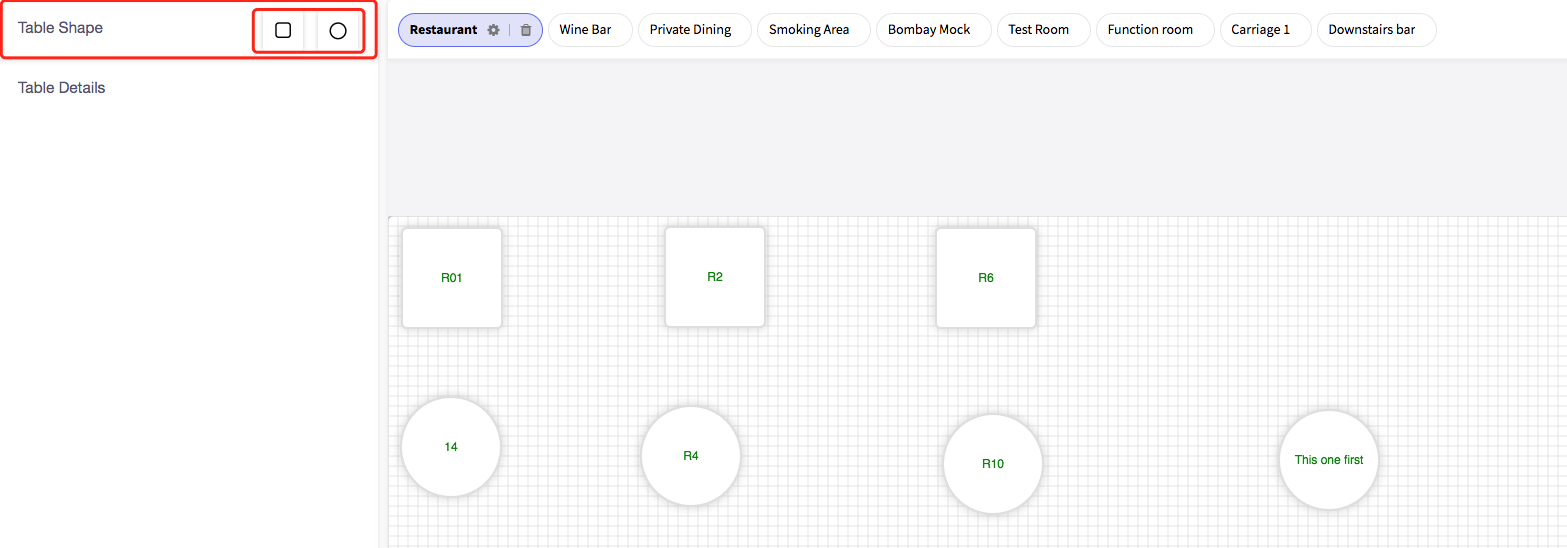
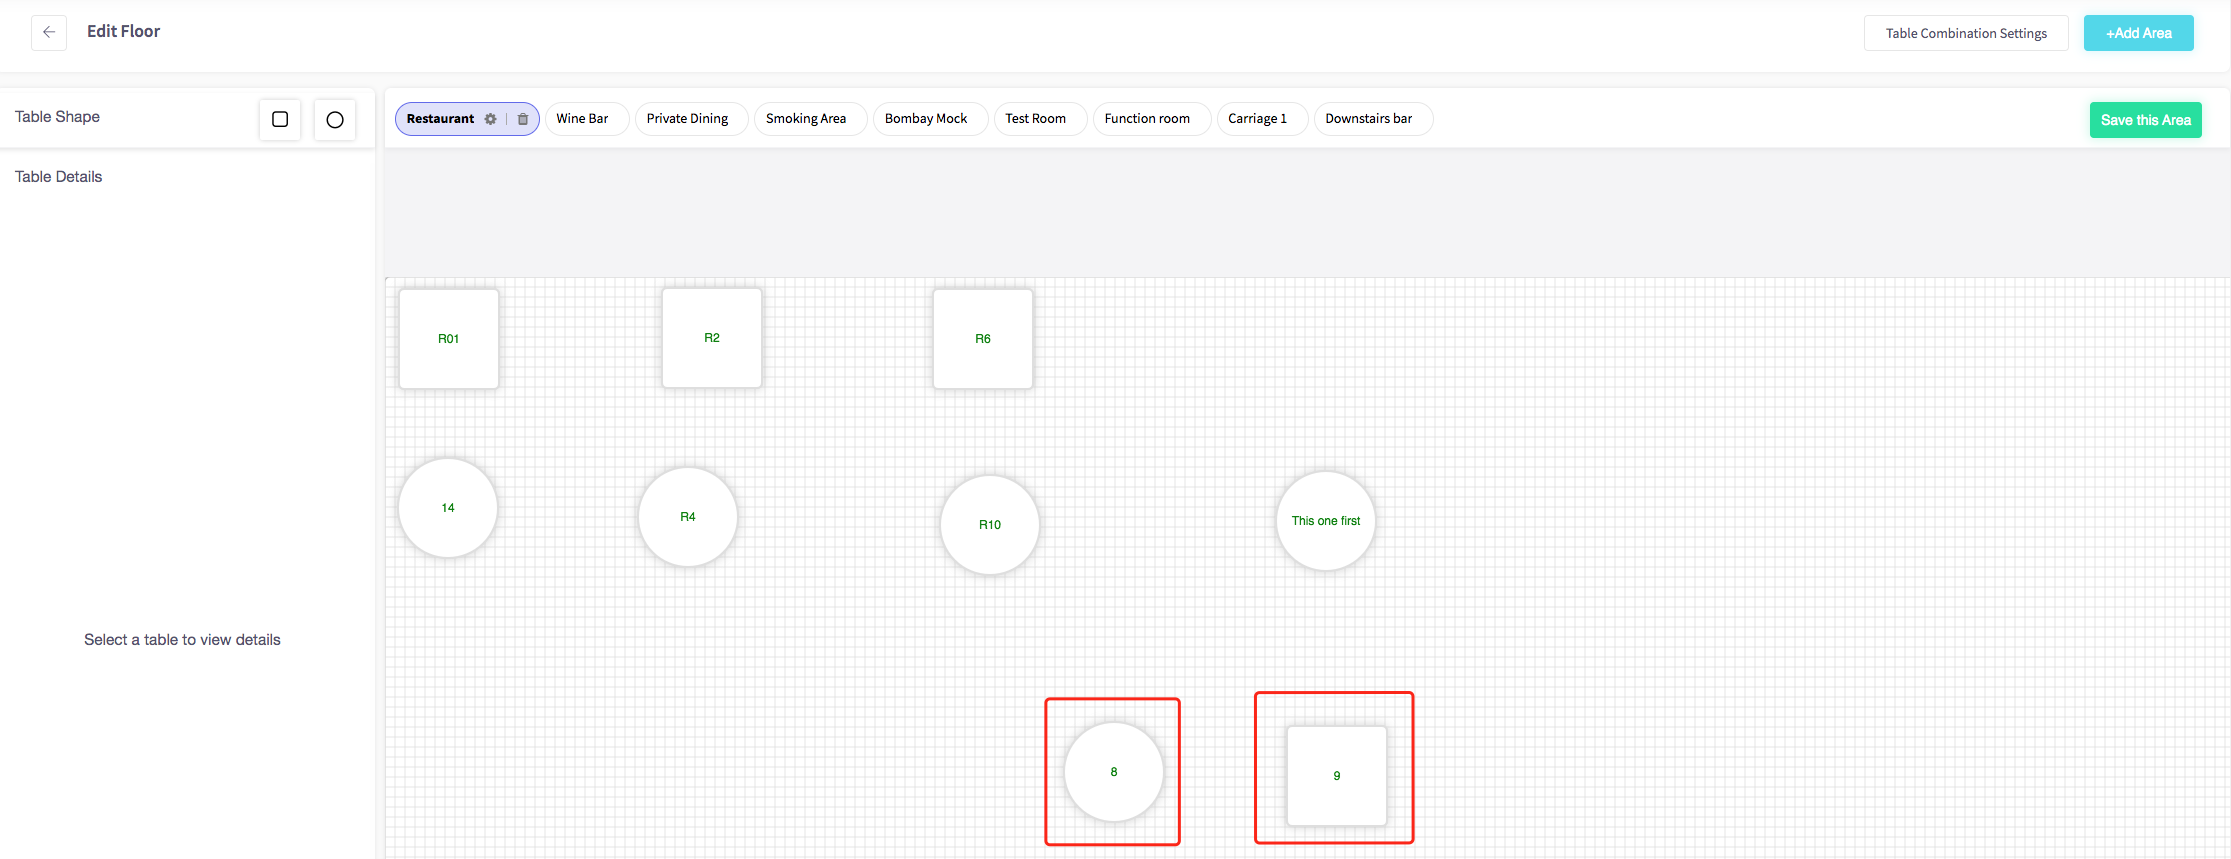
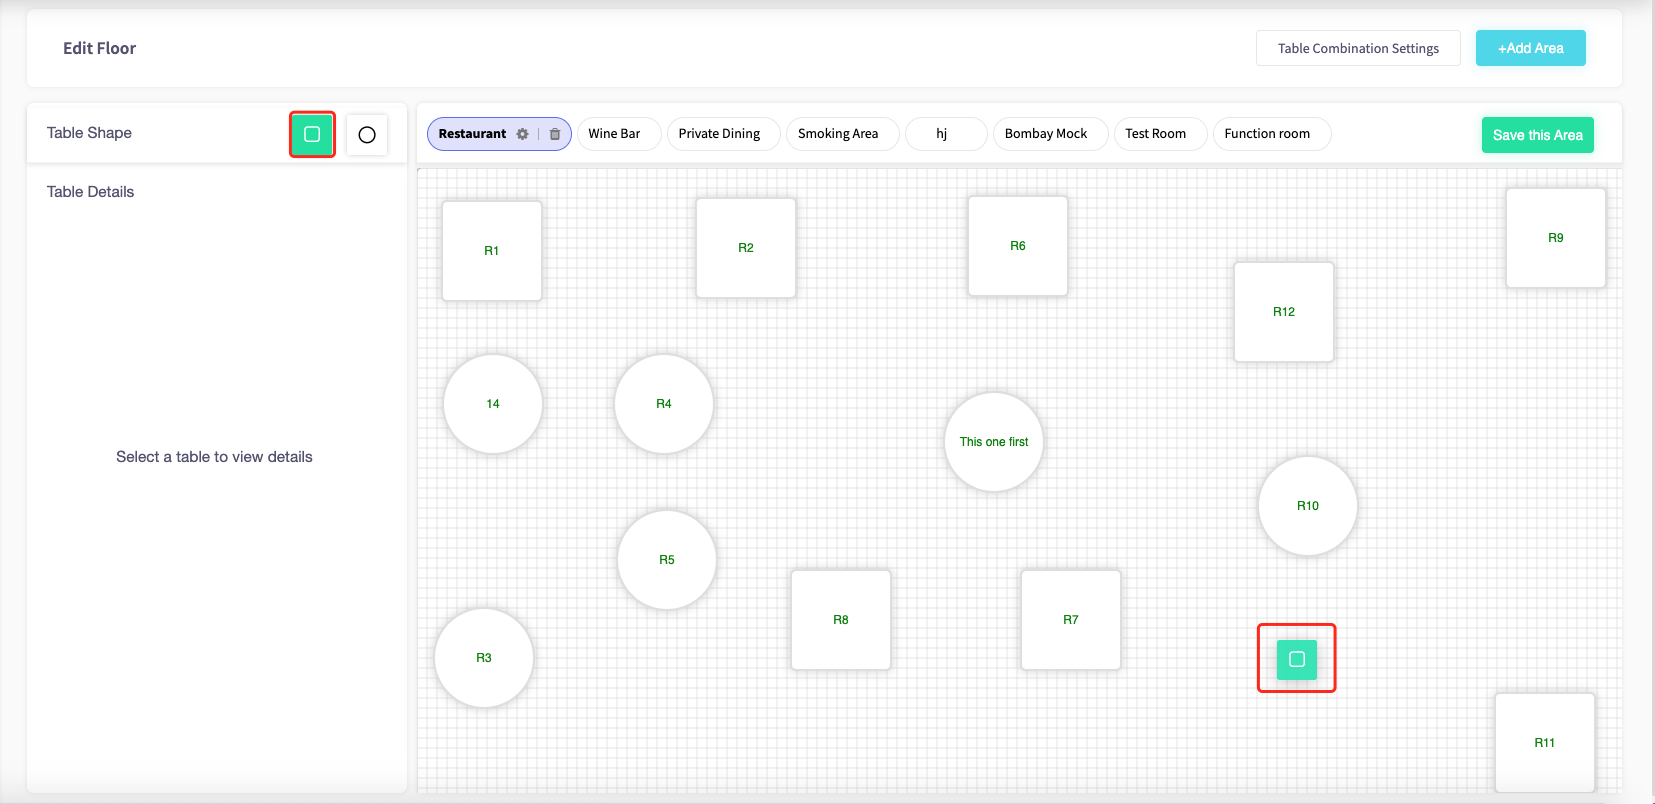
After you have selected your shape drag it onto the floor plan.
Your table will be added to your floor plan.
How to use the reservation toggle
This guide will show you how to use the reservation toggle on a table on your Cloud HQ.
Firstly, scroll down to click on the 'System Settings' on the left-hand side, then the 'Floor Plans ' option in the menu.
The edit floor menu should appear, shown below.
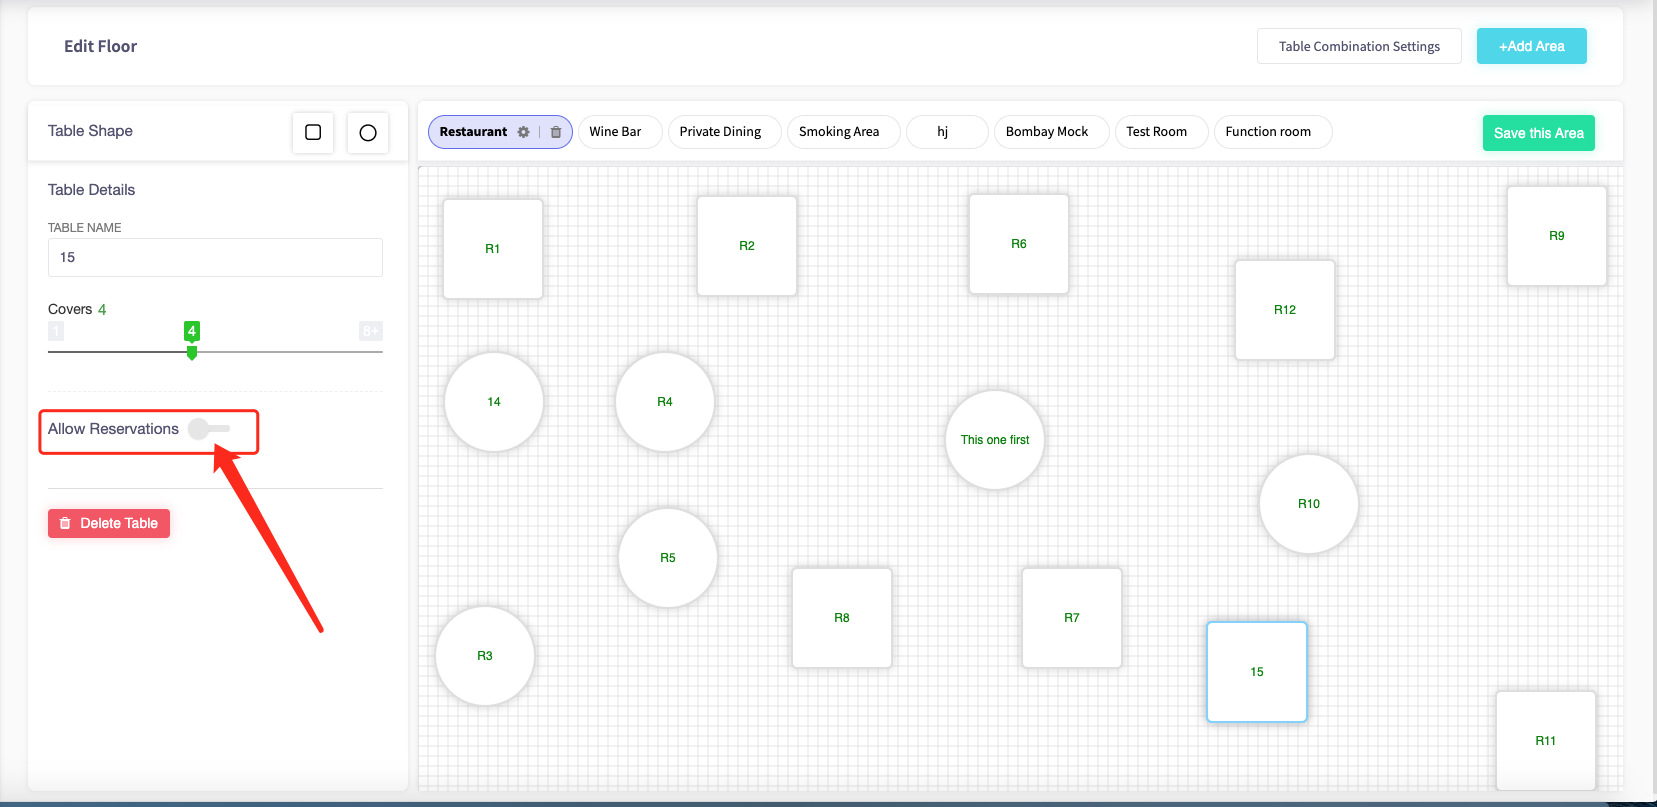
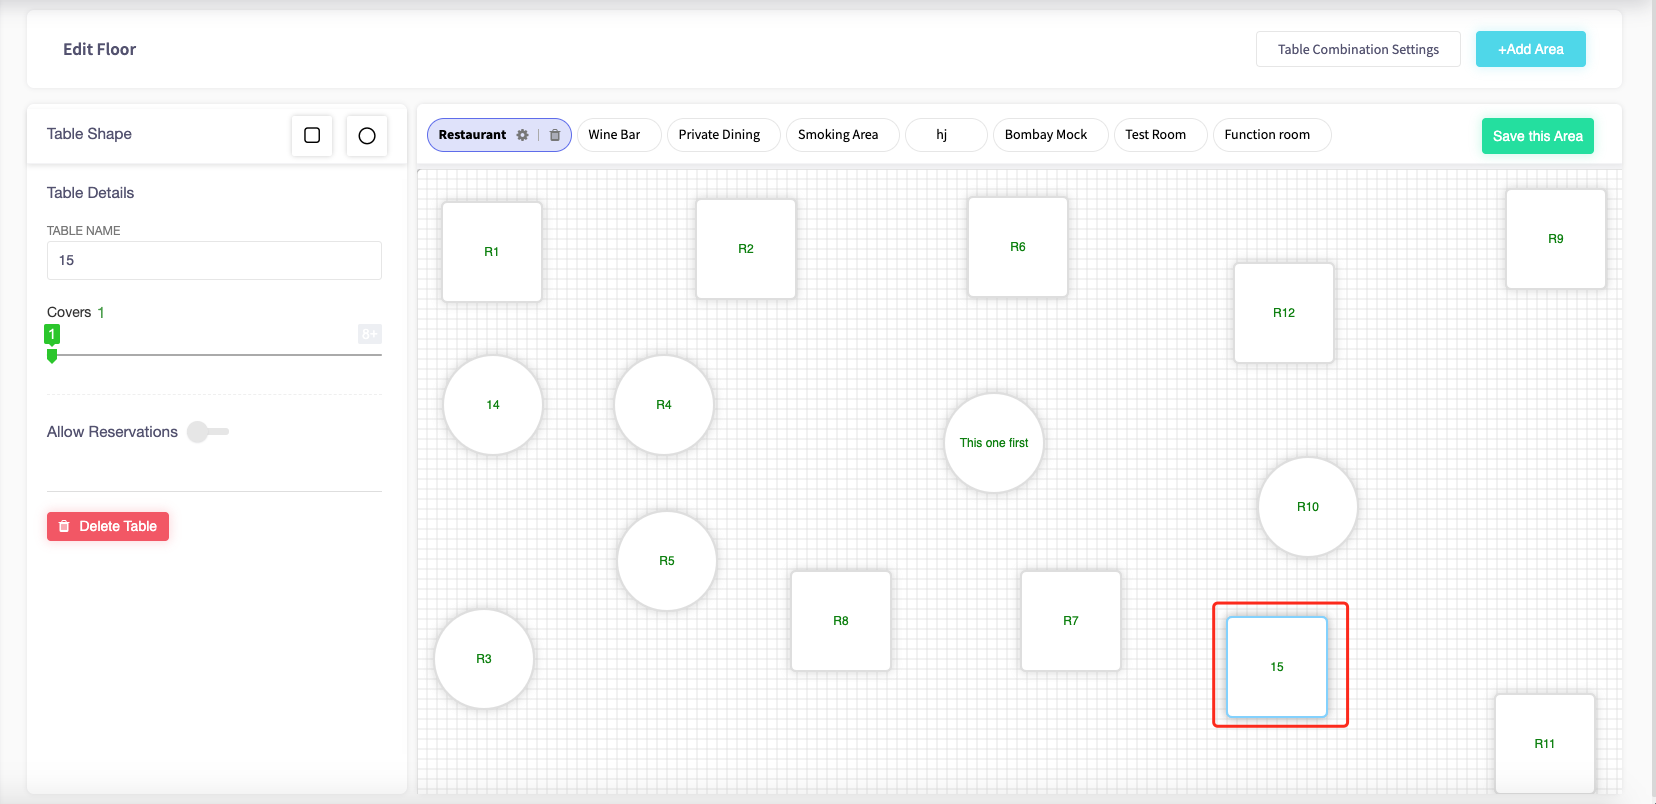
Find the specific table your looking to allow reservations. Once you have found the correct table click it. This should make the 'table details
If you would like to allow reservations, click on the toggle next to "Allow Reservations".
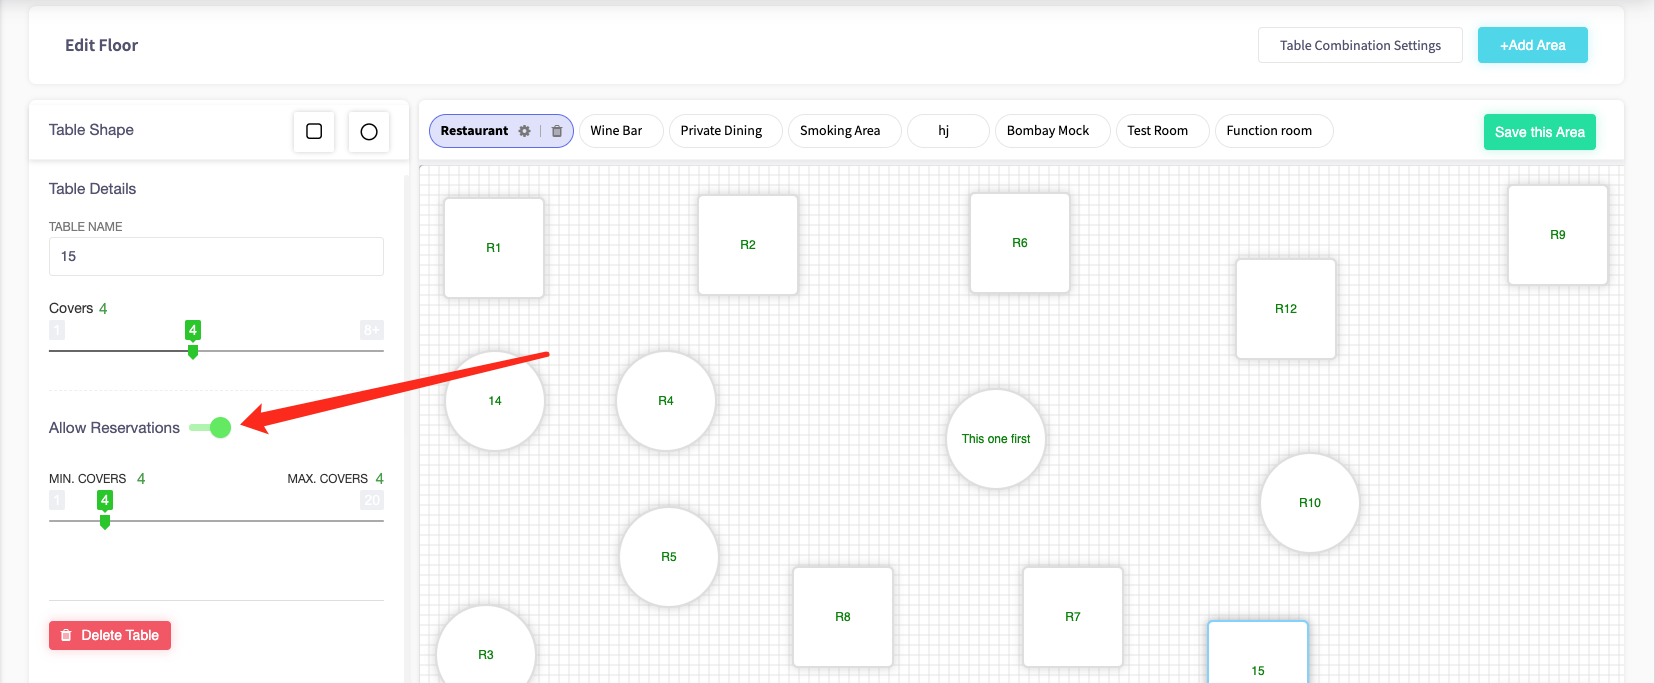
It will turn green, which means that customers can book this table for reservations.
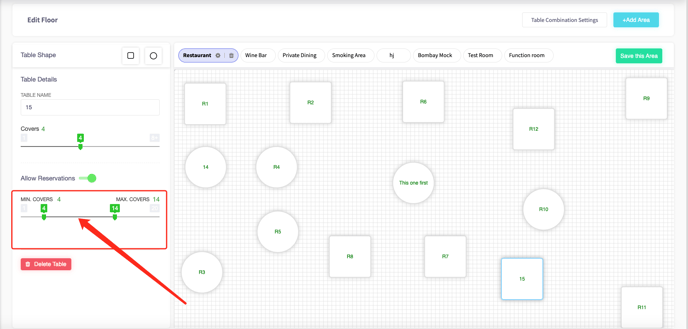
How to set the minimum and maximum capacity
This guide will show you how to the minimum and maximum capacity on a table on your Cloud HQ.
Firstly, scroll down to click on the 'System Settings', then the 'Floor Plans' option on the left-hand menu.
The edit floor menu should appear, shown below.
To add a table, choose your table shape either a square or a circle.
After you have selected your shape drag it onto the floor plan.
Your table will be added to your floor plan.
If you would like to allow reservations, click on the toggle next to "Allow Reservations".

It will turn green, this will mean that customers can book this table for reservations.

By allowing reservations, you can allow minimum and maximum covers to a table. Minimum covers being is the minimum of people that can sit at that table, and maximum covers being the maximum number of people that can sit at a table.