Before you do anything, make sure you login into your store account SparkEpos
How to edit the service charge.
This guide will show you how to edit the service charge on your Cloud HQ.
Firstly, scroll down to click on the 'System Settings' on the left-hand side, then the 'Service Charge Setting' option in the menu, as shown.
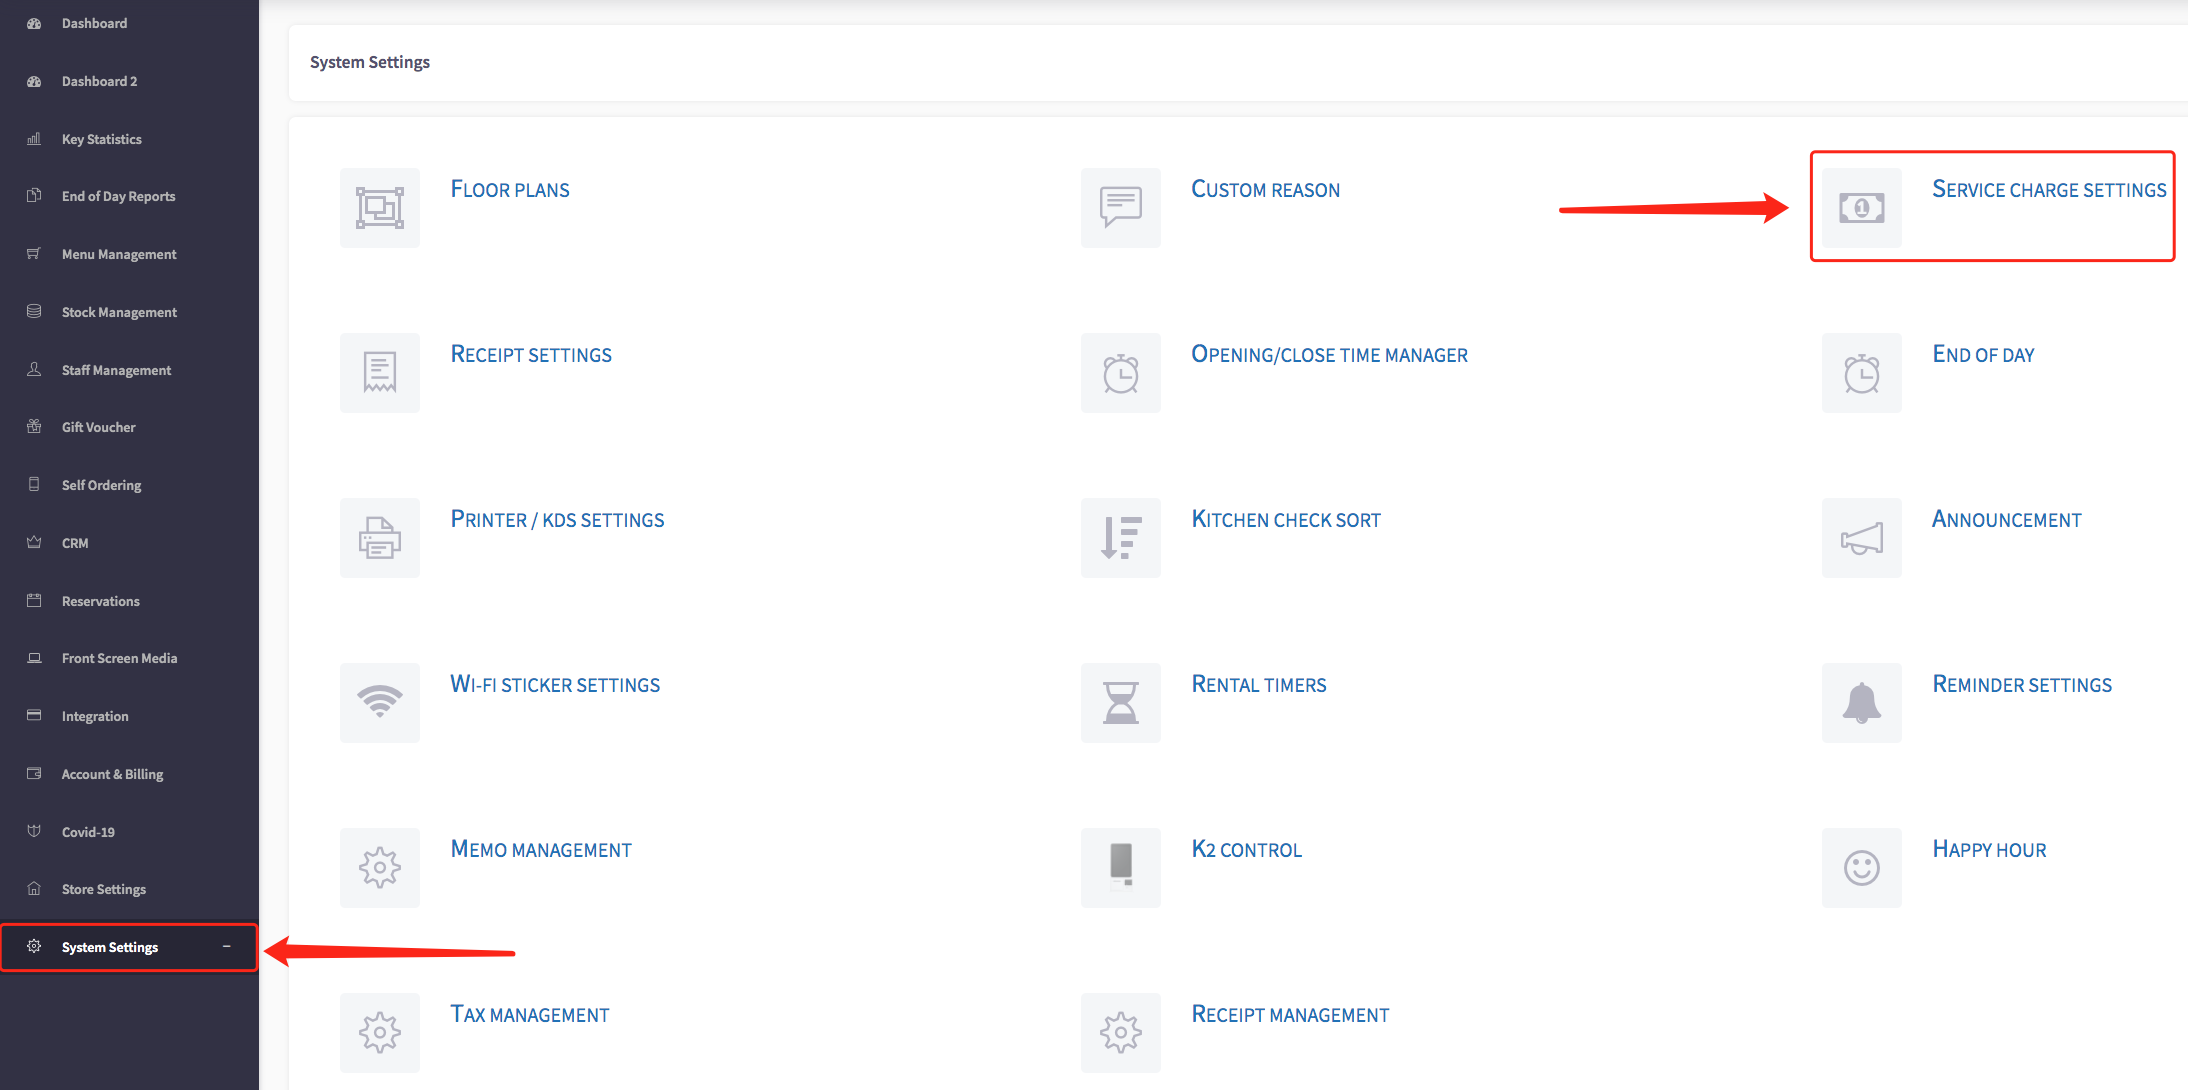
Service Charge settings menu will appear, shown below.

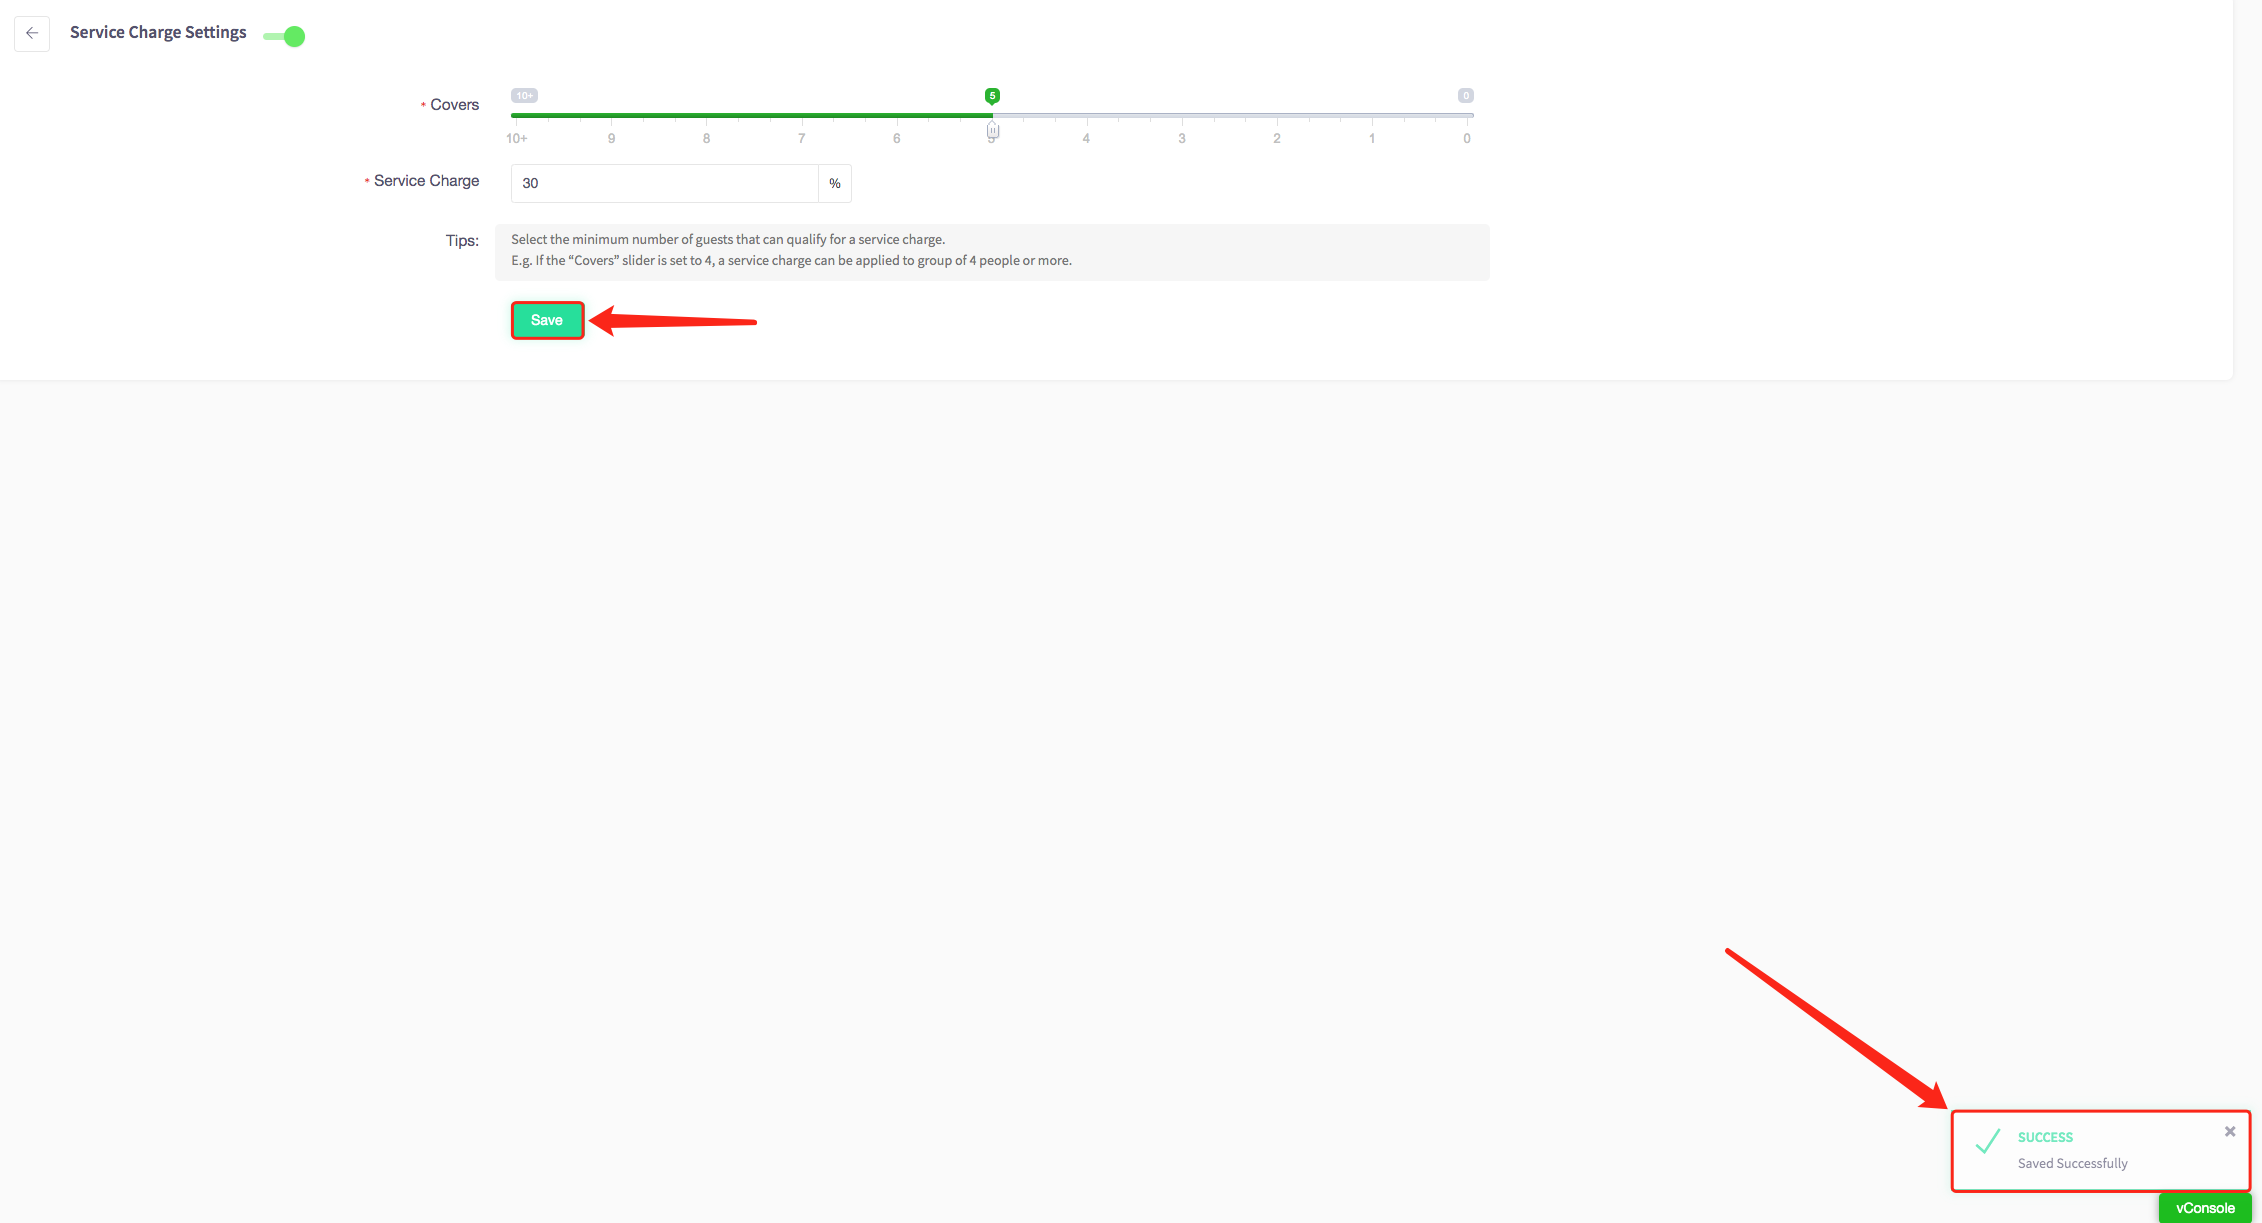
To add a service charge, select the number of covers you would like to service charge and create a percentage of how much you would like customers to tip-off their bill.

When you have decided on the number of covers and the percentage of service charge click the green save button and a message will appear saying it has been "saved successfully".
This feature automatically activates if the number of customers entered is equal or more than the amount of covers you set in the HQ.
You can manually turn on or off this feature in the main screen by finding the Service Charge button on the bottom row.
Please note that this position is not the default position of this button, you can drag and drop all the buttons, so customise the bottom row to your preference.
For using Service Charge on the Handheld, first make sure you are on the SPARK app screen.
Head over to Settings.

Next, click on System Settings.

Then make sure that you have enabled the inputting of the number of customers when selecting a table setting.

Once you have enabled this, the Service Charge will automatically be applied if the amount of customers is equal or more than the covers you have selected in the HQ.
To manually enable/disable the Service Charge, when you are making the payment, you will be able to see the Service Charge Button at the bottom of the screen.
When it is orange, that means the Service Charge will be applied.
