How to add a Multi-Choice Menu
This page will show you how to add a multi-choice option to your menu, ideal for meal deals and other grouped purchases.
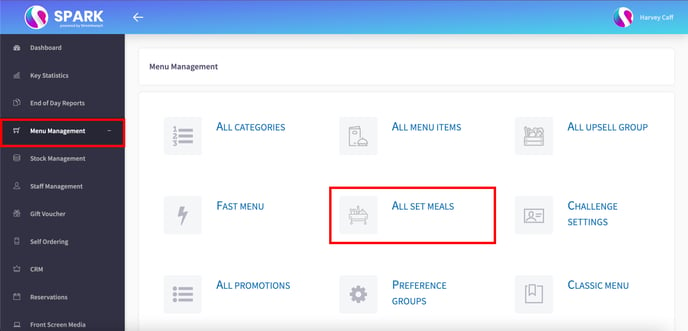
Firstly, navigate to the 'Menu Management' tab of your Cloud HQ. Then select the 'All Set Meals' option.
Next, select 'Add Multi-Choice Menu'.

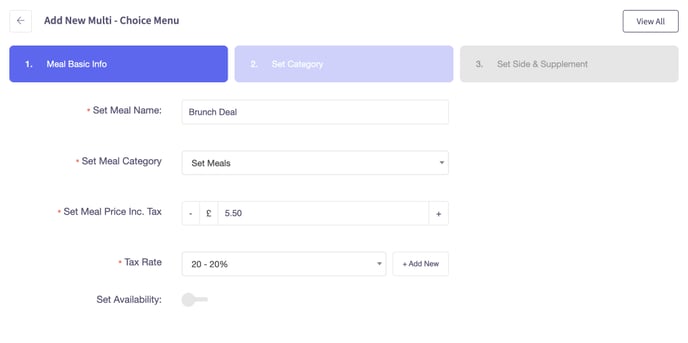
You should then see the menu below. The first step is filling out the 'Meal Basic Info'.
The 'Set Meal Name' is what the menu item will appear as on your POS. The 'Set Meal Category' is the category it will appear in. This works the same as regular menu items.
Add your 'Set Meal Price Inc. Tax' - the overall price of the meal deal, alongside the 'Tax Rate'. You can also 'Set Availability' if your meal deal is only available on certain days and at certain times. This will bring up extra options where you can select these times.
The second step is 'Set Category'. Here you can add categories that customers can choose from to make up their meal deal. Simply type in a name for the category and click 'Add'. You can add as many as you'd like to make up your deal.

Below are two examples - this brunch meal deal is made up of a 'Main' and a 'Drink'.
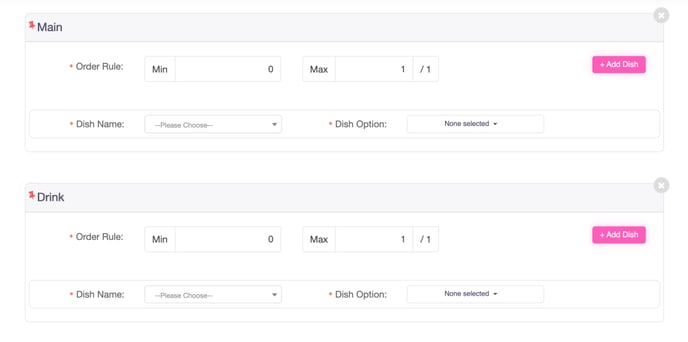
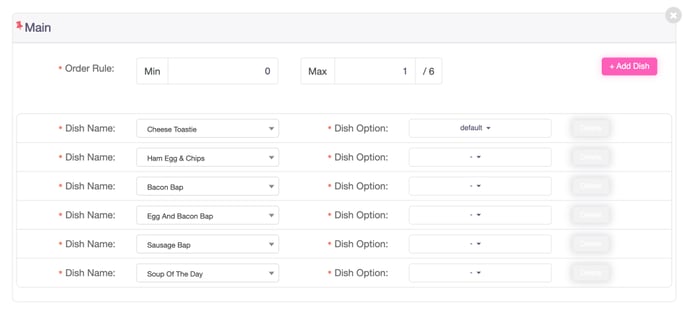
Firstly, add your dishes via the 'Dish Name' drop-down box, where you'll search you already set up items. 'Dish Option' allows you to select which options of each menu item are available if applicable. For example, here you are able to decide if only regular sizes of certain drinks will be included in the meal deal.
The 'Order Rule' dictates the minimum and maximum number of items that can be selected from each category.
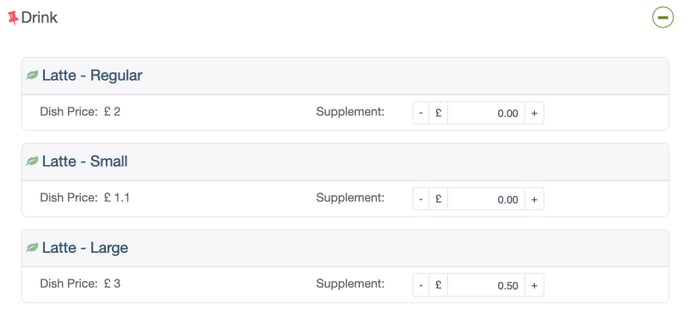
The next option is 'Set Side & Supplement', where you can make exceptions with pricing. Continuing with the example of drink sizes, you may want to include a large latte in your meal deal, but it would be an extra 50p. Here is where you set that rule up.
Finally, select 'Save', and your meal deal will appear both on the 'All Set Meals' list and on your 'All Menu Items' list.