- How to create a menu item
- How to delete a menu item
- How to hide a menu item
- How to edit a menu item
- How to assign a barcode to a menu item
How to create a menu item
This guide will show you the process of creating/adding a new menu item.
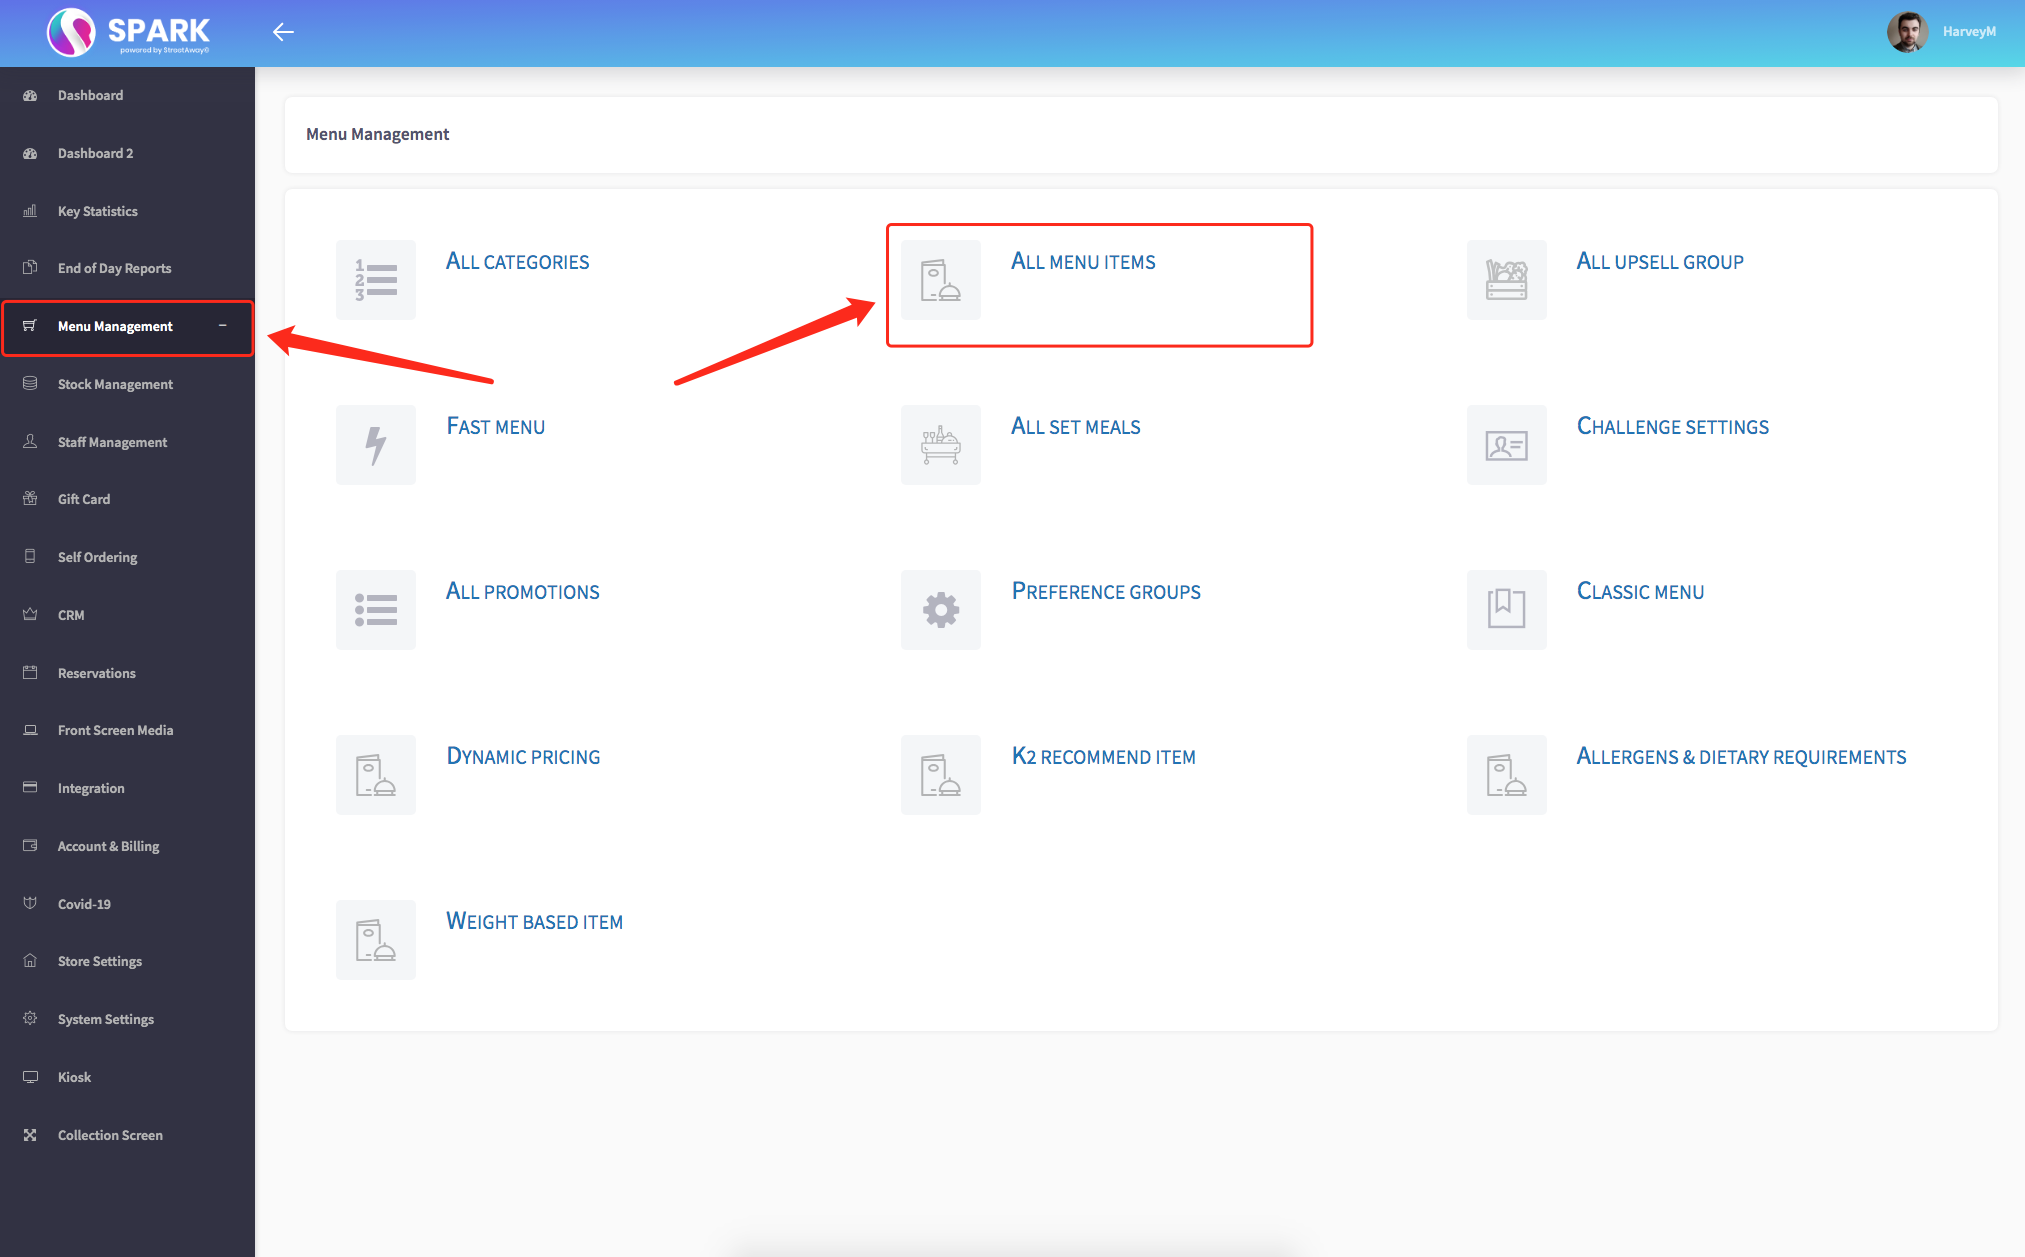
Firstly, click on the 'Menu Management' on the left-hand side, then the 'All Menu Items' option in the menu.

Here, all menu items will be displayed, shown below.

From here, click the green 'Add Menu Item' button.

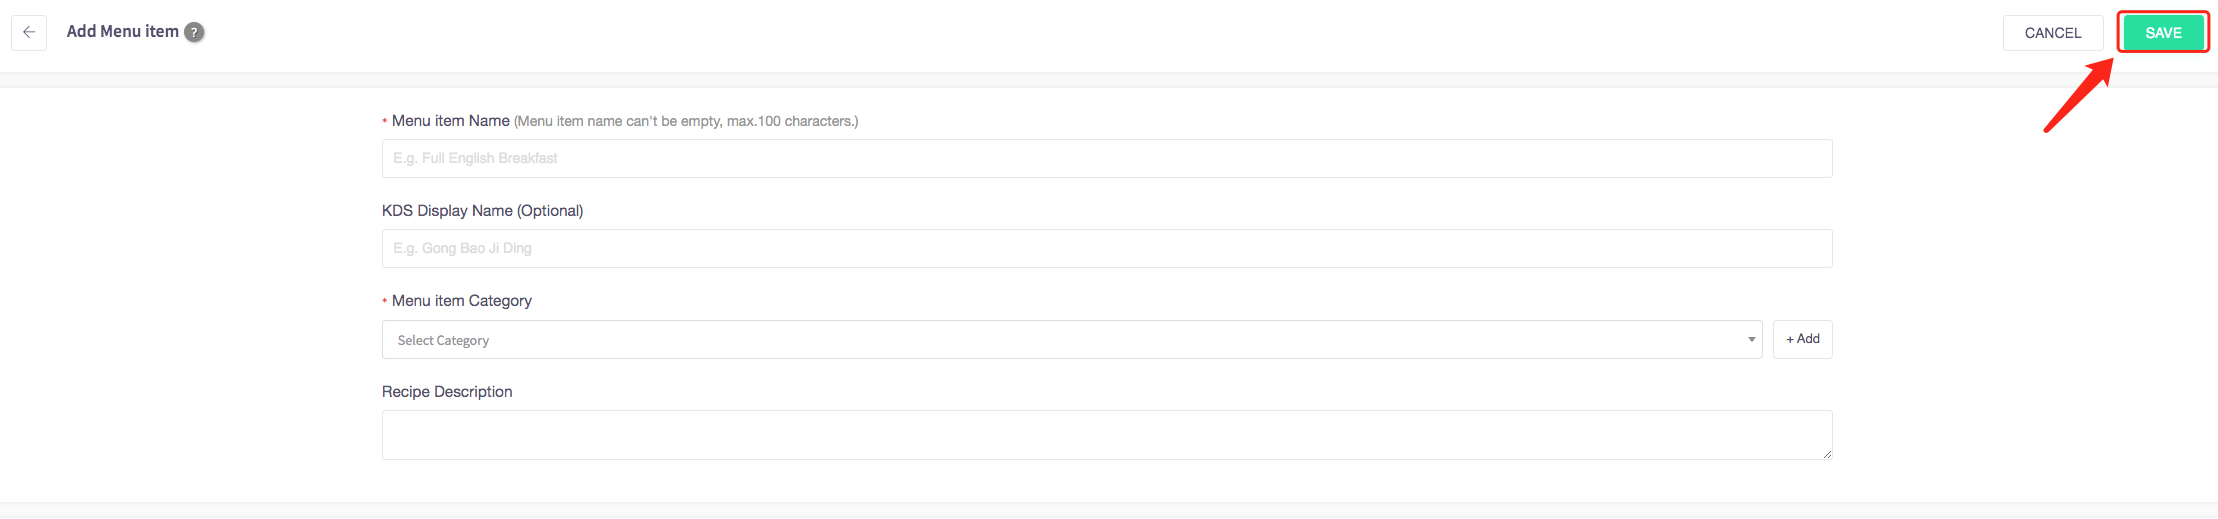
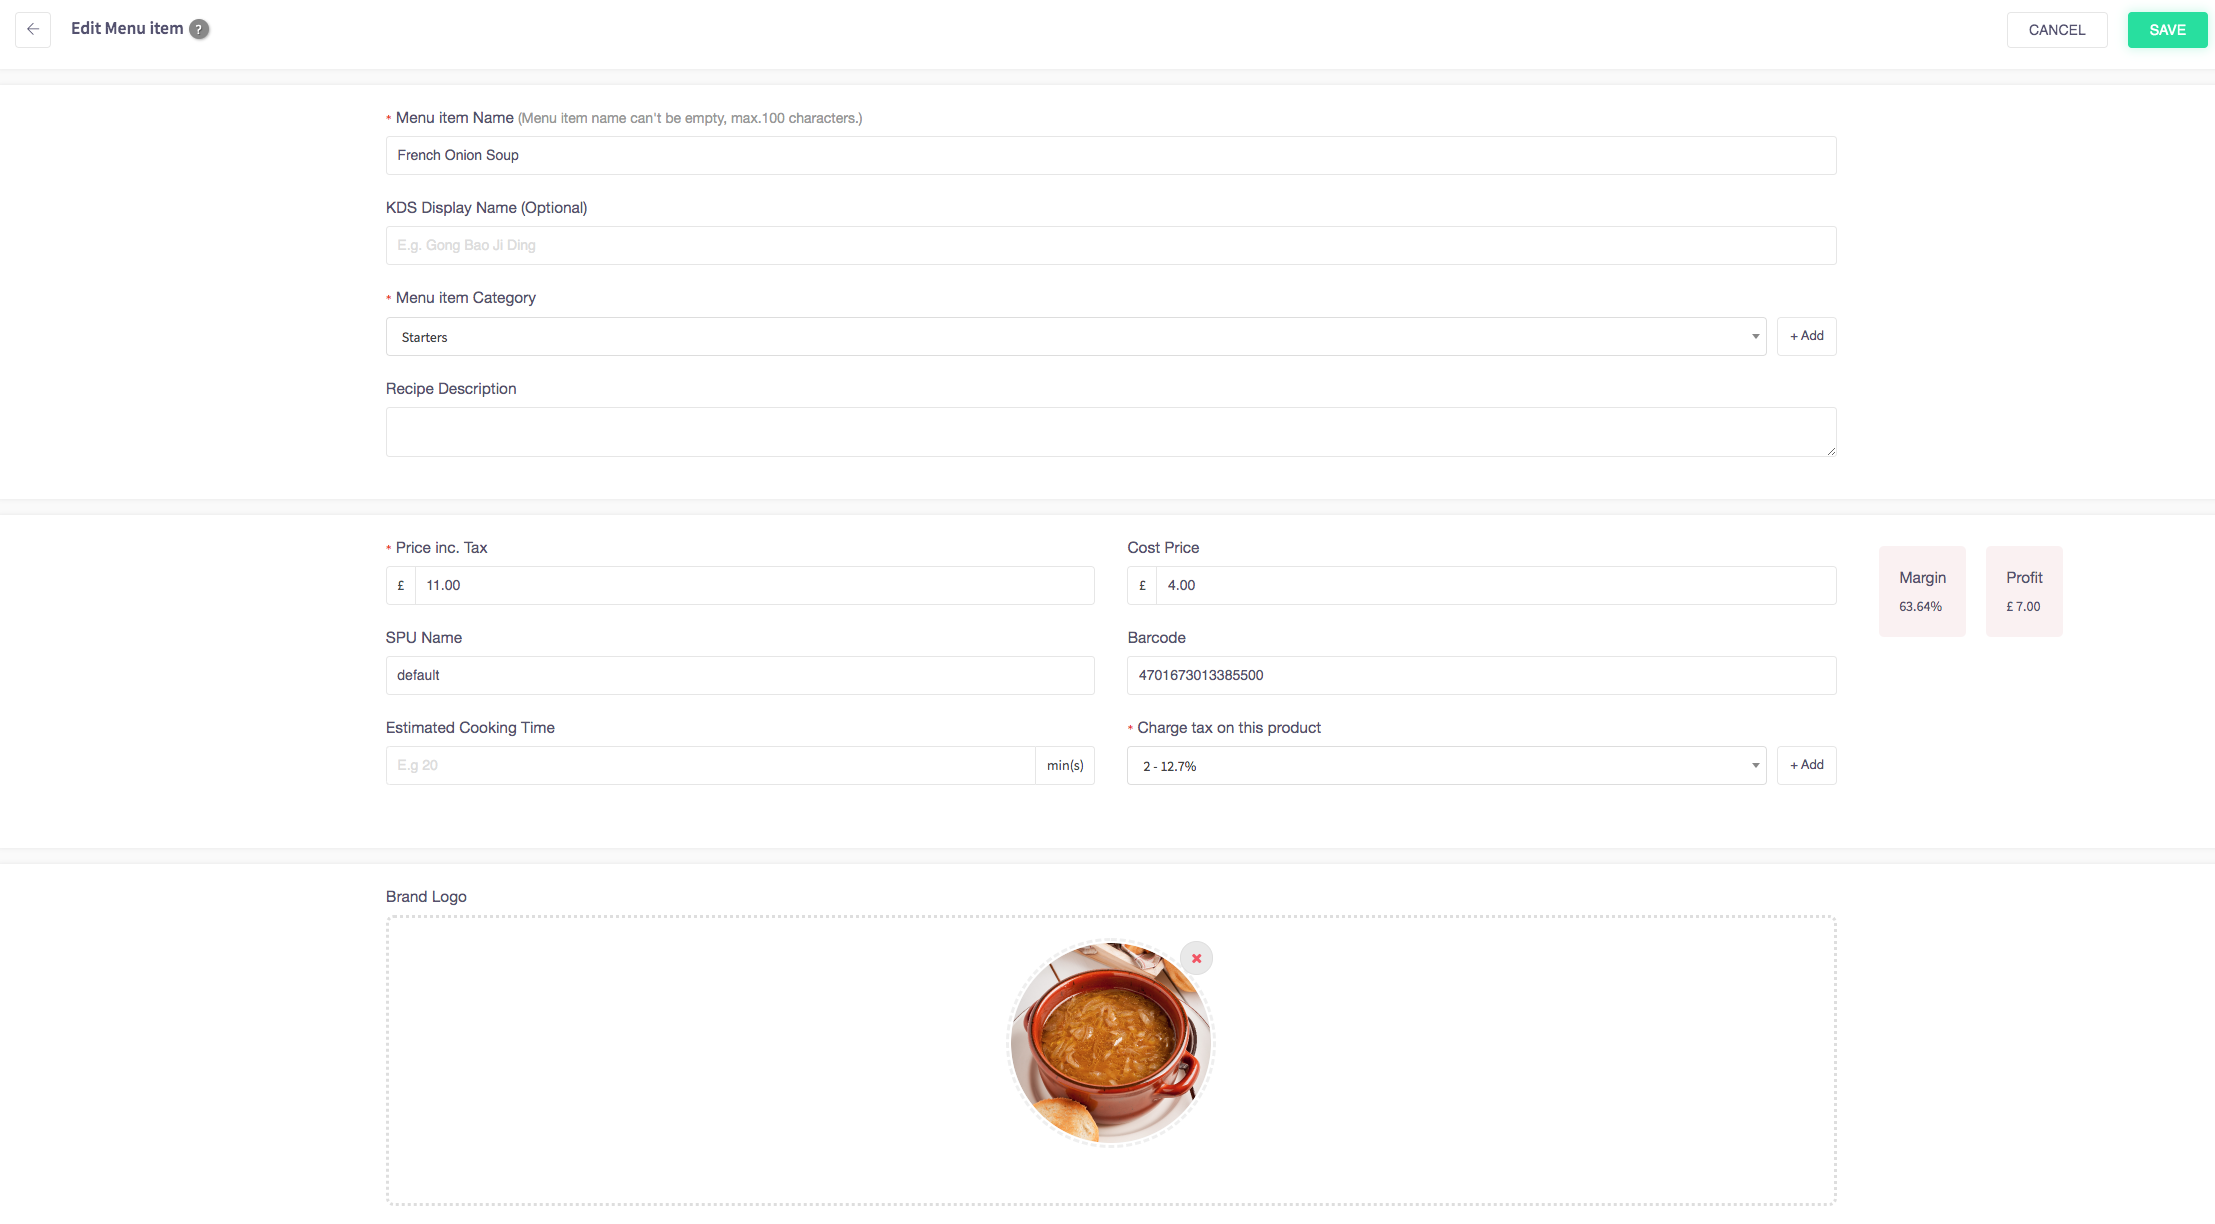
You will then be presented with a page that looks like this:
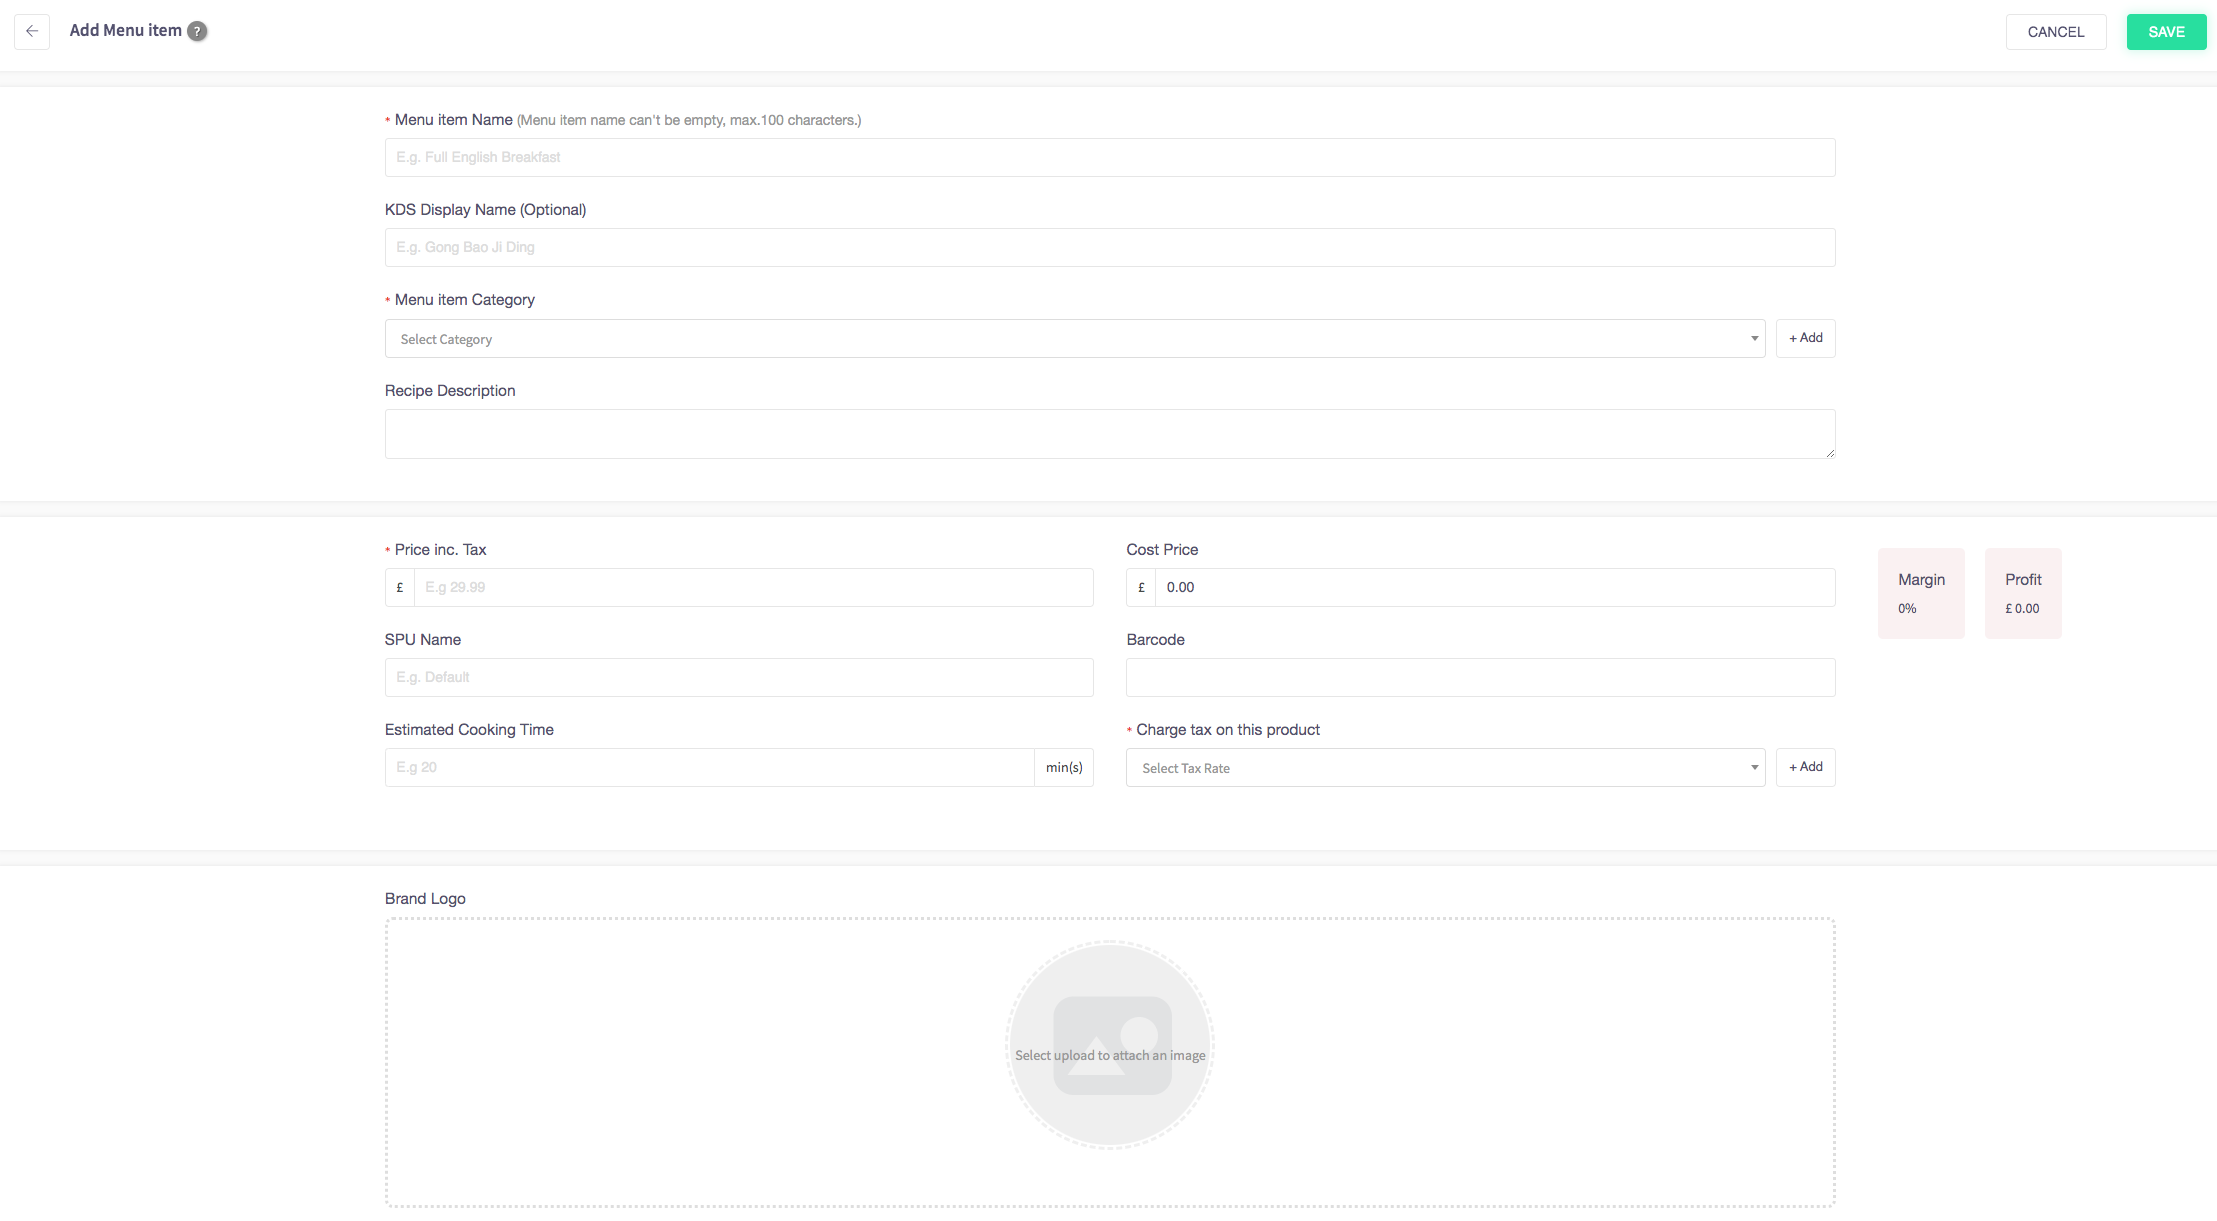
To add a menu item you must fill in the fields: 'Menu item Name', 'Menu item category', 'Price inc. Tax' and 'Charge tax on this product'
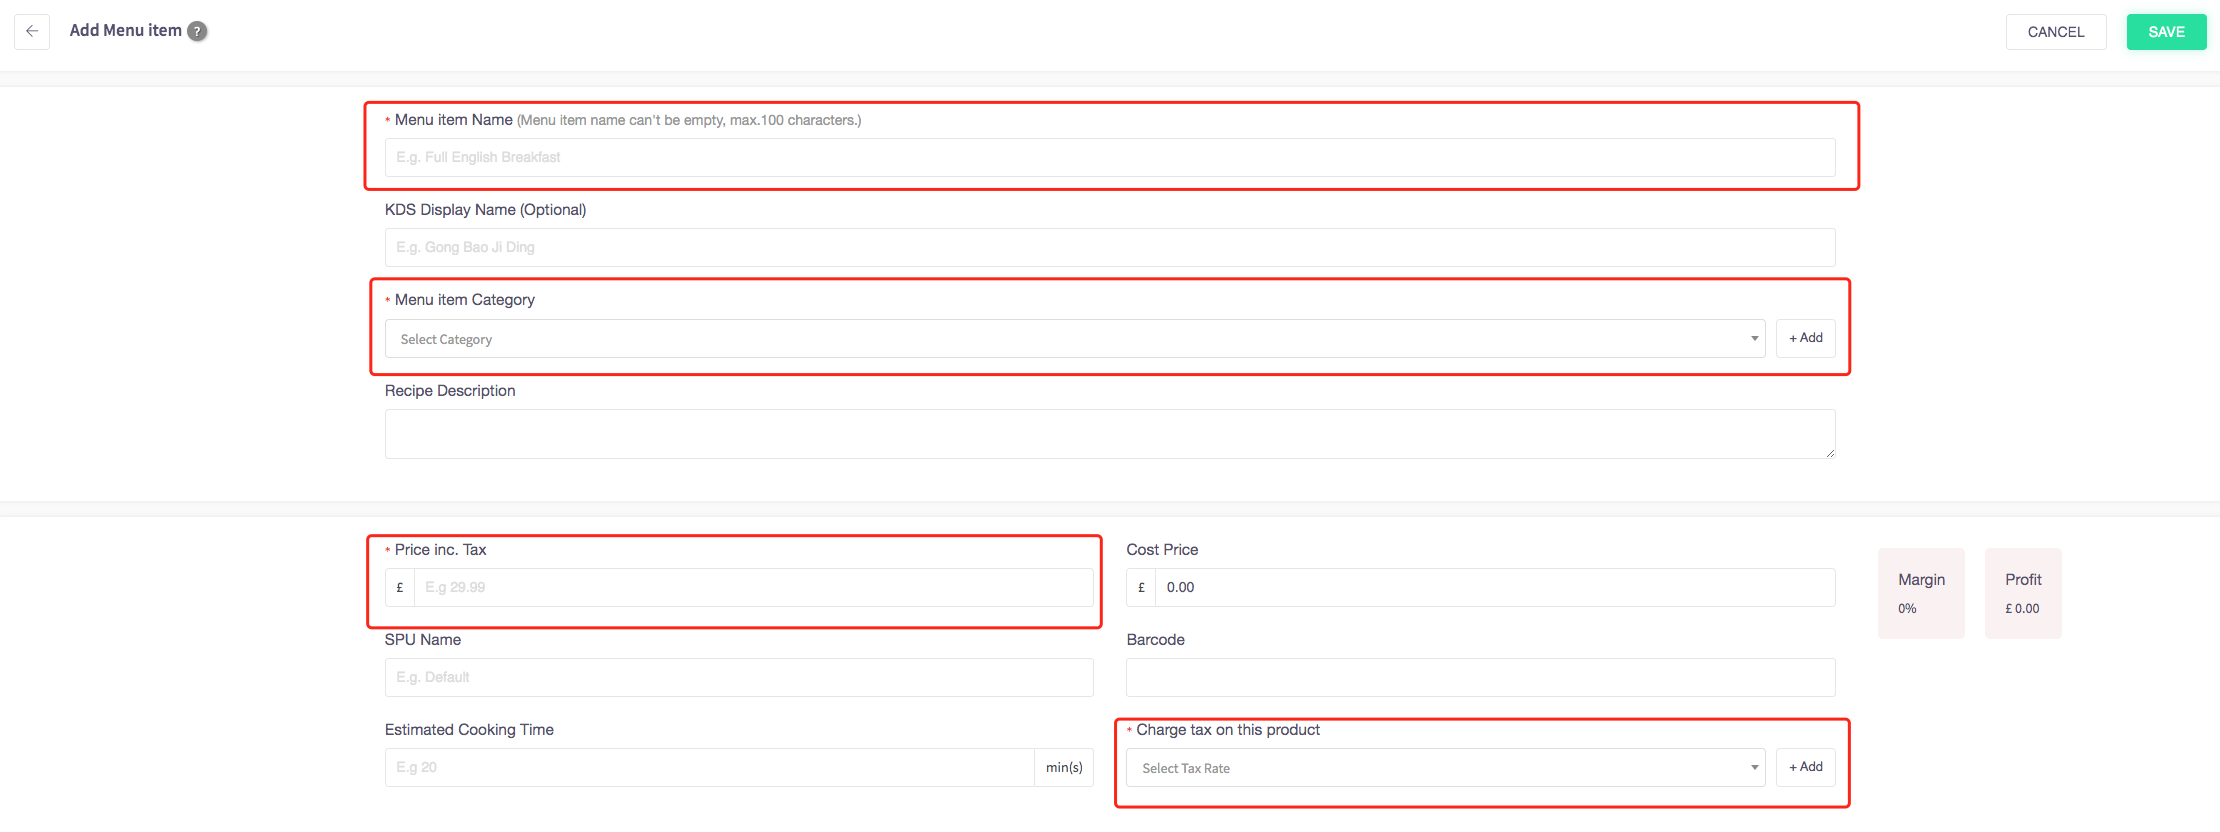
Although, if you would like to customise your menu item, you can also add things like 'Options' and a 'Brand Logo'
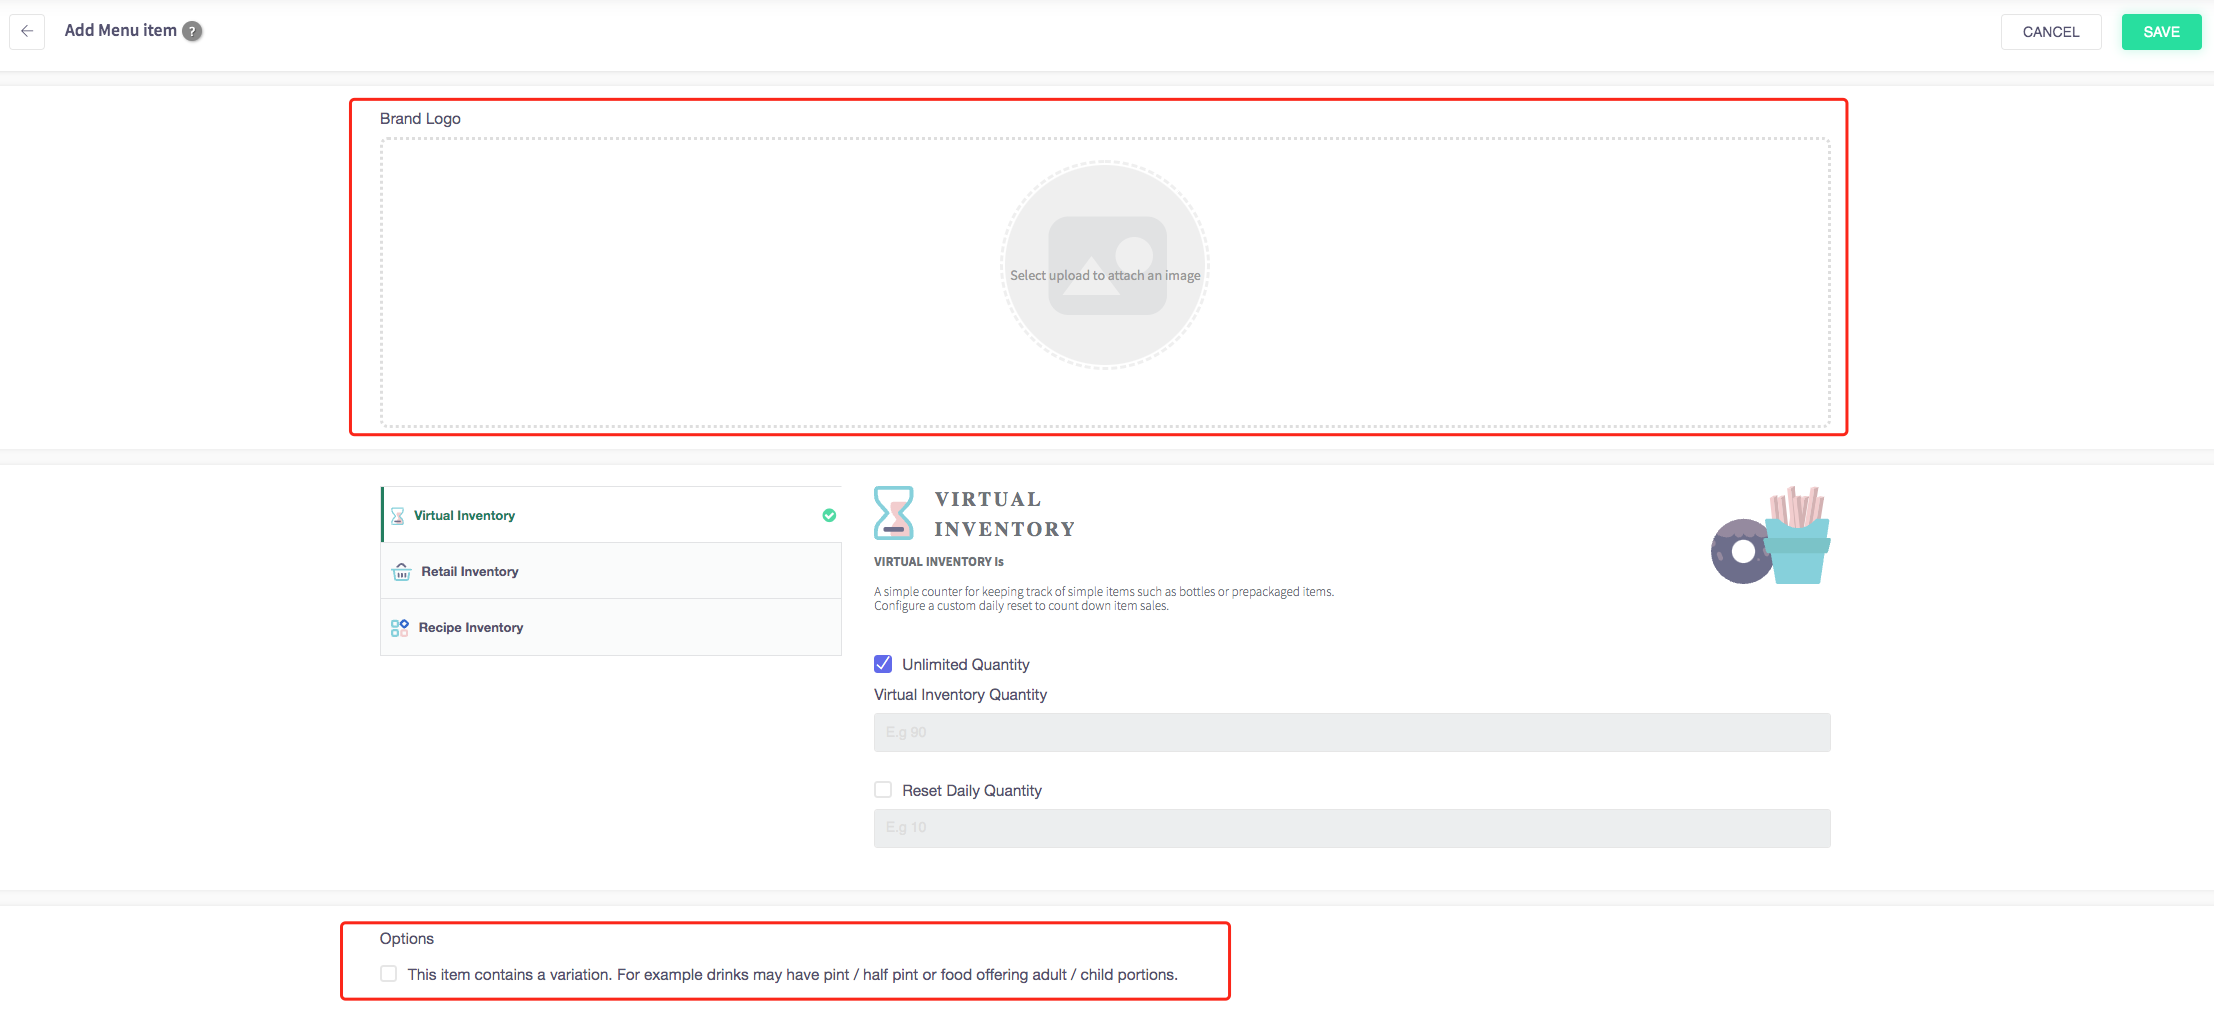
Once you have filled out your new 'Menu Item', click the green 'Save' button at the top-right of the page and your item will be added to the 'All Menu Items' list.
How to delete a menu item
This page will show you how to delete a menu item on your Cloud HQ.
Firstly, click on the 'Menu Management' on the left-hand side, then the 'All Menu Items' option in the menu.

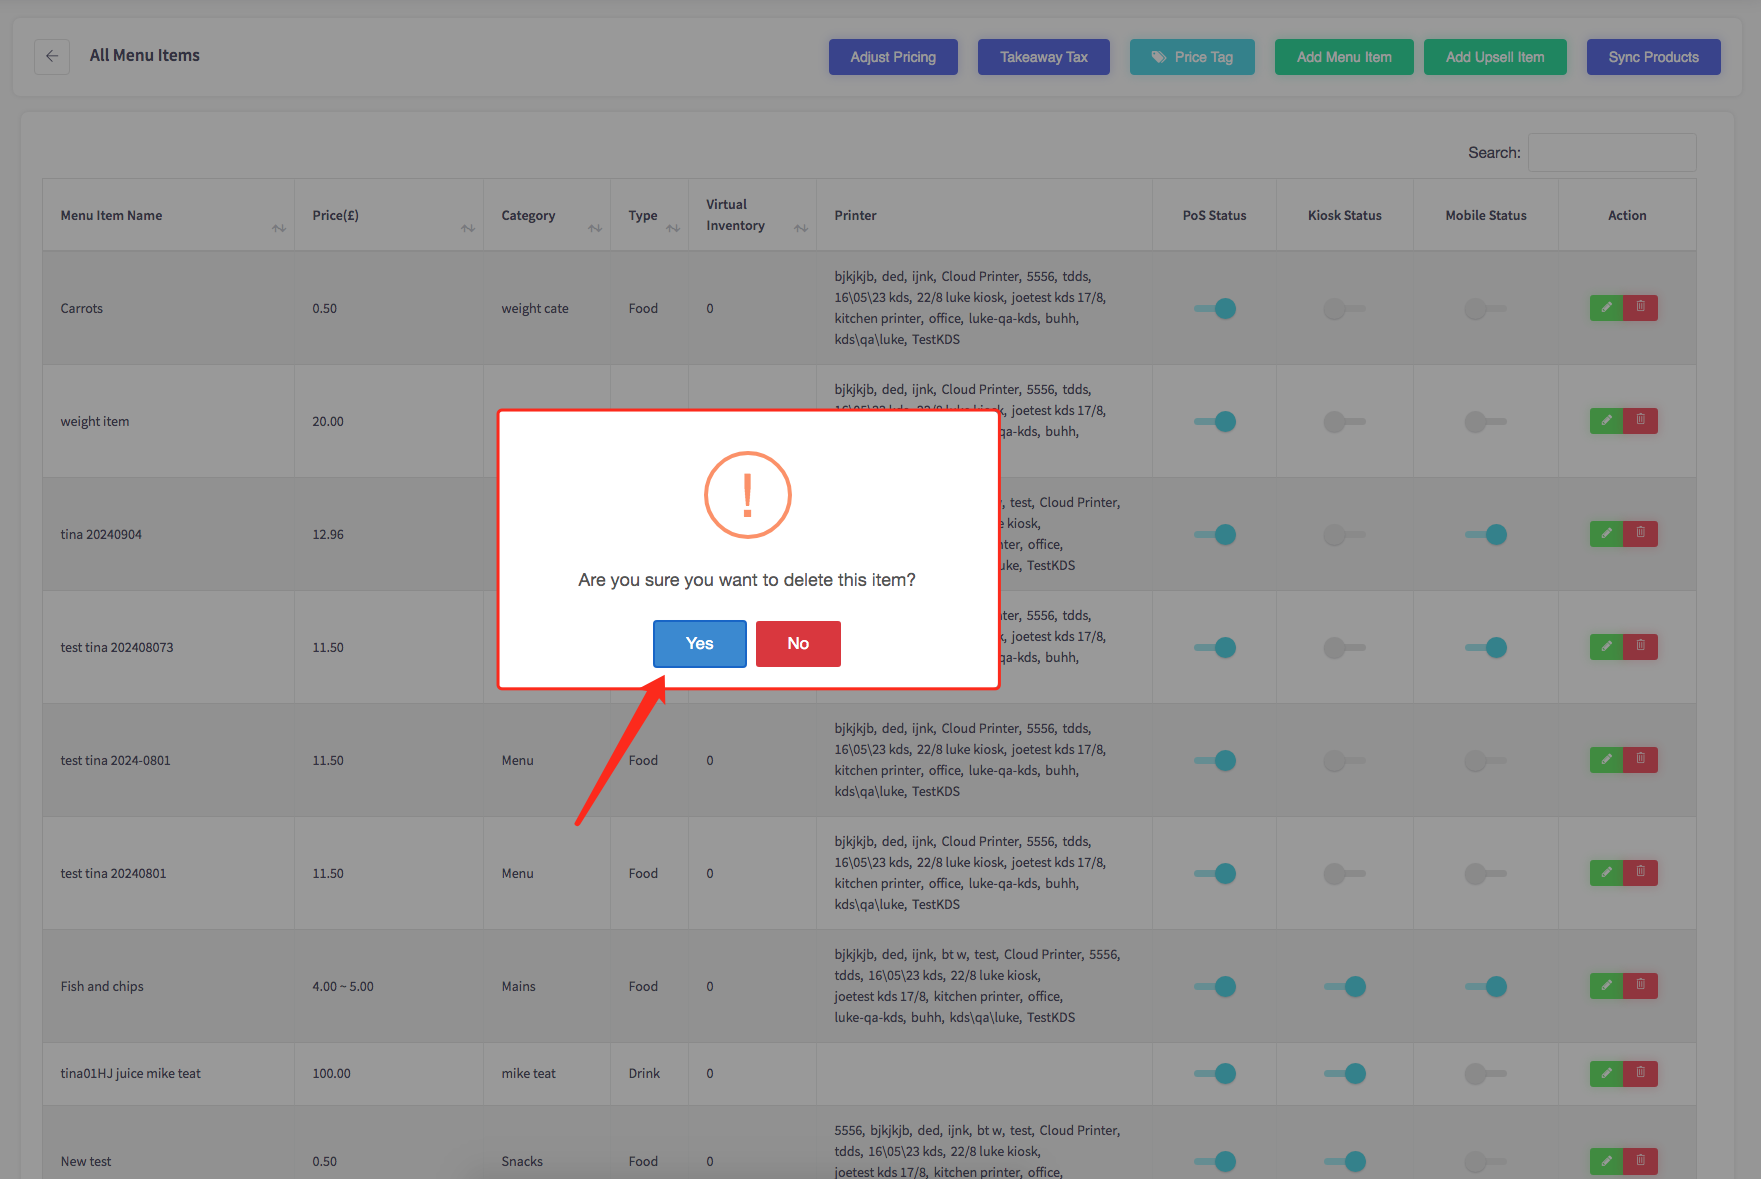
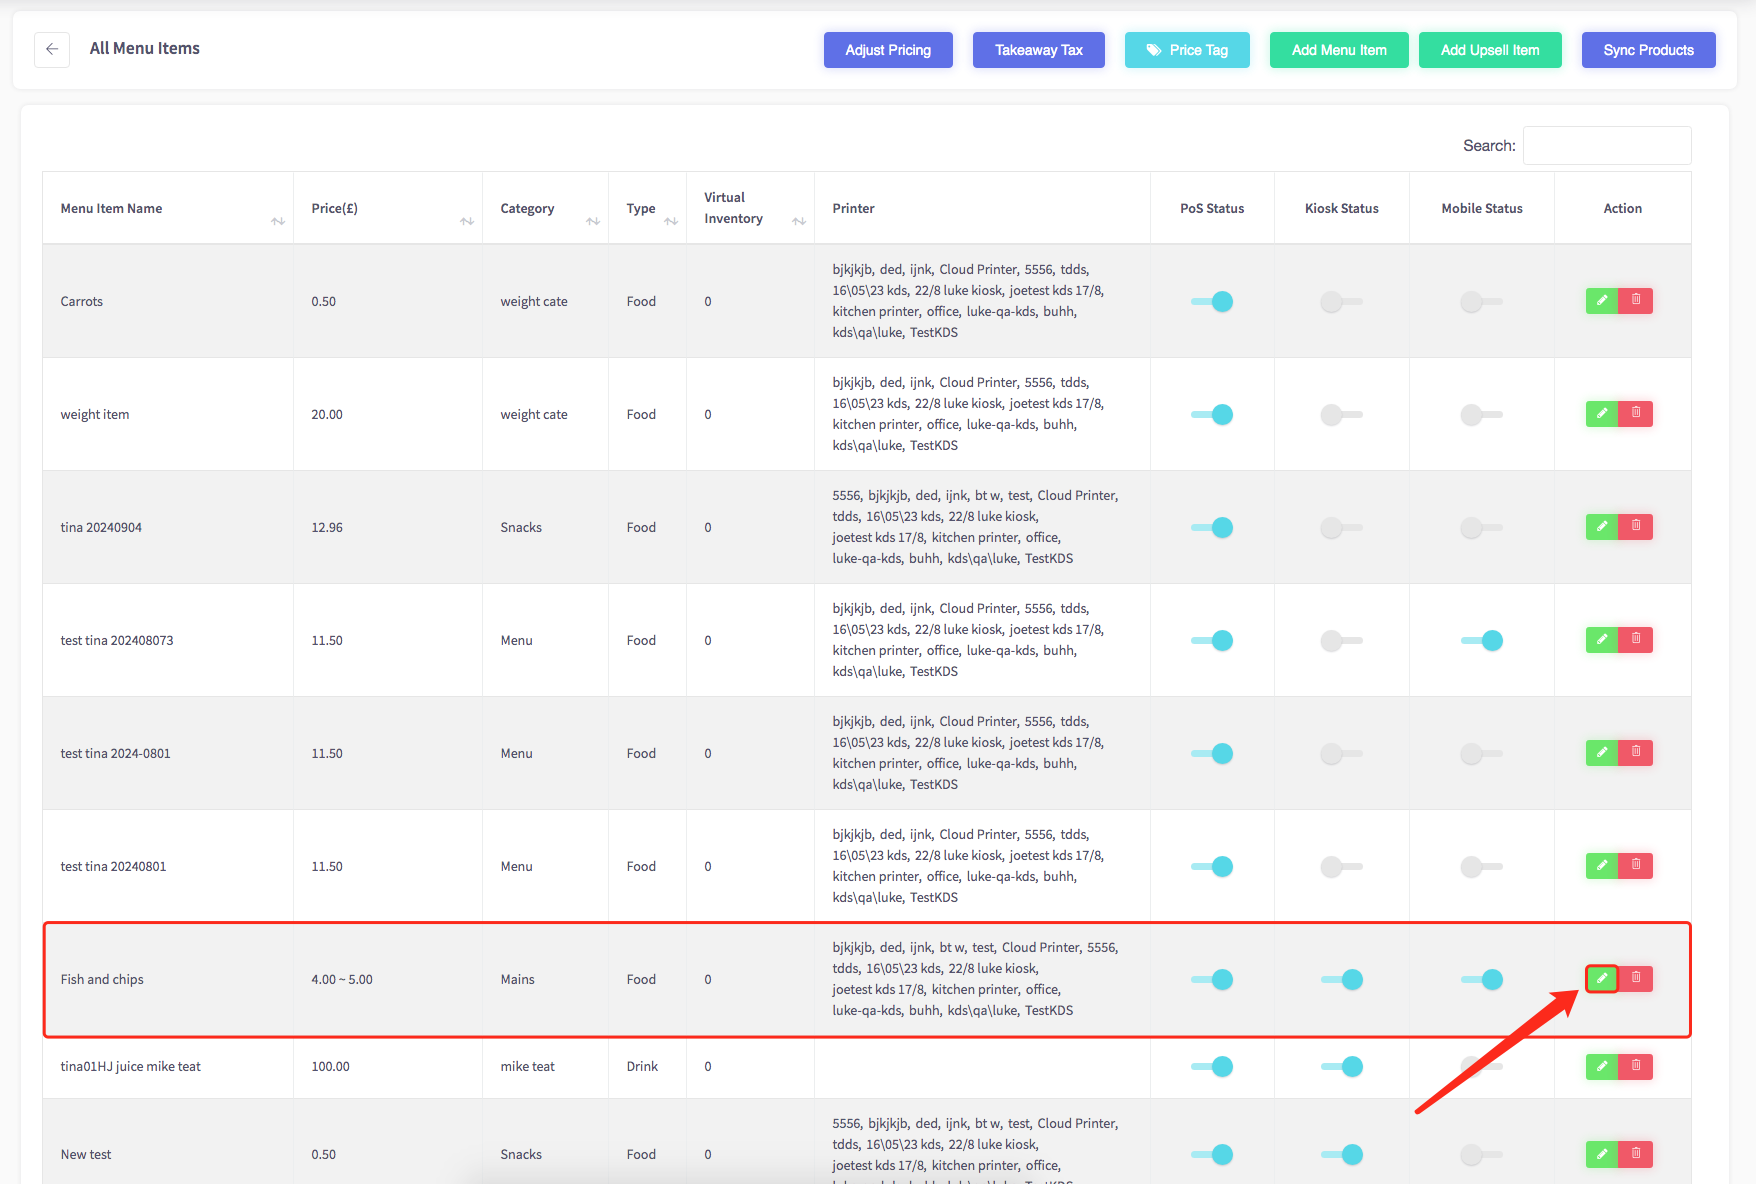
And all menu items will be displayed, shown below.

To delete a menu item select the menu item you would like to delete and click on the red bin icon on the right-side of the menu item.

A warning message will appear making sure you want to delete this item. If you do press the blue "Yes" button and your menu item will be deleted.
How to hide a menu item
This page will show you how to hide a menu item on your Cloud HQ.
Firstly, click on the 'Menu Management' on the left-hand side, then the 'All Menu Items' option in the menu.

And all menu items will be displayed, shown below.

To hide a menu item go along to the Status column of your menu items, please ensure you untoggle the correct option.

To hide a menu item click on one of the toggles and it will turn grey, this means that the item is hidden. A pop up message will appear in the bottom right-hand corner saying it has been "Saved Successfully".

How to edit a menu item
This page will show you how to edit a menu item on your Cloud HQ.
Firstly, click on the 'Menu Management' on the left-hand side, then the 'All Menu Items' option in the menu.

And all menu items will be displayed, shown below.

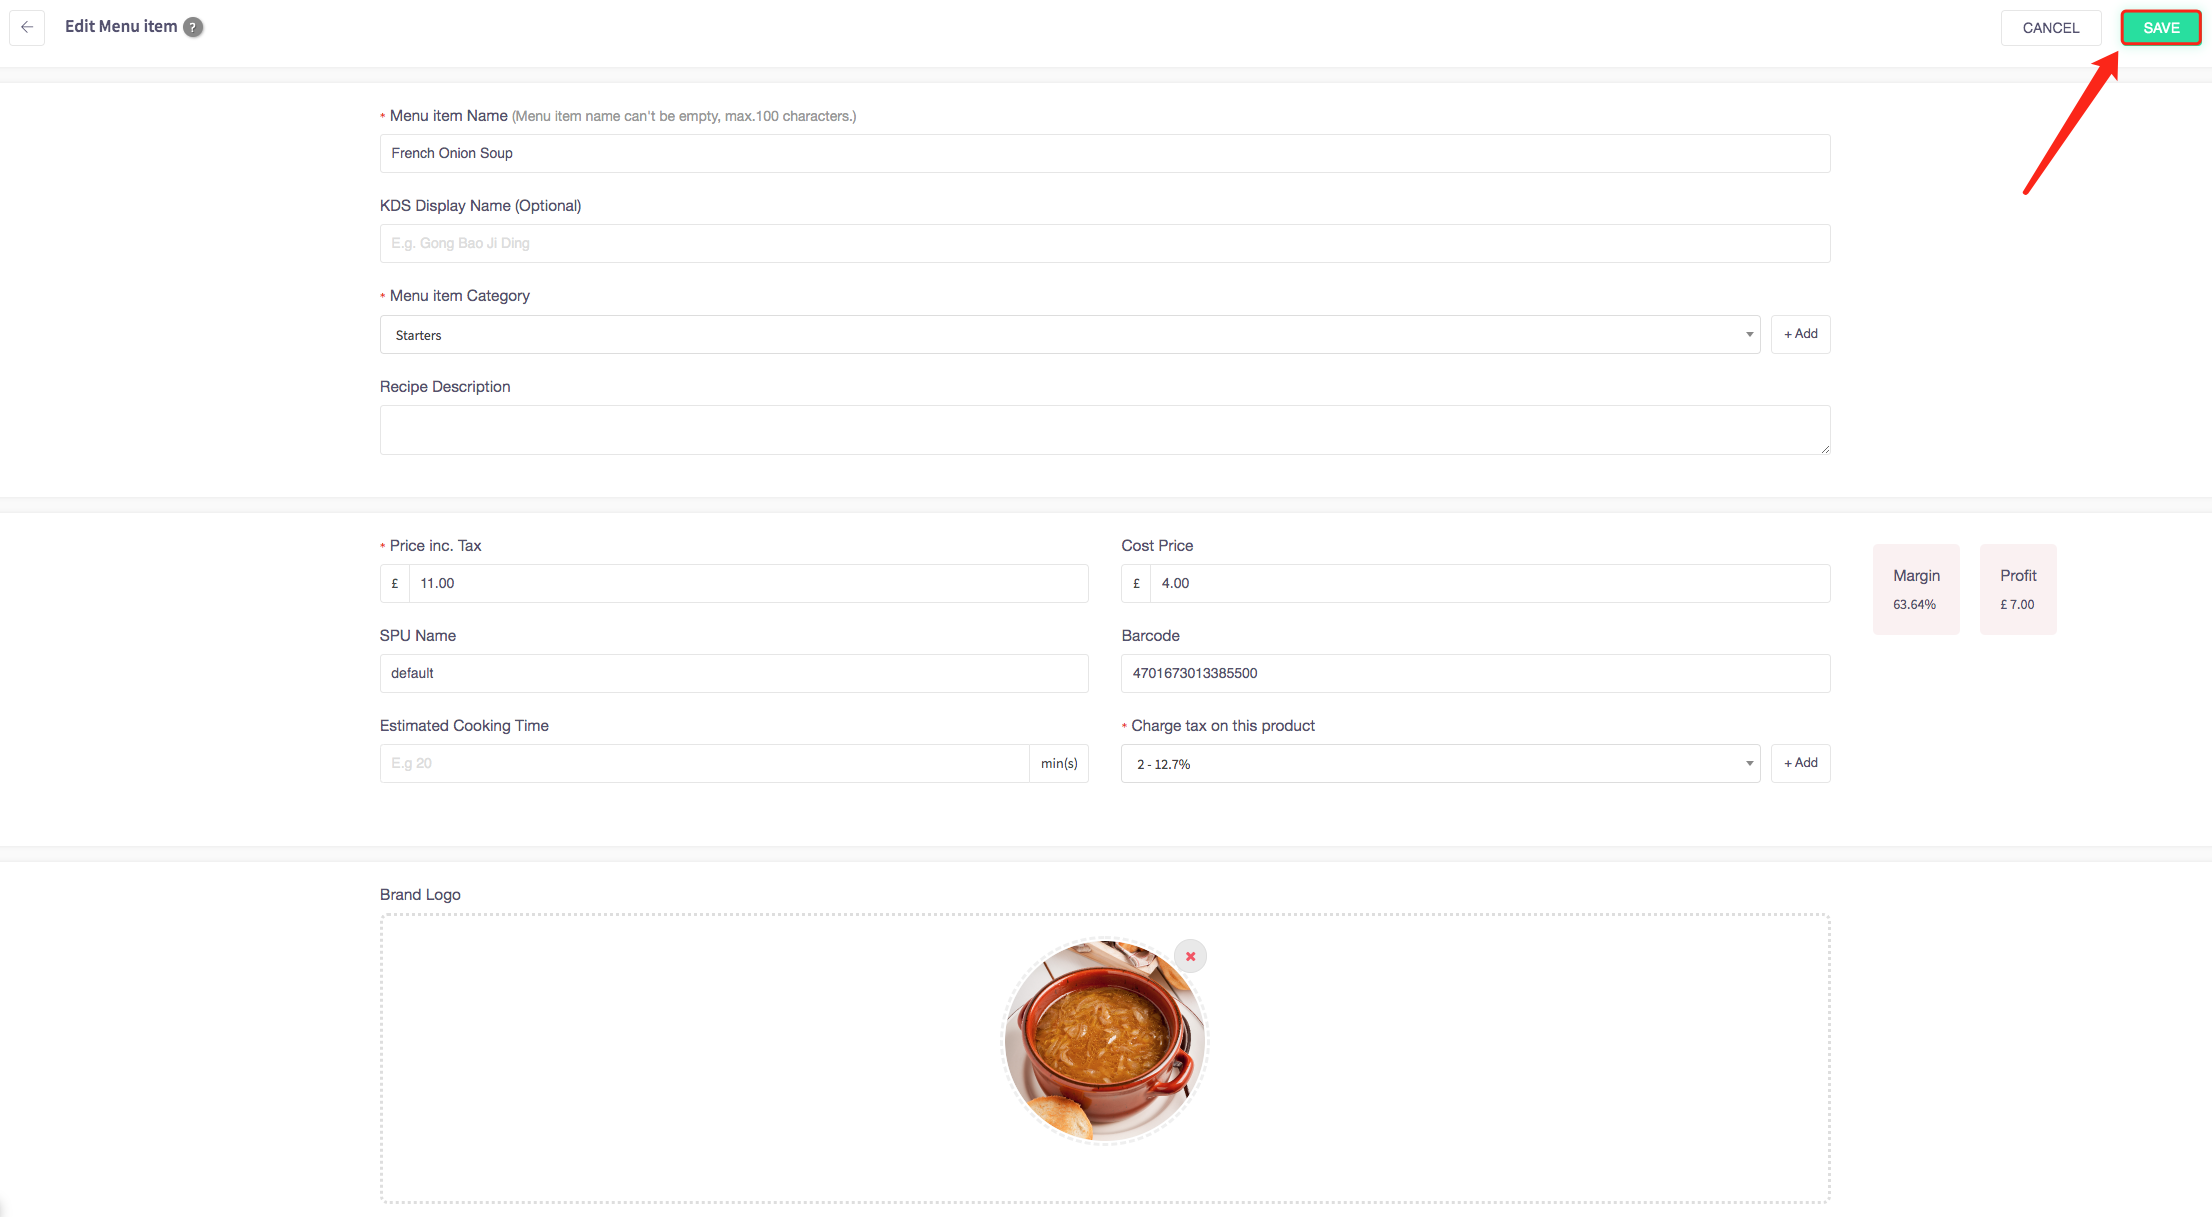
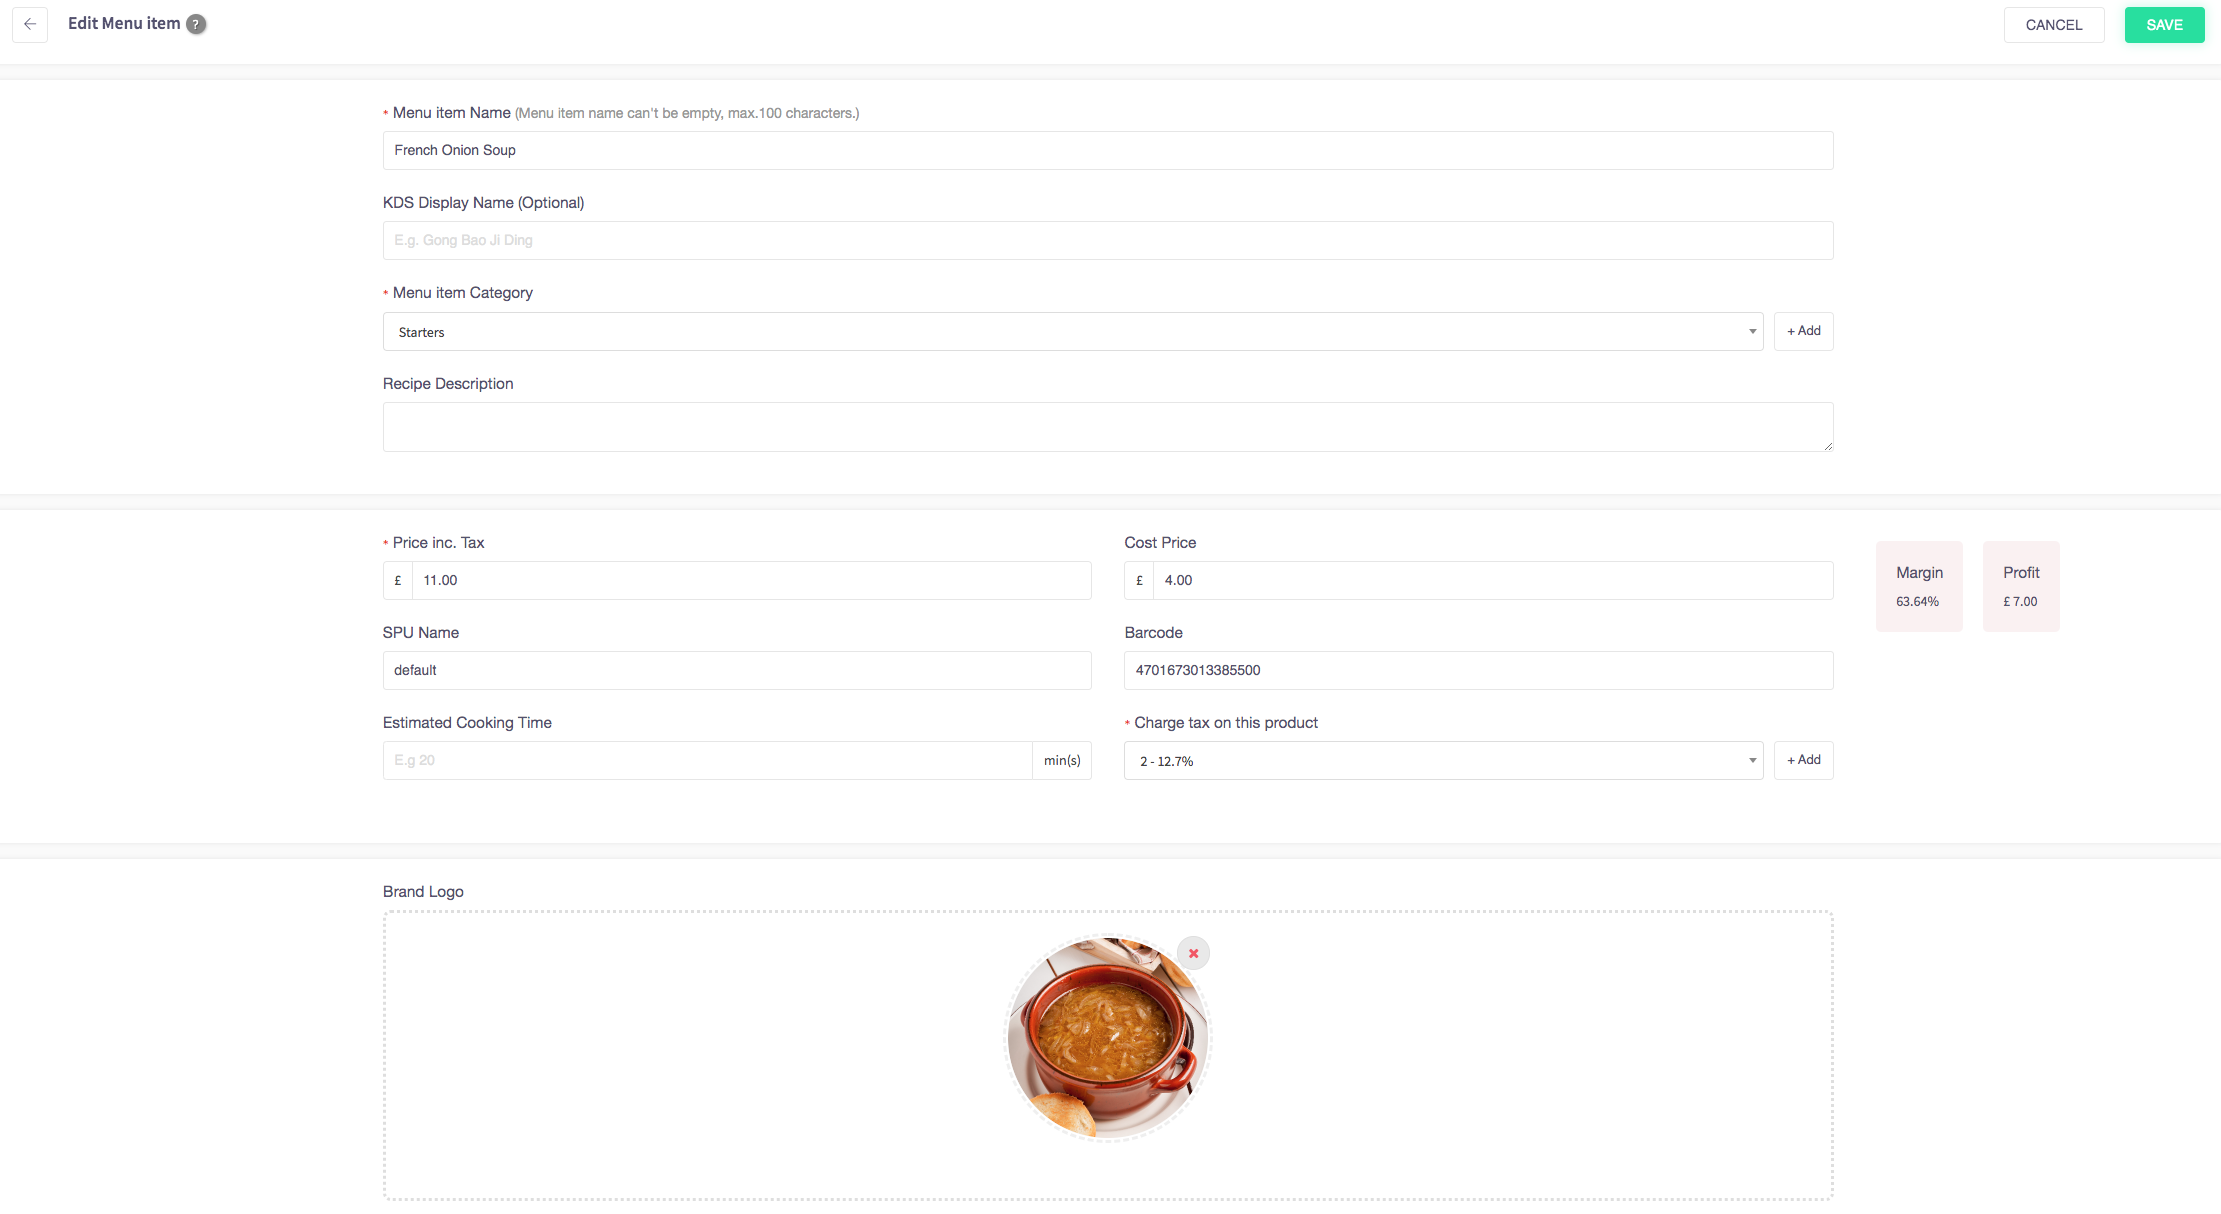
To edit a menu item select the menu item you would like to edit and click on the green pencil icon on the right-side of the menu item.

Here it will display many options where you can edit the item details such as the menu item name, item category, tax rate, available time range, recipe description, stick print enable, allergens and brand logo.
You can also edit the "Self Ordering Details" where you can enable self ordering, add an image of your product, add tags, you can add a description and can use the toggles to enable whether it is a popular, new, vegetarian or featured item.
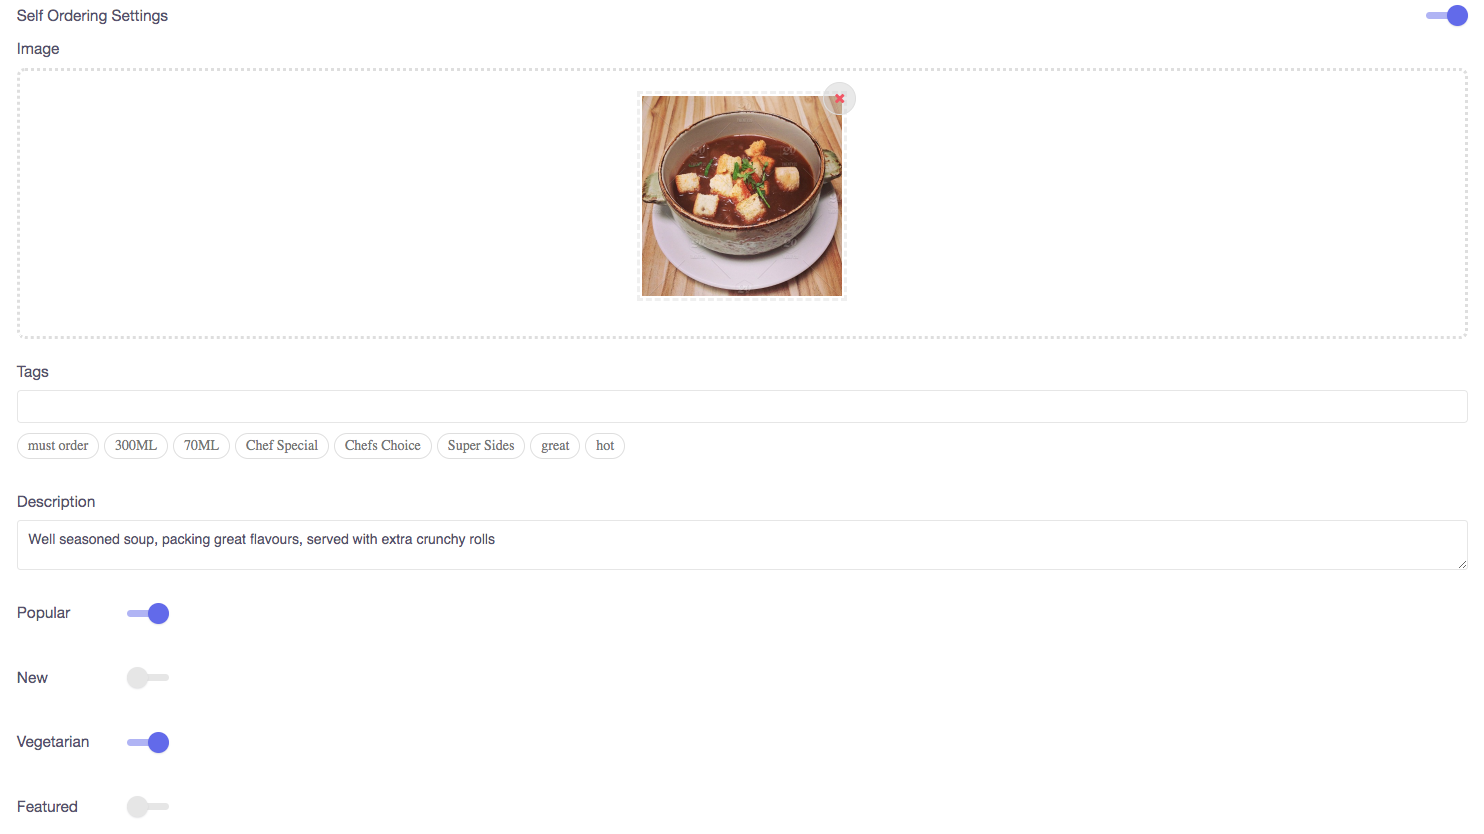
Also, make sure to click the green 'SAVE' button at the top-right of the screen.
How to assign a barcode to a menu item
This page will show you how to assign a barcode to a menu item on your Cloud HQ.
Firstly, click on the 'Menu Management' on the left-hand side, then the 'All Menu Items' option in the menu.
And all menu items will be displayed, shown below.

Select an item you would like to assign a barcode to, and click on the green pencil icon on the right-side of the menu item.
Then the item details will display.
Locate 'barcode' and input a barcode to assign it to the product.
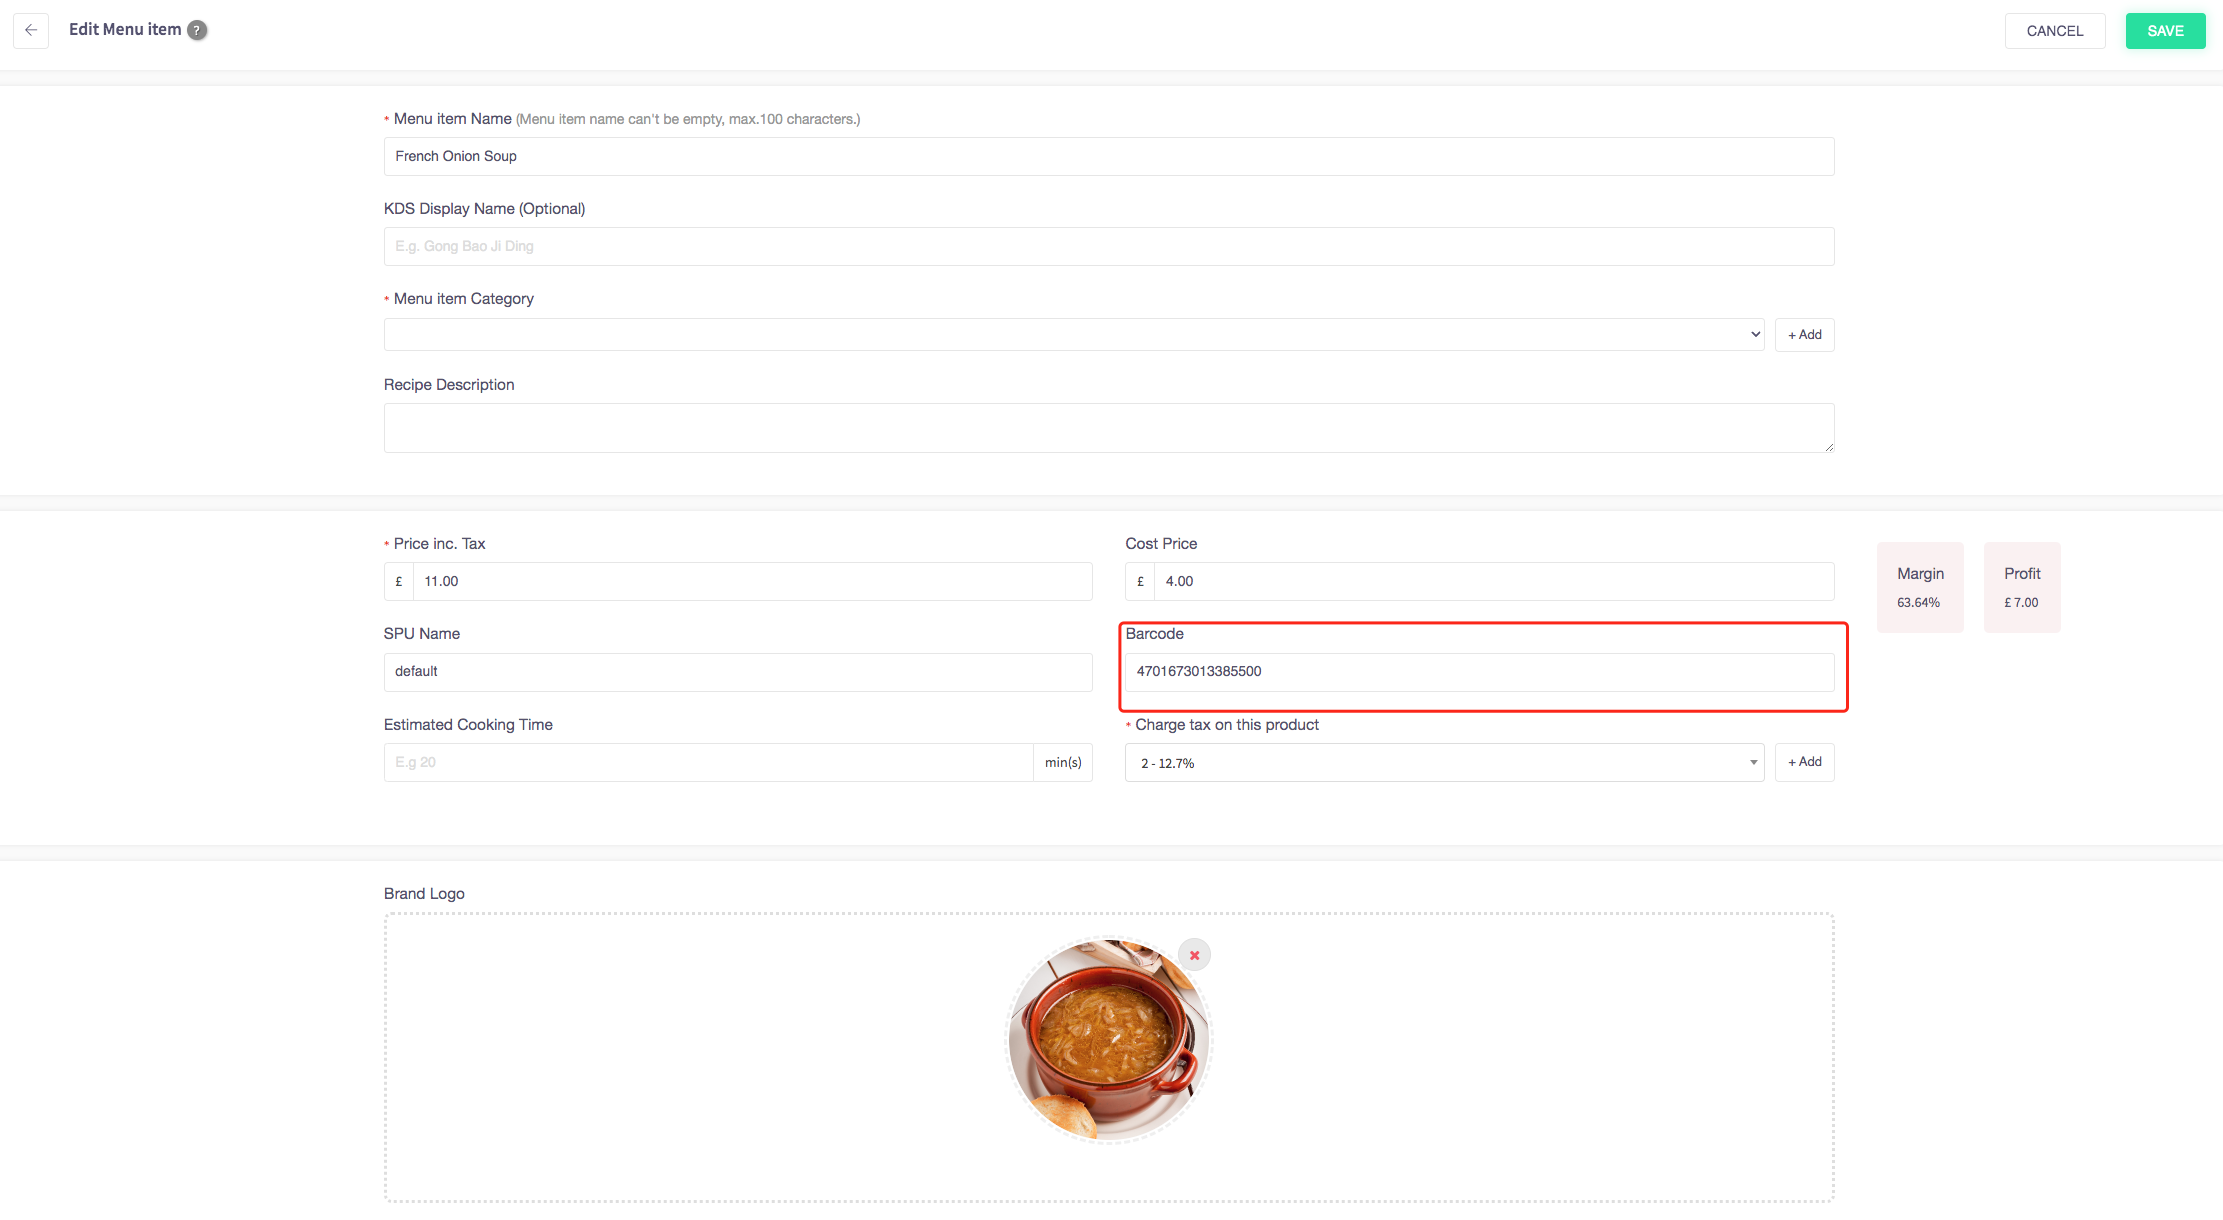
When you have inputted a barcode press the green "Save" button and the barcode will be assigned to the product item.