- How to create a menu category
- How to hide a menu category
- How to delete a menu category
- How to edit a menu category
- How to view the menu items of each category
- How to change the order of menu categories
How to create a menu category
This guide will walk you through the process of setting up menu categories.
Log in to SPARK EPoS Cloud HQ before you begin.
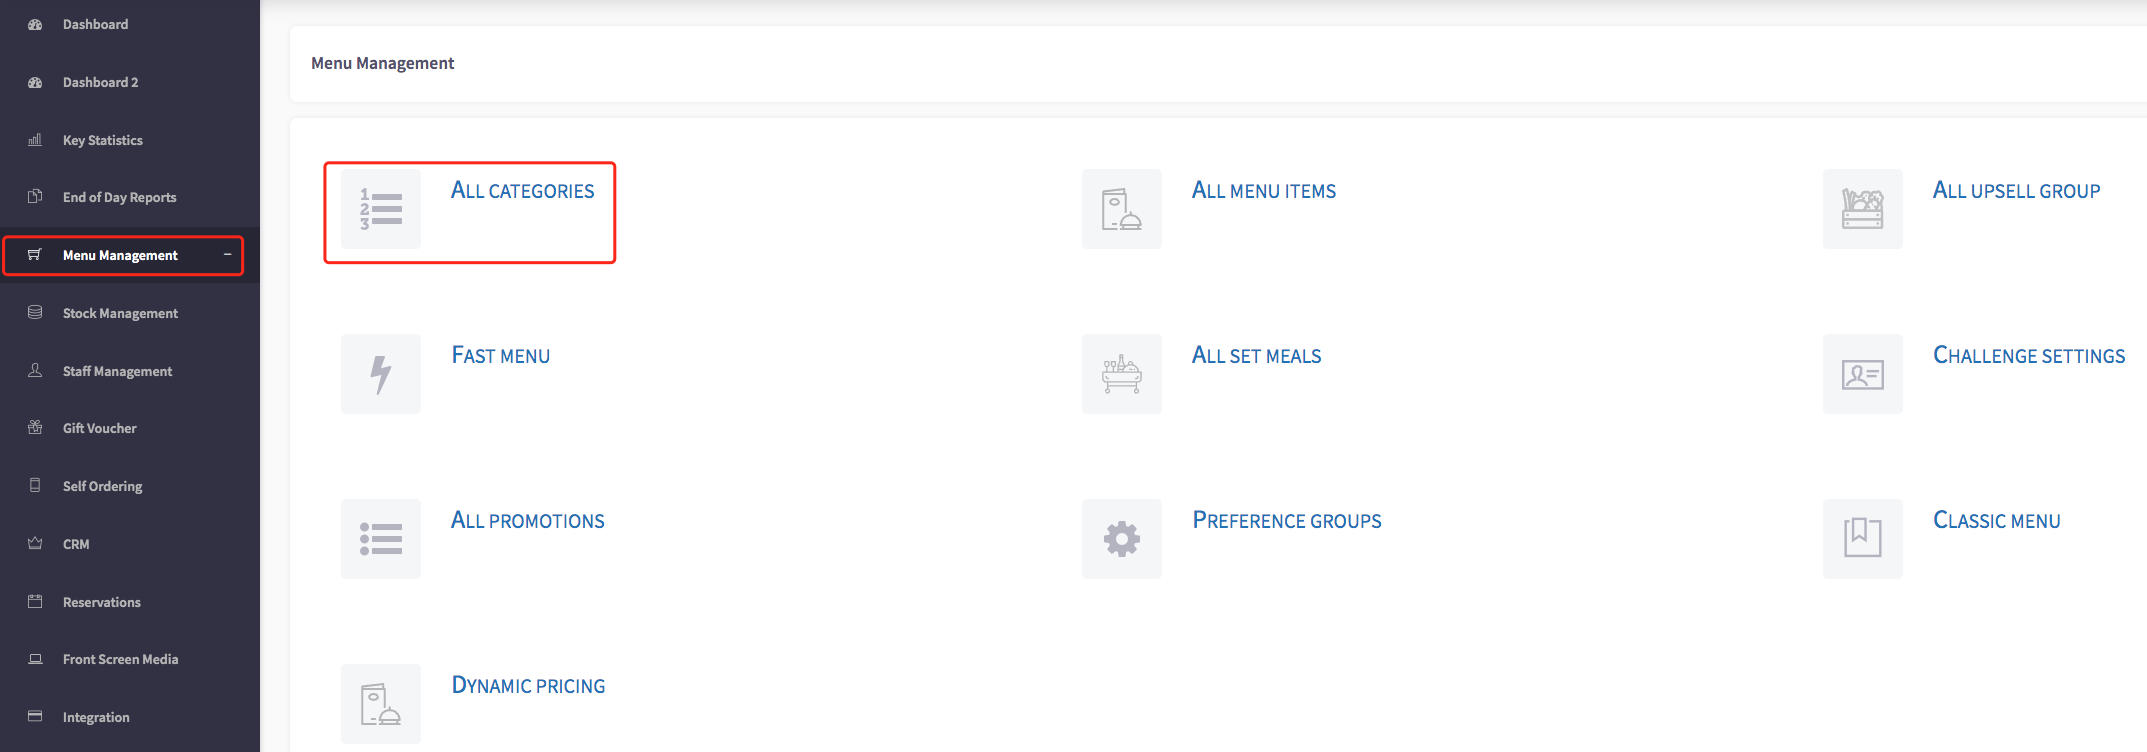
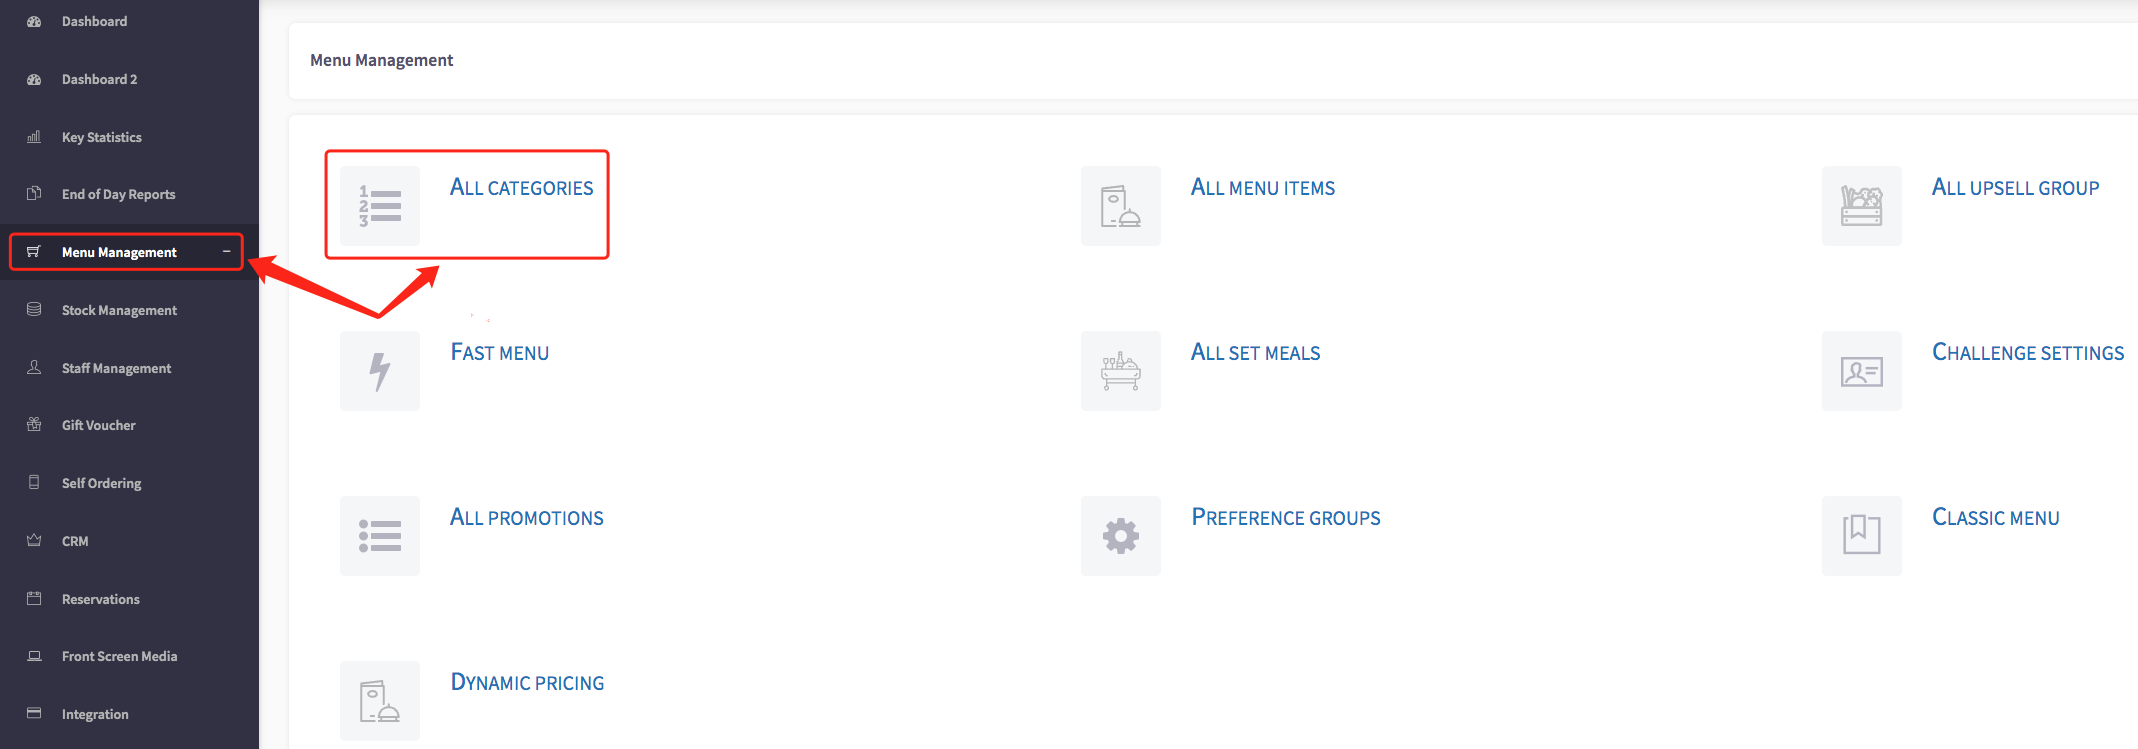
In the left-hand toolbar, go to 'Menu Management', then click 'All categories'.
A list of menu categories will appear on the following screen. If you are creating your first category, the table below will be empty. Click the green "Add Category" button in the top-right.
You will then be brought to the 'Add Category' page. Begin by entering the name of your category and deciding which parent category it belongs to: Food, Drink, or Other.

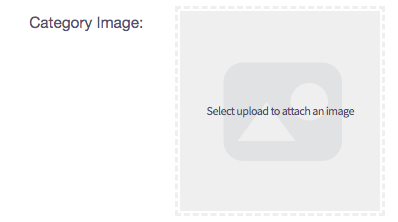
You may upload an image to represent your new category. We recommend doing this for frequently ordered menu items to make them more easily distinguishable.
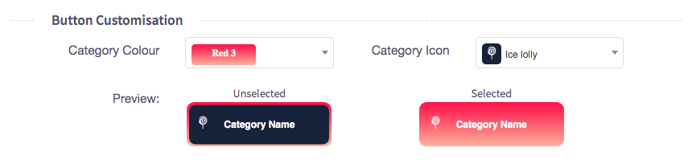
The options below allow you to change both the icon and the colour of the button used to represent your category on the POS terminal. You may wish to consider colour-coding your categories if you have a large number of them.
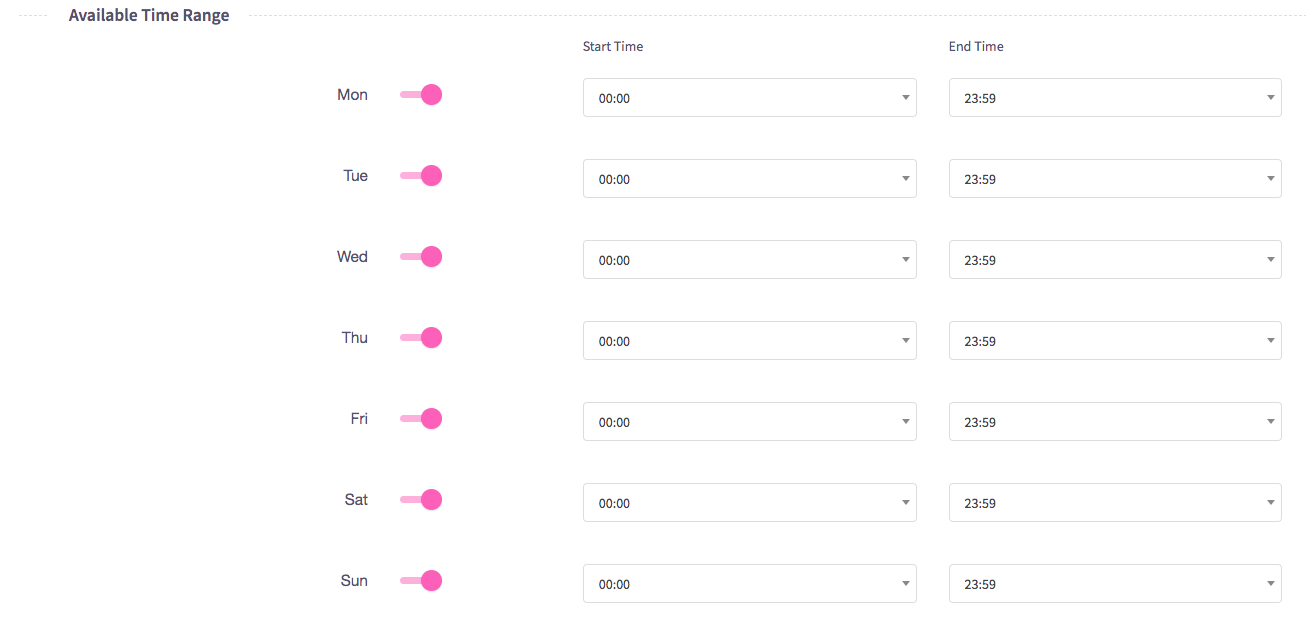
Categories can be made available at certain times of day, ideal if your establishment provides different offerings at breakfast, lunch and/or dinner.
Click the green 'Save' button to finalise your changes and add your new category to your menu. You can see the changes live on your POS terminal by hitting the <- arrow in the top-left of your display and then the "SYNC & Network" button to refresh your menu.
How to hide a menu category
This guide will show you how to hide a menu category.
Go to 'Menu Management' in the toolbar on the left. Click 'All categories'.
A list of menu categories will appear on the following screen.
Active categories are indicated by a light blue slider in the third column. When the slider is in this position, the category will display on your POS devices and is ready to order. Clicking the slider will toggle it between the "on" and "off" positions.

Likewise, inactive (or "hidden") categories, are indicated by the same slider, except greyed-out. Hidden categories will not display on any POS devices.

How to delete a menu category
This guide will show you how to delete a menu category.
Go to 'Menu Management' in the toolbar on the left. Click 'All categories'.
A list of menu categories will appear on the following screen.
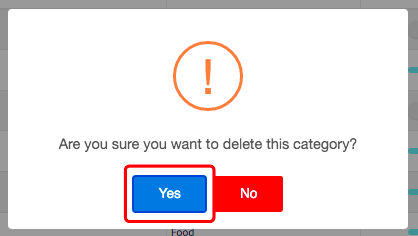
To delete a menu category, you can click on the red bin icon, shown here.

Warning: Deleted categories cannot be recovered! Be sure you want to do this before you continue.
Click 'Yes' to confirm.
How to edit a menu category
This guide will show you how to edit a menu category.
Go to 'Menu Management'. Click 'All categories'.
A list of menu categories will appear on the following screen.
To edit a menu category, you can click on the green pencil icon, shown here.

This will then take you to this box where you are able to change the category image, change the category name, colour, icon, and parent category.
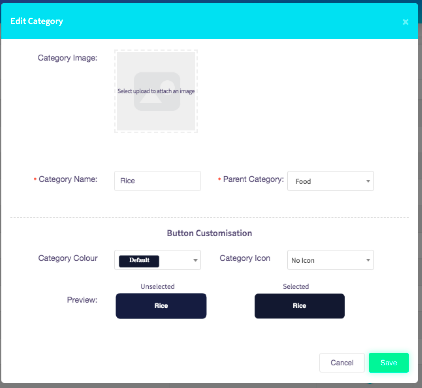
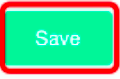
Once you have made all of the changes you would like to do, you can click on the 'Save' button.
How to view the menu items of each category
This guide will show you how to view the menu items of each category.
Go to 'Menu Management'. Click 'All categories'.
A list of menu categories will appear on the following screen.
Click on the blue list icon.

All items which currently have the selected category assigned to them will show up on the next screen.

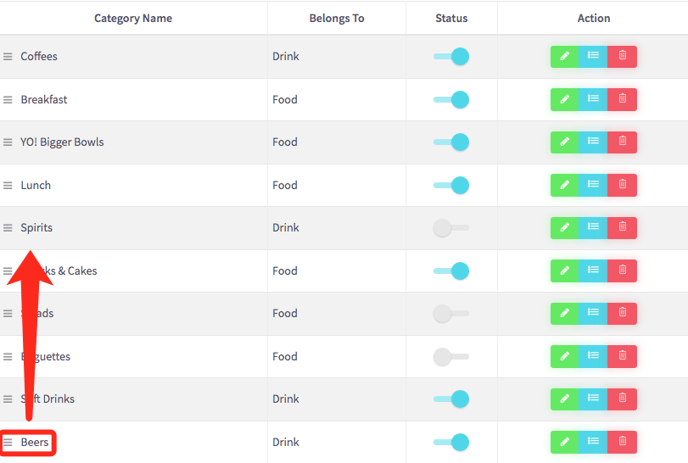
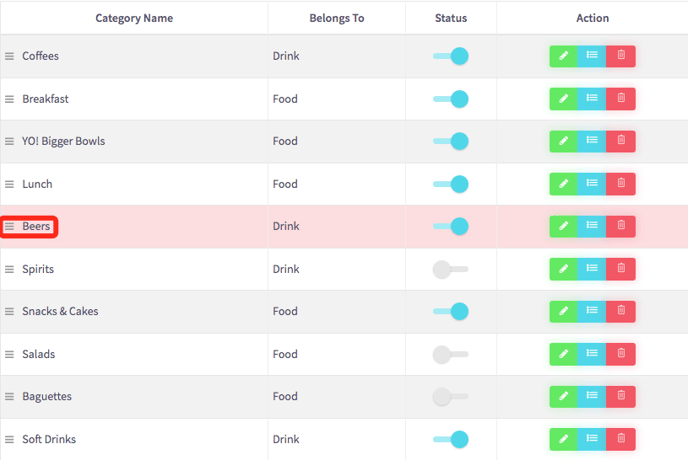
How to change the order of menu categories
This guide will show you how to change the order of menu categories.
Go to 'Menu Management'. Click 'All Categories'.
This will then show all of the menu categories, shown here.
Click and drag the category you would like to reposition on your menu. In the example given below, we have moved the 'Beers' category up so that it is adjacent to 'Spirits'.