- How to check stock
- How to move stock
- How to create stock locations
- How to view stock reports
- How to use the traffic light system
- How to add a new supplier
- How to add or change the par level
- How to remove stock items
Before you do anything, make sure you login into your store account SparkEpos
How to check stock
This guide will show you how to check stock to your Cloud HQ.
Firstly, click on the 'Stock Management' option on the left-hand menu, then the 'Check Stock List' in the 'Stock Management' section.

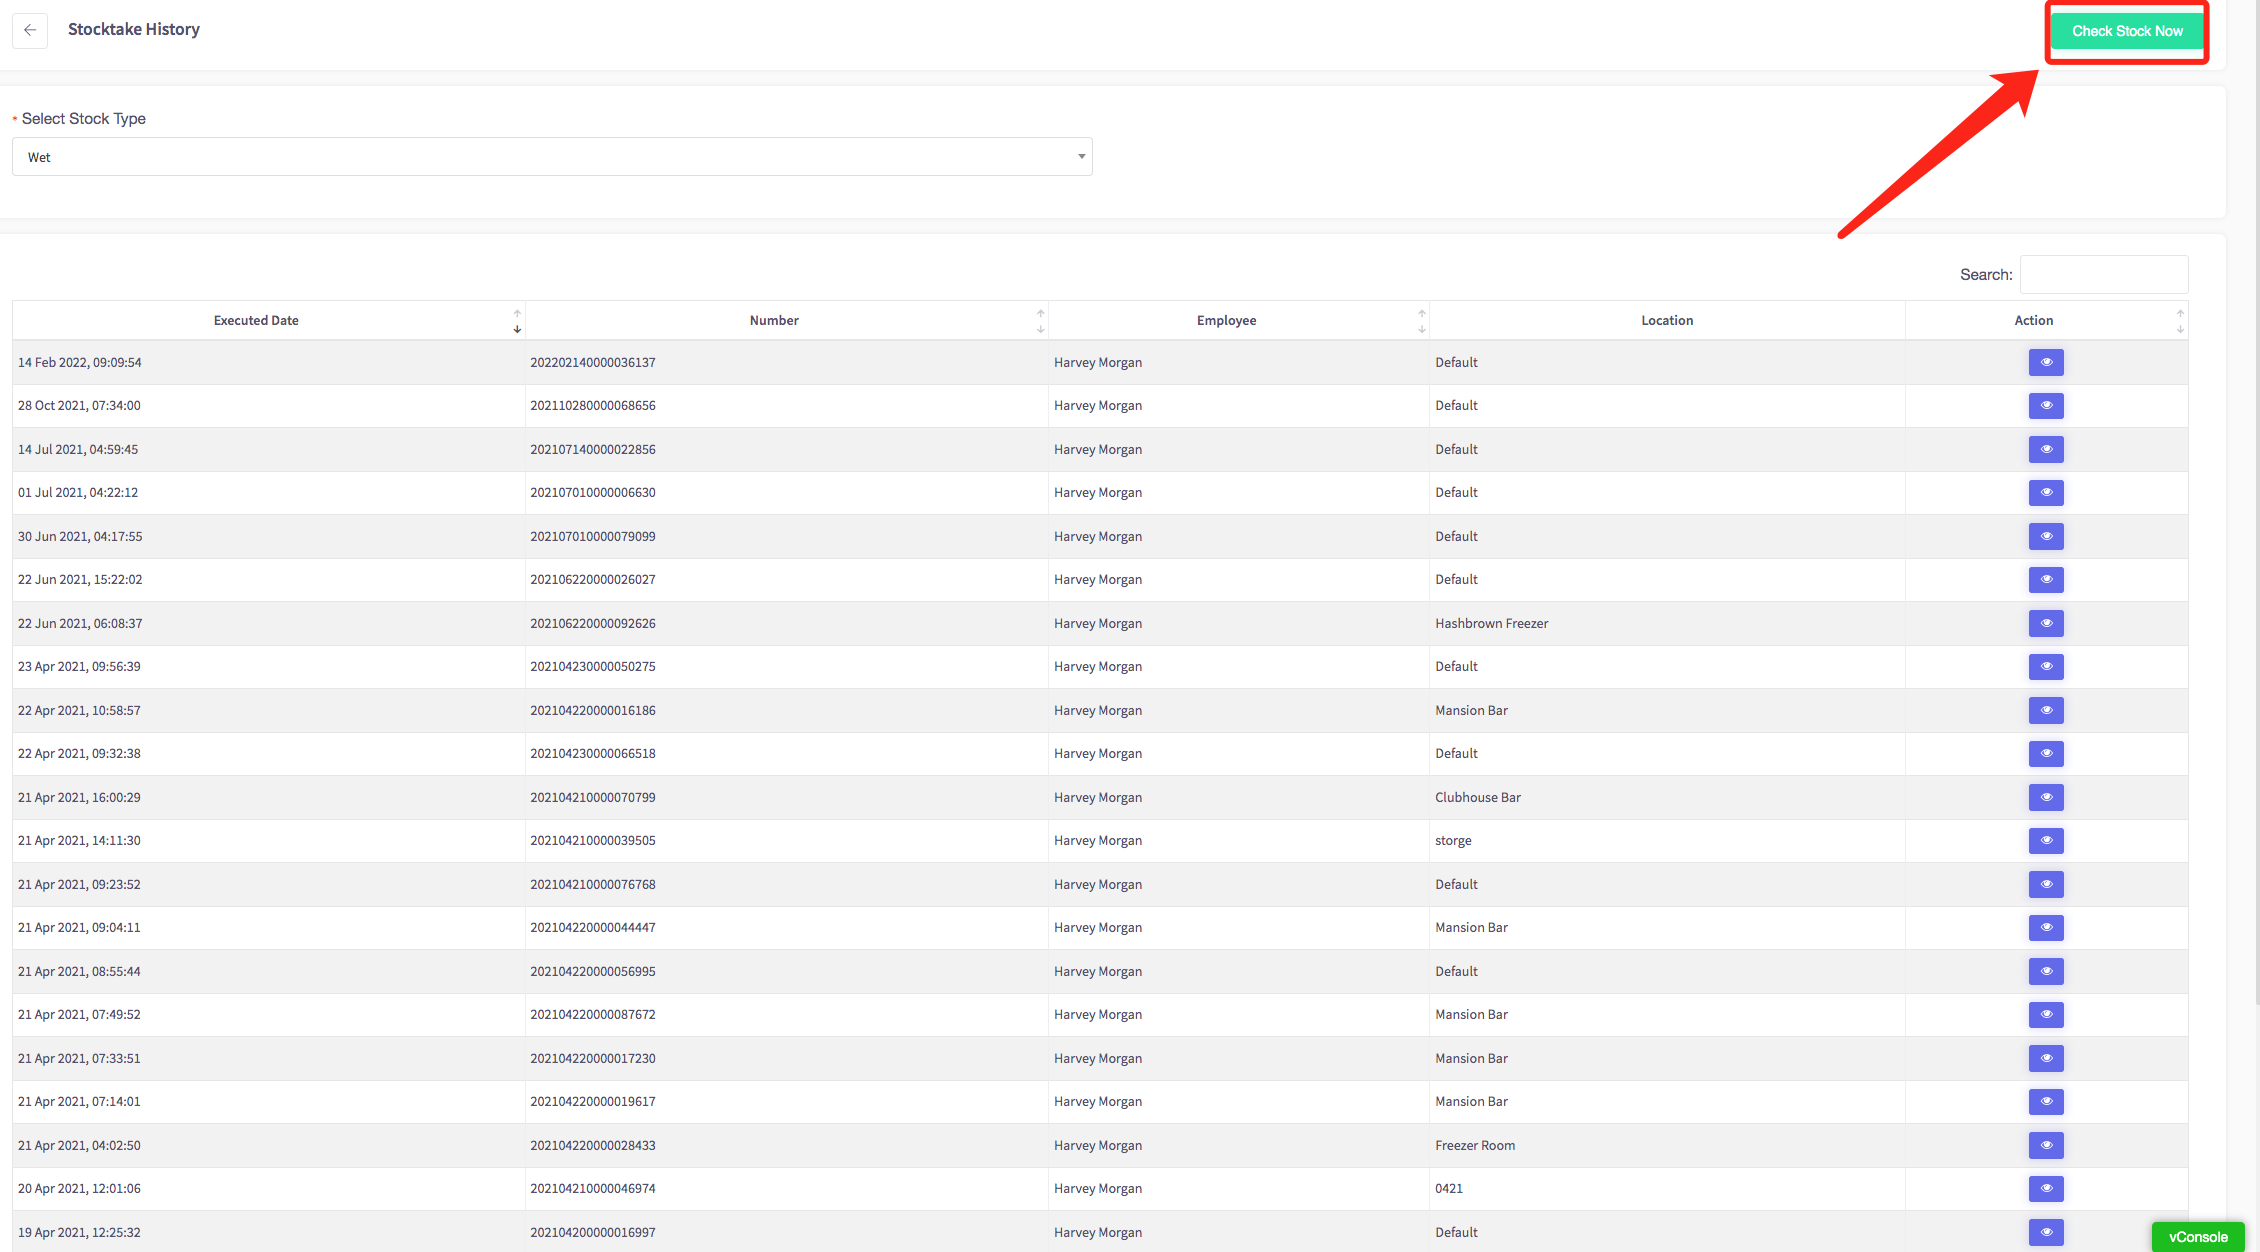
This will display your stocktake history, shown below.
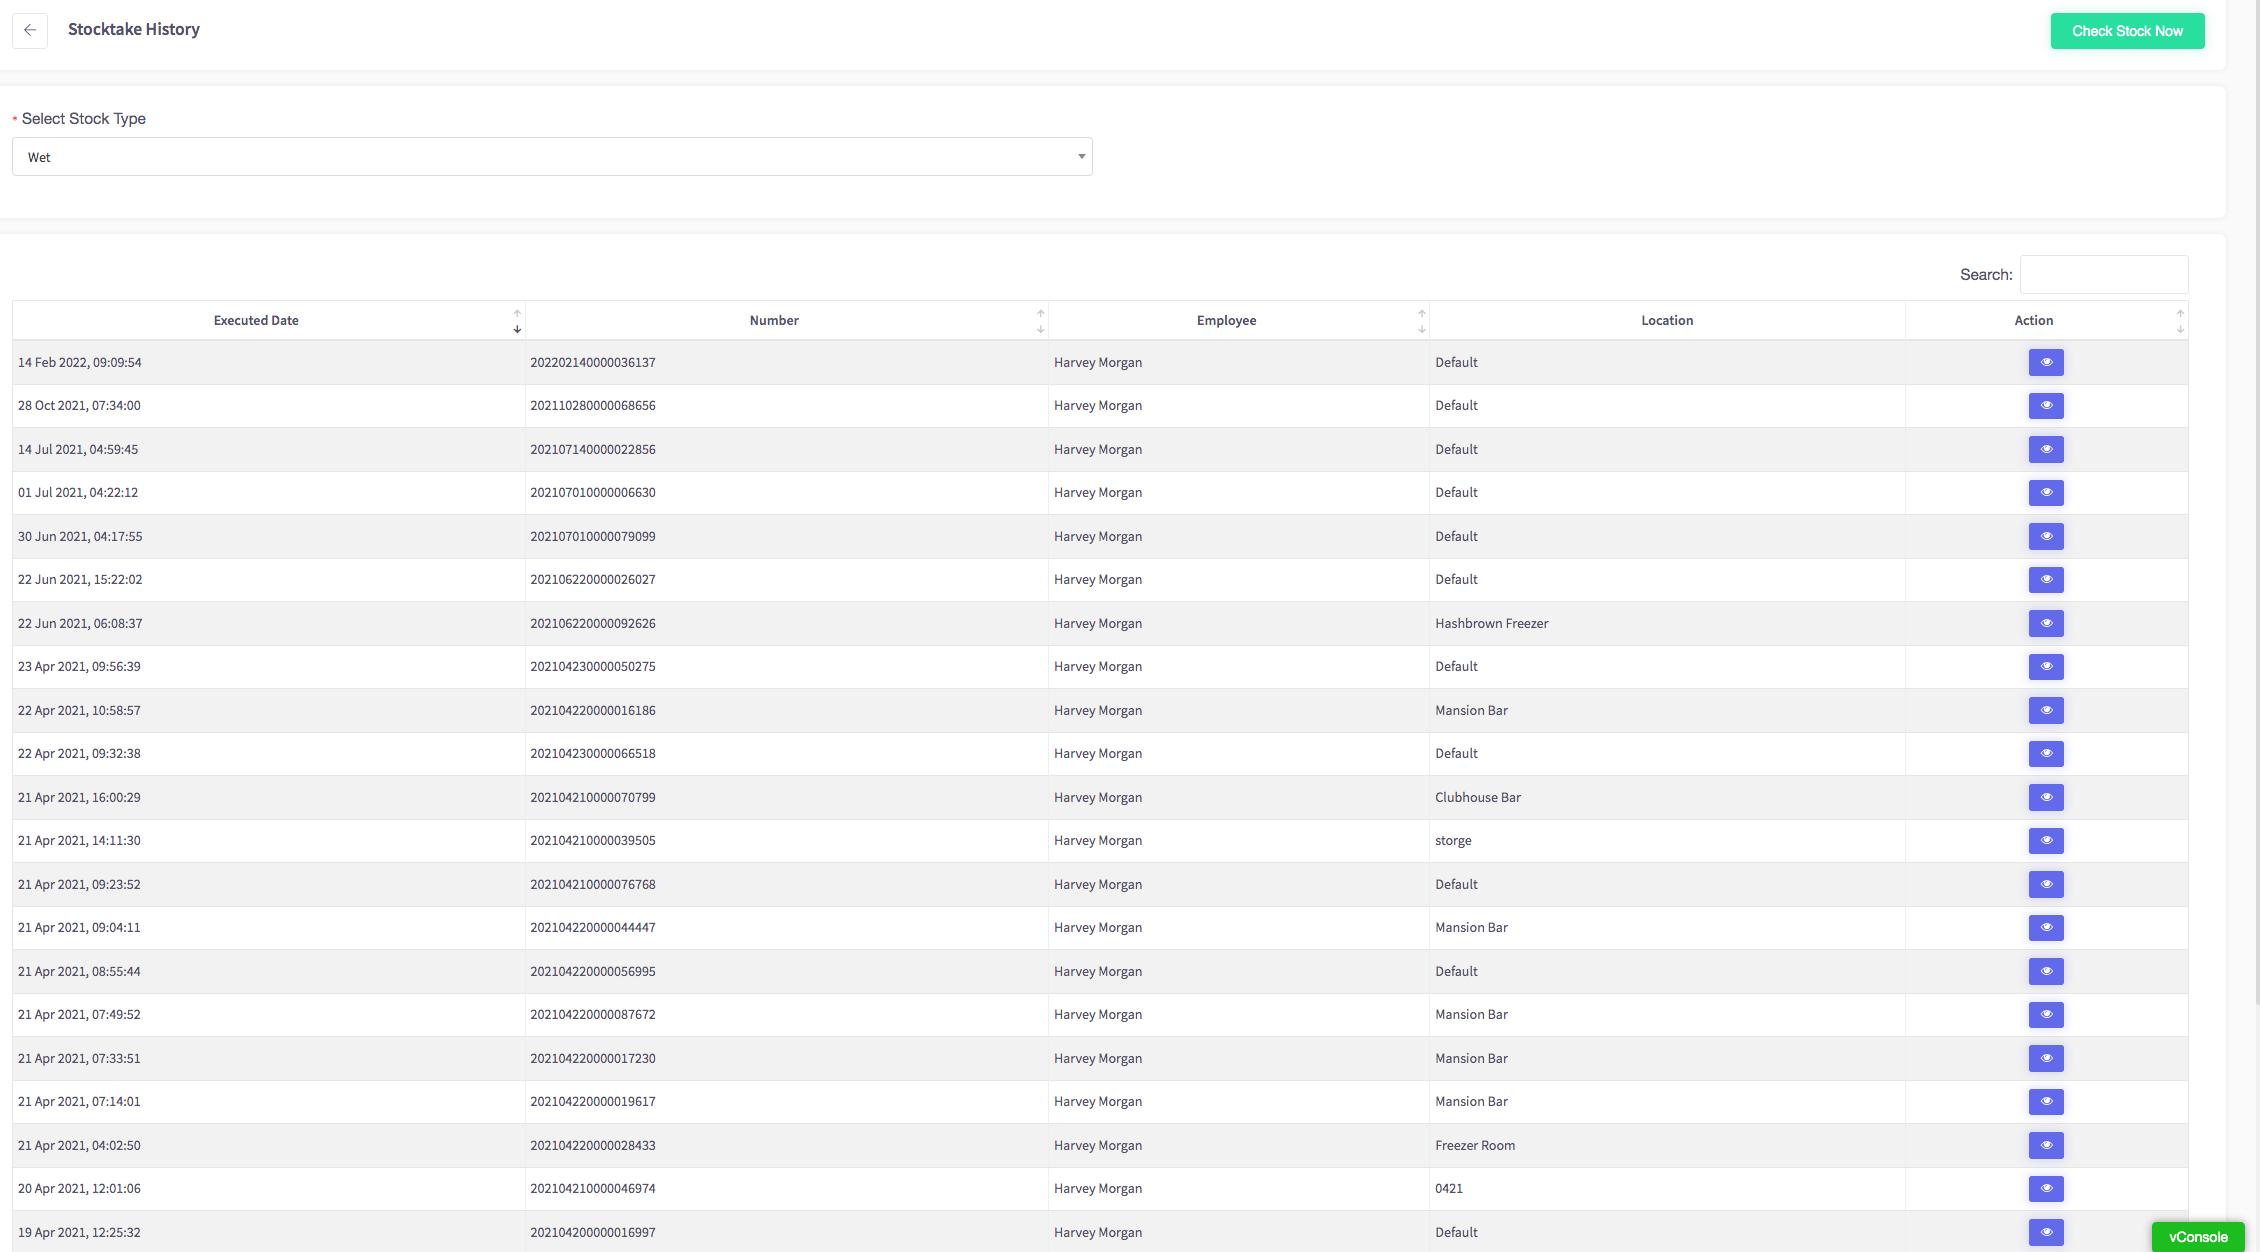
To check stock, press the green, "Check Stock Now" button at the top of the page.
The from the drop-down boxes select which location and product type you would like to check stock for.
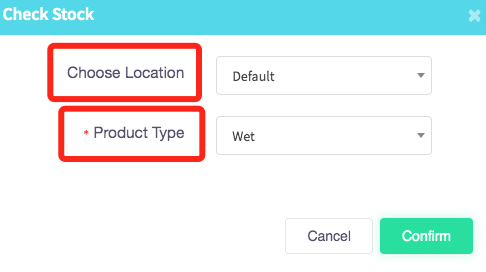
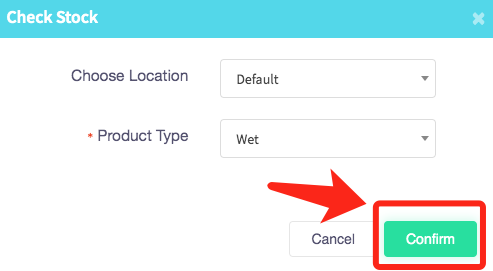
Once you have chosen your location and product type, select the green "Confirm" button at the bottom right of the menu.
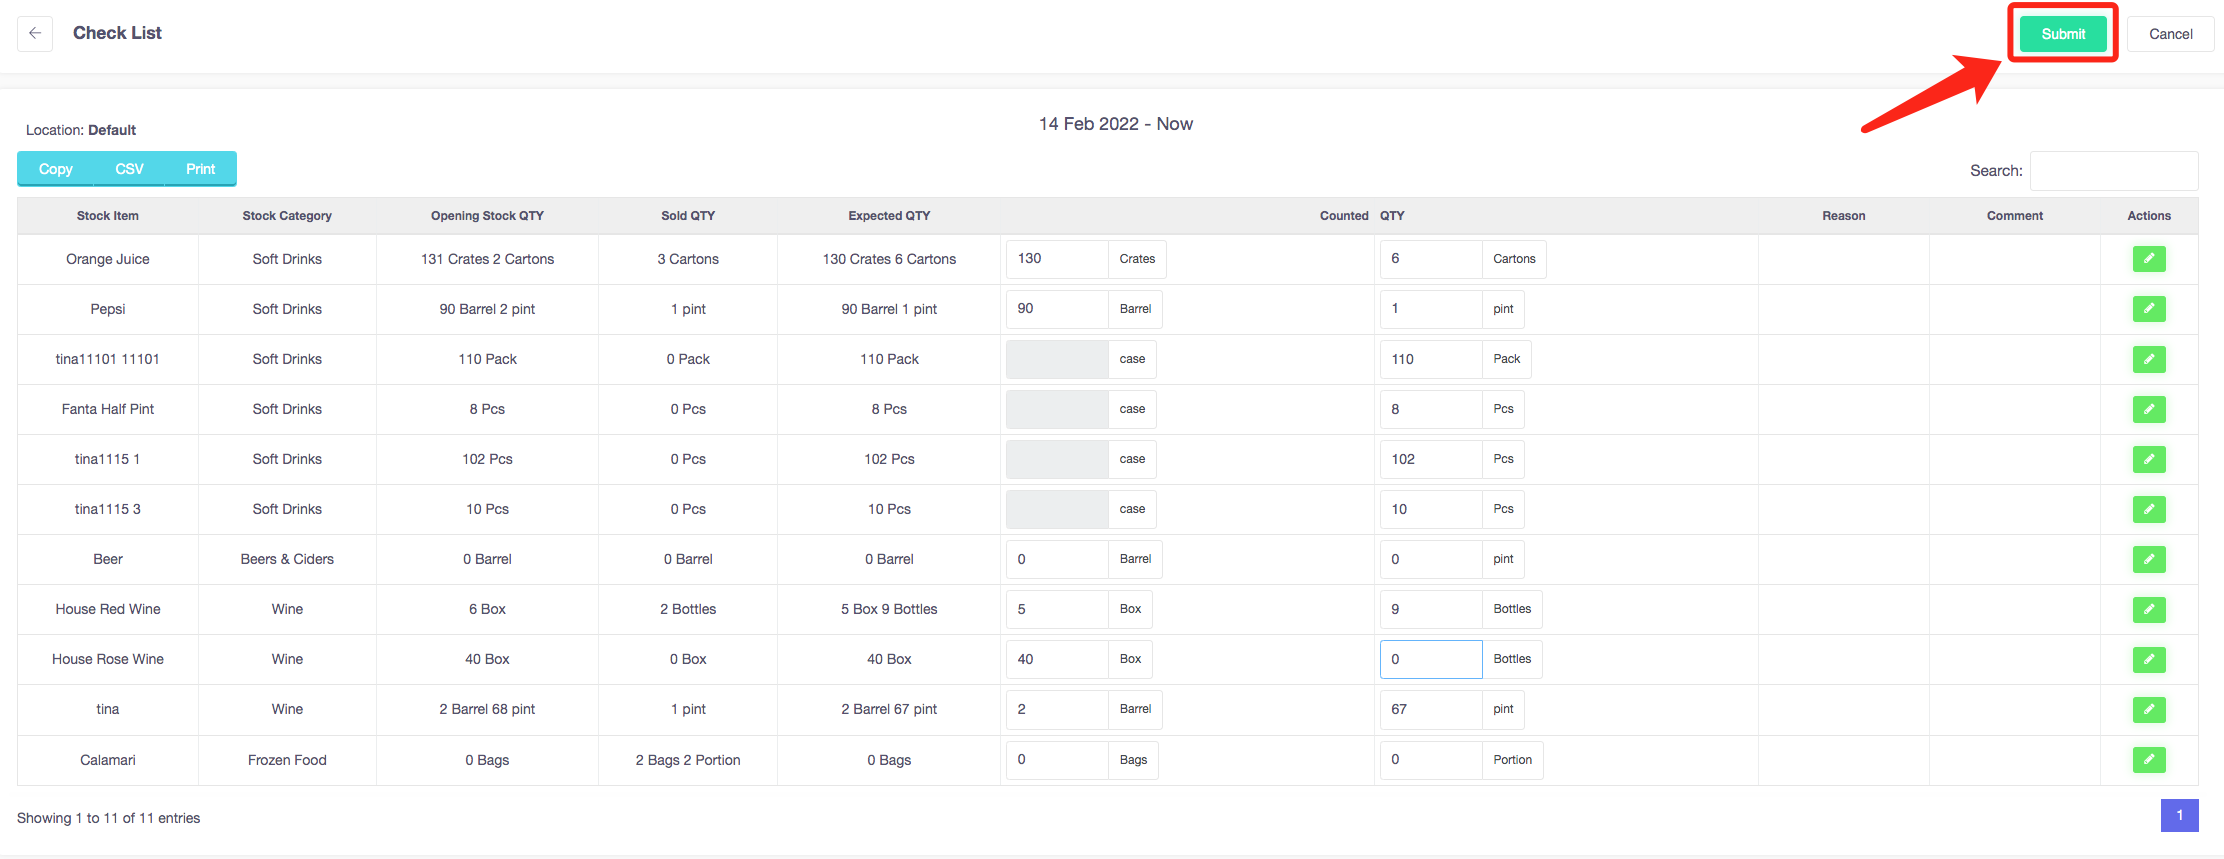
Then it will display this screen, showing you all the products you have in stock.
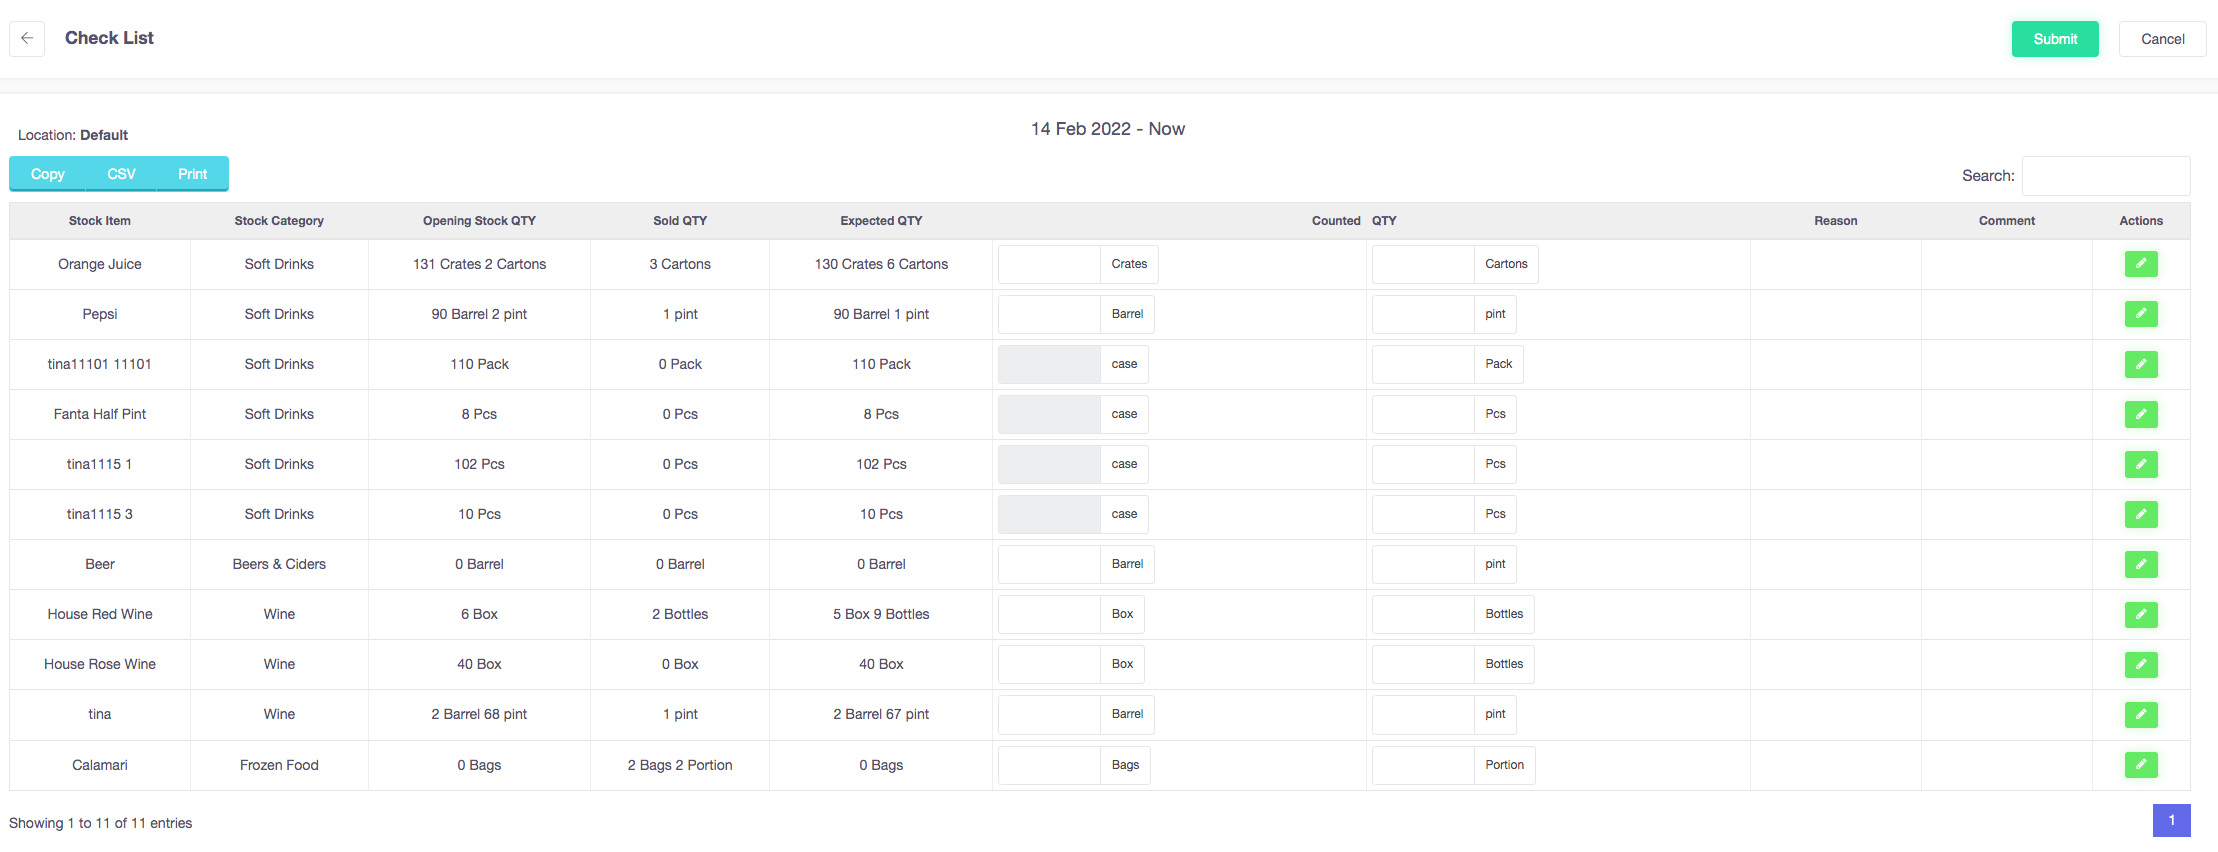
You can then update your stock system by counting how many stock items your company has left.
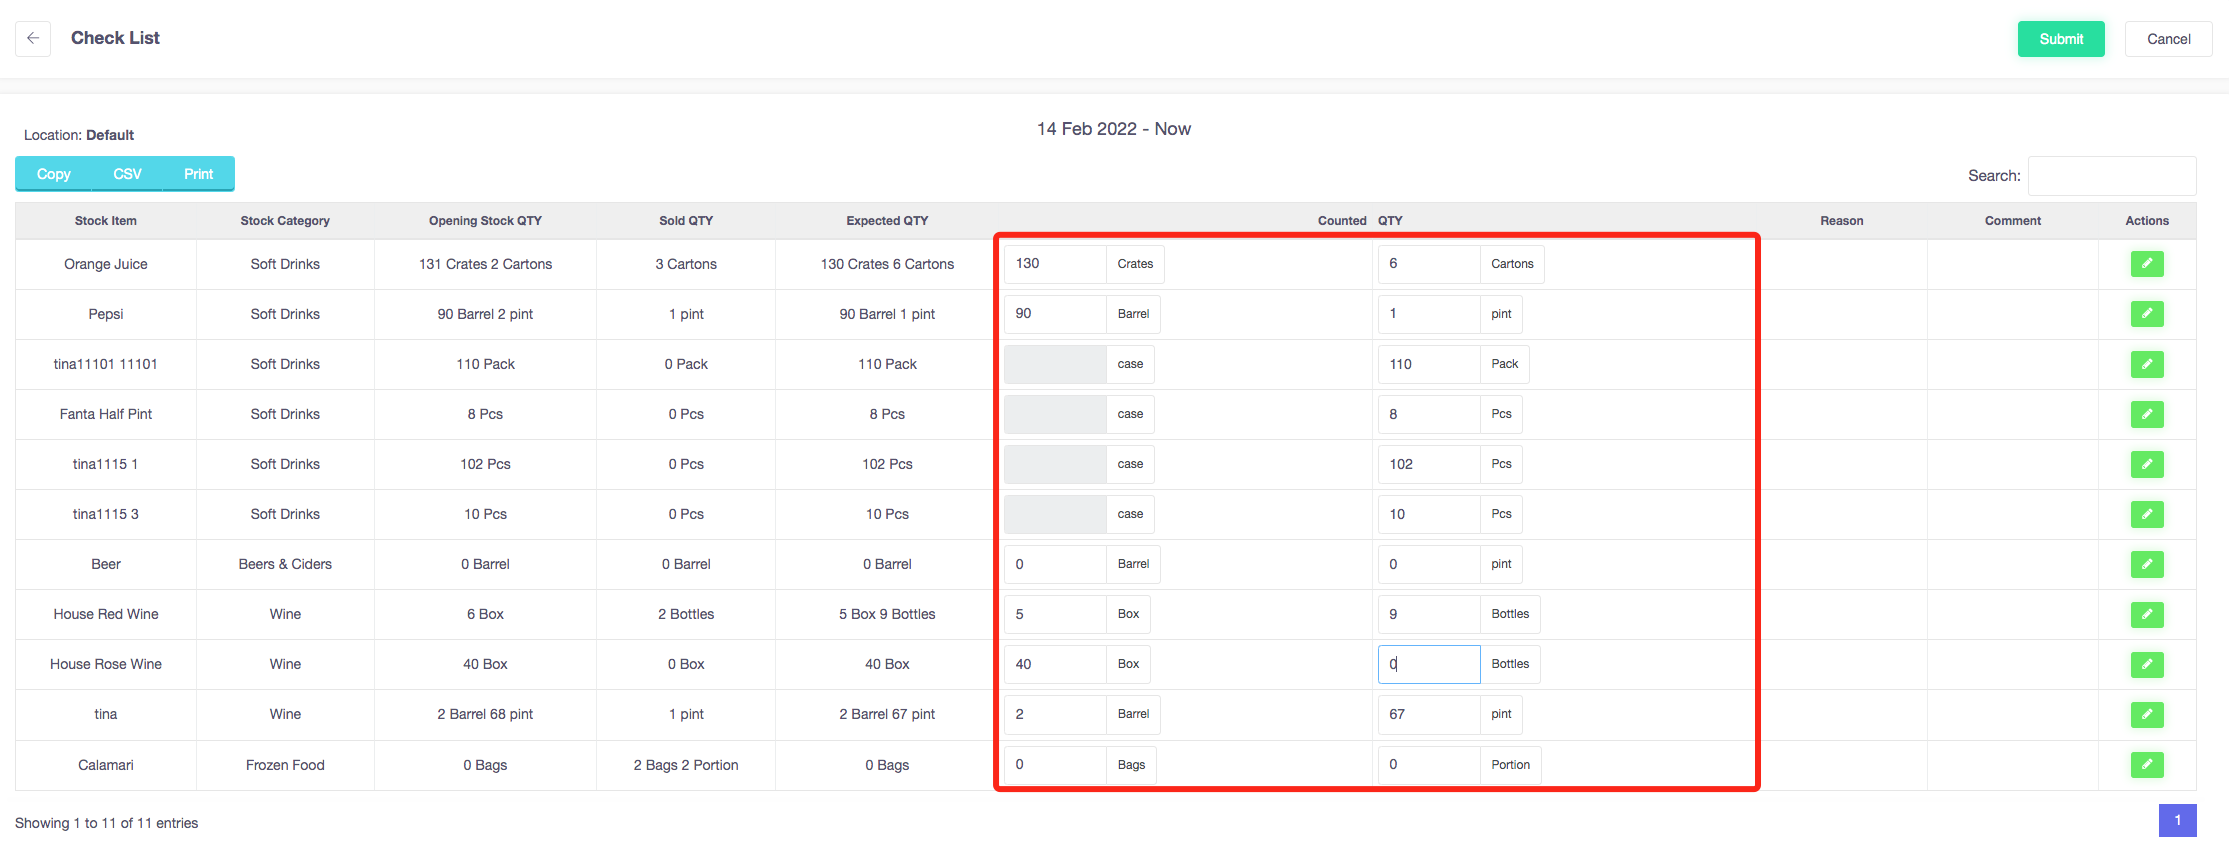
Once you have counted the number of your products, click the green "Submit" button at the top of the page.
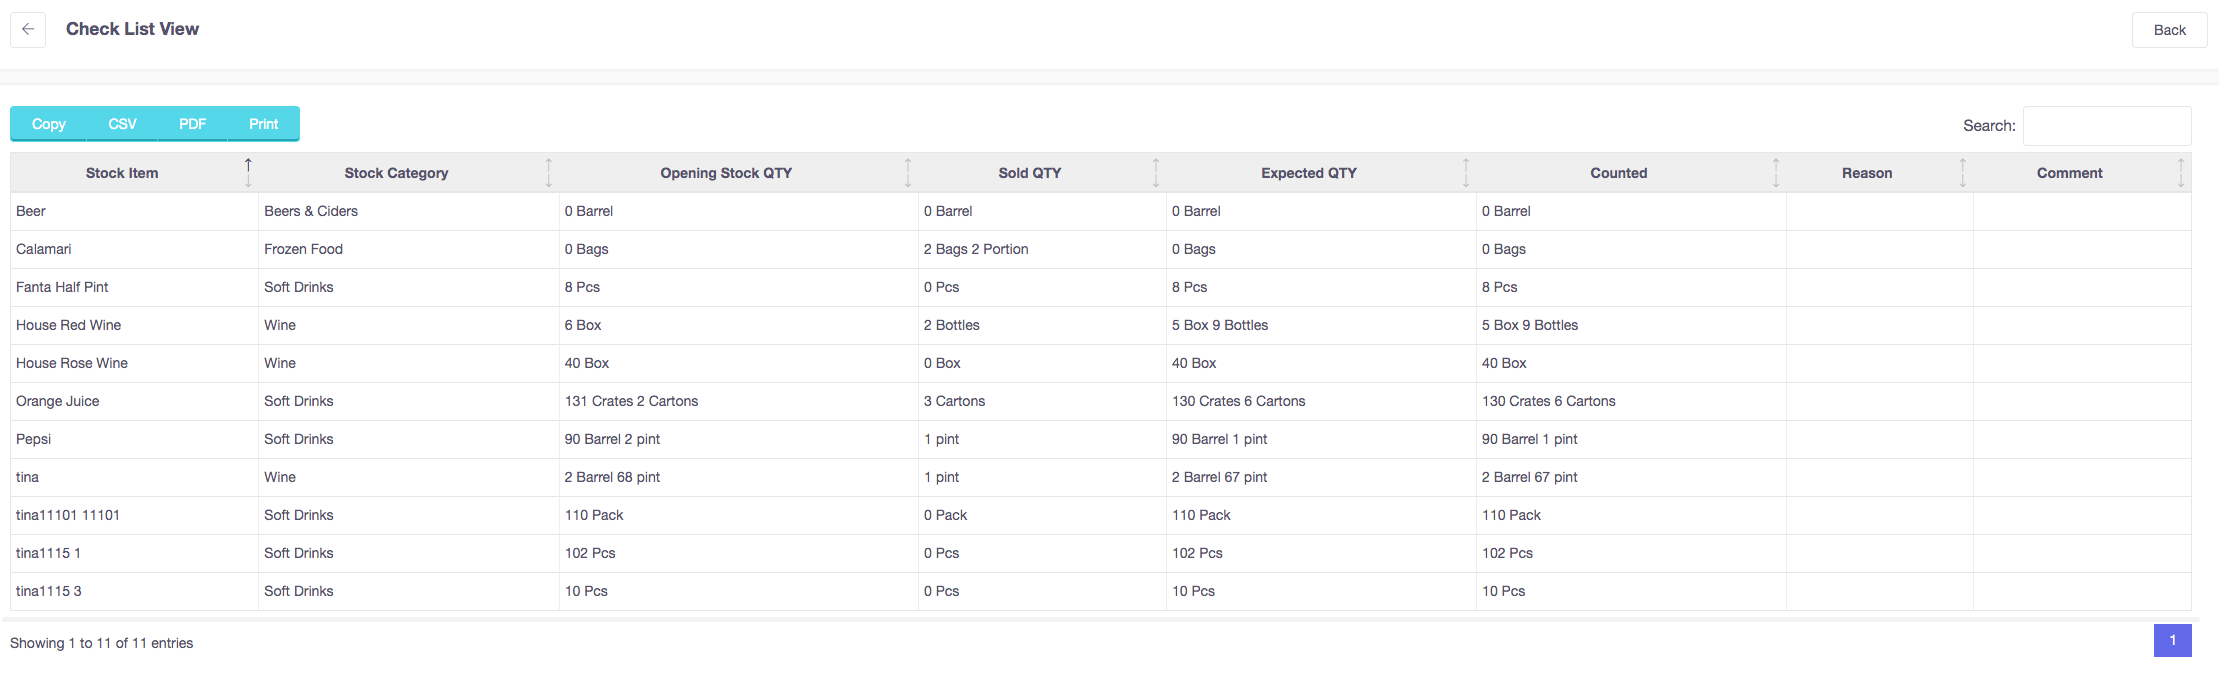
Then in your stocktake history you can see the report that has been produced.
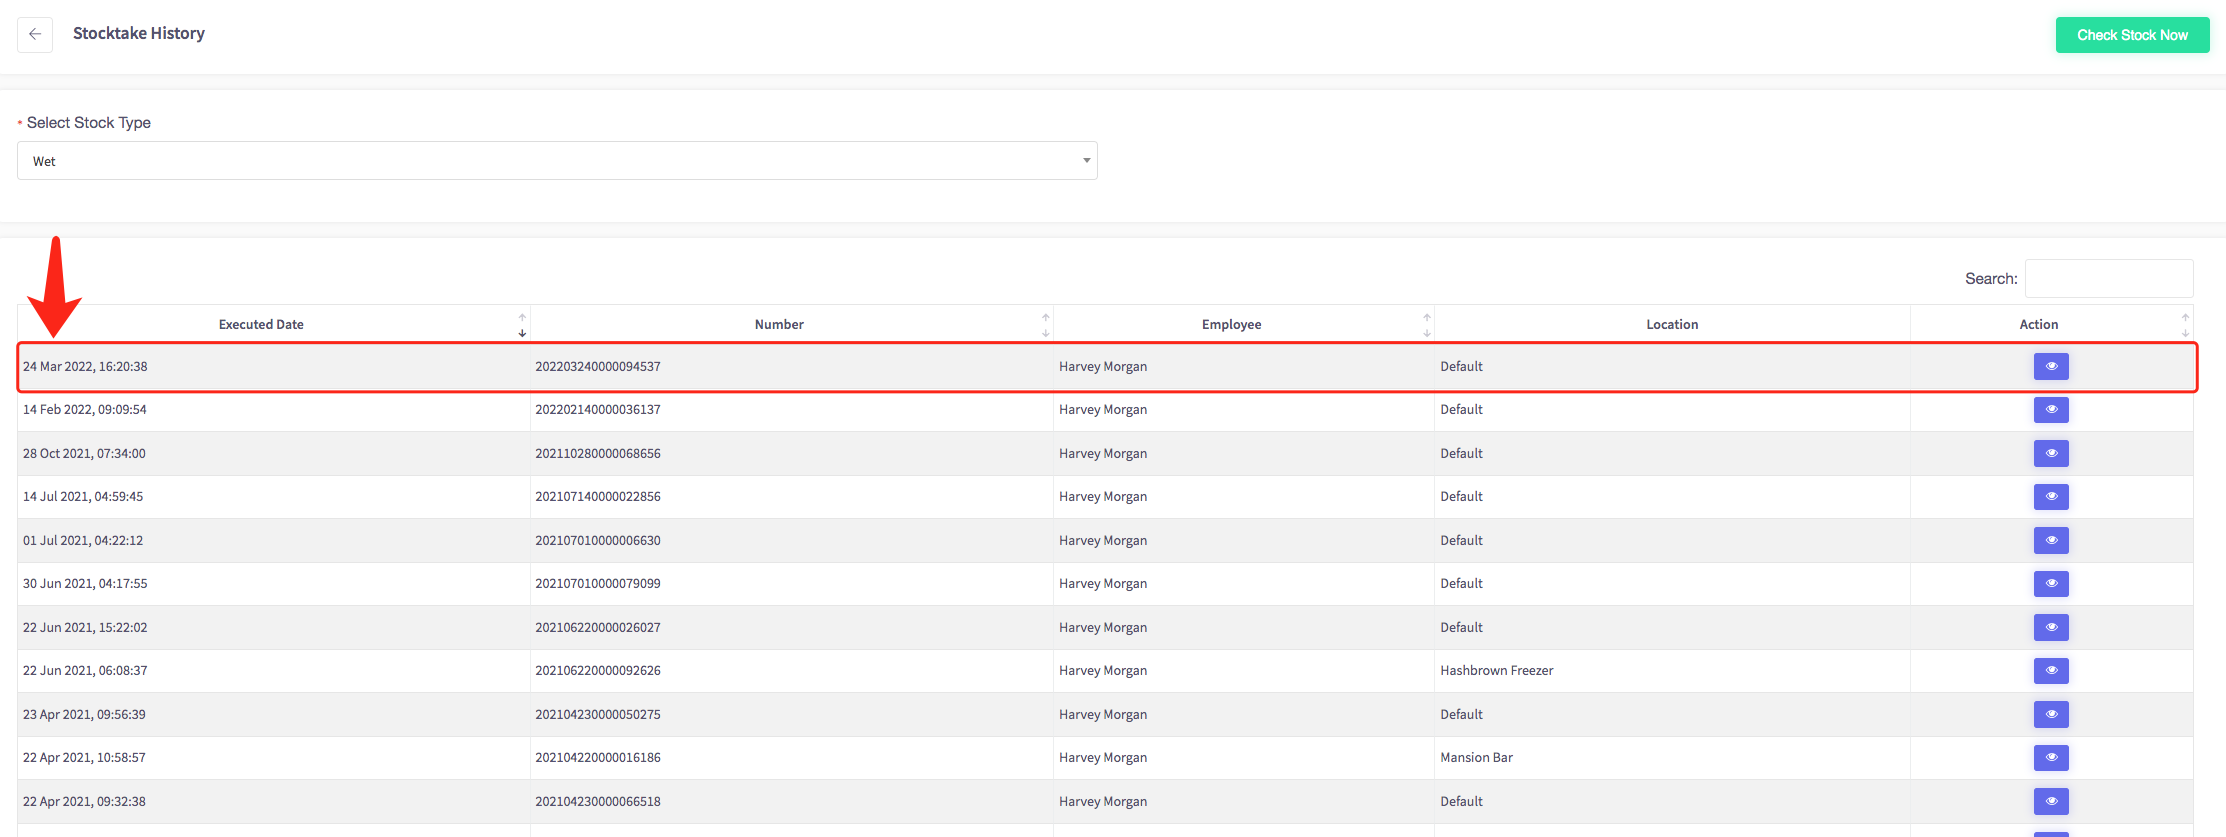
By selecting the symbol you can view that stock check, shown below.
How to move stock
This guide will show you how to move stock in your Cloud HQ.
Firstly, click on the 'Stock Management' on the left-hand side, then the 'Move Stock' option on the menu screen.

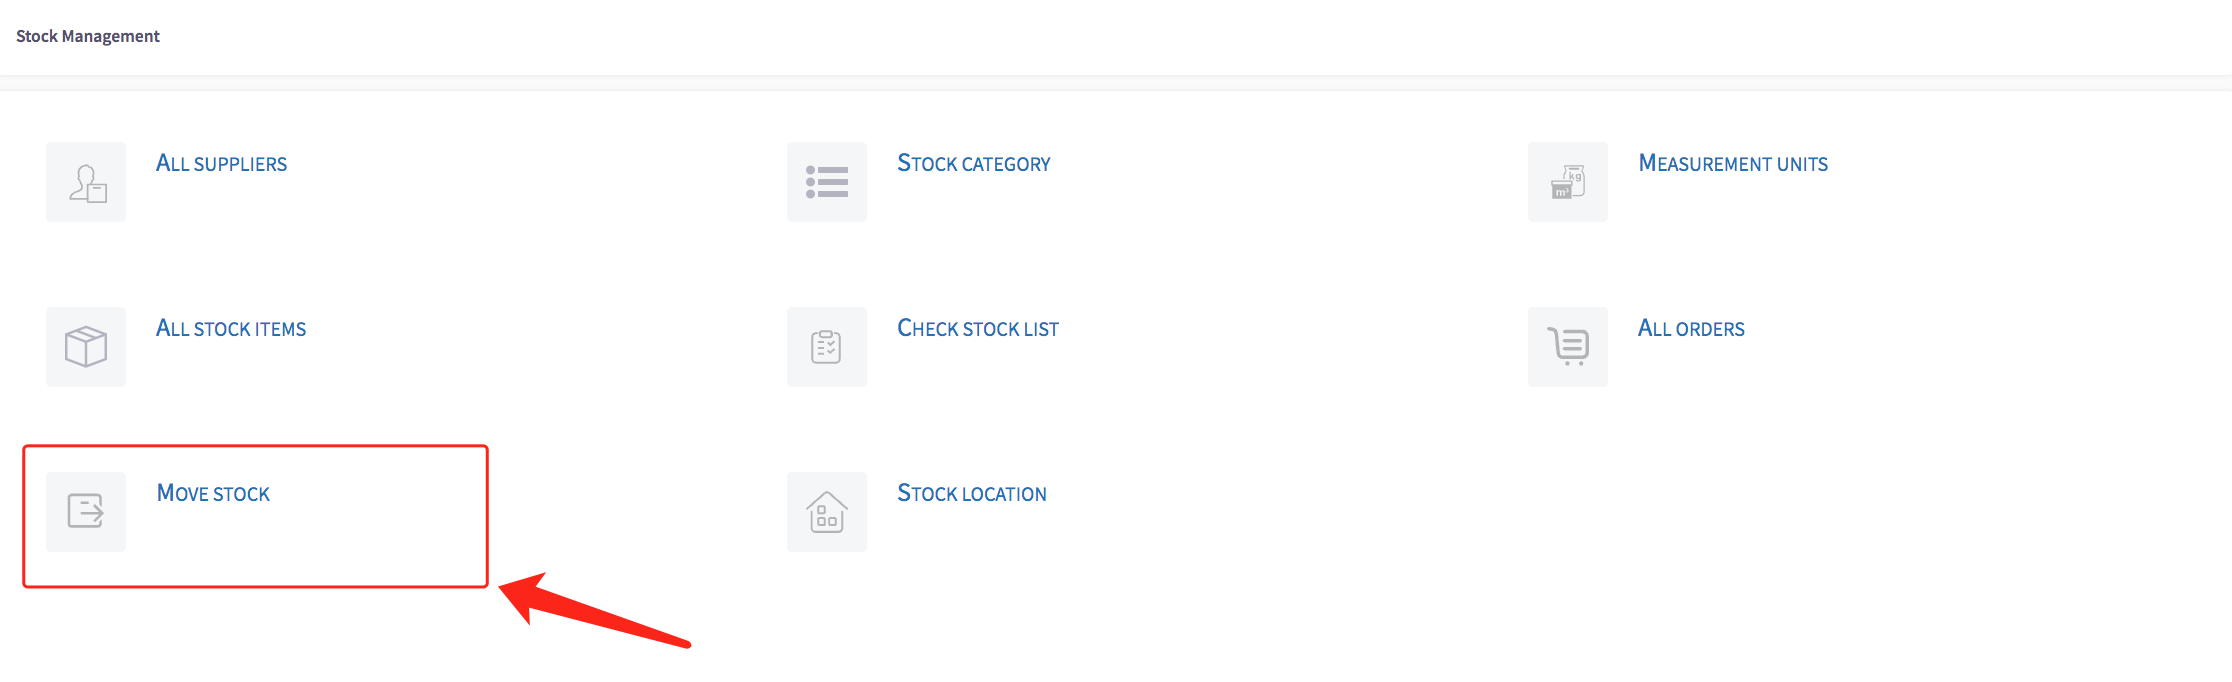
This will display your stock move list, shown below.
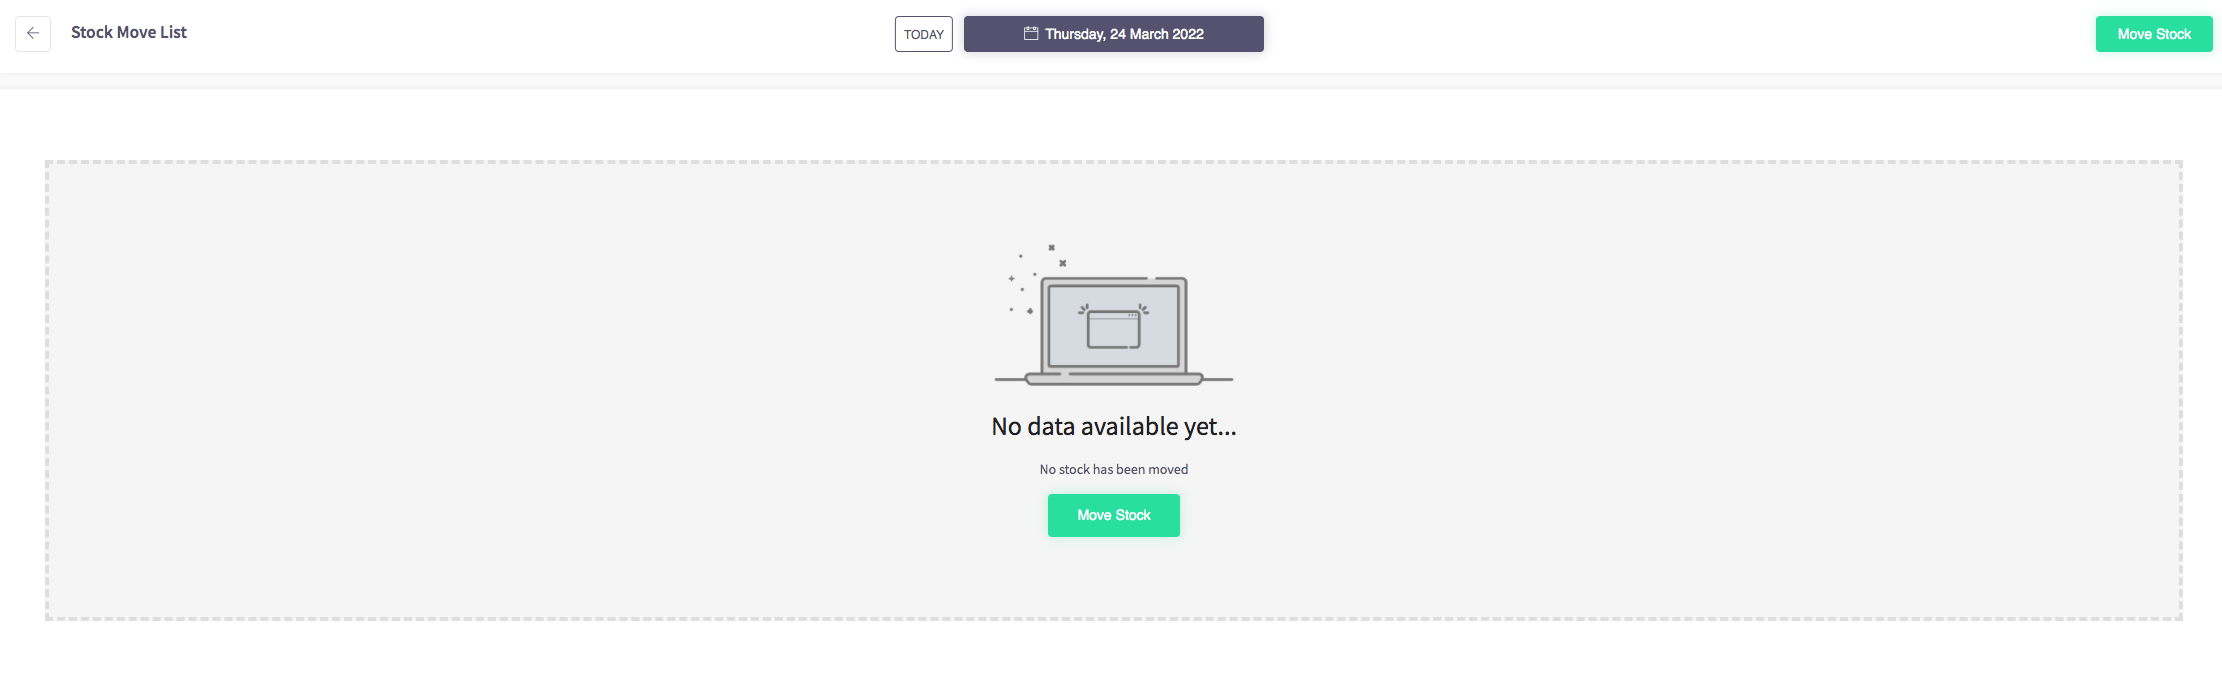
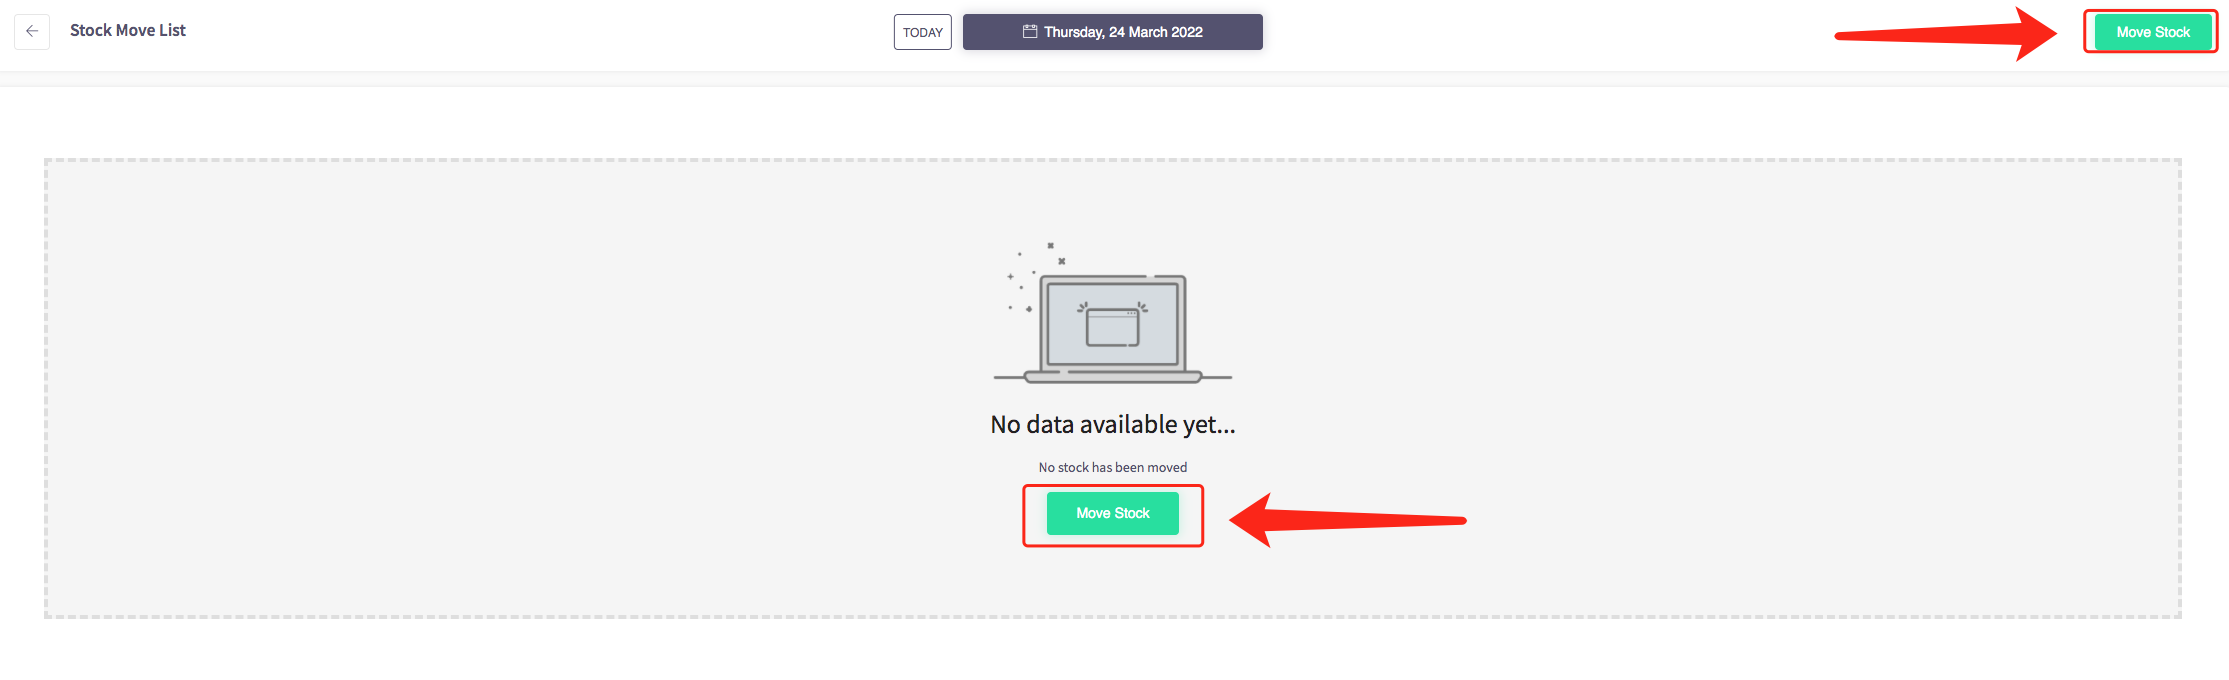
To move stock, click the green "Move Stock" button in the top left-hand corner of the page or in the centre if you have no previously moved stock.
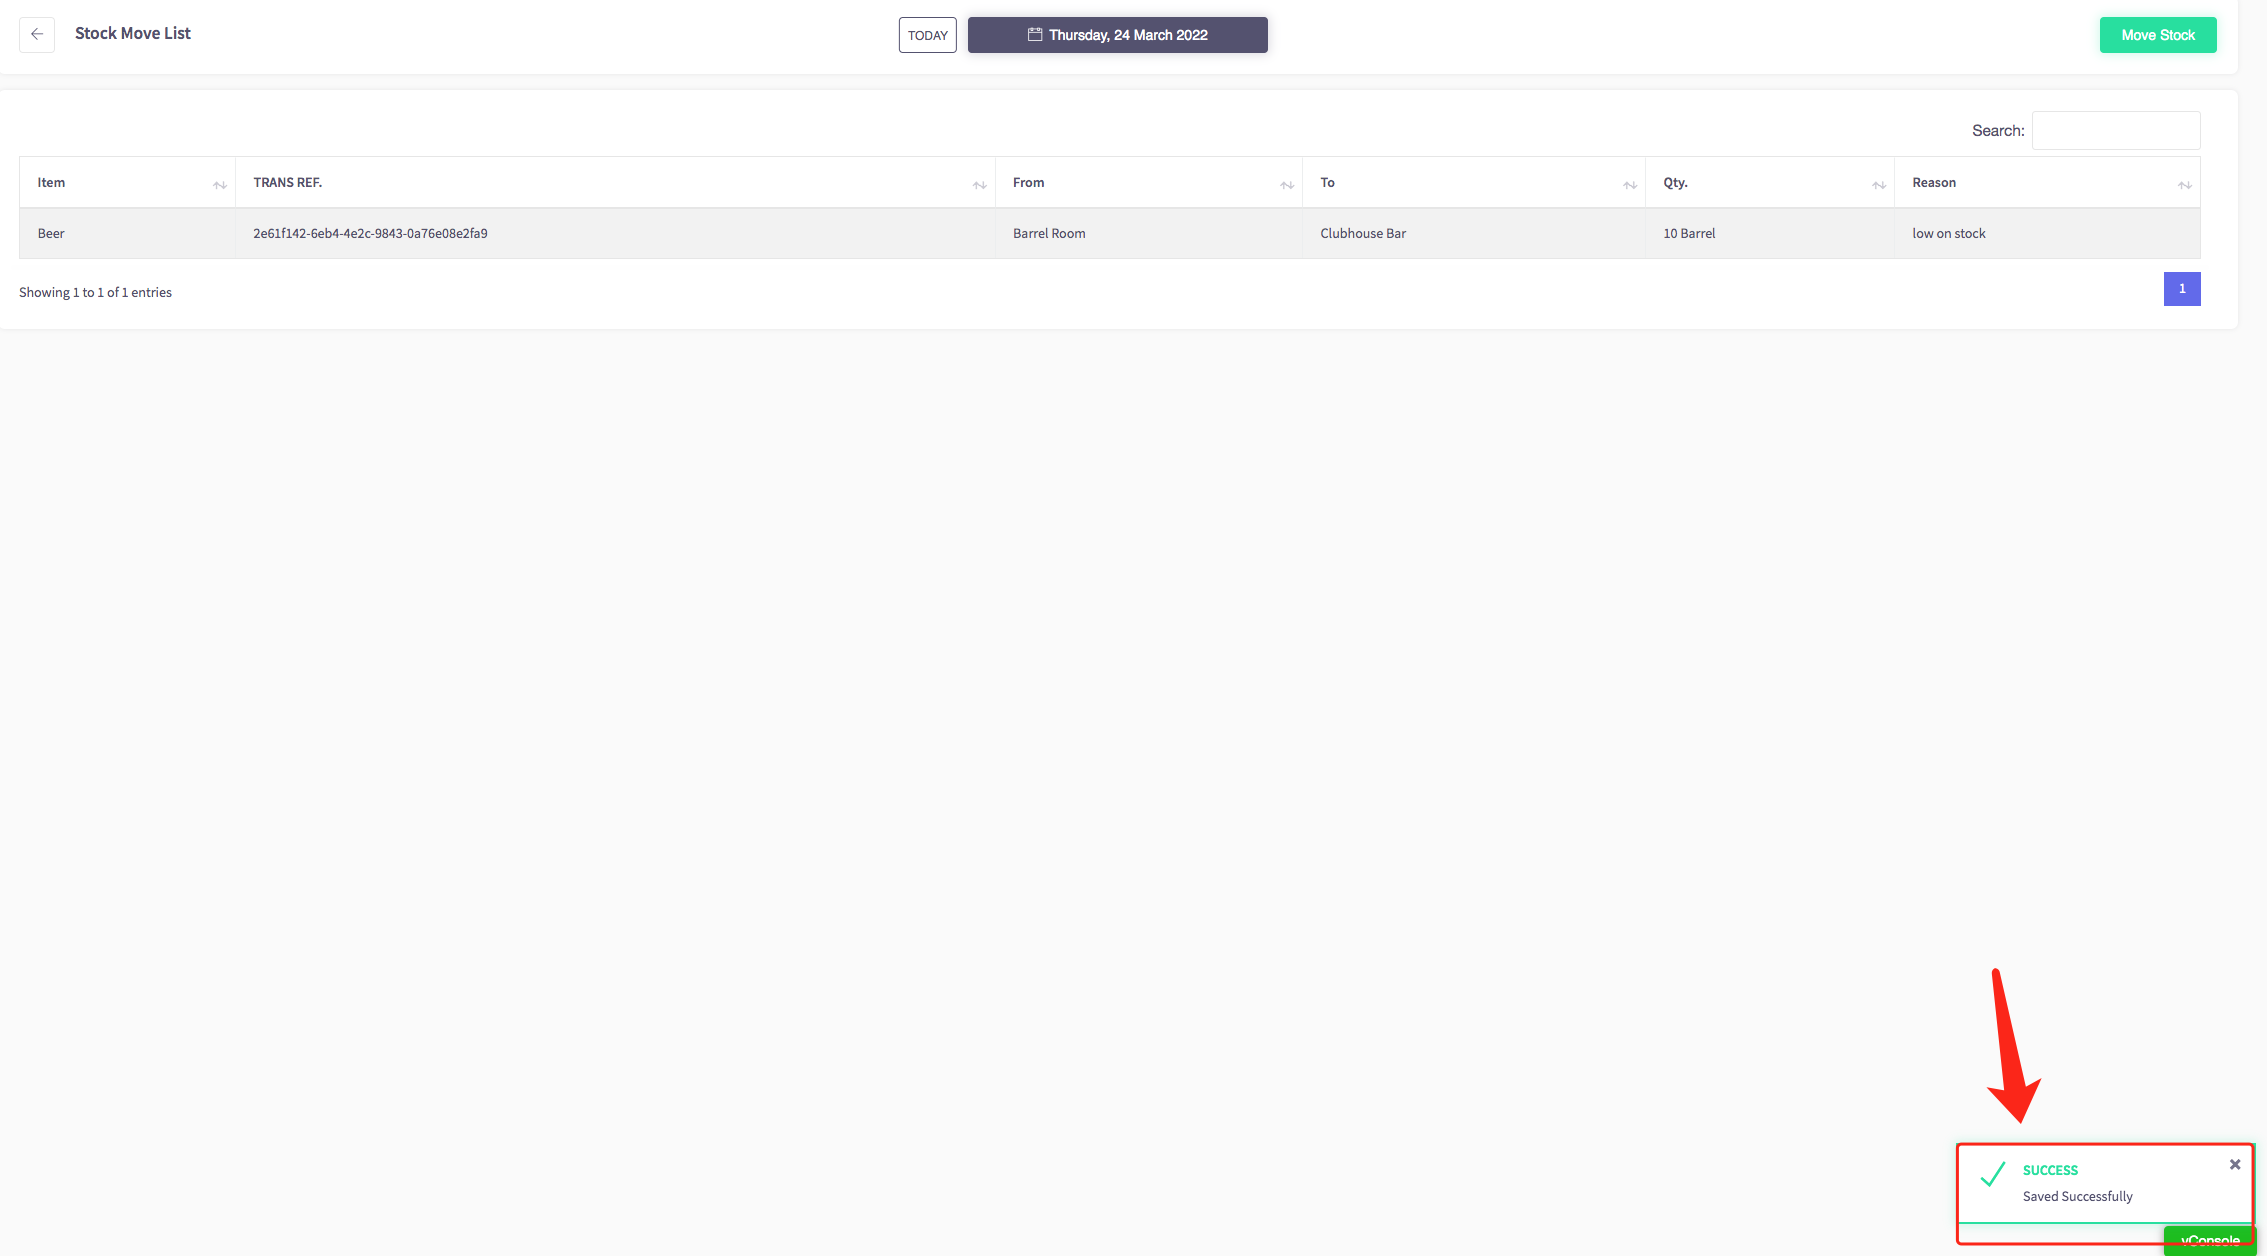
Then select the item you would like to move and select where you are moving it from and where it is going to, what quantity of the product are you moving and the reason behind moving this product to a different area.
 .
.
Once you have filled in all this information, click the green "Save All" button at the top right of the screen.

Then your product information will be displayed in your "Stock Move List" and a green confirmation message will appear in the bottom right of the screen saying this has been "Saved Successfully".
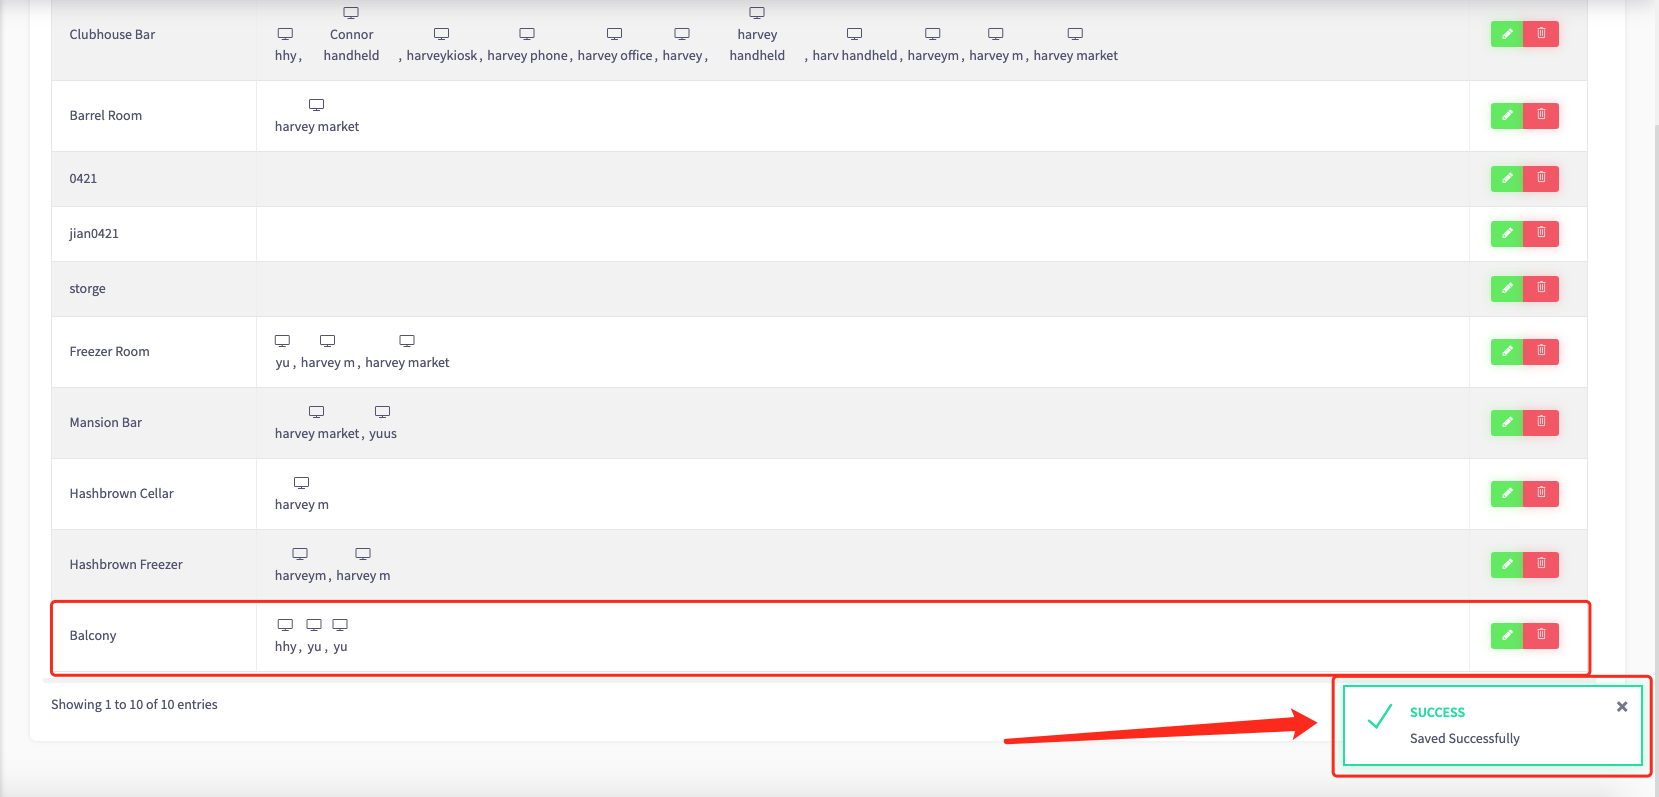
How to create stock locations
This guide will show you how to create stock locations in your Cloud HQ.
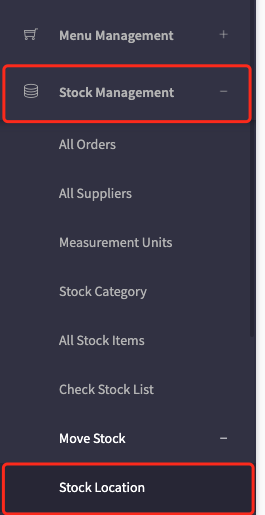
Firstly, click on the 'Stock Management', then the 'Stock Location' option on the left-hand menu.
This will display all your venues locations, shown below.
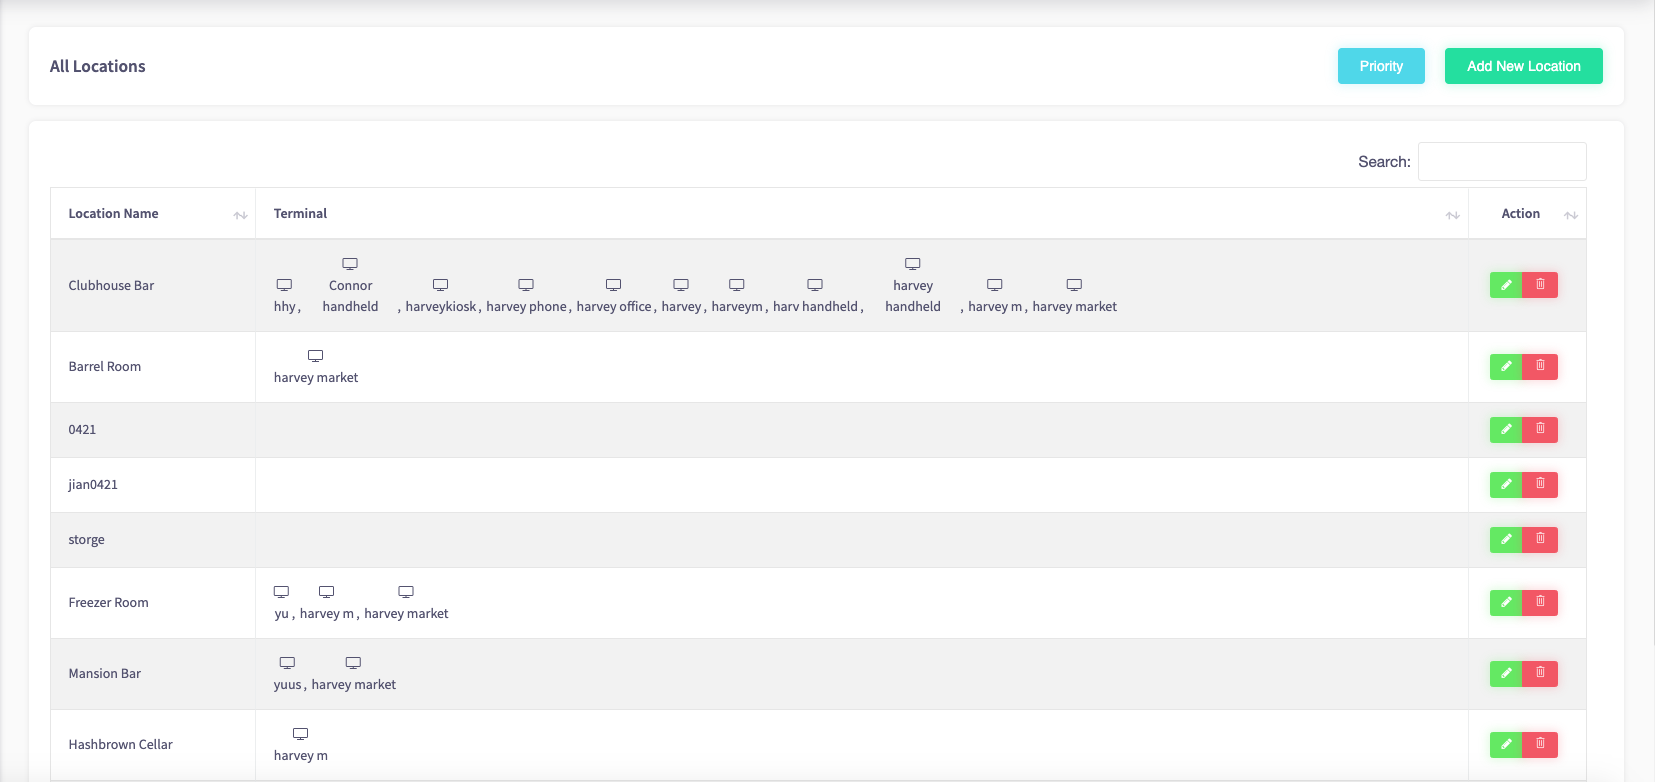
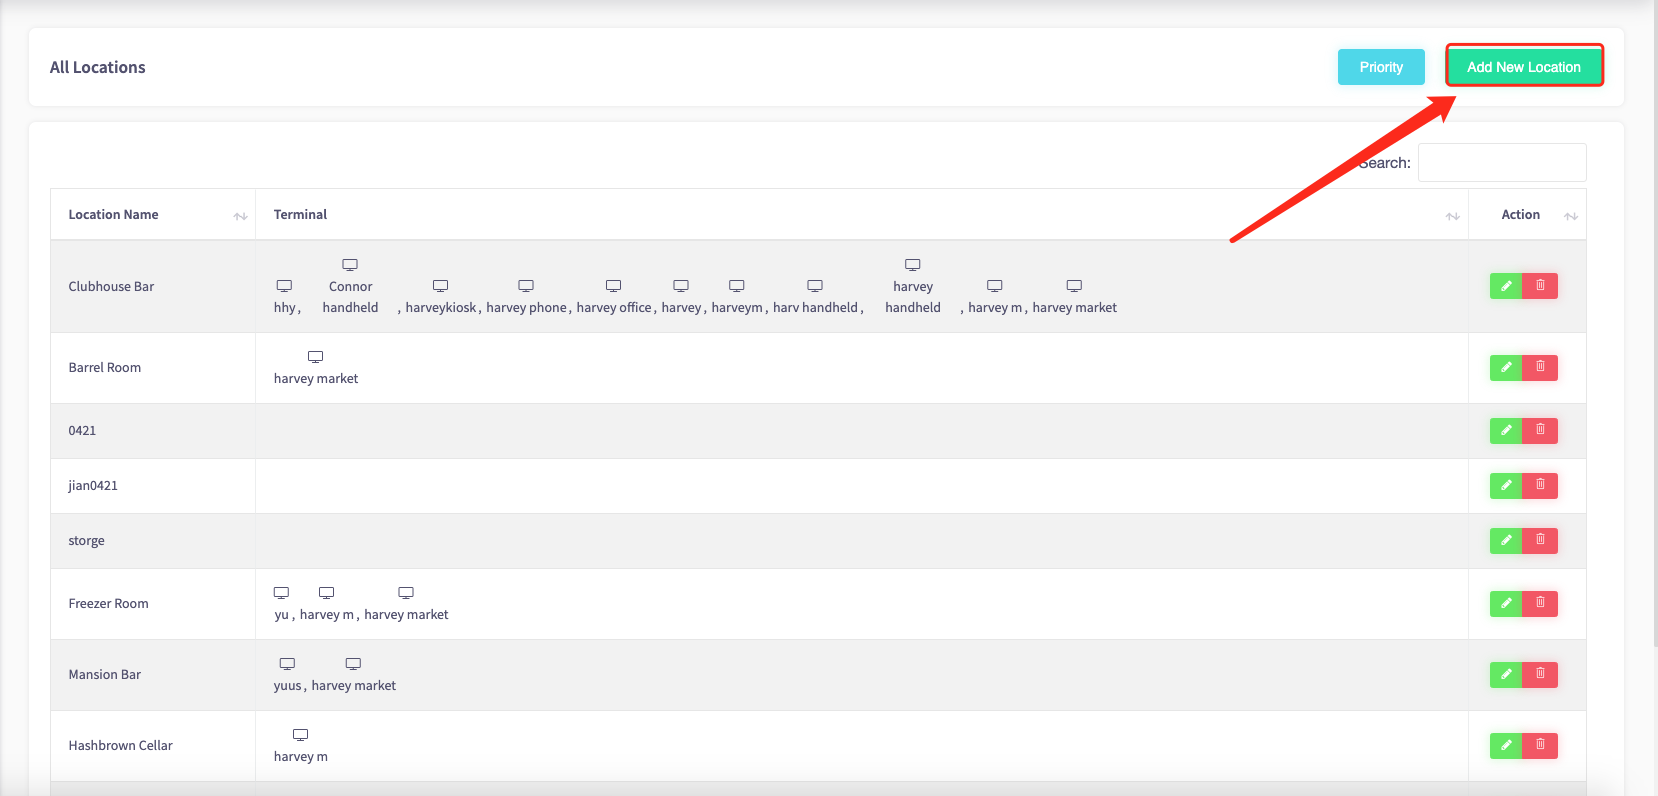
To add a new location, click the "Add New Location" button that the top right of the page.
Fill in the information needed such as the location name, and select which terminals are going to be used in that area.
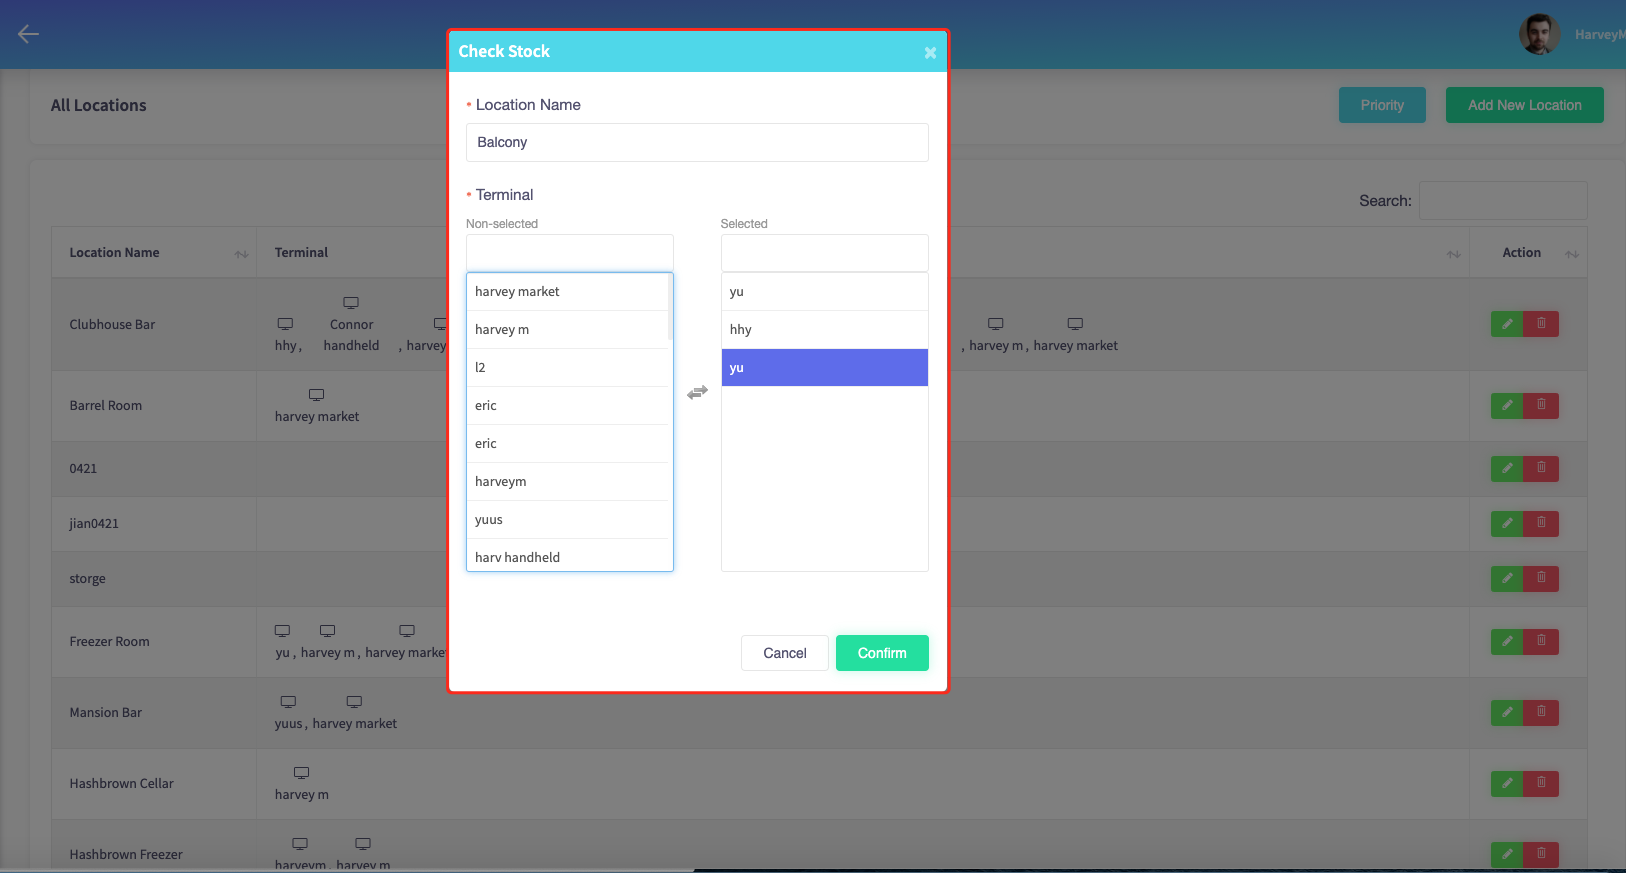
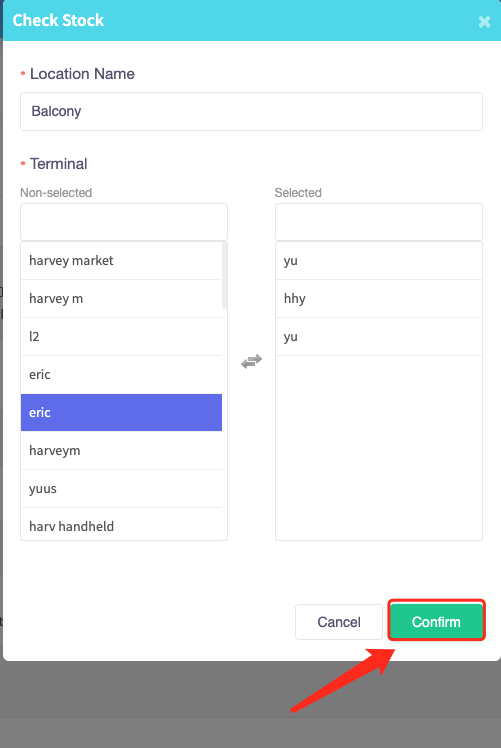
When you have named your location, and selected which terminals are going to be used for this area, select the green "Confirm" button at the bottom right of the screen.
Then your new location has been added to your locations, showing all the terminals that are in that location. A confirmation message will pop up in the right-hand corner of the screen, saying it has been "Saved Successfully".
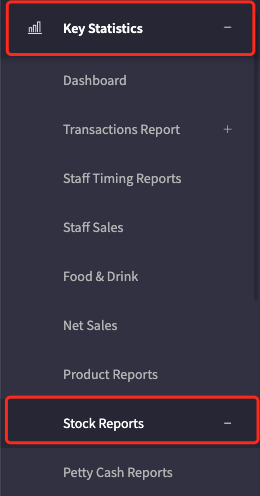
How to view stock reports
This guide will show you how to view stock reports on your Cloud HQ.
Firstly, click on the 'Key Statistics', then the 'Stock Reports' option on the left-hand menu.
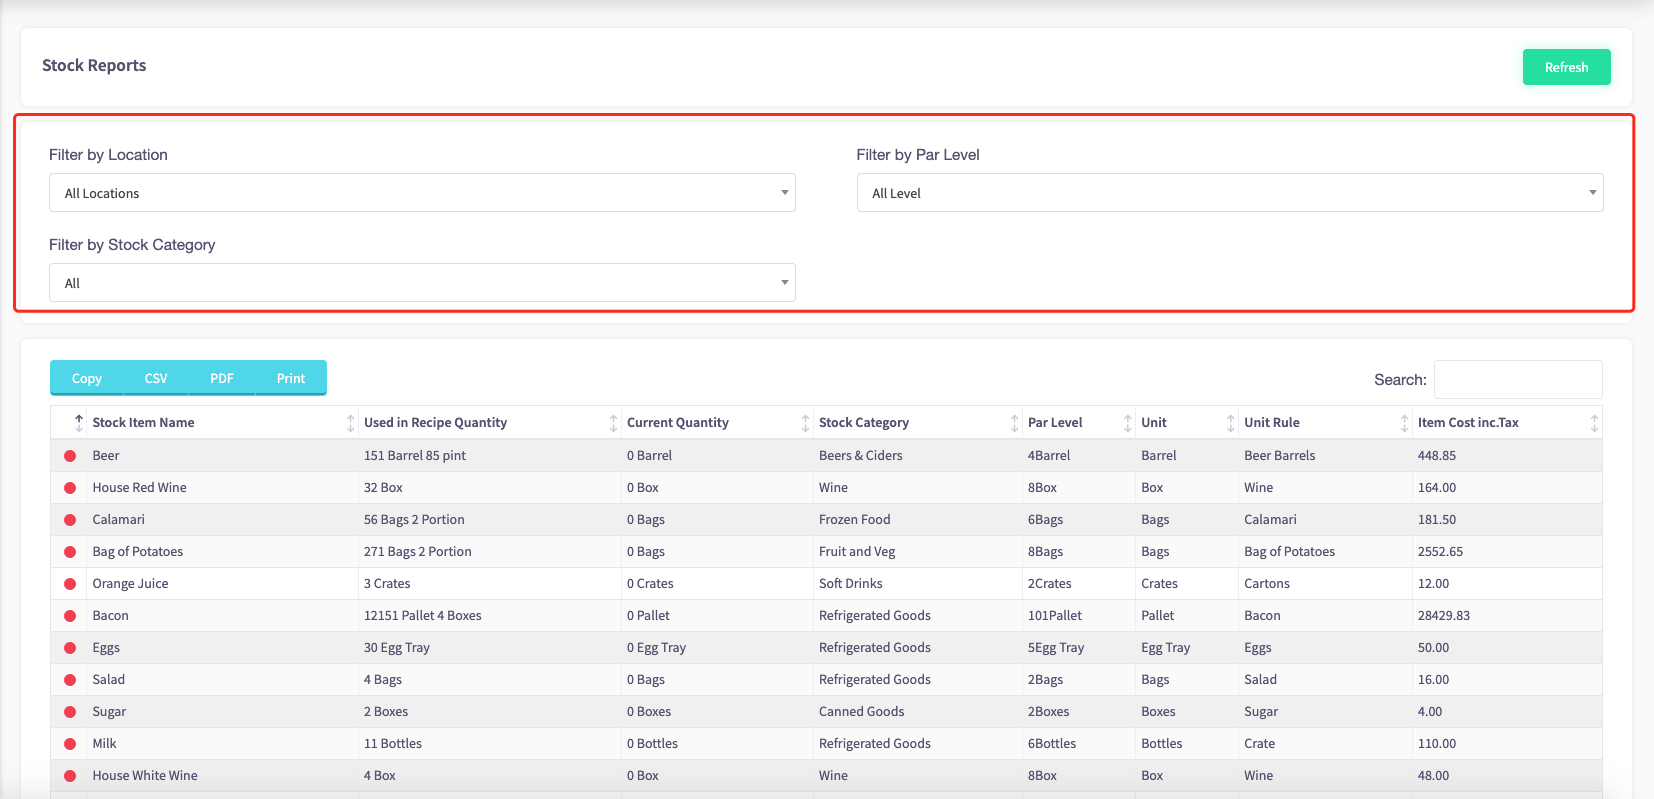
Then this is the screen showing operators all the stock reports that have taken place.
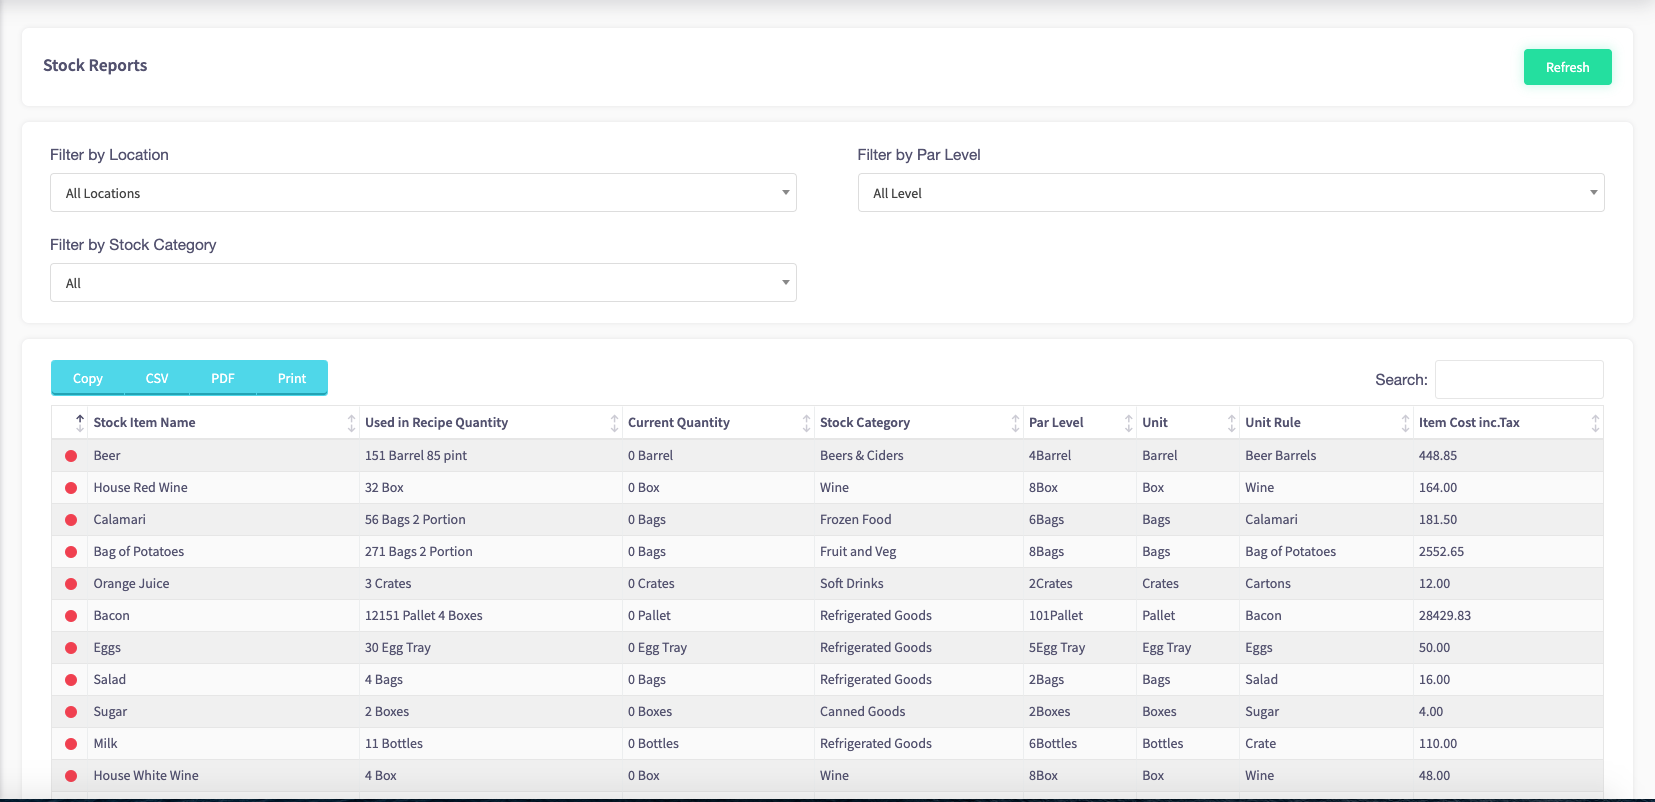
Filters are also available to make it easier to find specific reports.
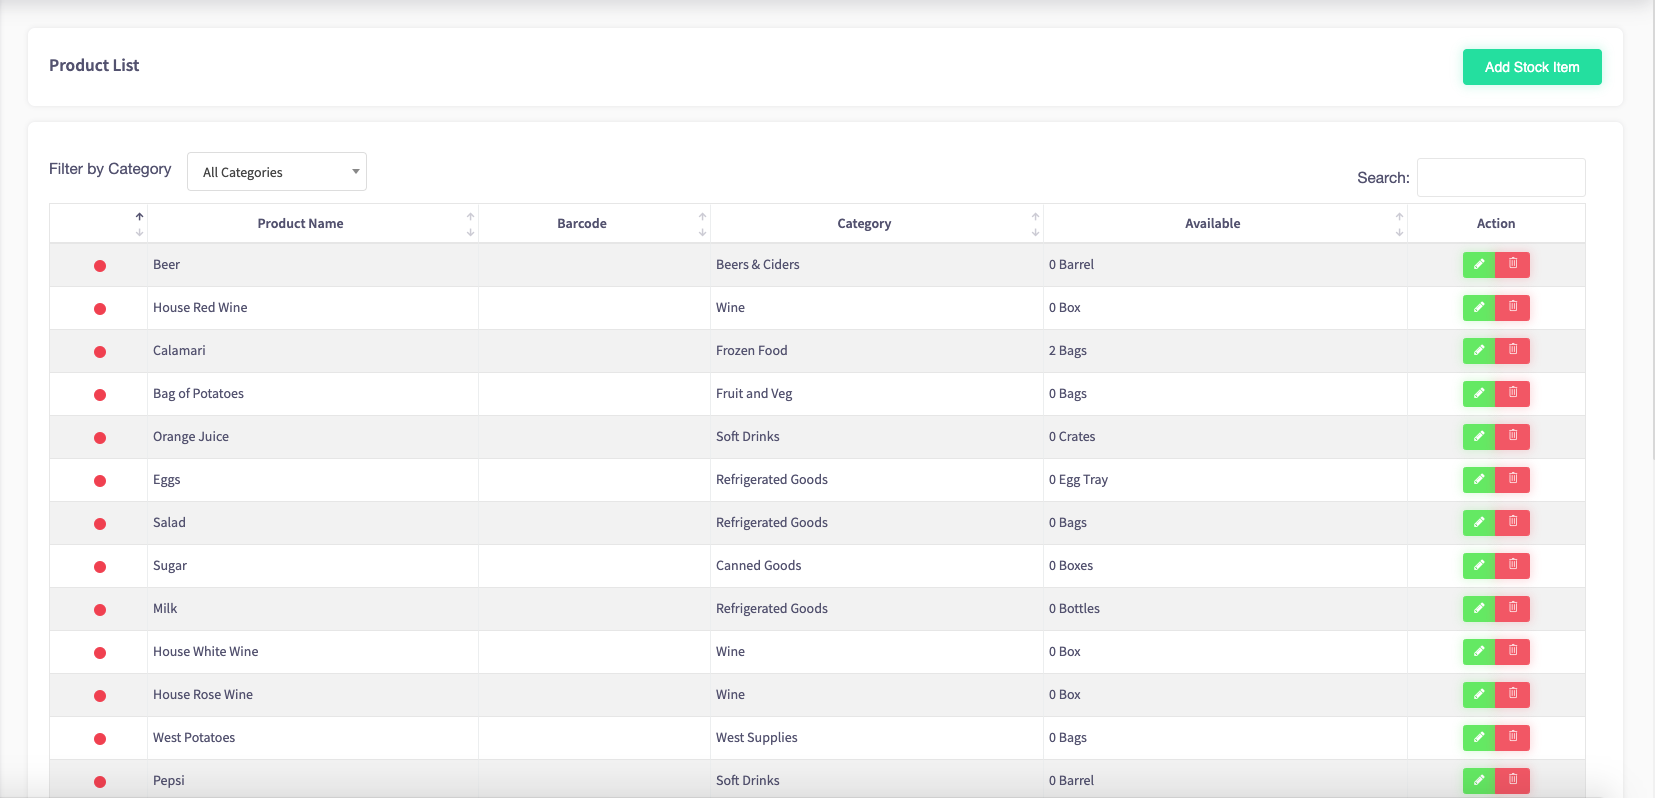
How to use the traffic light system
This guide will show you how to use the traffic light system on your Cloud HQ.
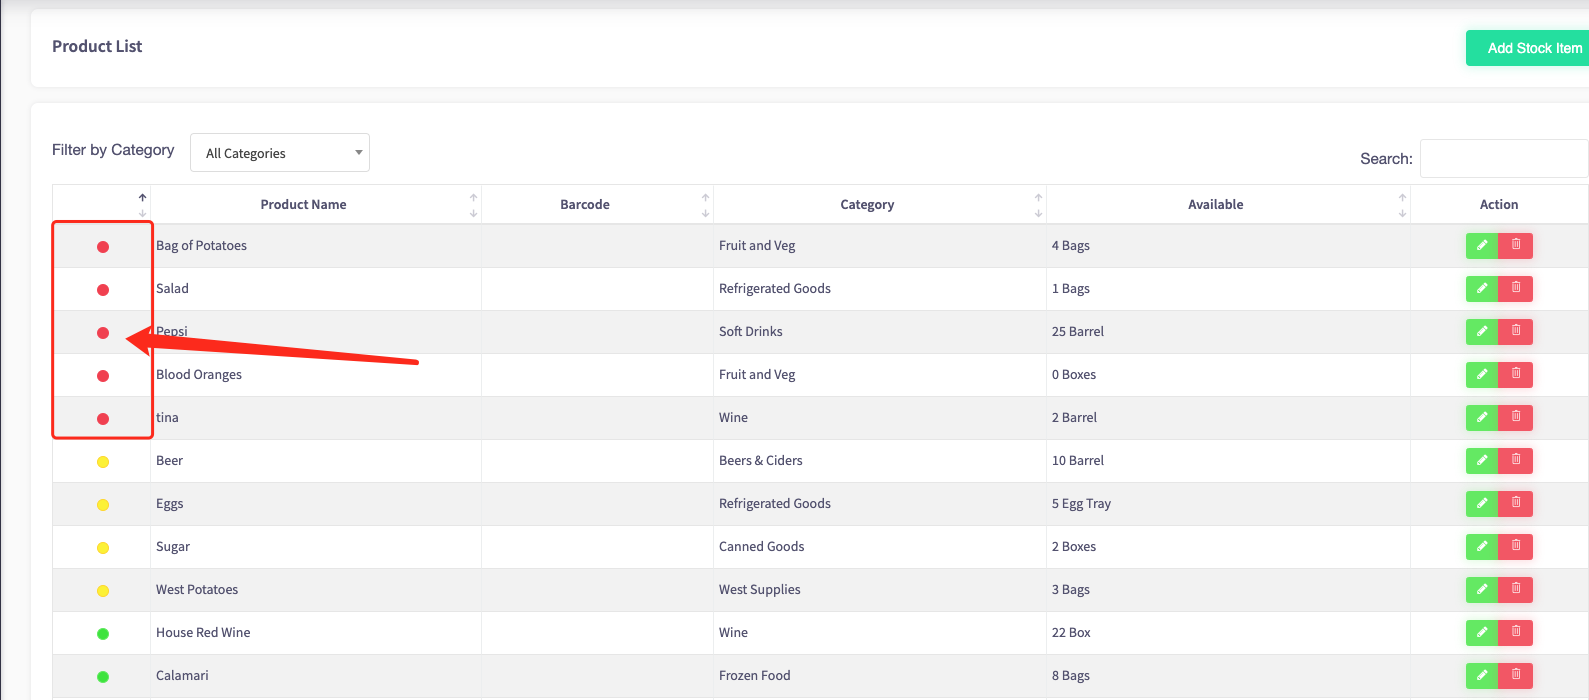
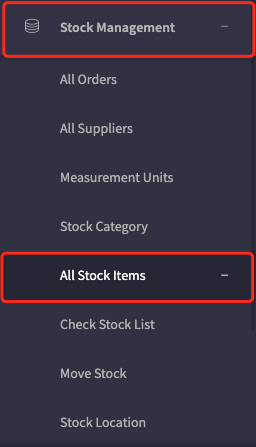
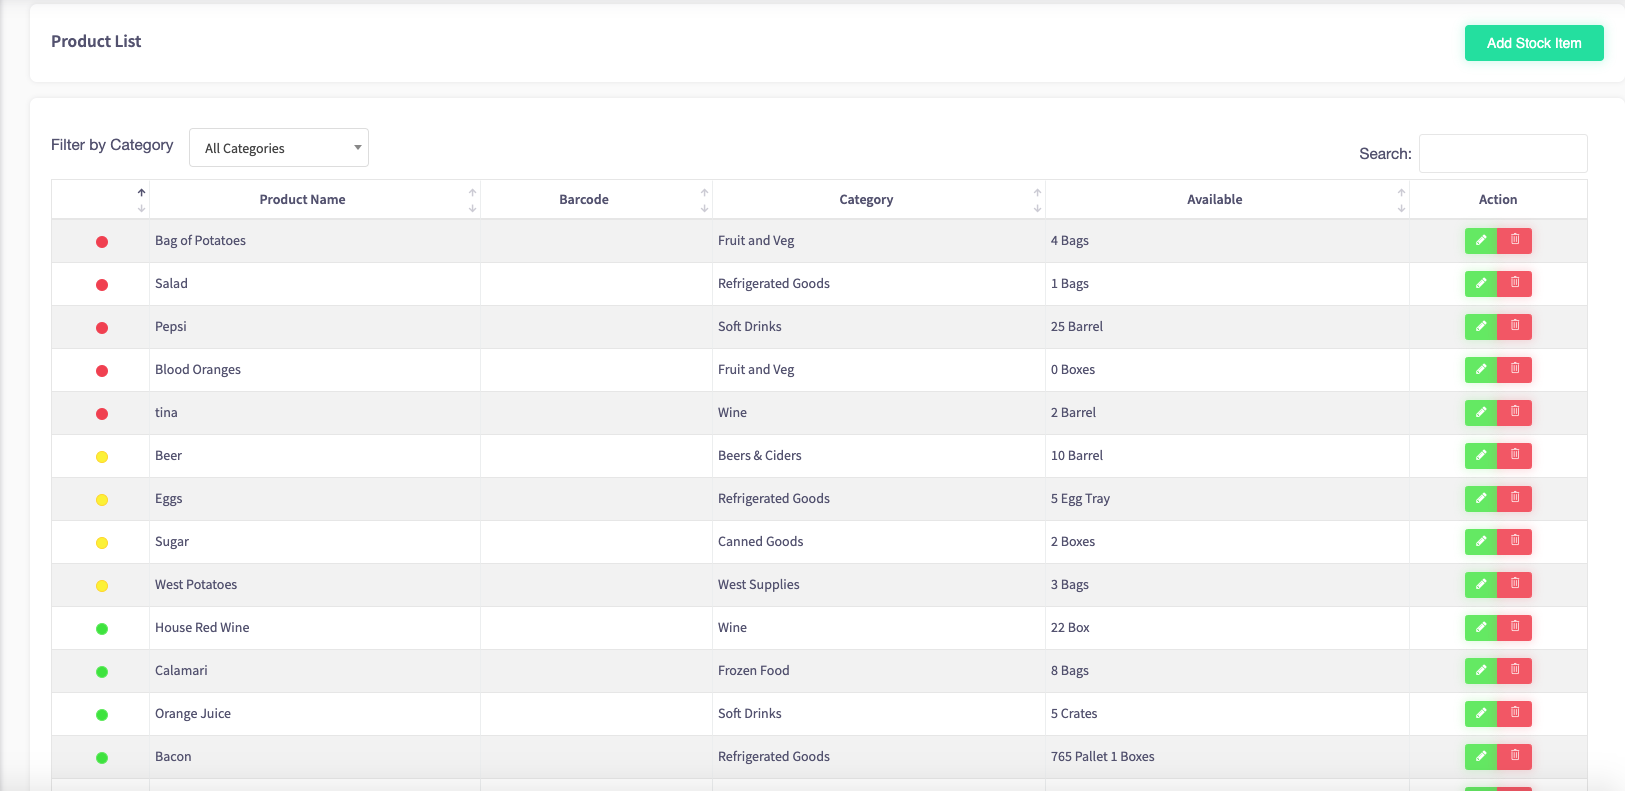
Firstly, click on the 'Stock Management, then the 'All Stock Items' option on the left-hand menu.

Then this screen will display showing operators all the products they sell.

The red dot of the traffic light system, next to the products shows that the product is below the par level.
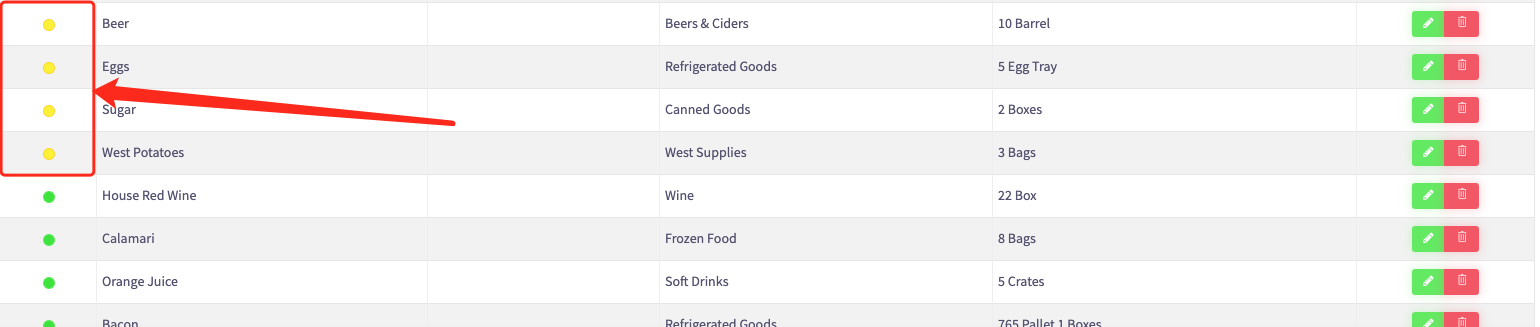
The yellow dot of the traffic light system shows that the product is around about on par level.
The green dot of the traffic light system shows that the product is above par level.

How to add a new supplier
This guide will show you how to add a new supplier to your Cloud HQ.
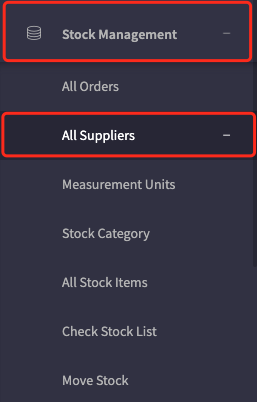
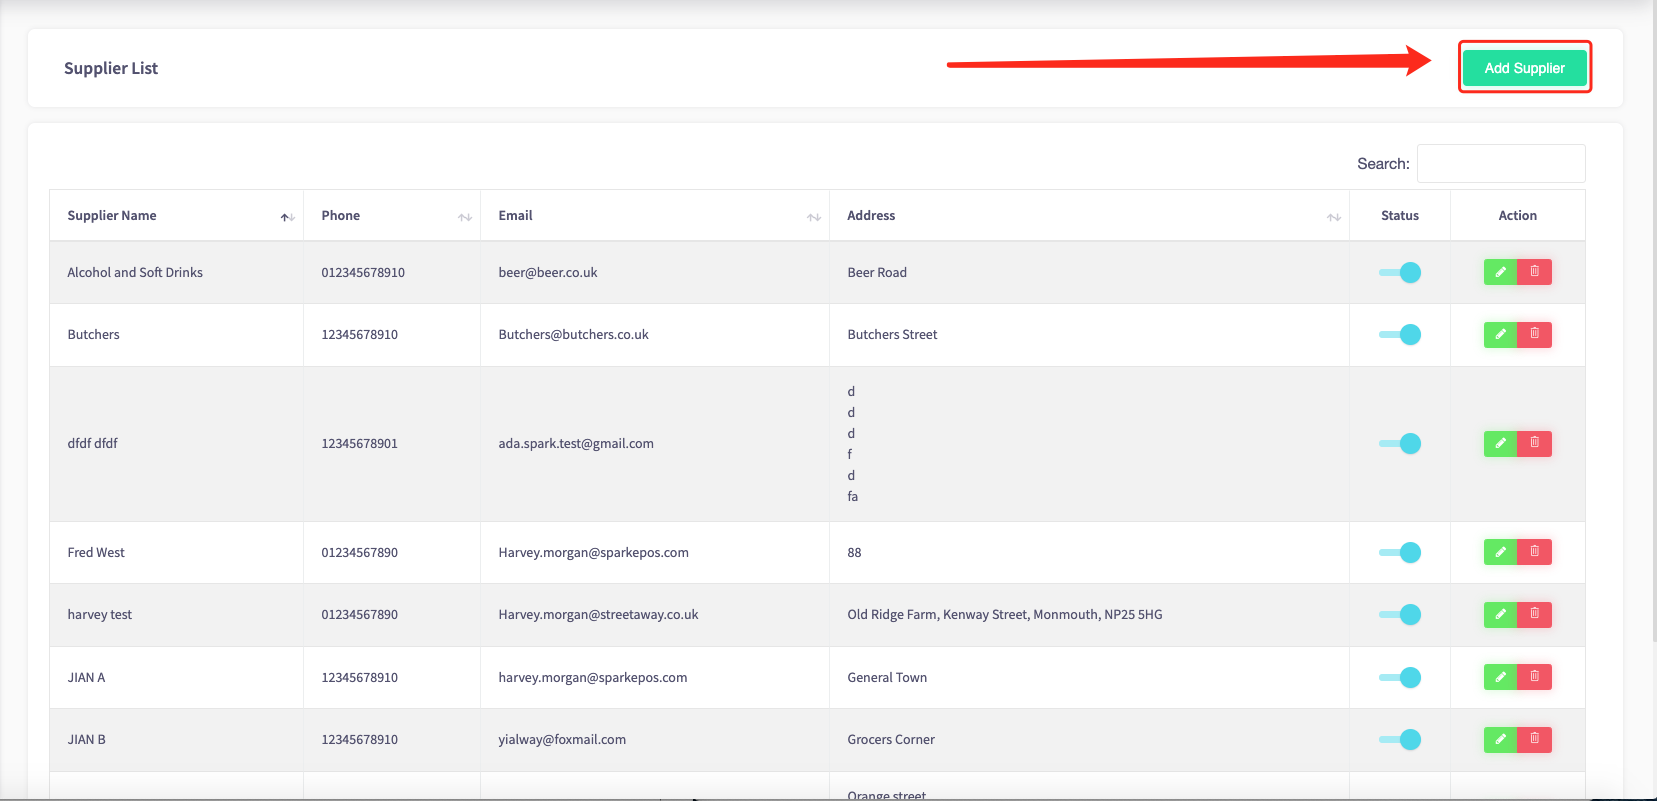
Firstly, click on the 'Stock Management, then the 'All Suppliers' option on the left-hand menu.
This will display your supplier list, shown here.
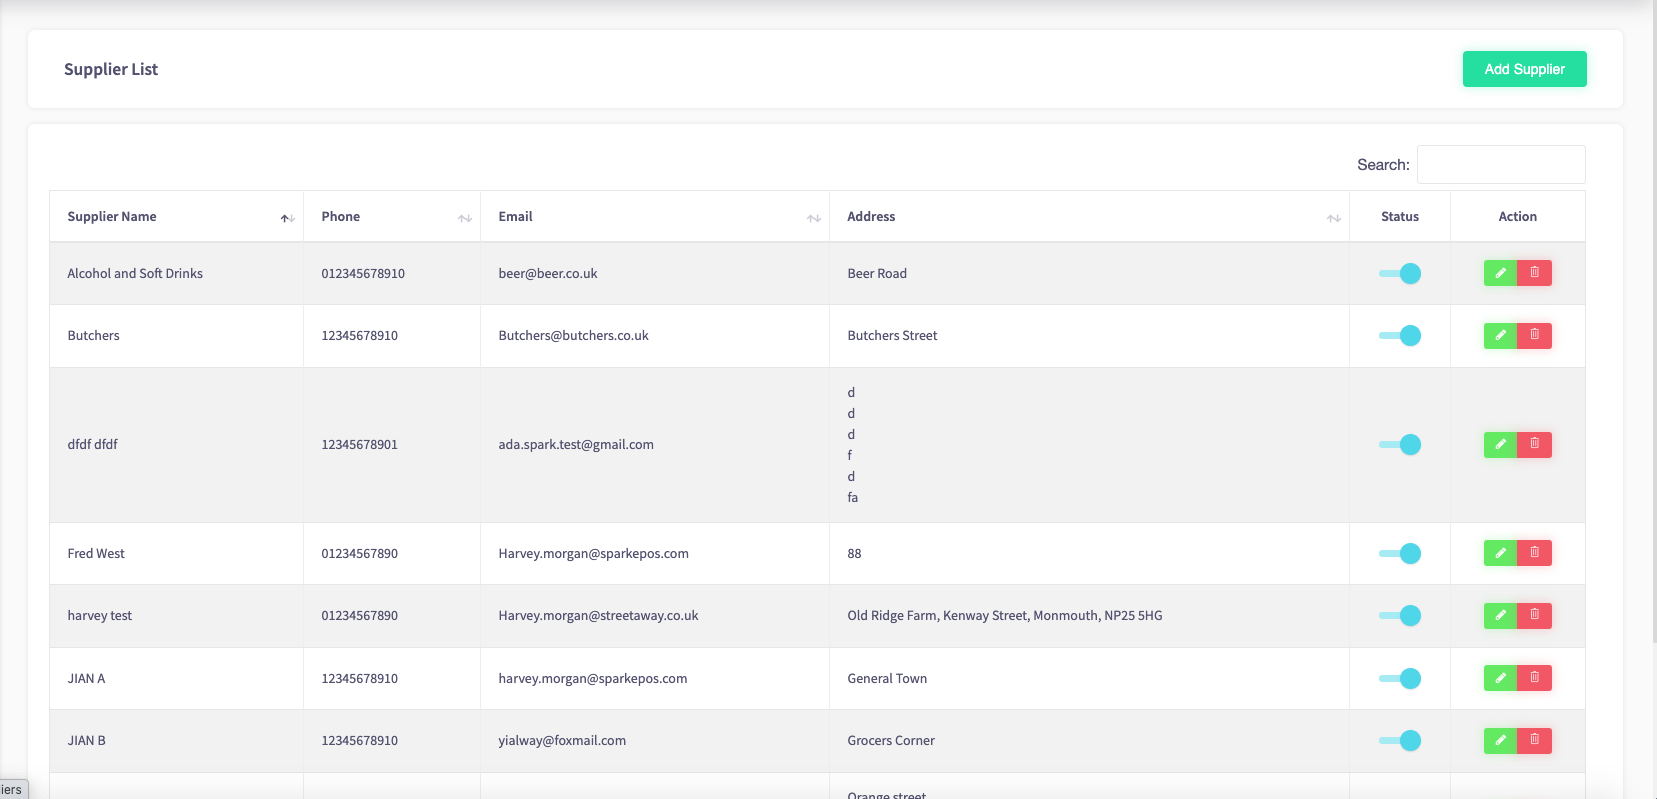
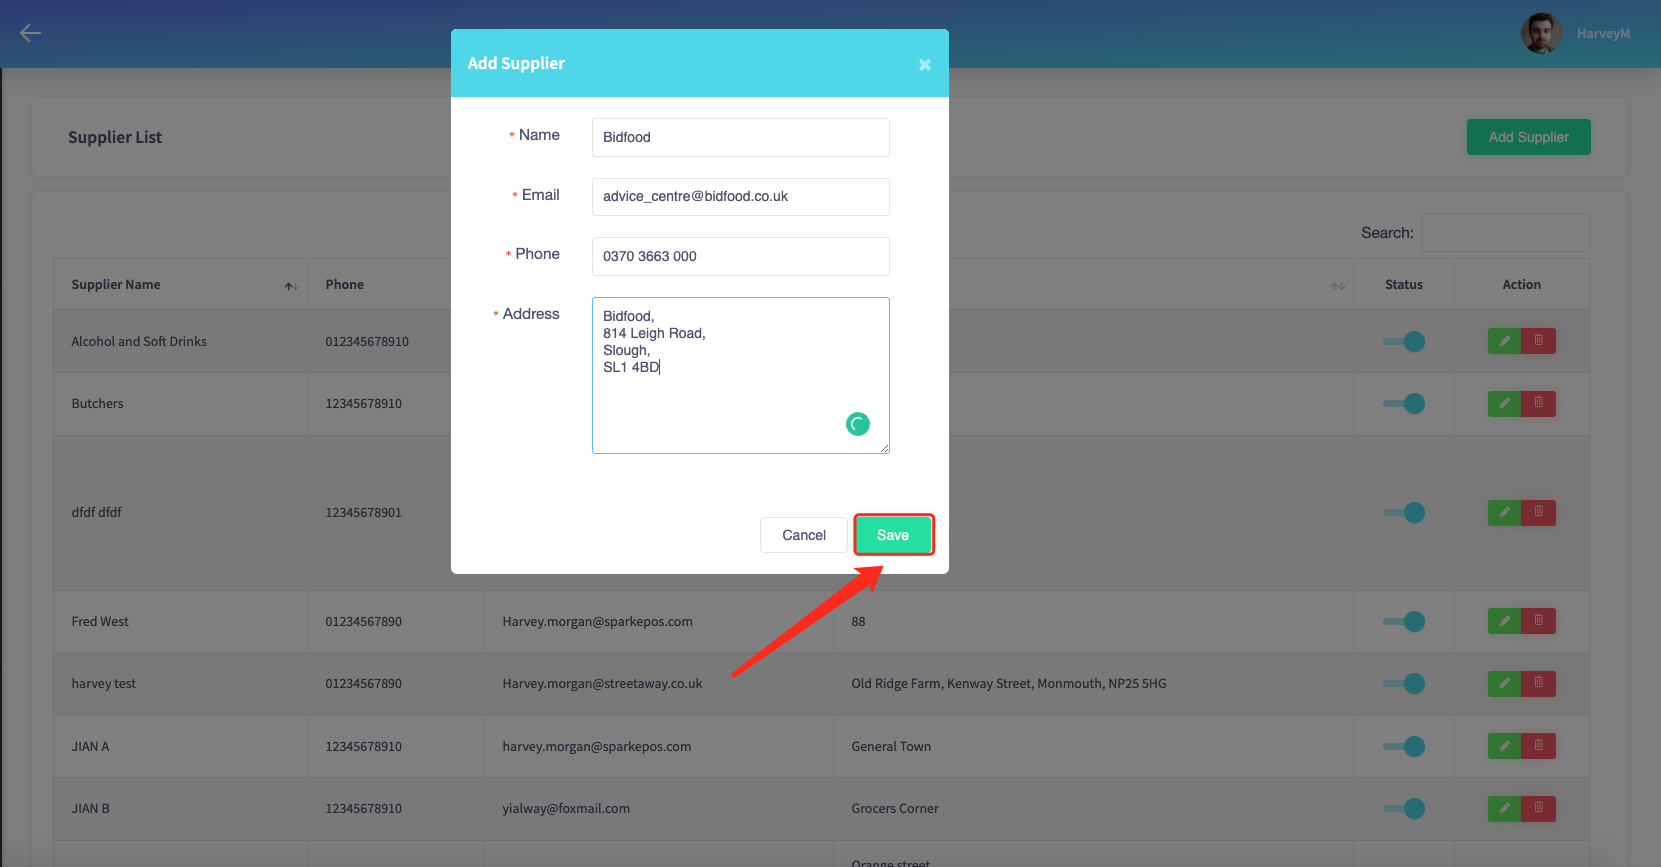
Then click the green "Add Supplier" button at the top right of the page.
Once you have filled in all the information about your supplier, click the green "Save" button at the bottom right of the window.
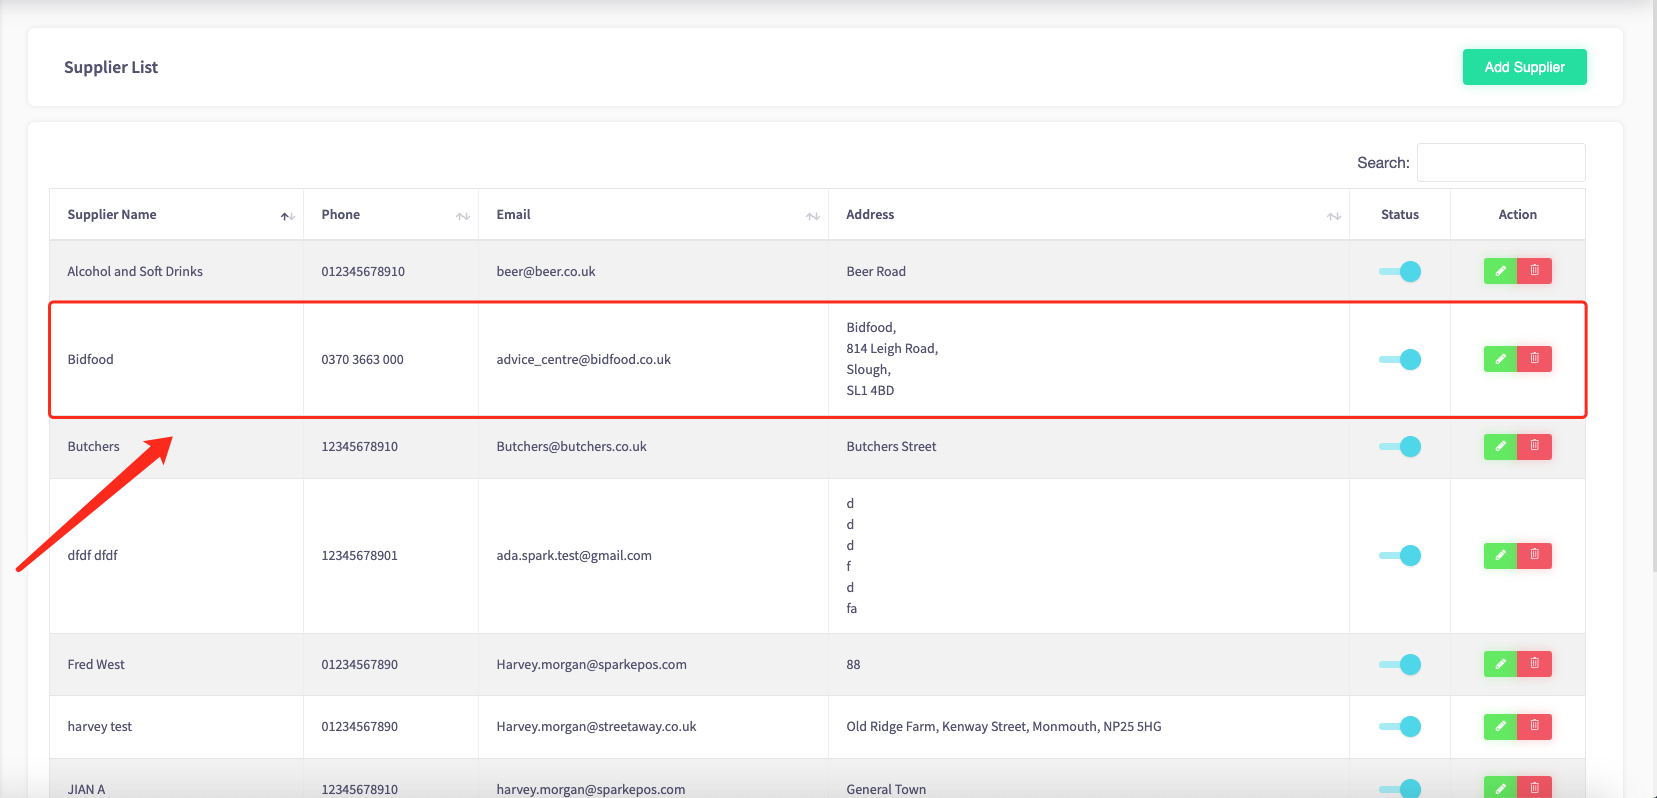
Then your new supplier is added to your supplier list.
How to add or change the par level
This guide will show you how to add or change the par level on your Cloud HQ.
Firstly, click on the 'Stock Management', then the 'All Stock items' option on the left-hand menu.
Then this screen will display showing operators all the products they sell.
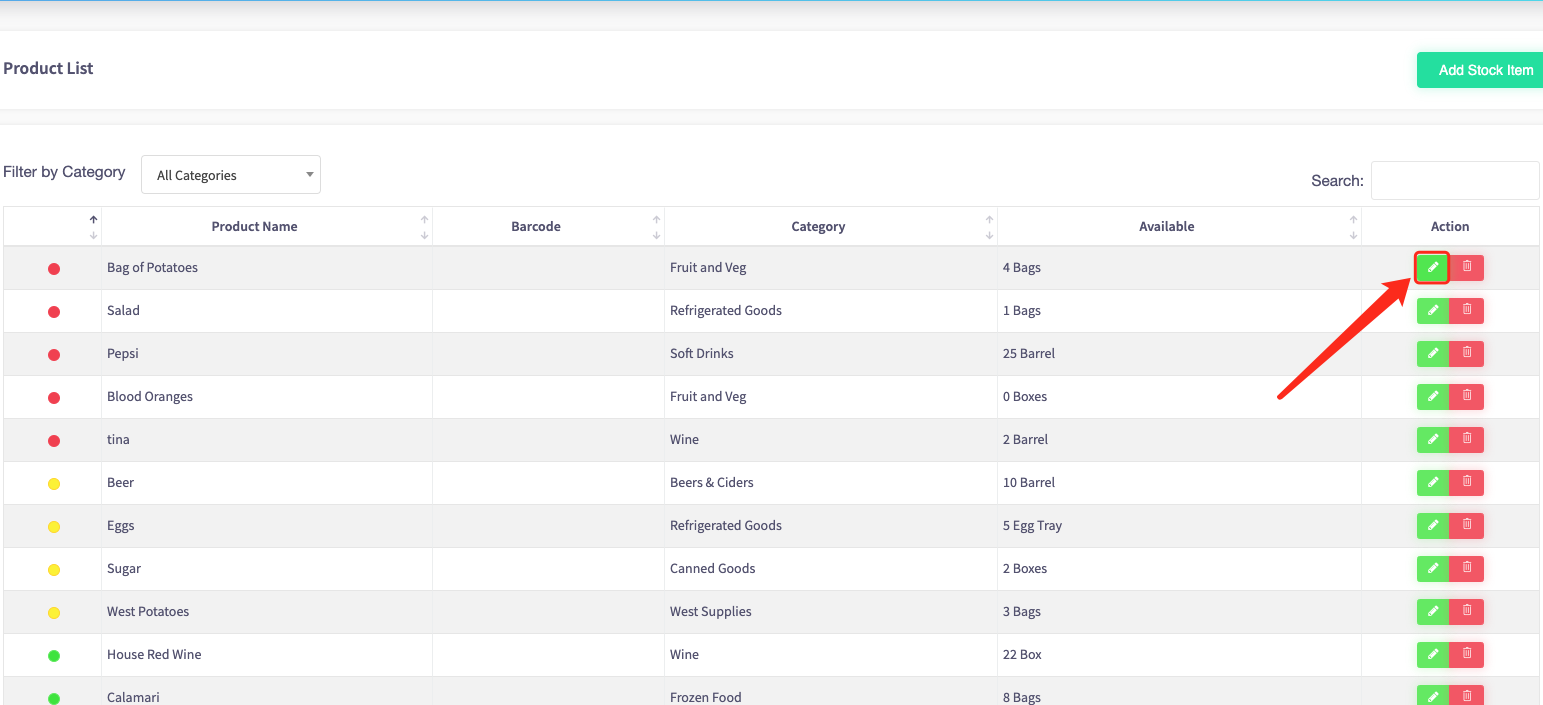
To add or change the par level of a product, click on the green pencil icon to edit the stock item.
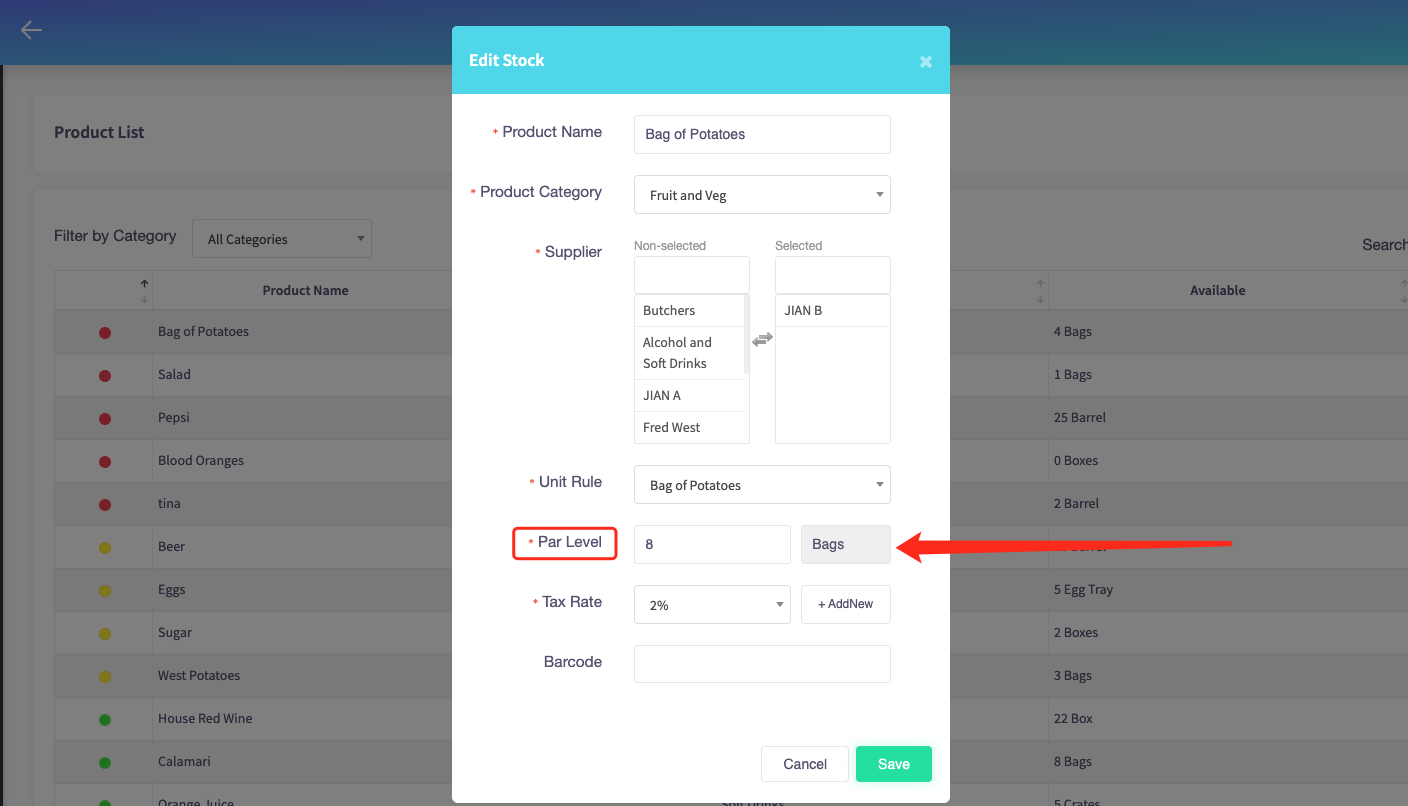
This window will pop up, and here it gives you the option to add or change the par level of a product.
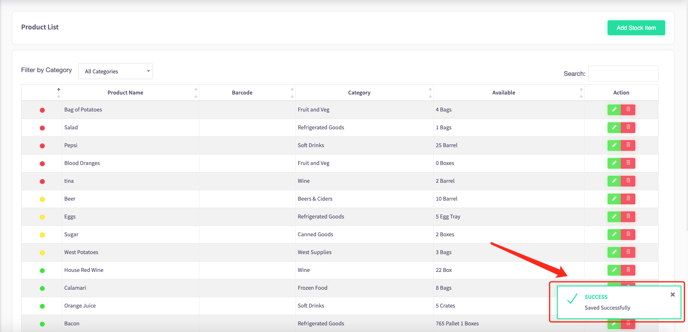
Once you have added or changed your par level on the product, a green "Saved Successfully" message will pop up in the bottom right-hand corner.
How to remove stock items
This guide will show you how to remove stock items on your Cloud HQ.
Firstly, click on the 'Stock Management', then the 'All Stock Items' option on the left-hand menu.
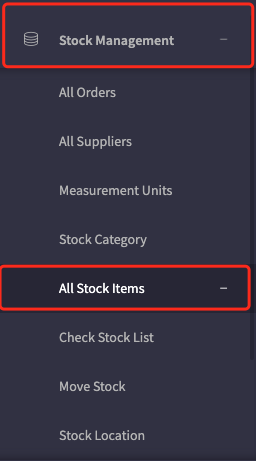
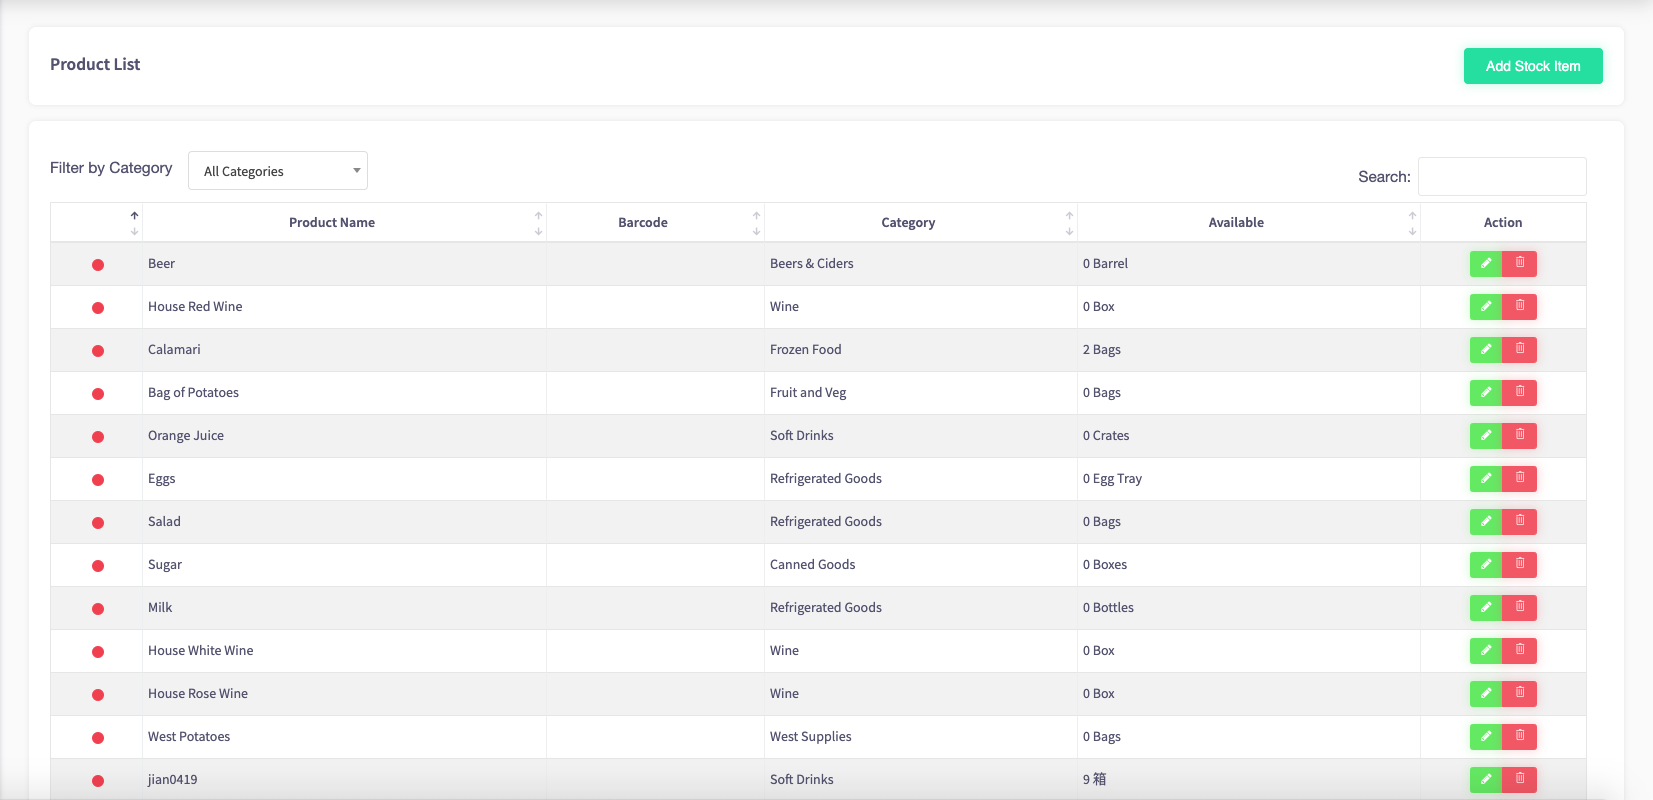
Here should display all your product items.
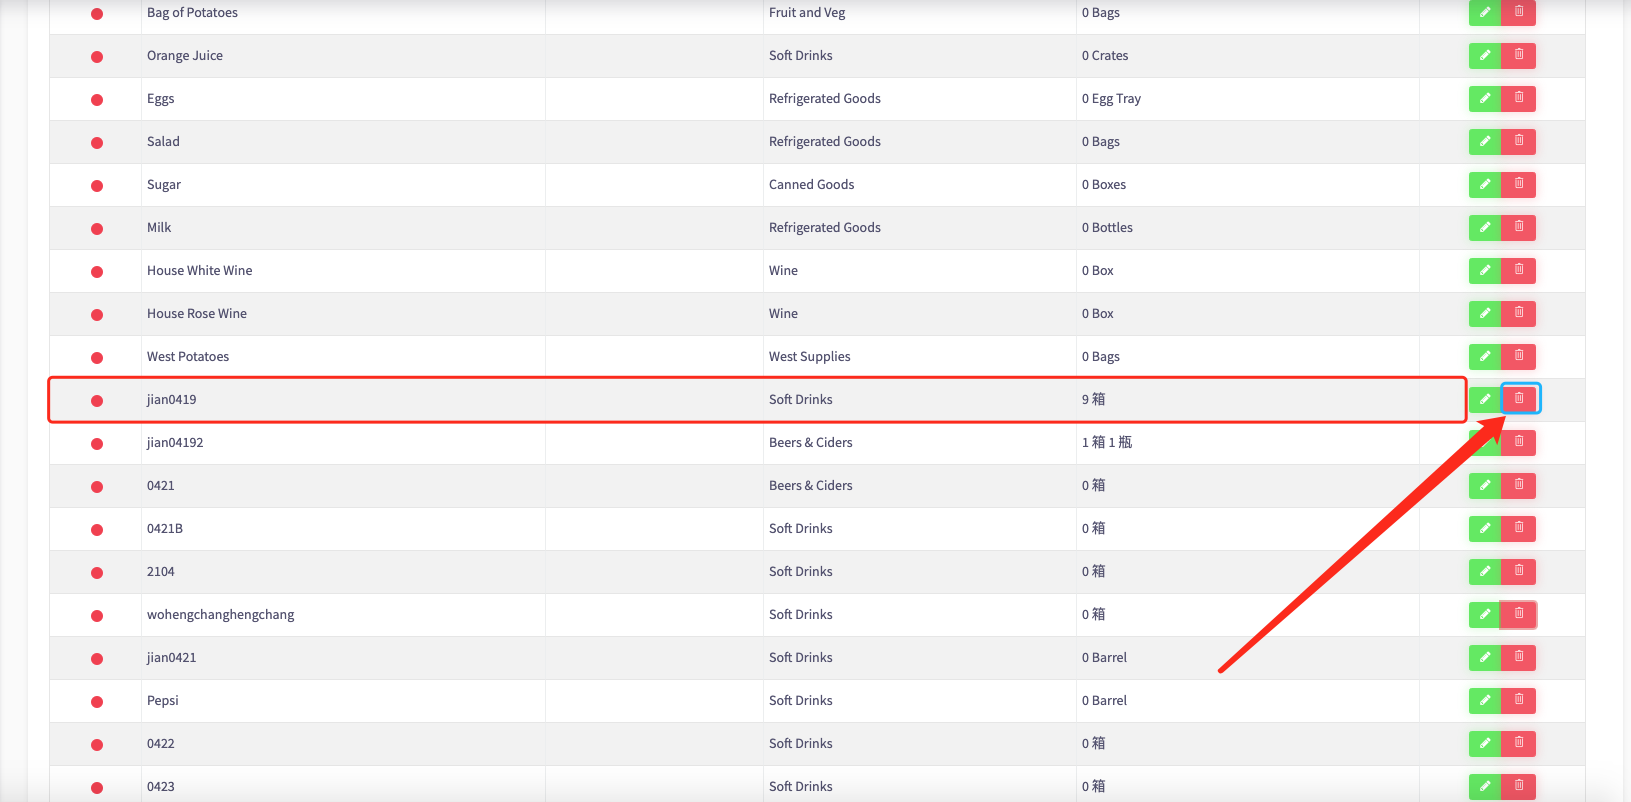
To remove a stock item, click on the red bin icon on the right side of the page.
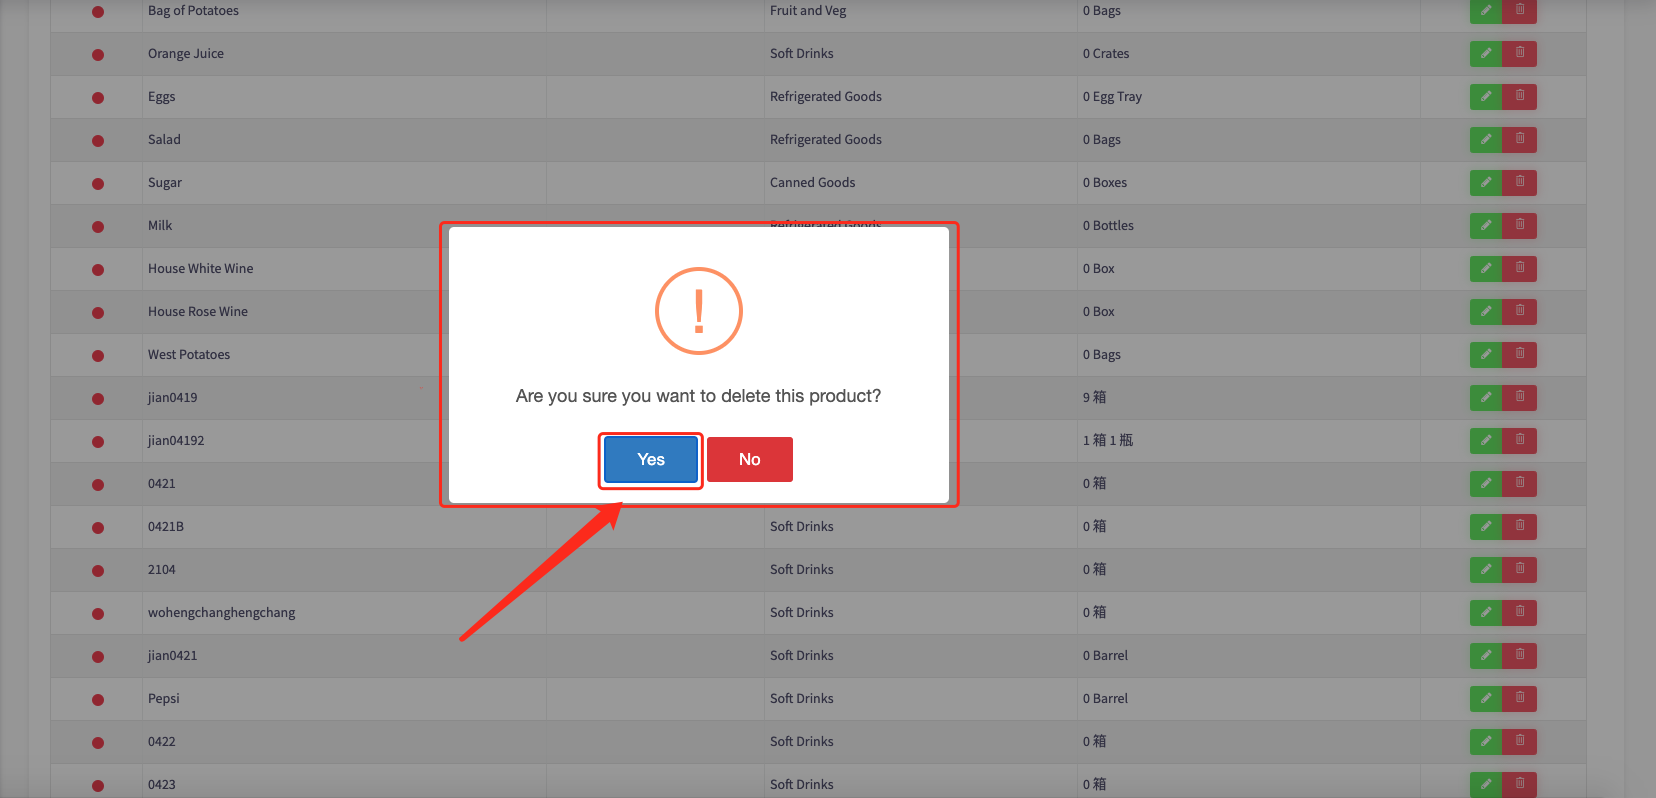
When the icon is clicked, a warning message asks you "Are you sure you want to delete this product?" if you are sure to click the blue yes button.
Then the product will be removed from the product list.