- How to invite new members of staff to your team
- How to manually add new members of staff to your team
- How to edit existing members of staff
Make sure to log into Cloud HQ before you begin.
How to invite new members of staff to your team
Start by finding "Staff Management" along the toolbar on the left-hand side of the screen. Then, on the following screen, click "Manage Staff".
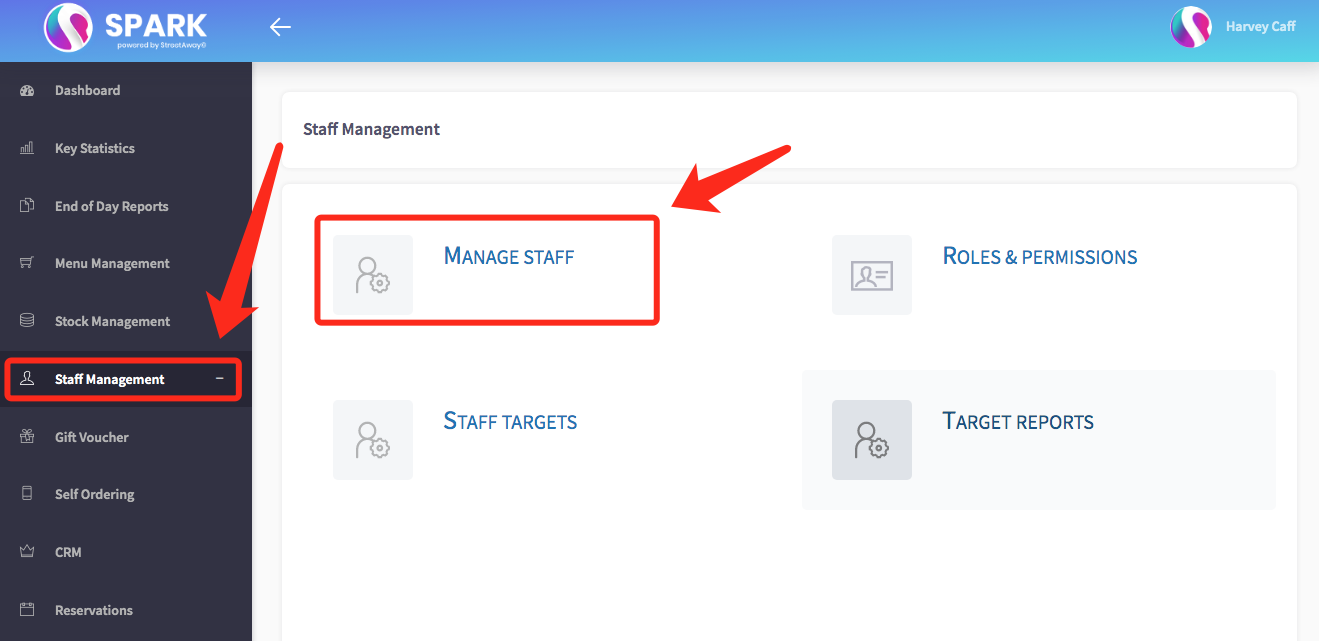
The following table displays a list of all members of staff you currently have on file. If you look in the top-right corner, you'll see three buttons: Invite Staff, QR Card Settings and Add Staff Member.
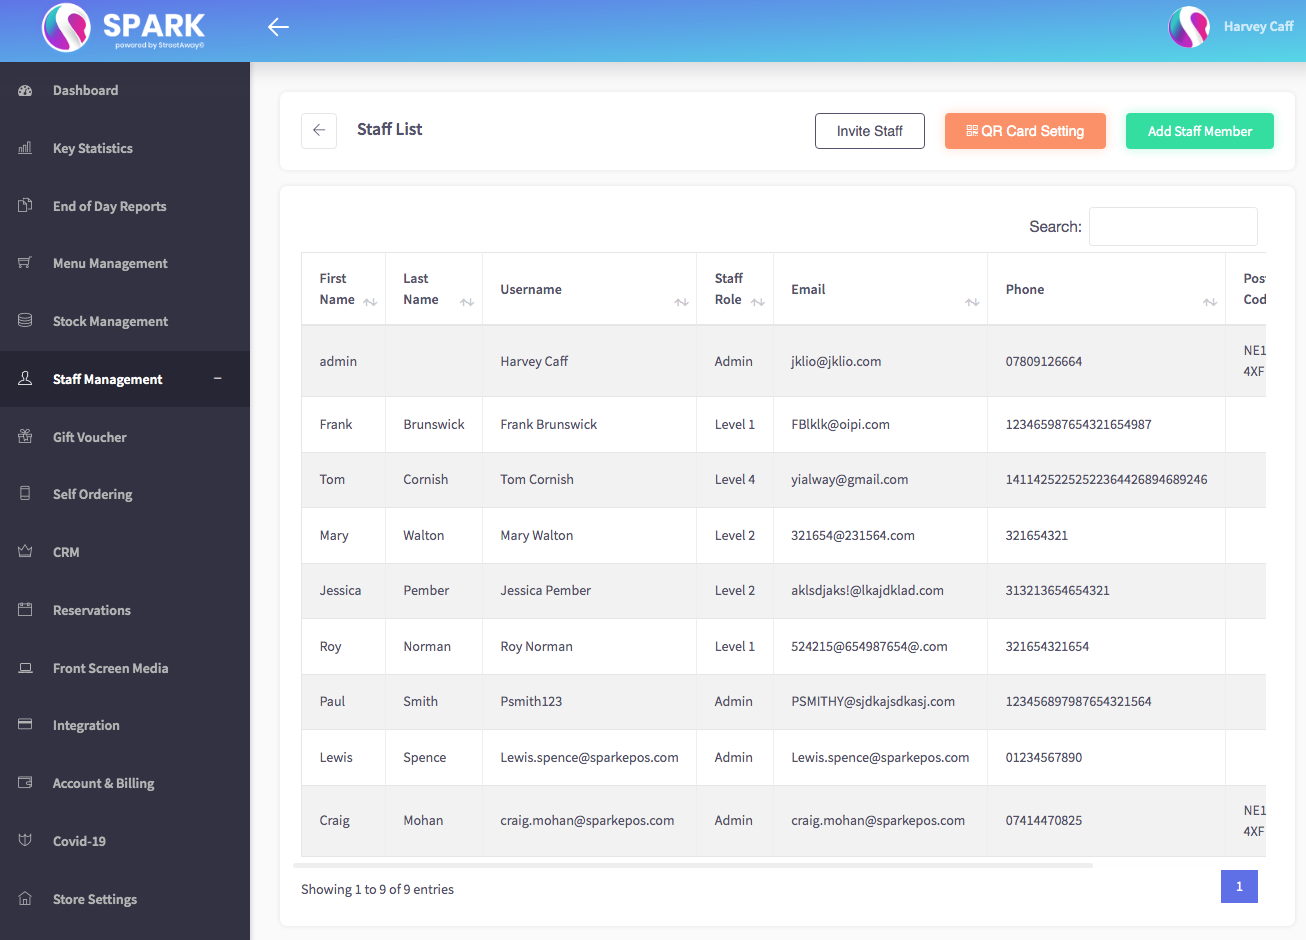
Click Invite Staff.
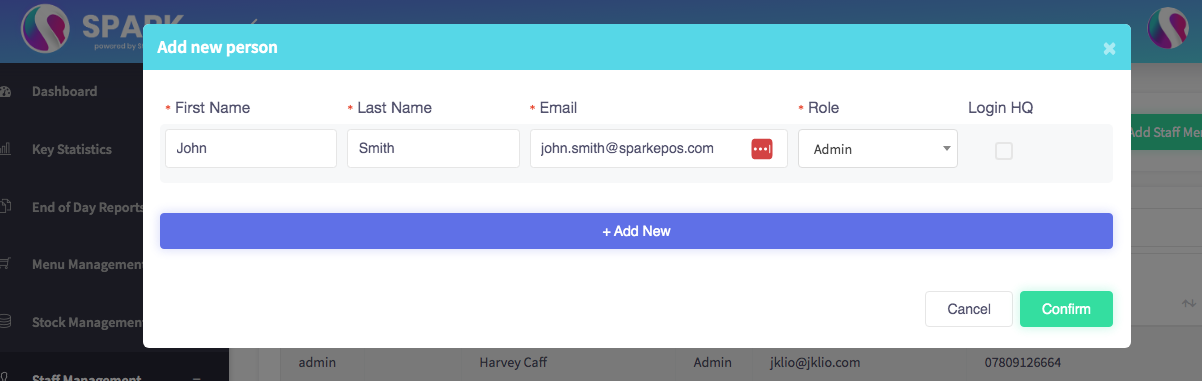
Fill out these boxes with the required information. If you've only just signed up for an account with SPARK, the Role drop-down menu will likely empty. If this is the case, please see our article on how to set up Roles & Permissions before you continue.
The Login HQ box can be checked if this new member of staff should be permitted to log into Cloud HQ. This is especially useful if they belong to management or are otherwise directly involved in the administration of your business. When you're done, click the blue + Add New button.
The system will then send an email to your new team member. This email will contain a link to a form for them to fill out and finalise their onboarding. Once they've completed that, you're done! Your new staff member will be visible in the Staff List and ready to begin operating your terminals.
How to manually add new members of staff to your team
Start by finding "Staff Management" along the toolbar on the left-hand side of the screen. Then, on the following screen, click "Manage Staff".
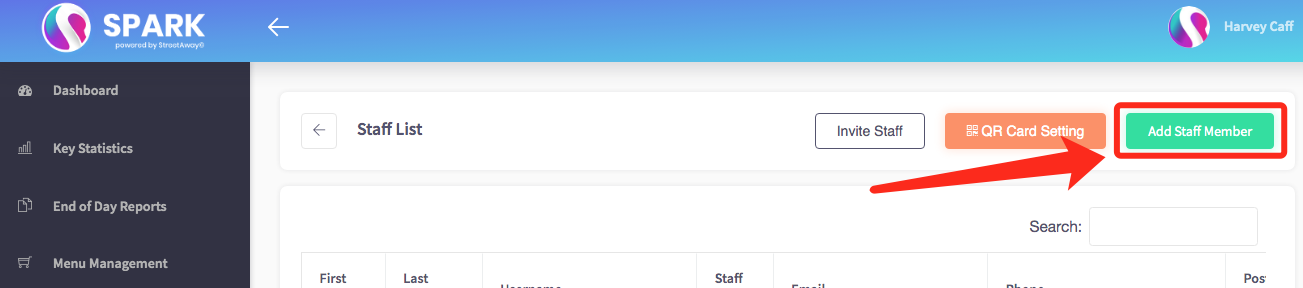
The following table displays a list of all members of staff you currently have on file. If you look in the top-right corner, you'll see three buttons: Invite Staff, QR Card Settings and Add Staff Member. Click Add Staff Member.
Fill out the following form with the required information. If you've only just signed up for an account with SPARK, the Choose Staff Role drop-down menu is likely to be empty. In this case, please see our article on how to set up Roles & Permissions (opens in a new tab) before you continue.
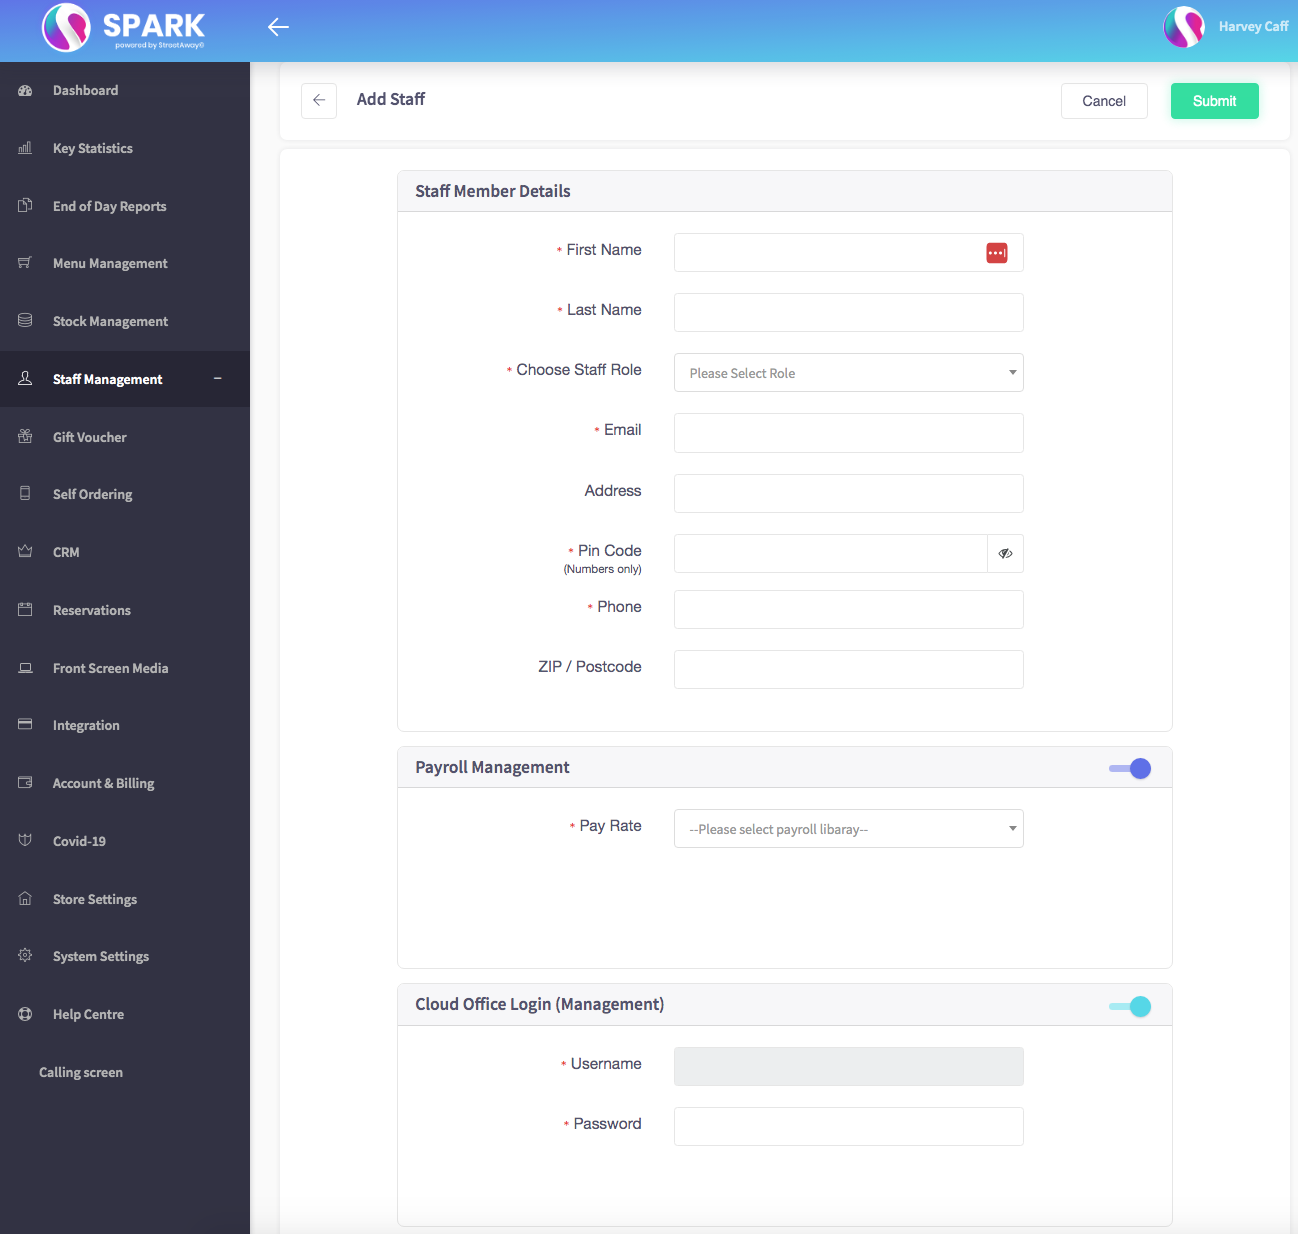
By default, the Cloud Office Login (Management) toggle will be greyed out. Simply click it to switch it on. Here, you can give your new manager a password with which they will be able to log into your business's Cloud HQ account. The username field will automatically populate with their email address.
Once you're done, click the green submit button to confirm your settings. And that's it! Your new staff member has been enrolled.
How to edit existing members of staff
Start by finding "Staff Management" along the toolbar on the left-hand side of the screen. Then, on the following screen, click "Manage Staff".
The following table displays a list of all members of staff you currently have on file: your Staff List.
When viewing your Staff List, take note of the green Edit icon in the rightmost column, as shown below.
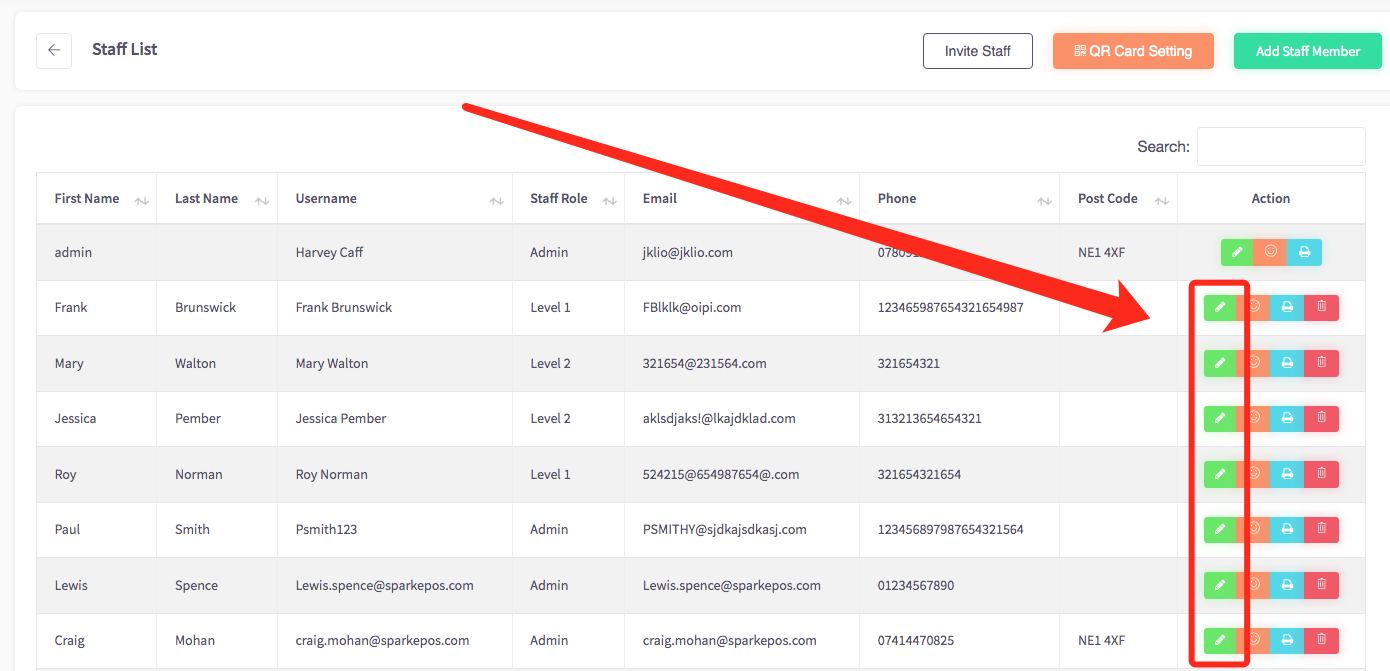
Clicking on any of these will bring up the Edit Staff form.
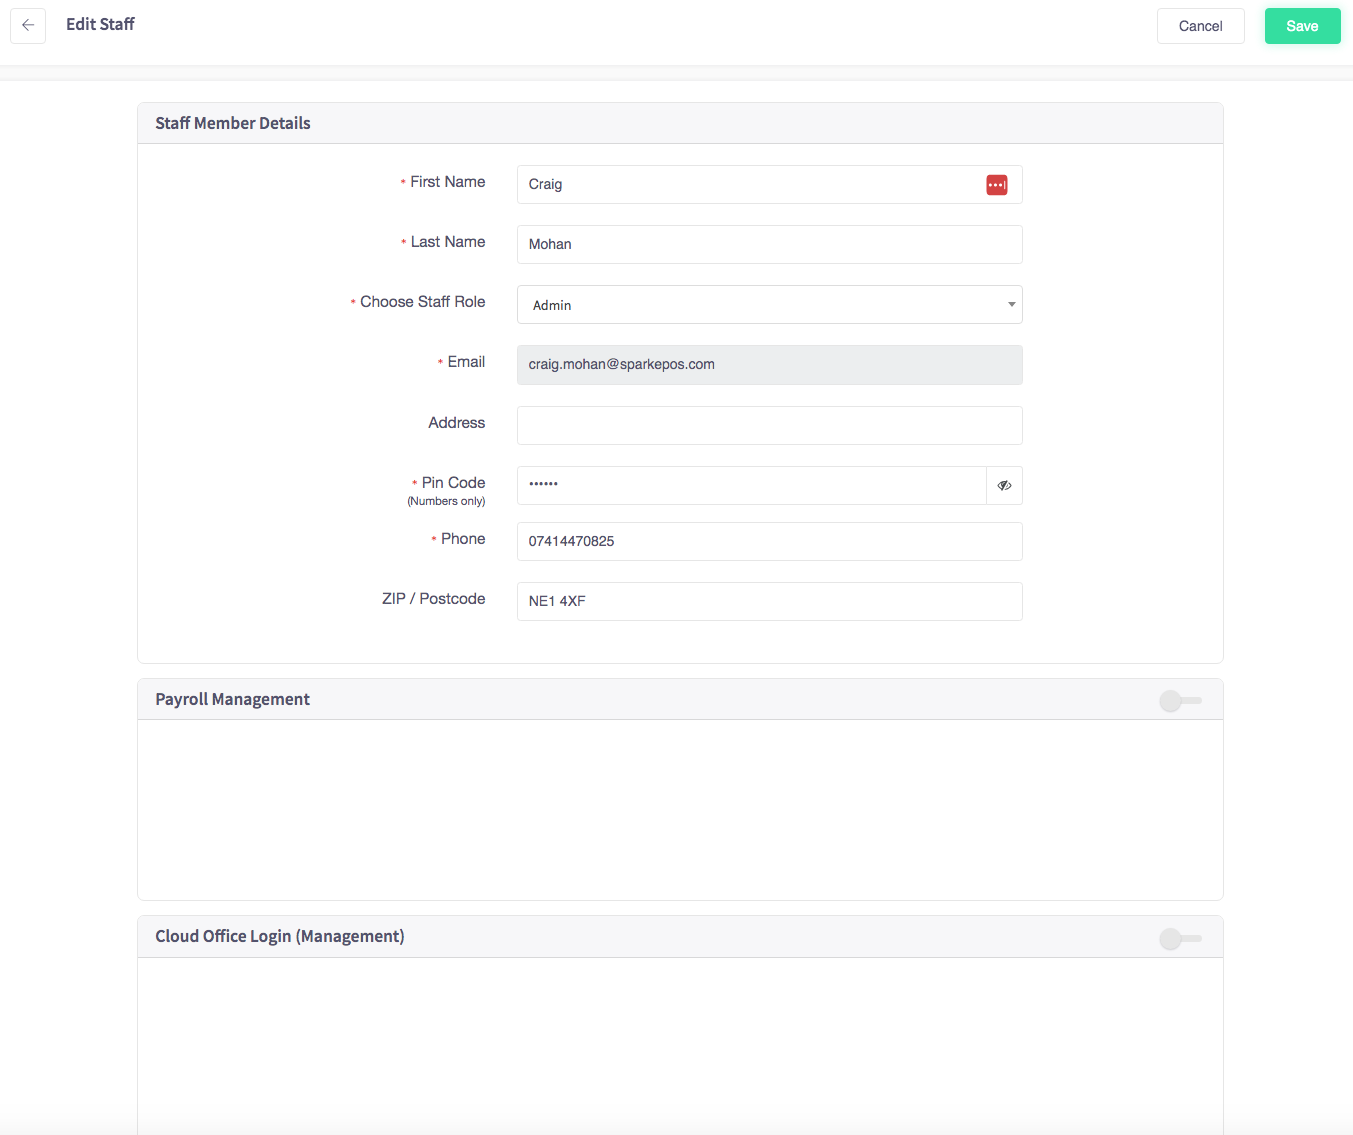
From here, you can change any of the information stored about this particular staff member (except for email address). You can also add Cloud HQ login information for them and change their payroll enrolment - from hourly to salaried, or vice versa.
When you're done, click save to finalise your changes.