This guide will walk you through the process of temporarily stopping bookings for a specific duration and teach you how to filter this option to block certain tables during designated times. Follow these steps to learn more:
Step 1: Accessing the Back Office
Begin by accessing the back office of your reservation system.
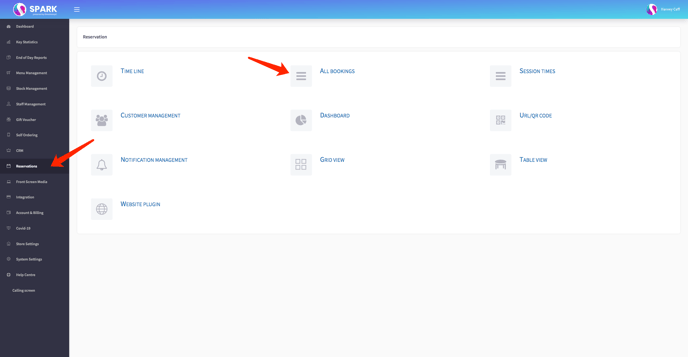
Step 2: Navigating to the "Reservations" Tab
Once inside the back office, locate and click on the "Reservations" tab.
Step 3: Selecting "All Bookings"
Within the "Reservations" tab, find and click on the checkbox labelled "All Bookings." This action will display a comprehensive list of all current bookings.
Step 4: Blocking Bookings
At the top of the page, you'll notice an option labeled "Block Booking." Click on this option to proceed: 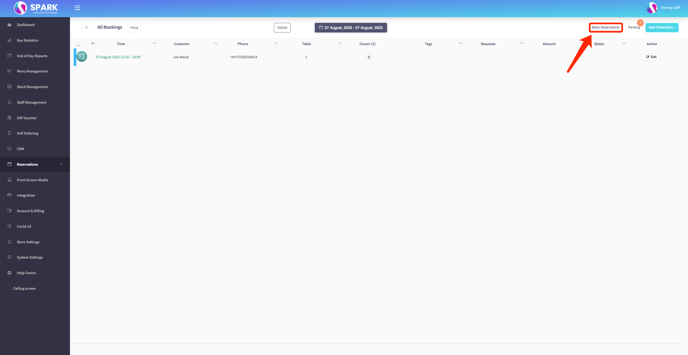
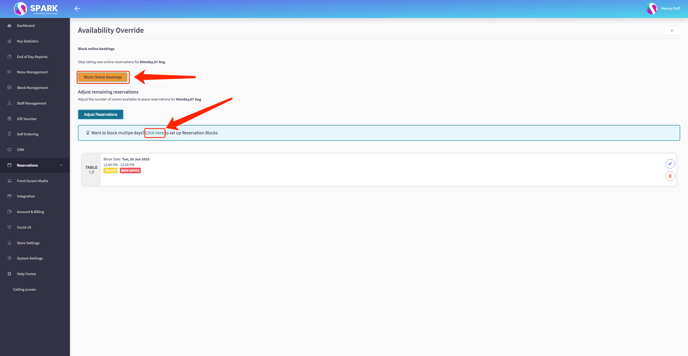
Step 5: Choosing Blocking Options
Upon clicking "Block Booking," you'll be presented with two choices:
Blocking All Bookings Until Next Business Day: If you wish to halt all new bookings until the next business day, click on "Block Online Bookings." This action prevents customers from making new reservations until the following business day.
Specific Tables and Dates: To block bookings for specific tables during designated times, proceed to the next step.
To block bookings for multiple days or specific tables, locate and click on the link that says "Click Here".
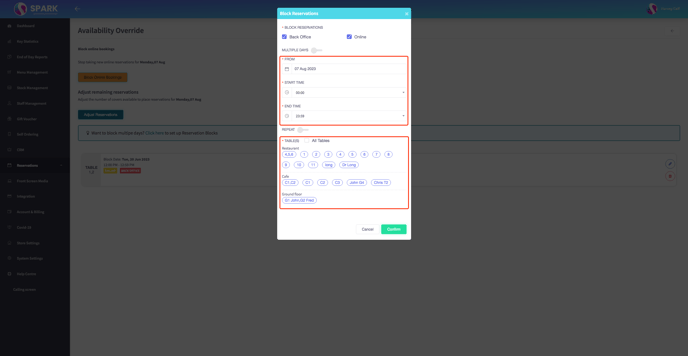
Step 6: Choosing your options
After clicking "Click Here," you'll be directed to a page where you can customize the blocking settings. This page provides options to select:
- Dates and Times: Choose the dates and times during which you want to block bookings.
- Specific Tables: Select the tables you wish to block during the chosen time period.
Please keep in mind, you can create multiple filtered reservation blocks at once.
Once you've made your selections, confirm your choices.