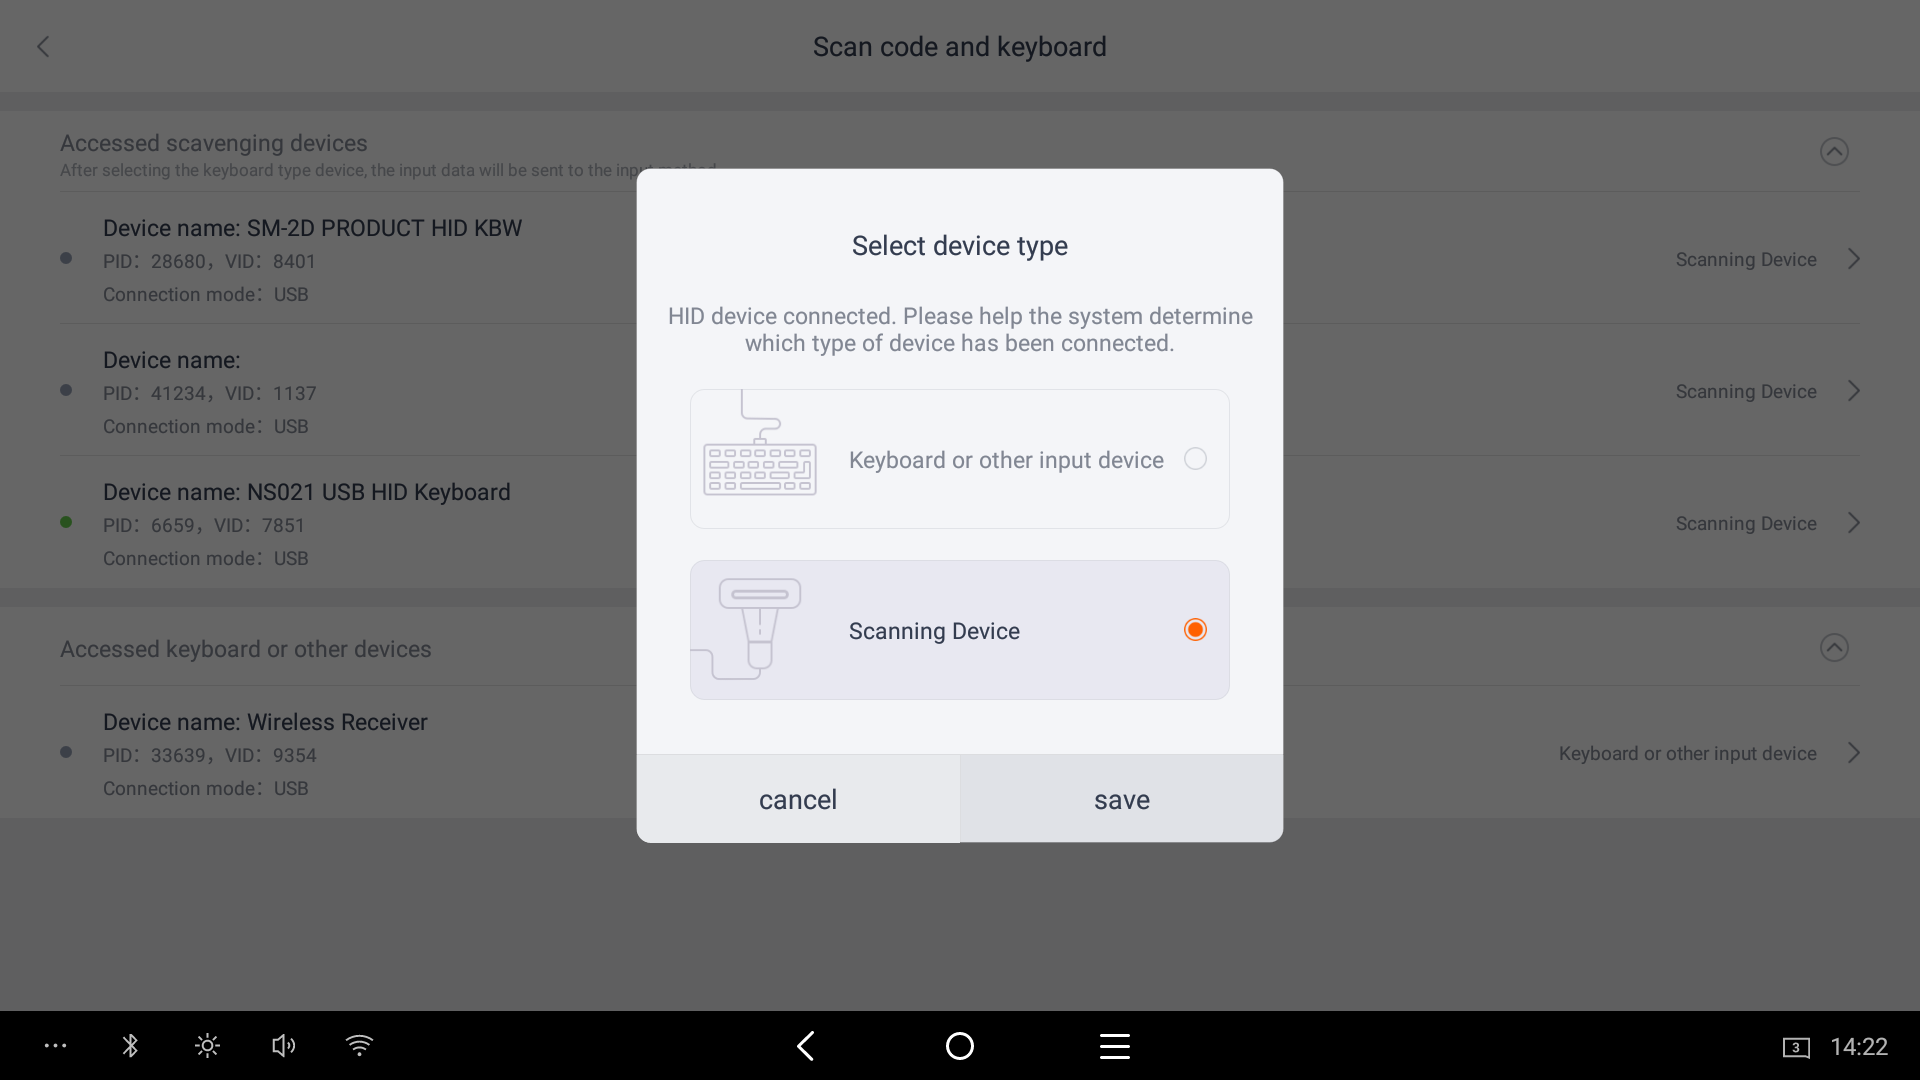
1. Plug the barcode scanner into the Terminal by USB and you may receive a pop up showing a window like the one below.

2. For device type select Scanning Device.
3. Navigate to the settings app on the terminal
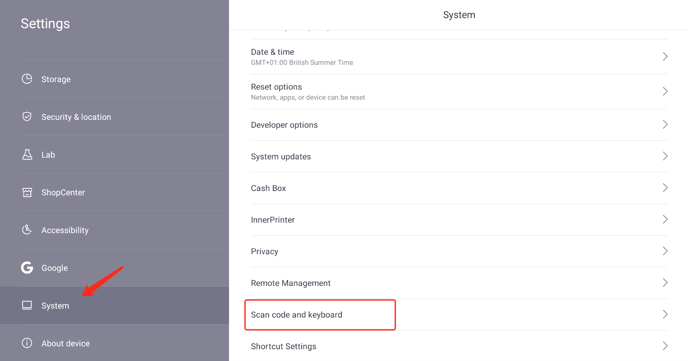
4. Then scroll down to the System settings tab on the left hand side, then Scan code and keyboard
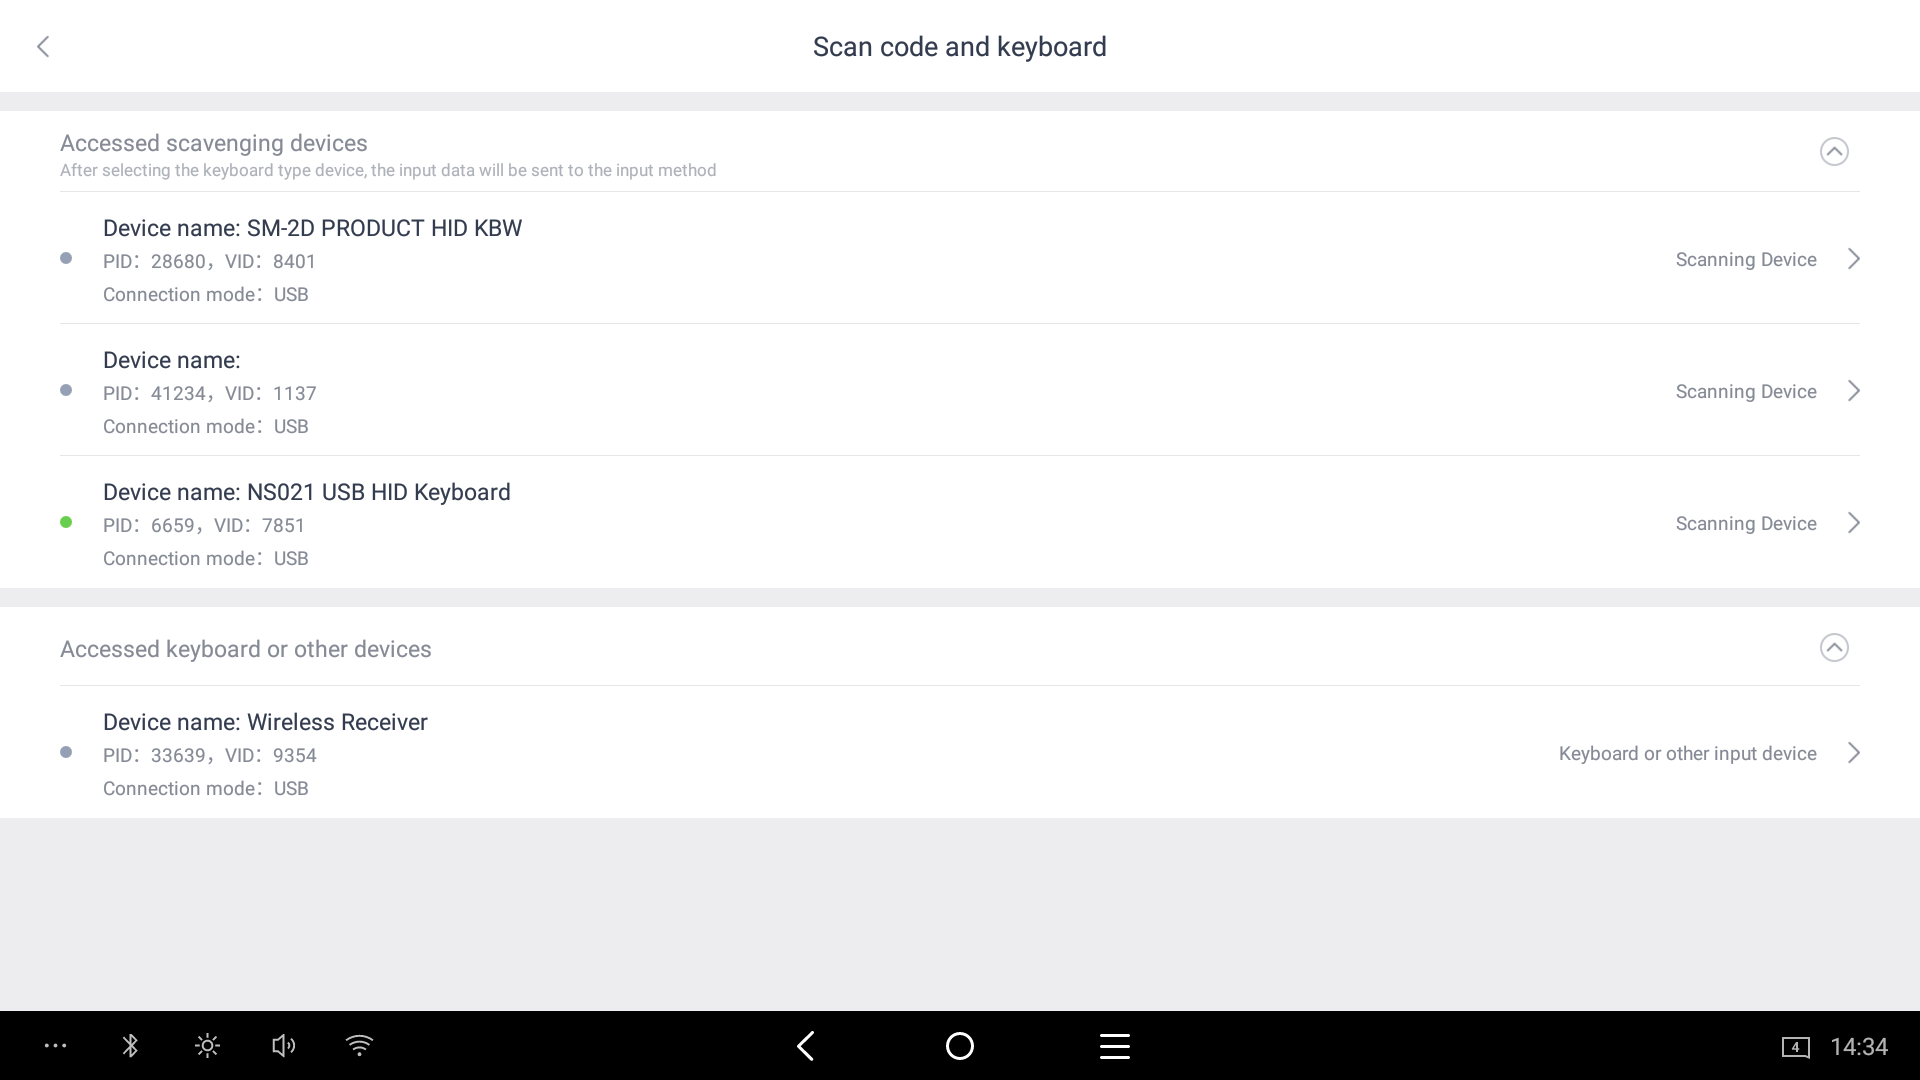
5. Select your barcode scanner from this list - if it's plugged in you'll see a green circle to the left of the name USB HID Keyboard
6. After selecting the barcode scanner change your settings to match this screenshot
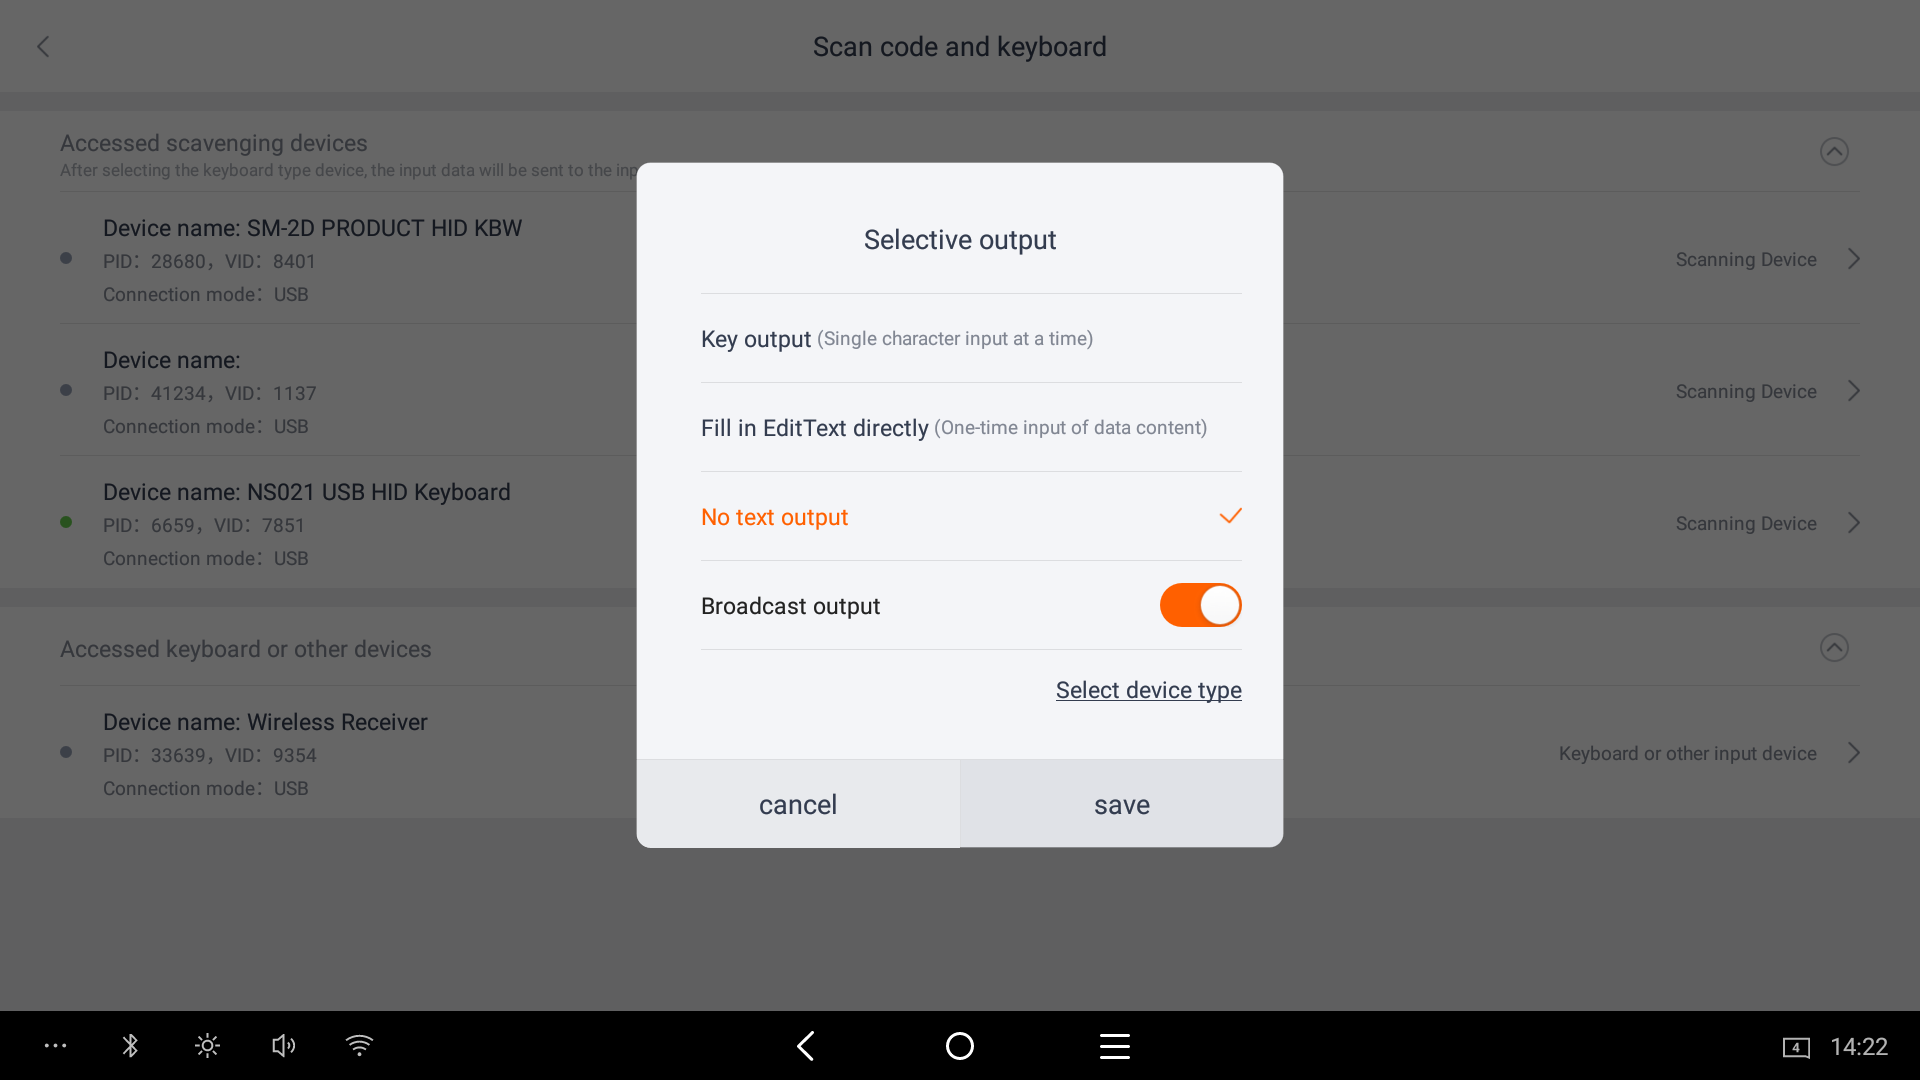
7. Press the select device type link to ensure it's showing as scanning device
Note: If you're still having issues you can follow our video guide below that will show you how to access these settings.
8. Now that it's configured correctly you'll need to assign barcodes to your menu items. Click here to view our guide on how to assign barcodes to menu items in Cloud Office