This guide will cover all the steps to replace Hola front screen, from removing the old screen to connecting the new screen.
This guide will be updated with newer media soon, we apologise for the image's poor quality.
Step 0: Safety Precautions Before starting, ensure safety by removing any items from the top tray and powering down the robot to avoid potential electrical shocks.
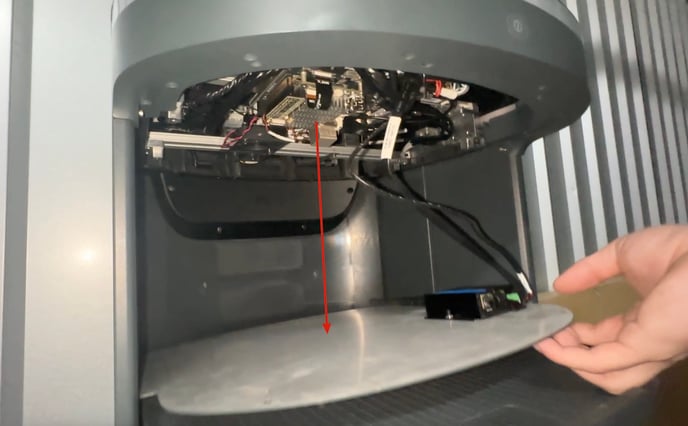
Step 1: Removing the Top Plate Using a size 2.5 Allen key, locate and remove approximately 8 screws securing the top plate beneath Holas interactive screen.
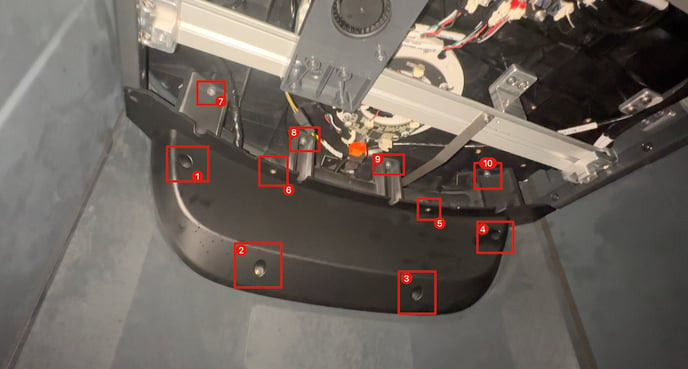
Step 2: To remove the Front Plate After removing the top plate, locate and remove additional screws indicated in the provided diagram. These screws secure the front plate in place. Keep these screws safely stored. (A size 3 Allen key will be needed for these screws)
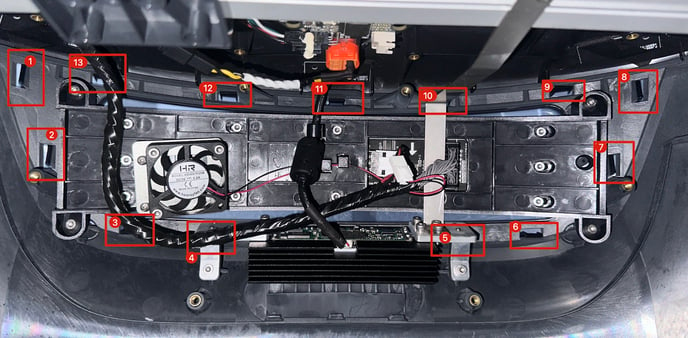
Step 3: To remove the Damaged Screen, use a guitar pick or a flat-head screwdriver to push the plastic tabs indicated in the diagram. This will allow the damaged front-facing screen to be easily popped out.
Step 4: Insert the new screen in place, ensuring alignment with the spaces left by the old screen. Utilize the tabs on the screen for guidance, then firmly push the screen into position until it clicks into place.

Step 5: Securing the Screen Verify that the new screen is snugly fitted, then reassemble the device by screwing everything back together. Work in reverse order through the guide, ensuring all components are returned to their original positions and that all removed screws are utilised.
By following these steps carefully, you can successfully replace Holas' interactive screen with minimal hassle.
If you have any difficulties or if you are unsure, give us a ring and we can talk you through the steps.
Our number: 0191 468 2250