This guide serves as your comprehensive walkthrough for the process of downloading and printing barcodes from your back office.
However, kindly note that the initial setup process will not be covered here. To learn more about setting up barcodes, click here
To commence the barcode printing process, ensure you're logged into your back office account. Once logged in, navigate to the "Menu Management" section.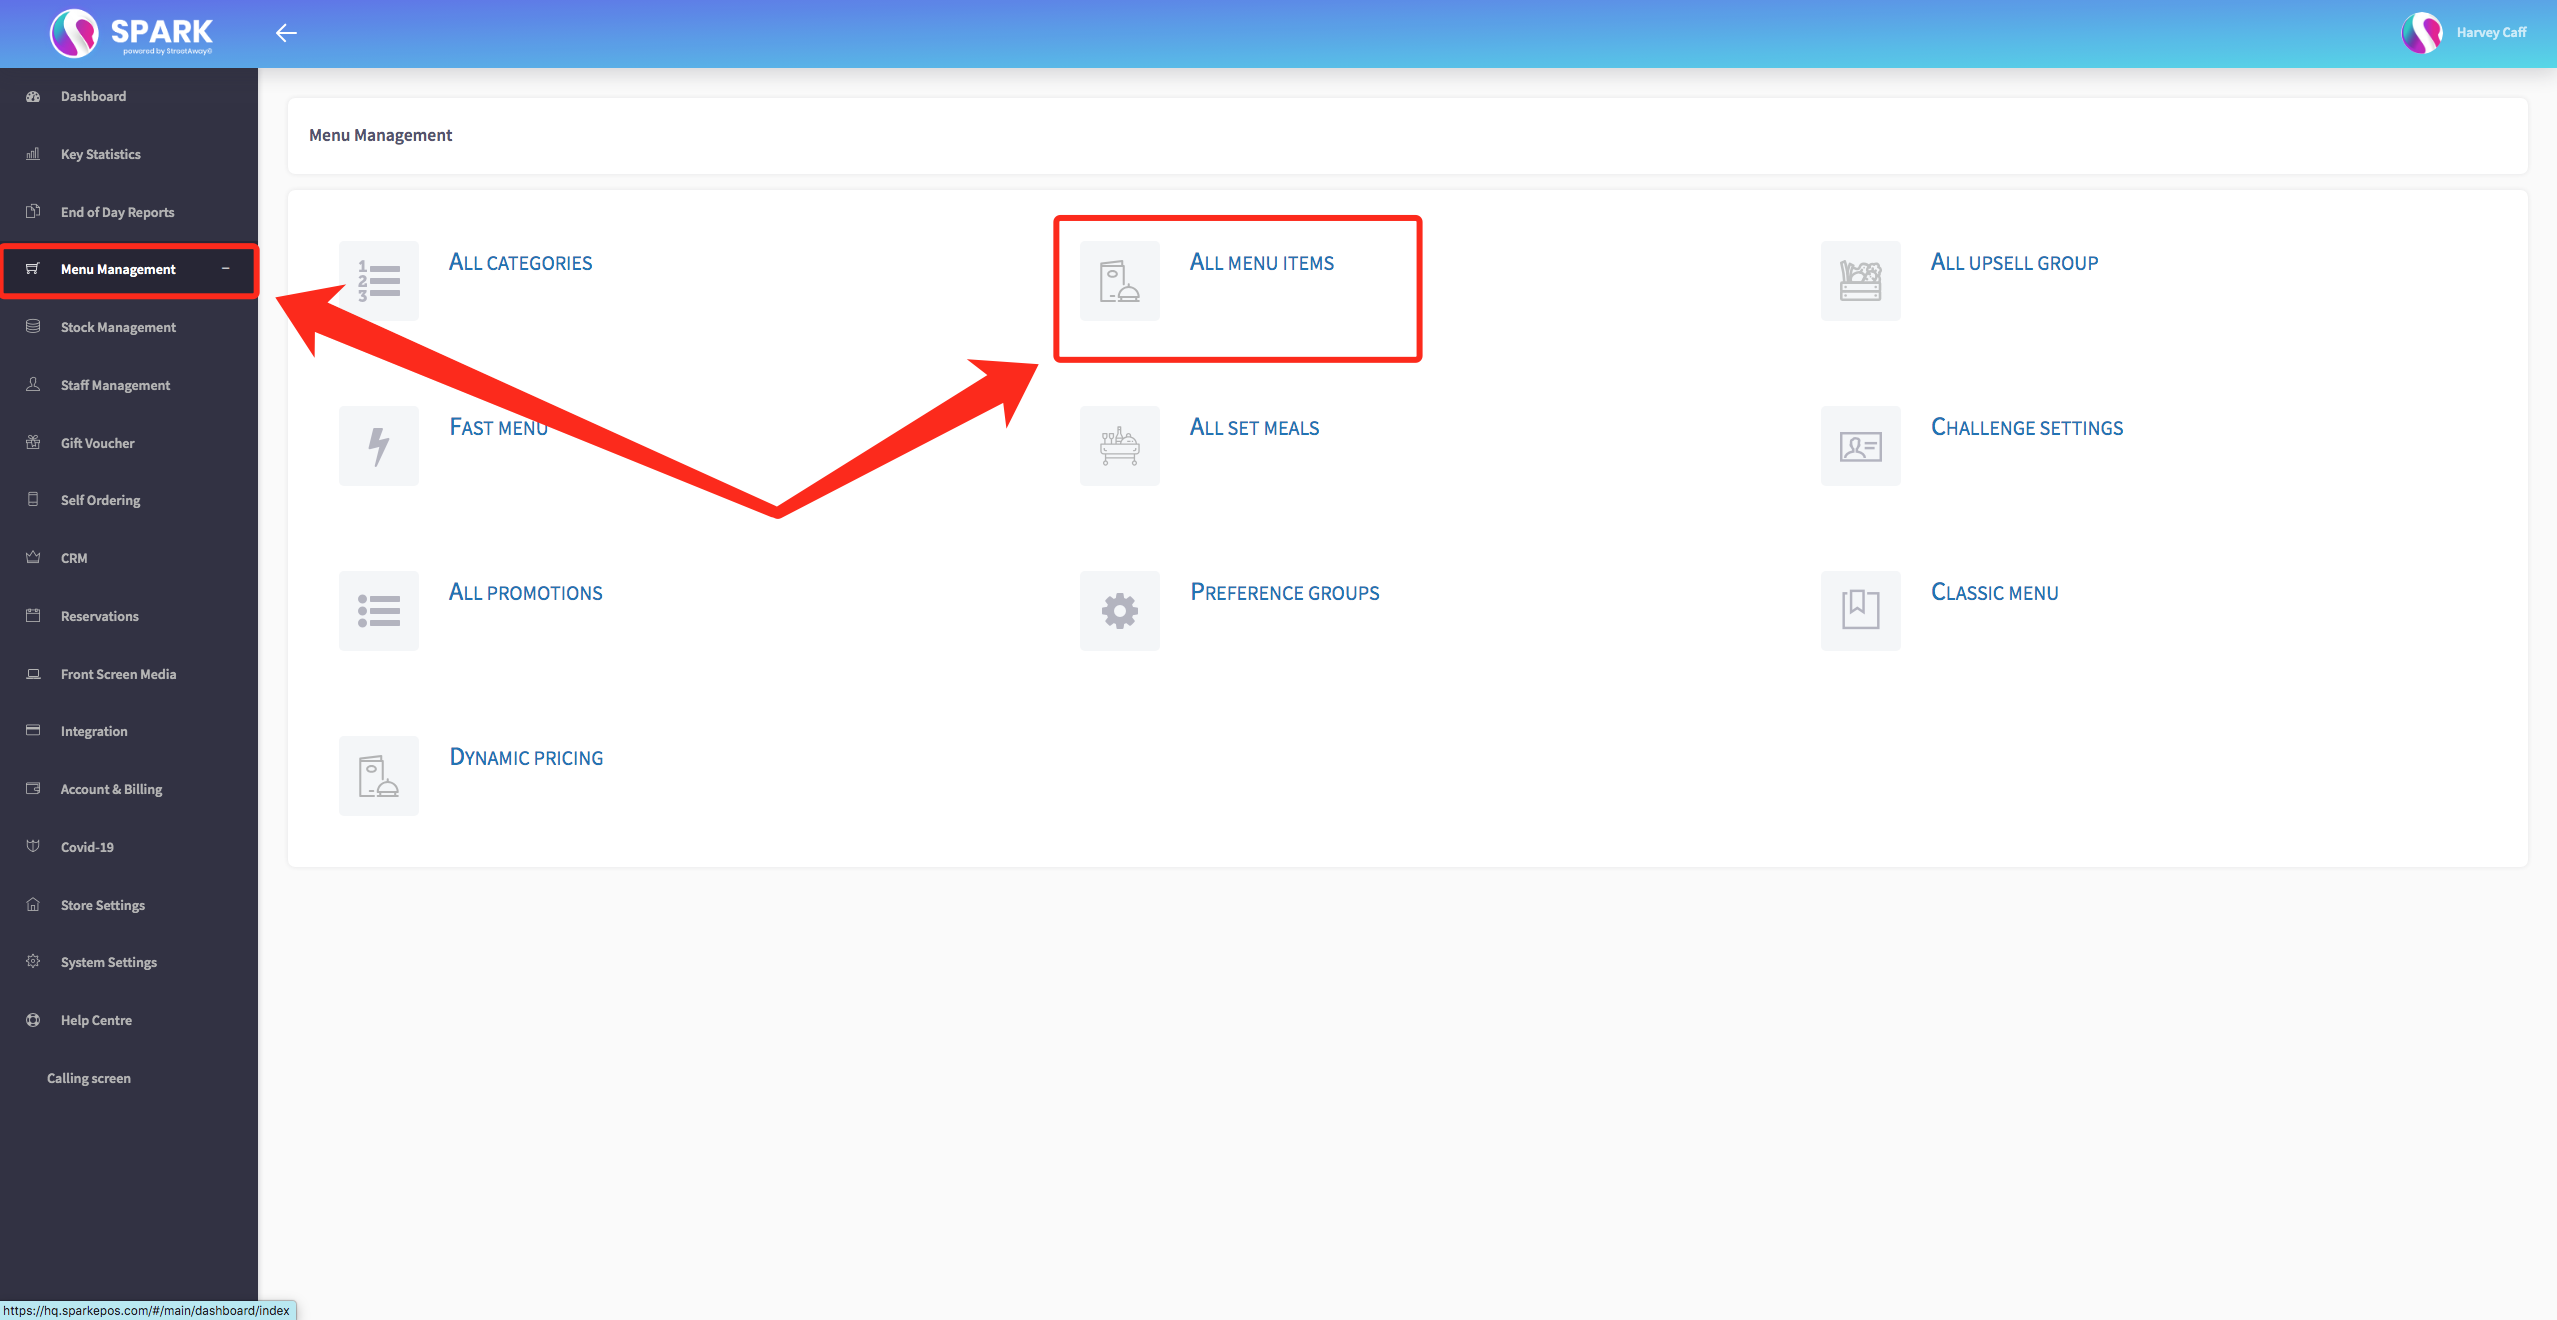
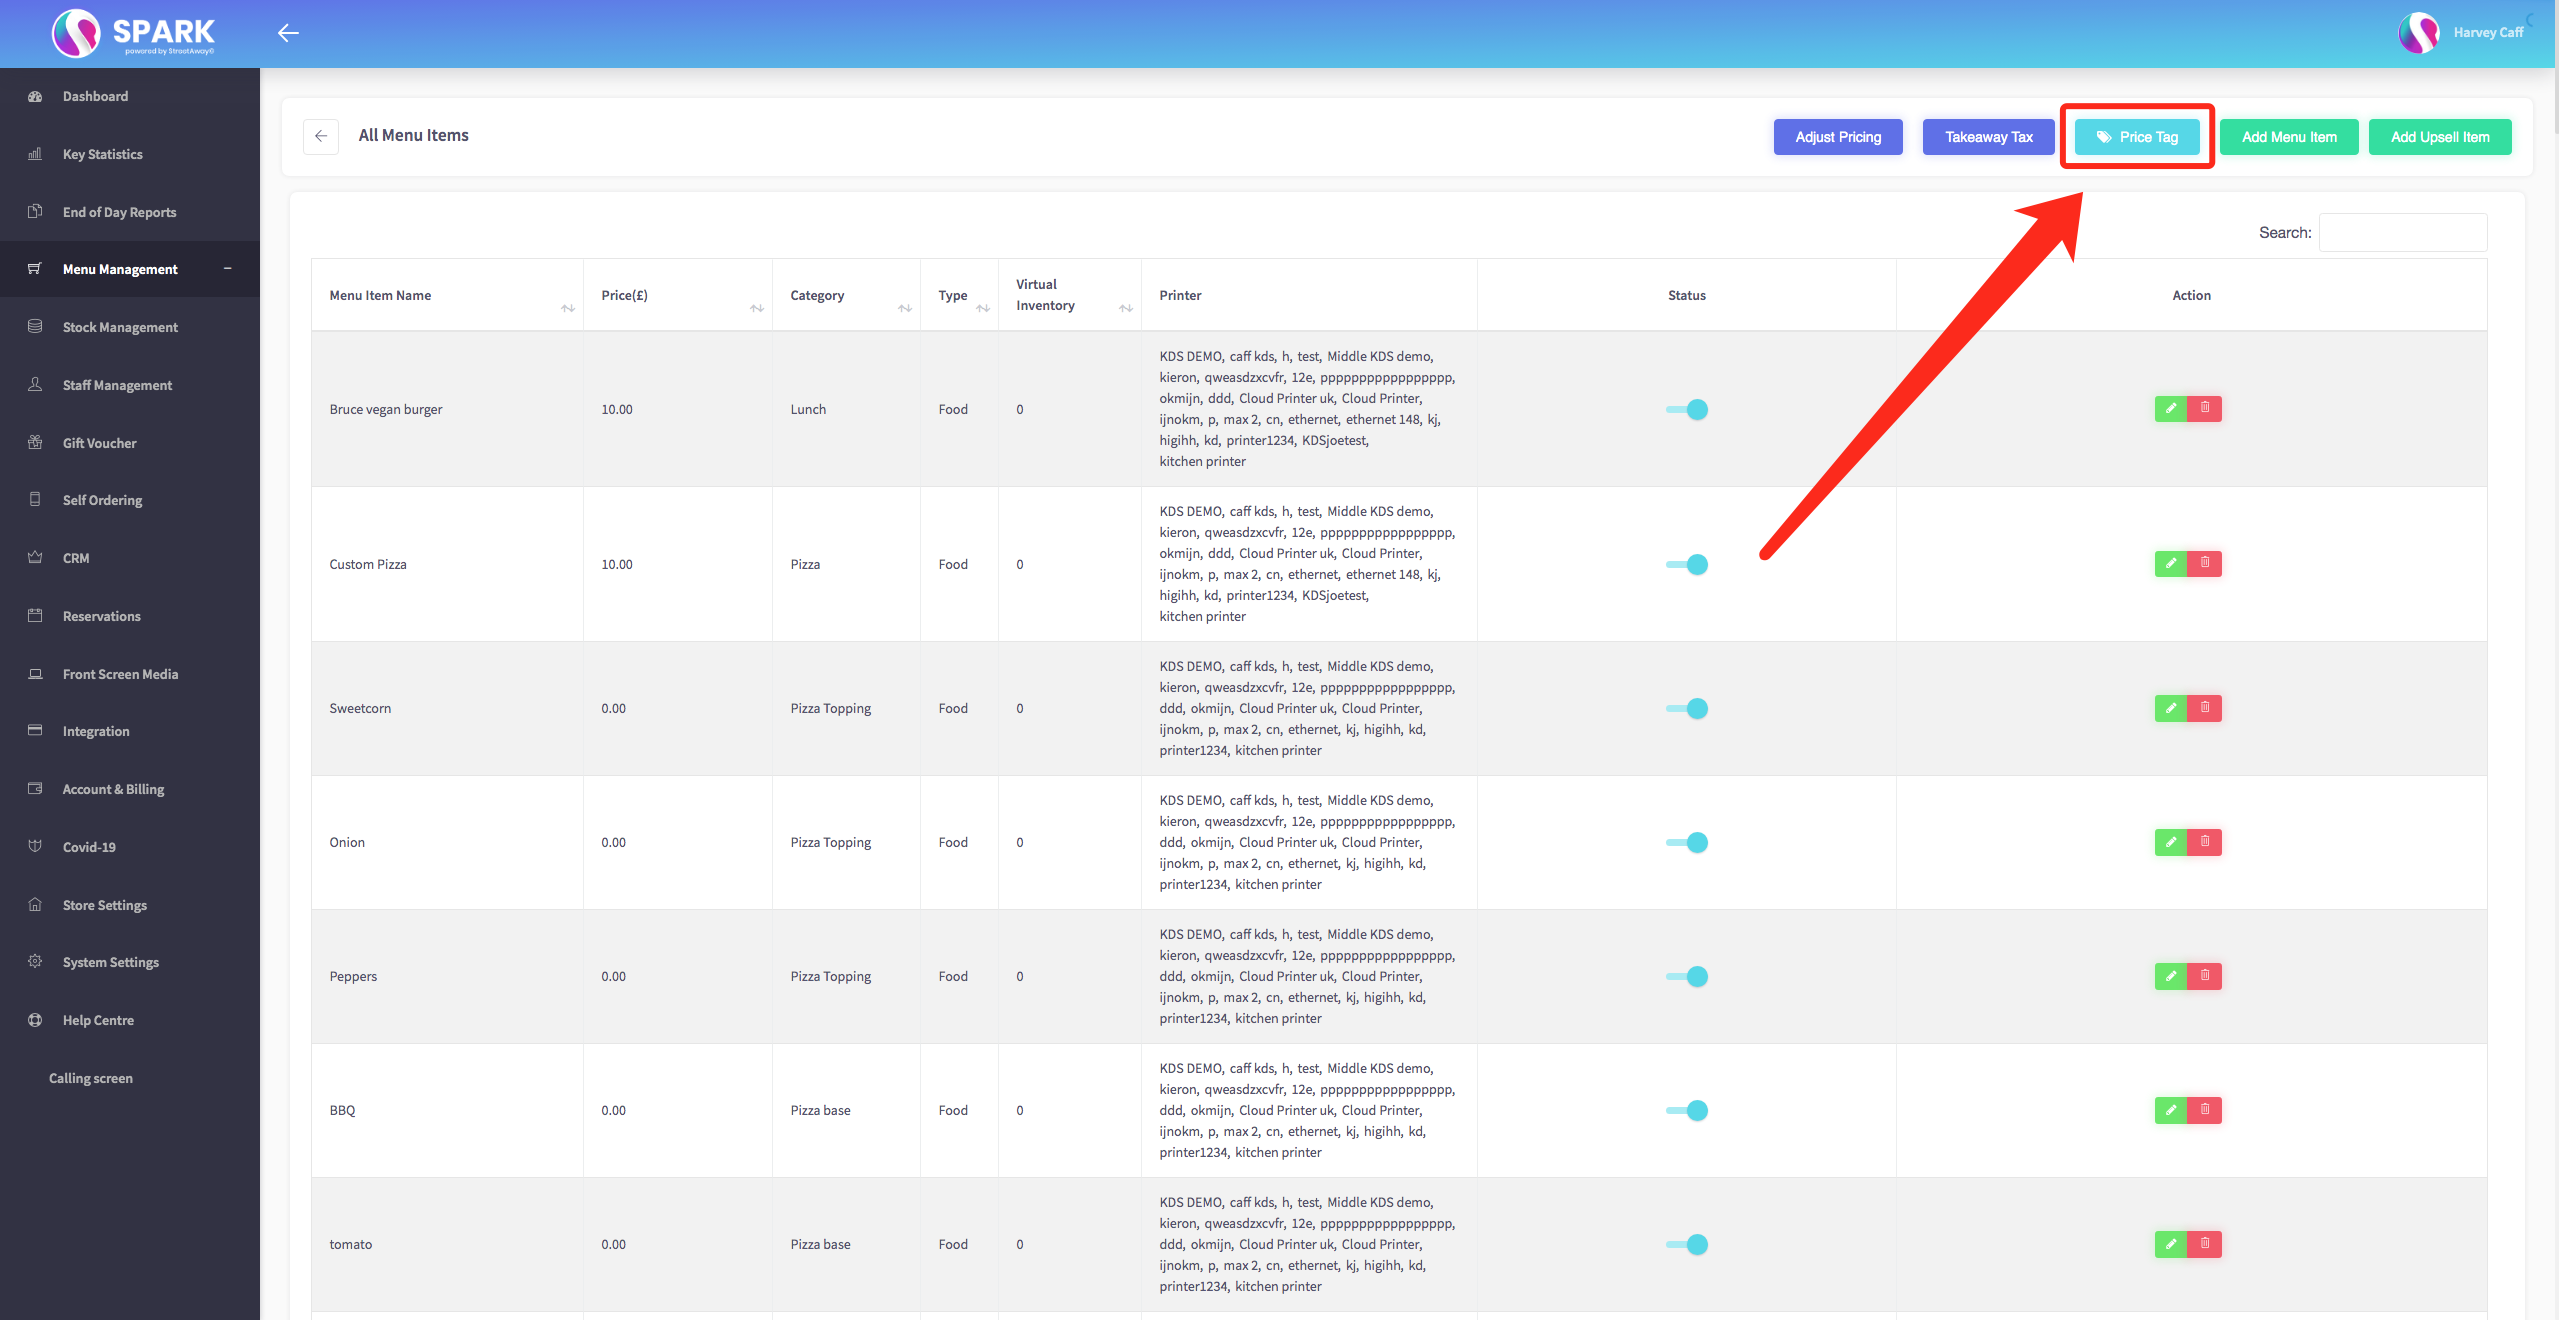
Within this section, you'll find an extensive list of all your menu items. However, your focus should be on the button labelled "Price Tags" situated at the top. Give it a click.
 Upon clicking, a new page will unveil itself, prompting you to choose your preferred style for tags or barcodes. Once you've made your selection, proceed by clicking the "Next" button.
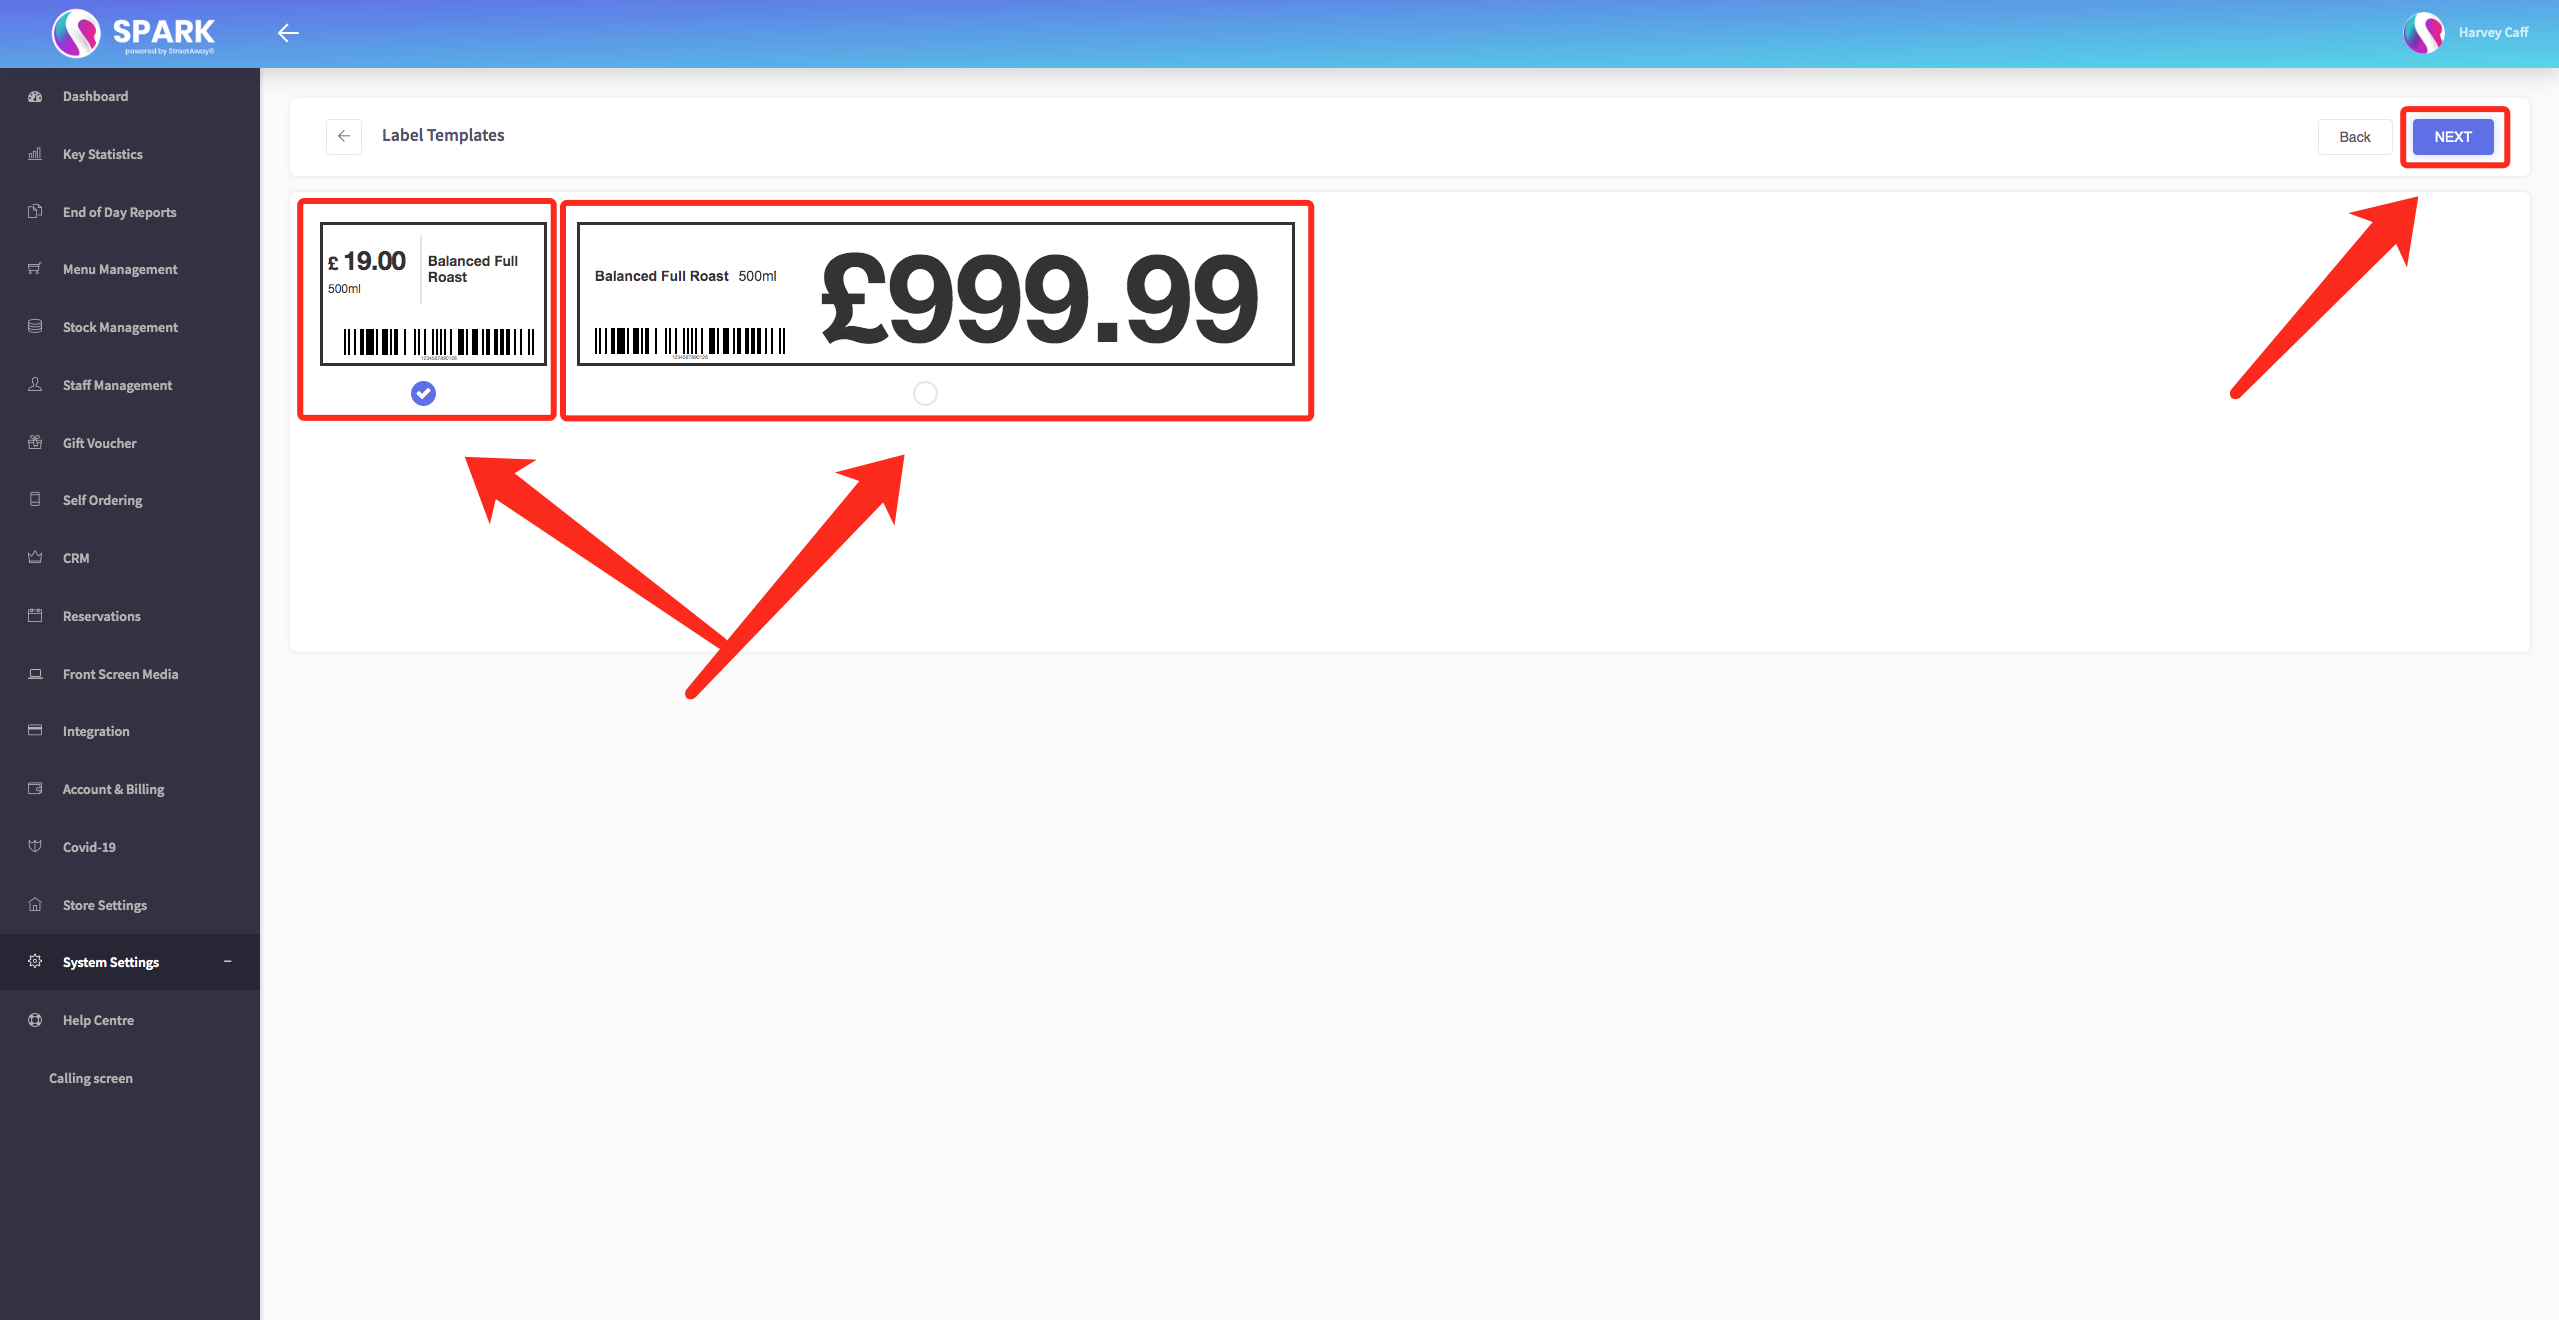
Following this, you'll be prompted to pick the specific items for which you wish to generate tags or barcodes. Alternatively, you can opt to select "All" at the top to cover all items. After making your selection, press the "Next" button once more.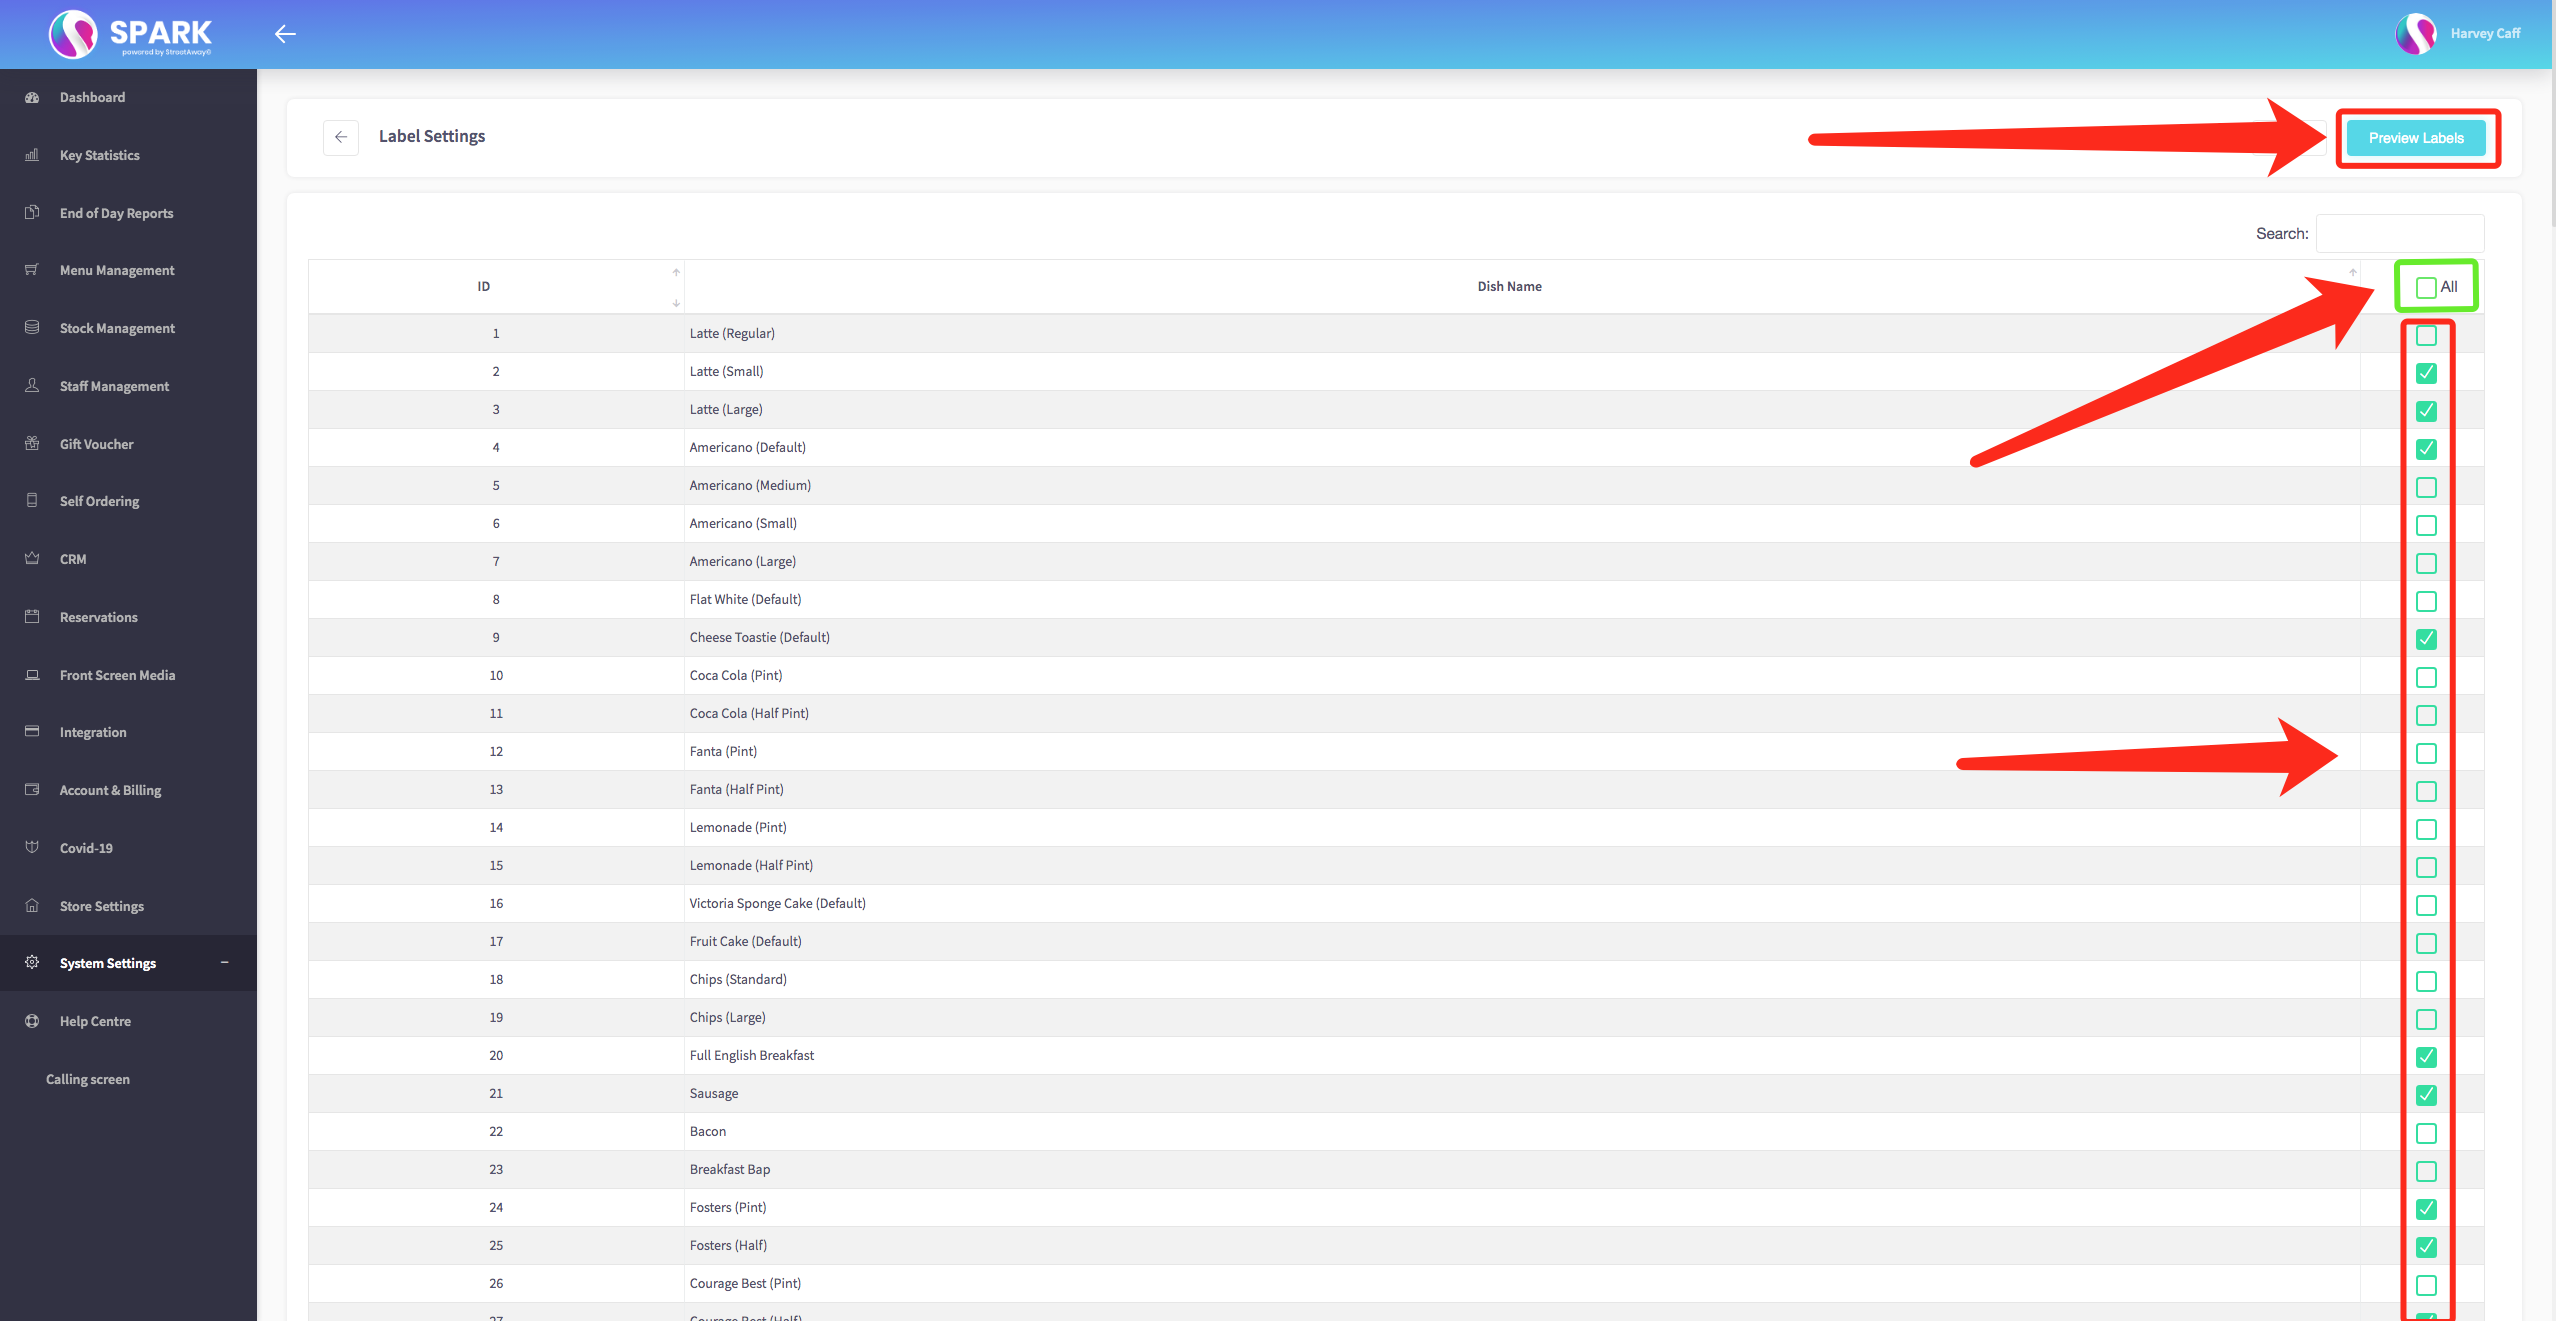
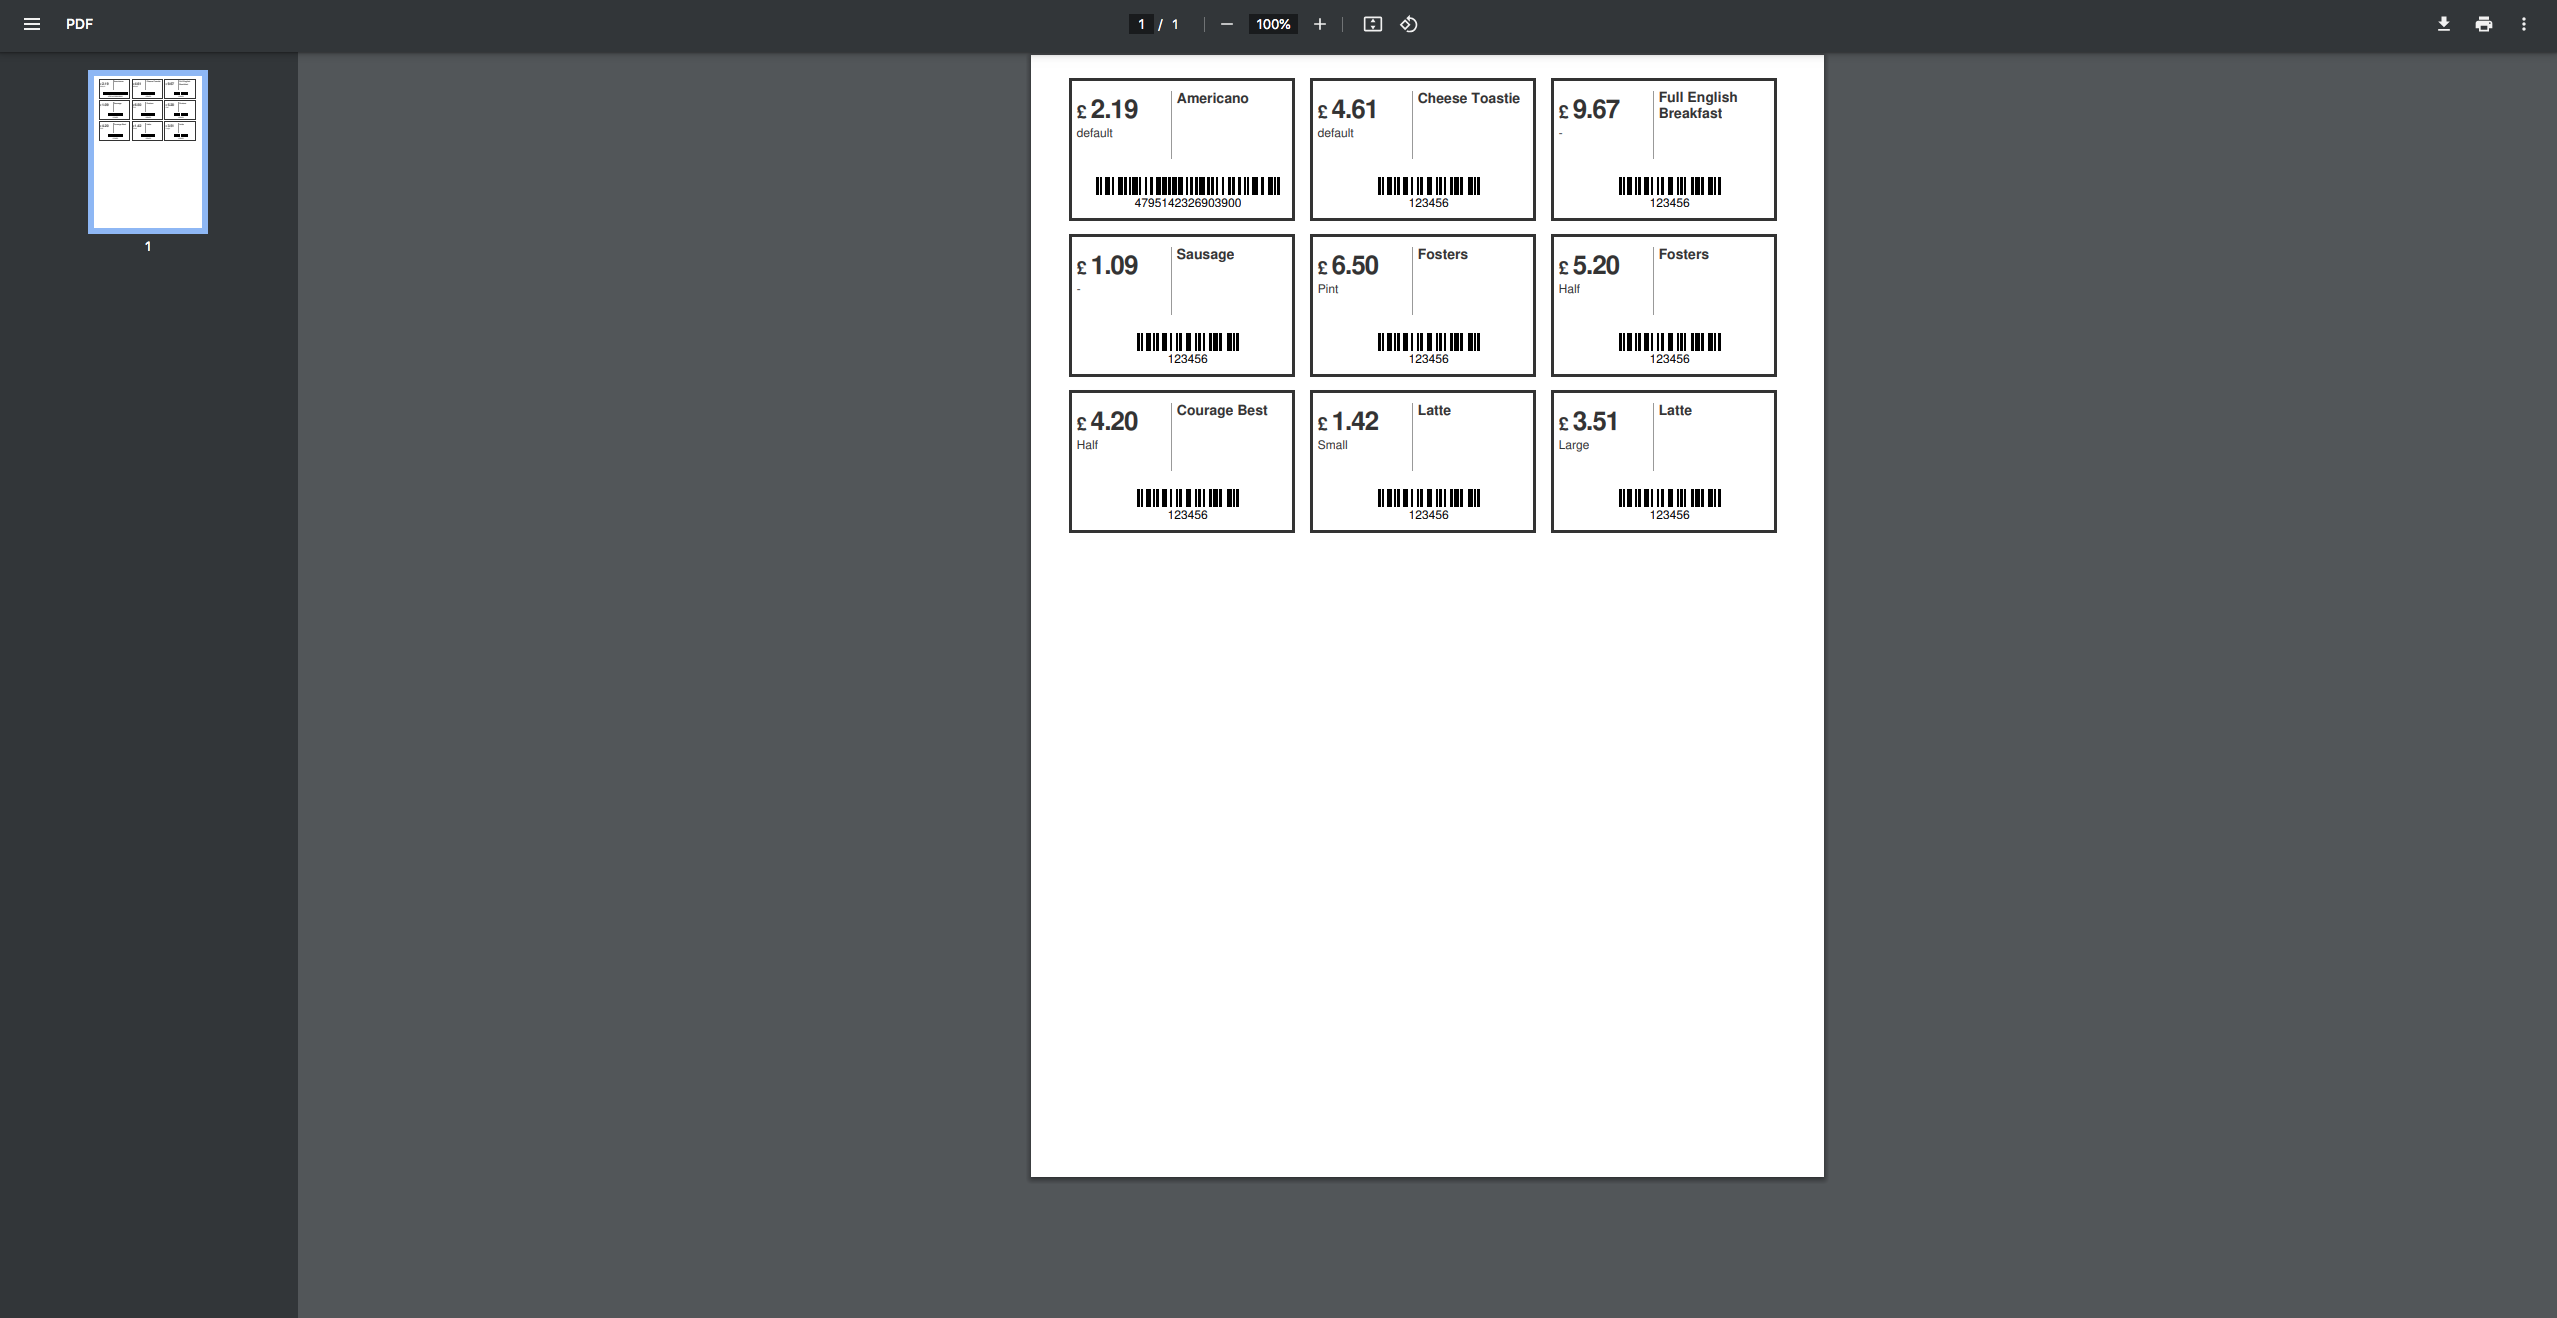
Upon hitting "Next," a fresh page will emerge, offering you the choice to either directly print the generated tags or save them in PDF format.