Congratulations on acquiring your new NFC reader! This powerful tool will enable your staff members to log into the terminal and process payments with ease, enhancing efficiency and providing a seamless payment experience. To get started, follow these straightforward steps to connect your NFC reader to your terminal.
Please be aware, Payment Gateway Terms and Conditions do apply when taking card payments
Step 1: Unboxing the NFC Reader Carefully unbox your new NFC reader, ensuring you have all the necessary components included in the package.
Step 2: Locating the Connection Port on Your Terminal Flip your payment terminal to its backside, where you'll find two panels. Remove the larger panel located at the top of the device to reveal the connection area.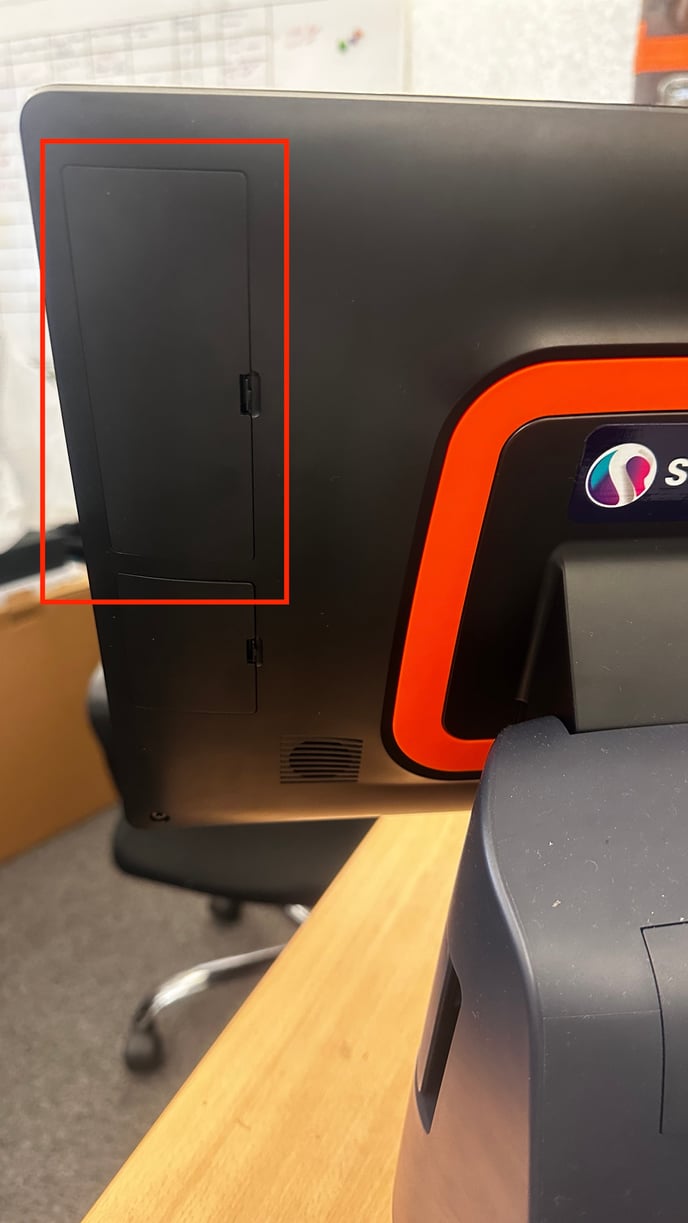
Step 3: Connecting the NFC Reader Once the connector area is exposed, take the cable provided with your NFC reader and insert it into the designated port.
Step 4: Ensuring Correct Insertion, Ensure that the cable is inserted correctly by aligning the red line on the cable with the bottom of the port.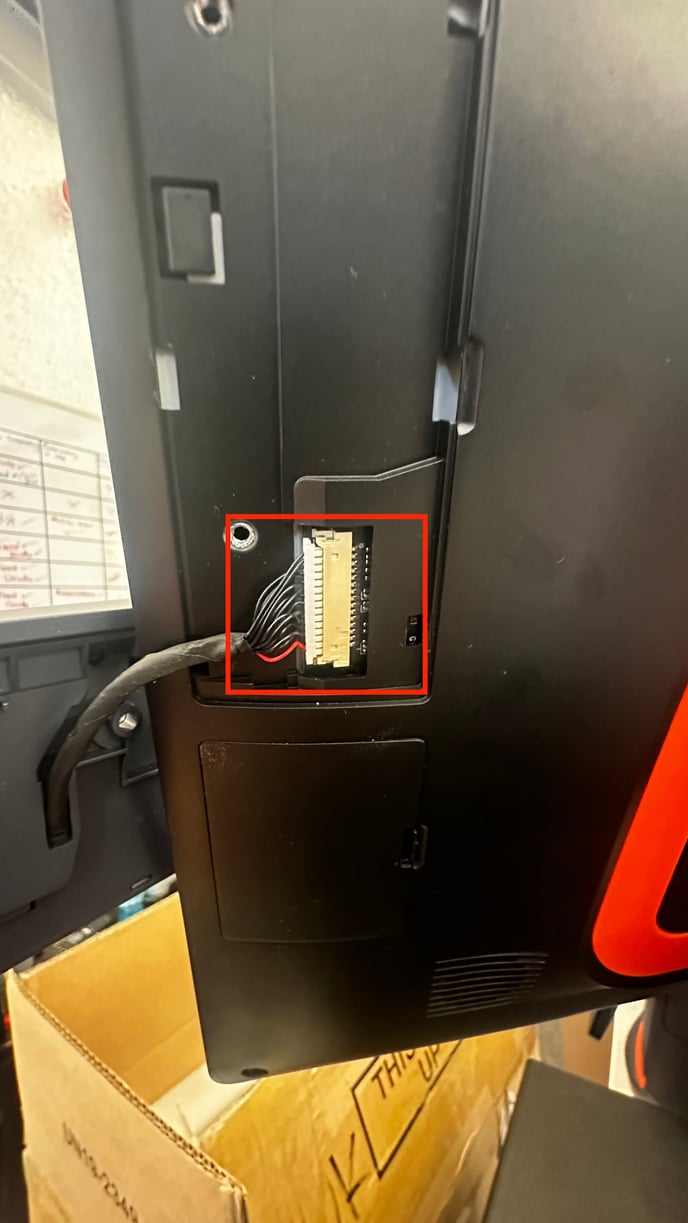
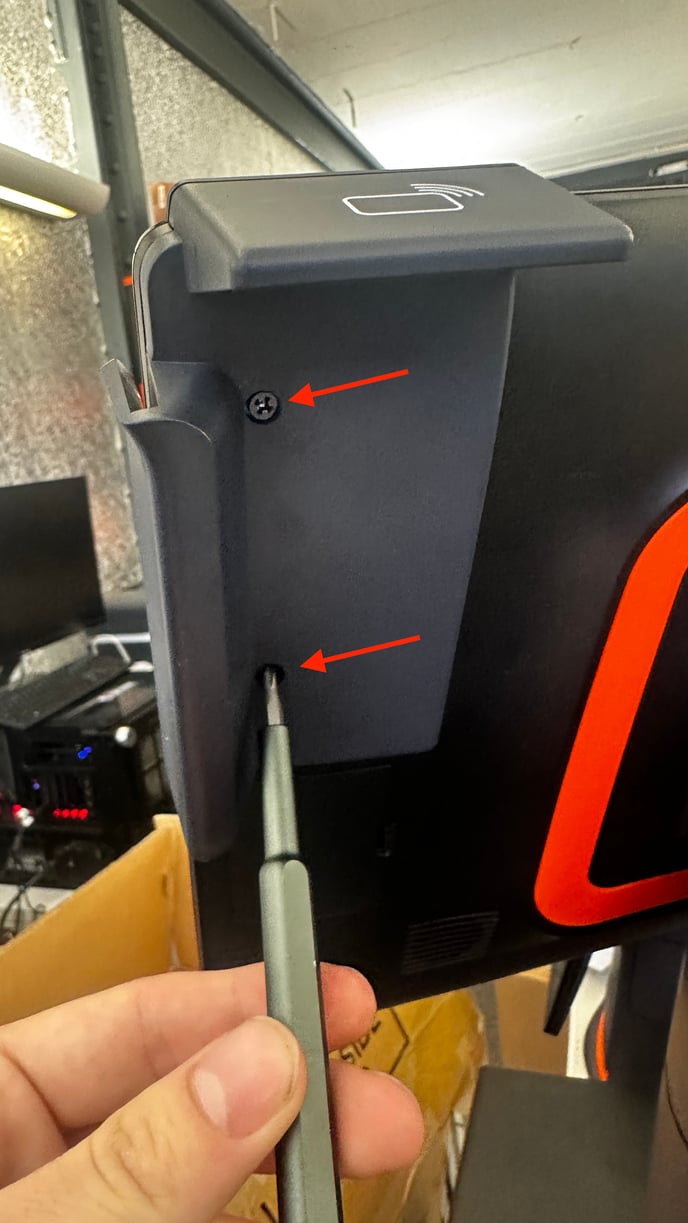
Step 5: Securing the Connection After inserting the cable properly, carefully place the NFC reader in its designated spot on the payment terminal. To ensure a secure connection, use the two Philips head screws provided in the box to tighten the NFC reader in place:
Now, it's time to enable your NFC reader in the settings of your terminal and test it. Click here to find out more.