-
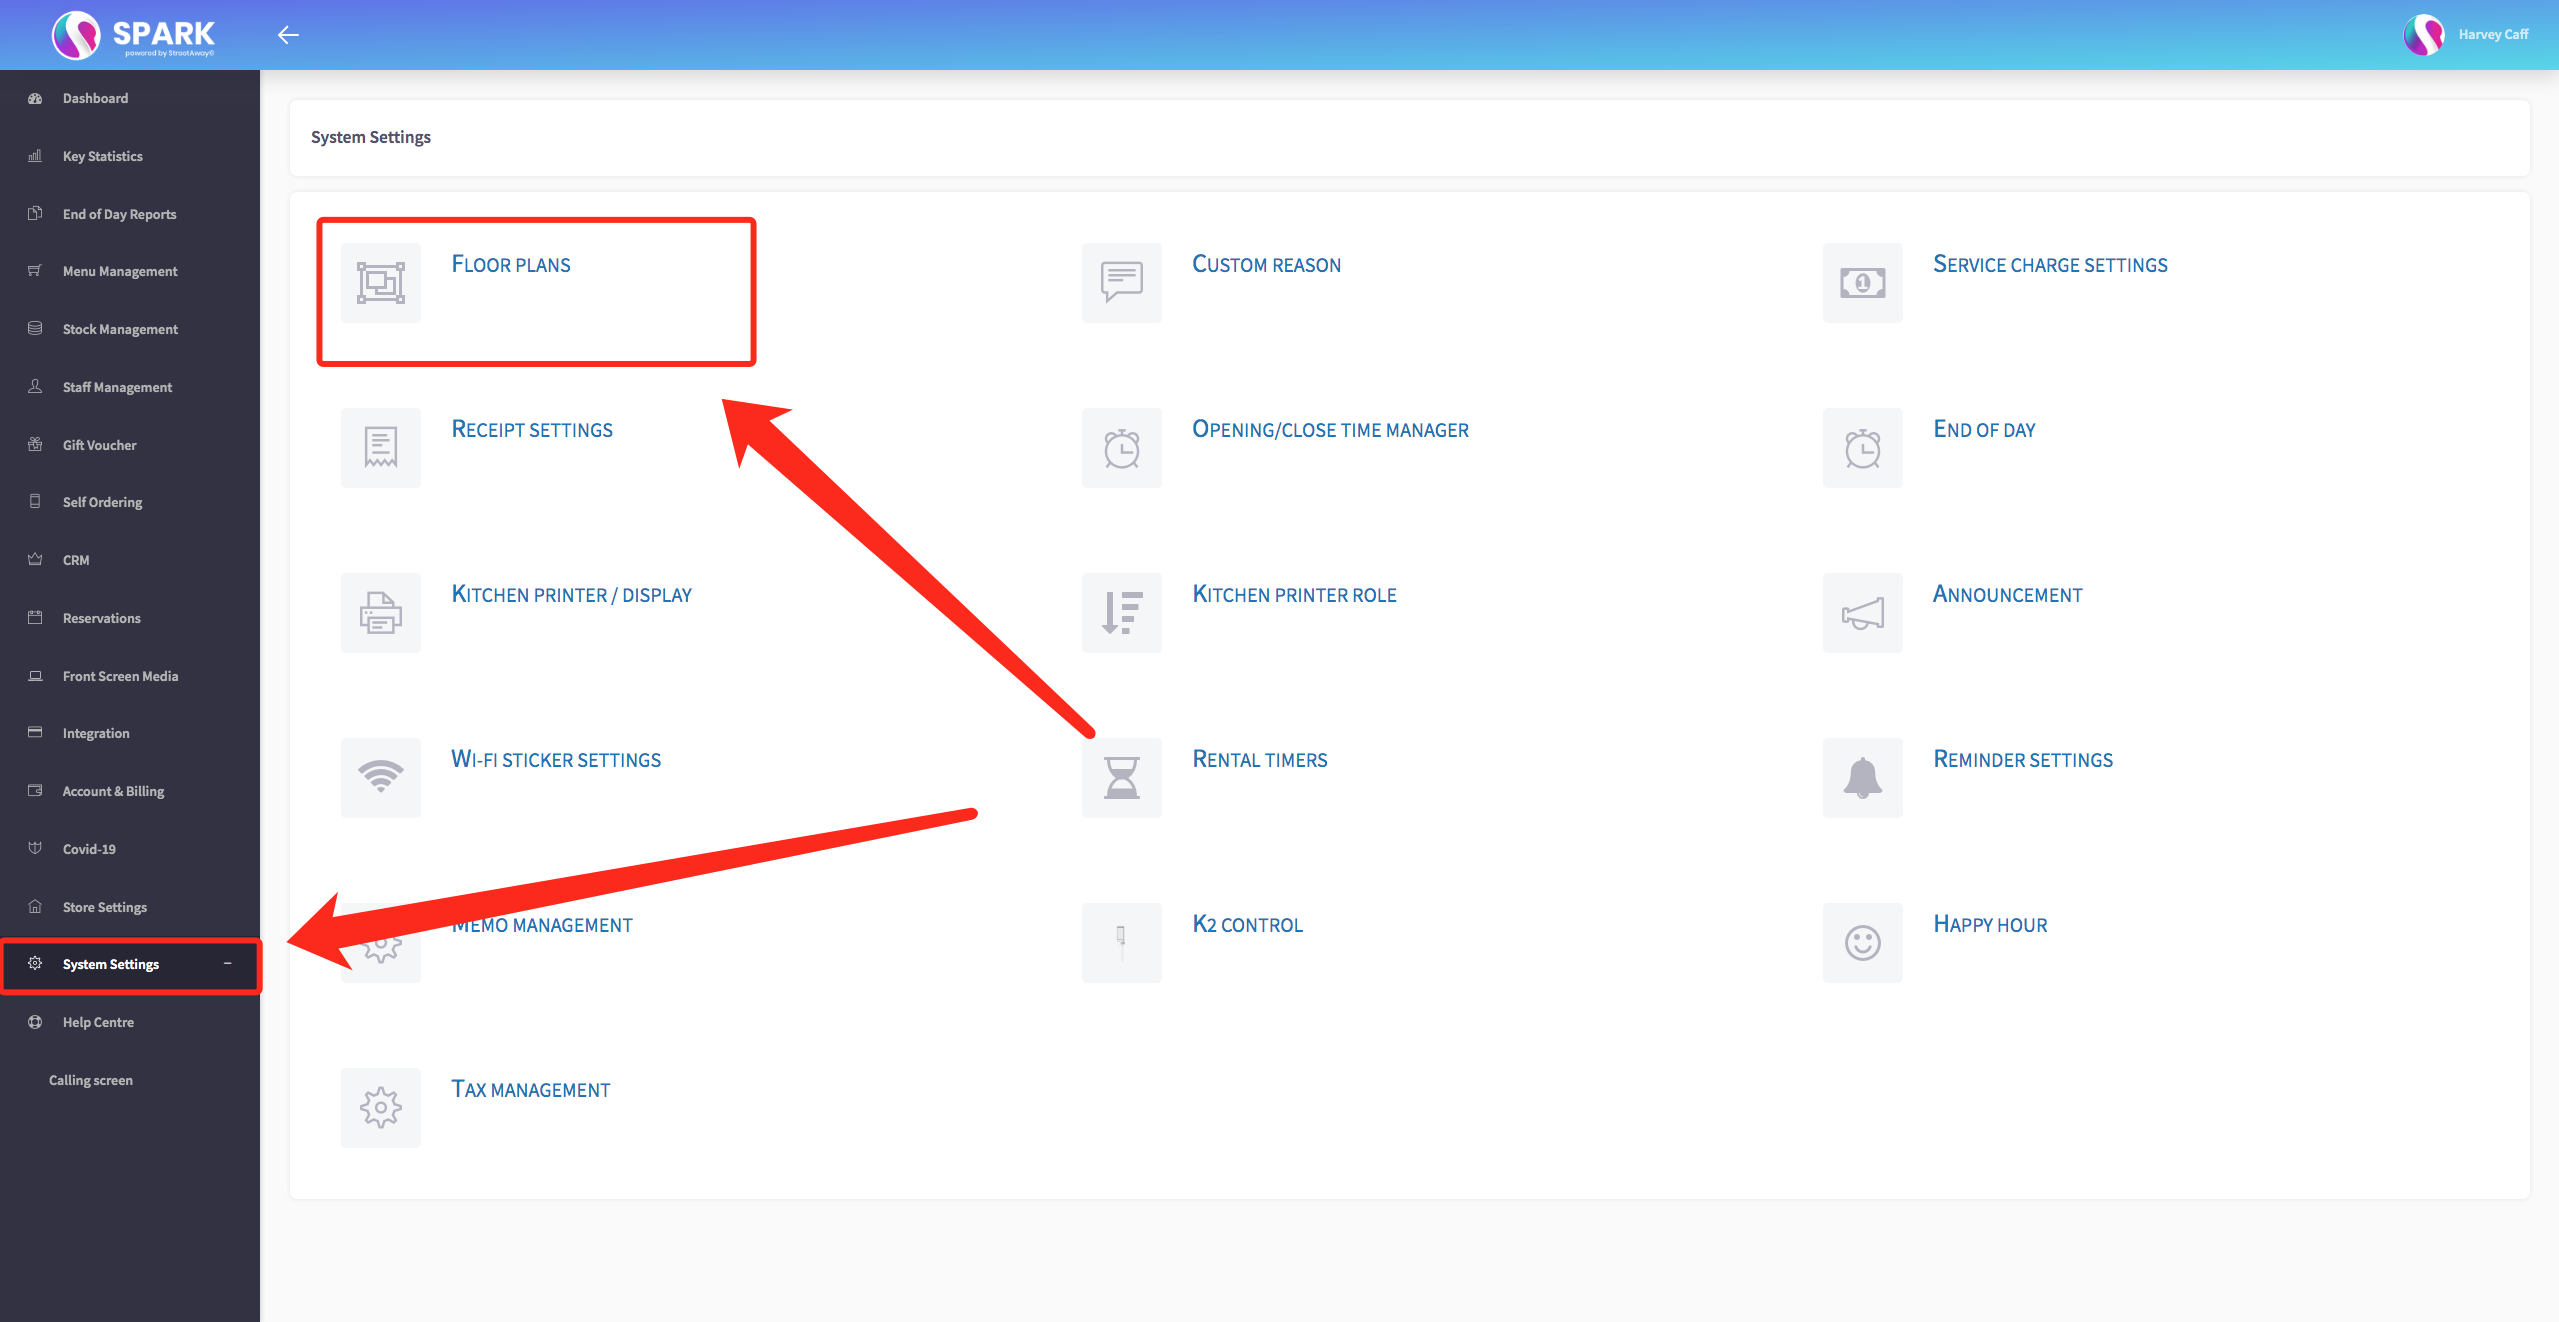
Access the back office and proceed to the "System Settings" section.
Within "System Settings," you'll find an option labelled "Floor Plans." Click on this option.
-
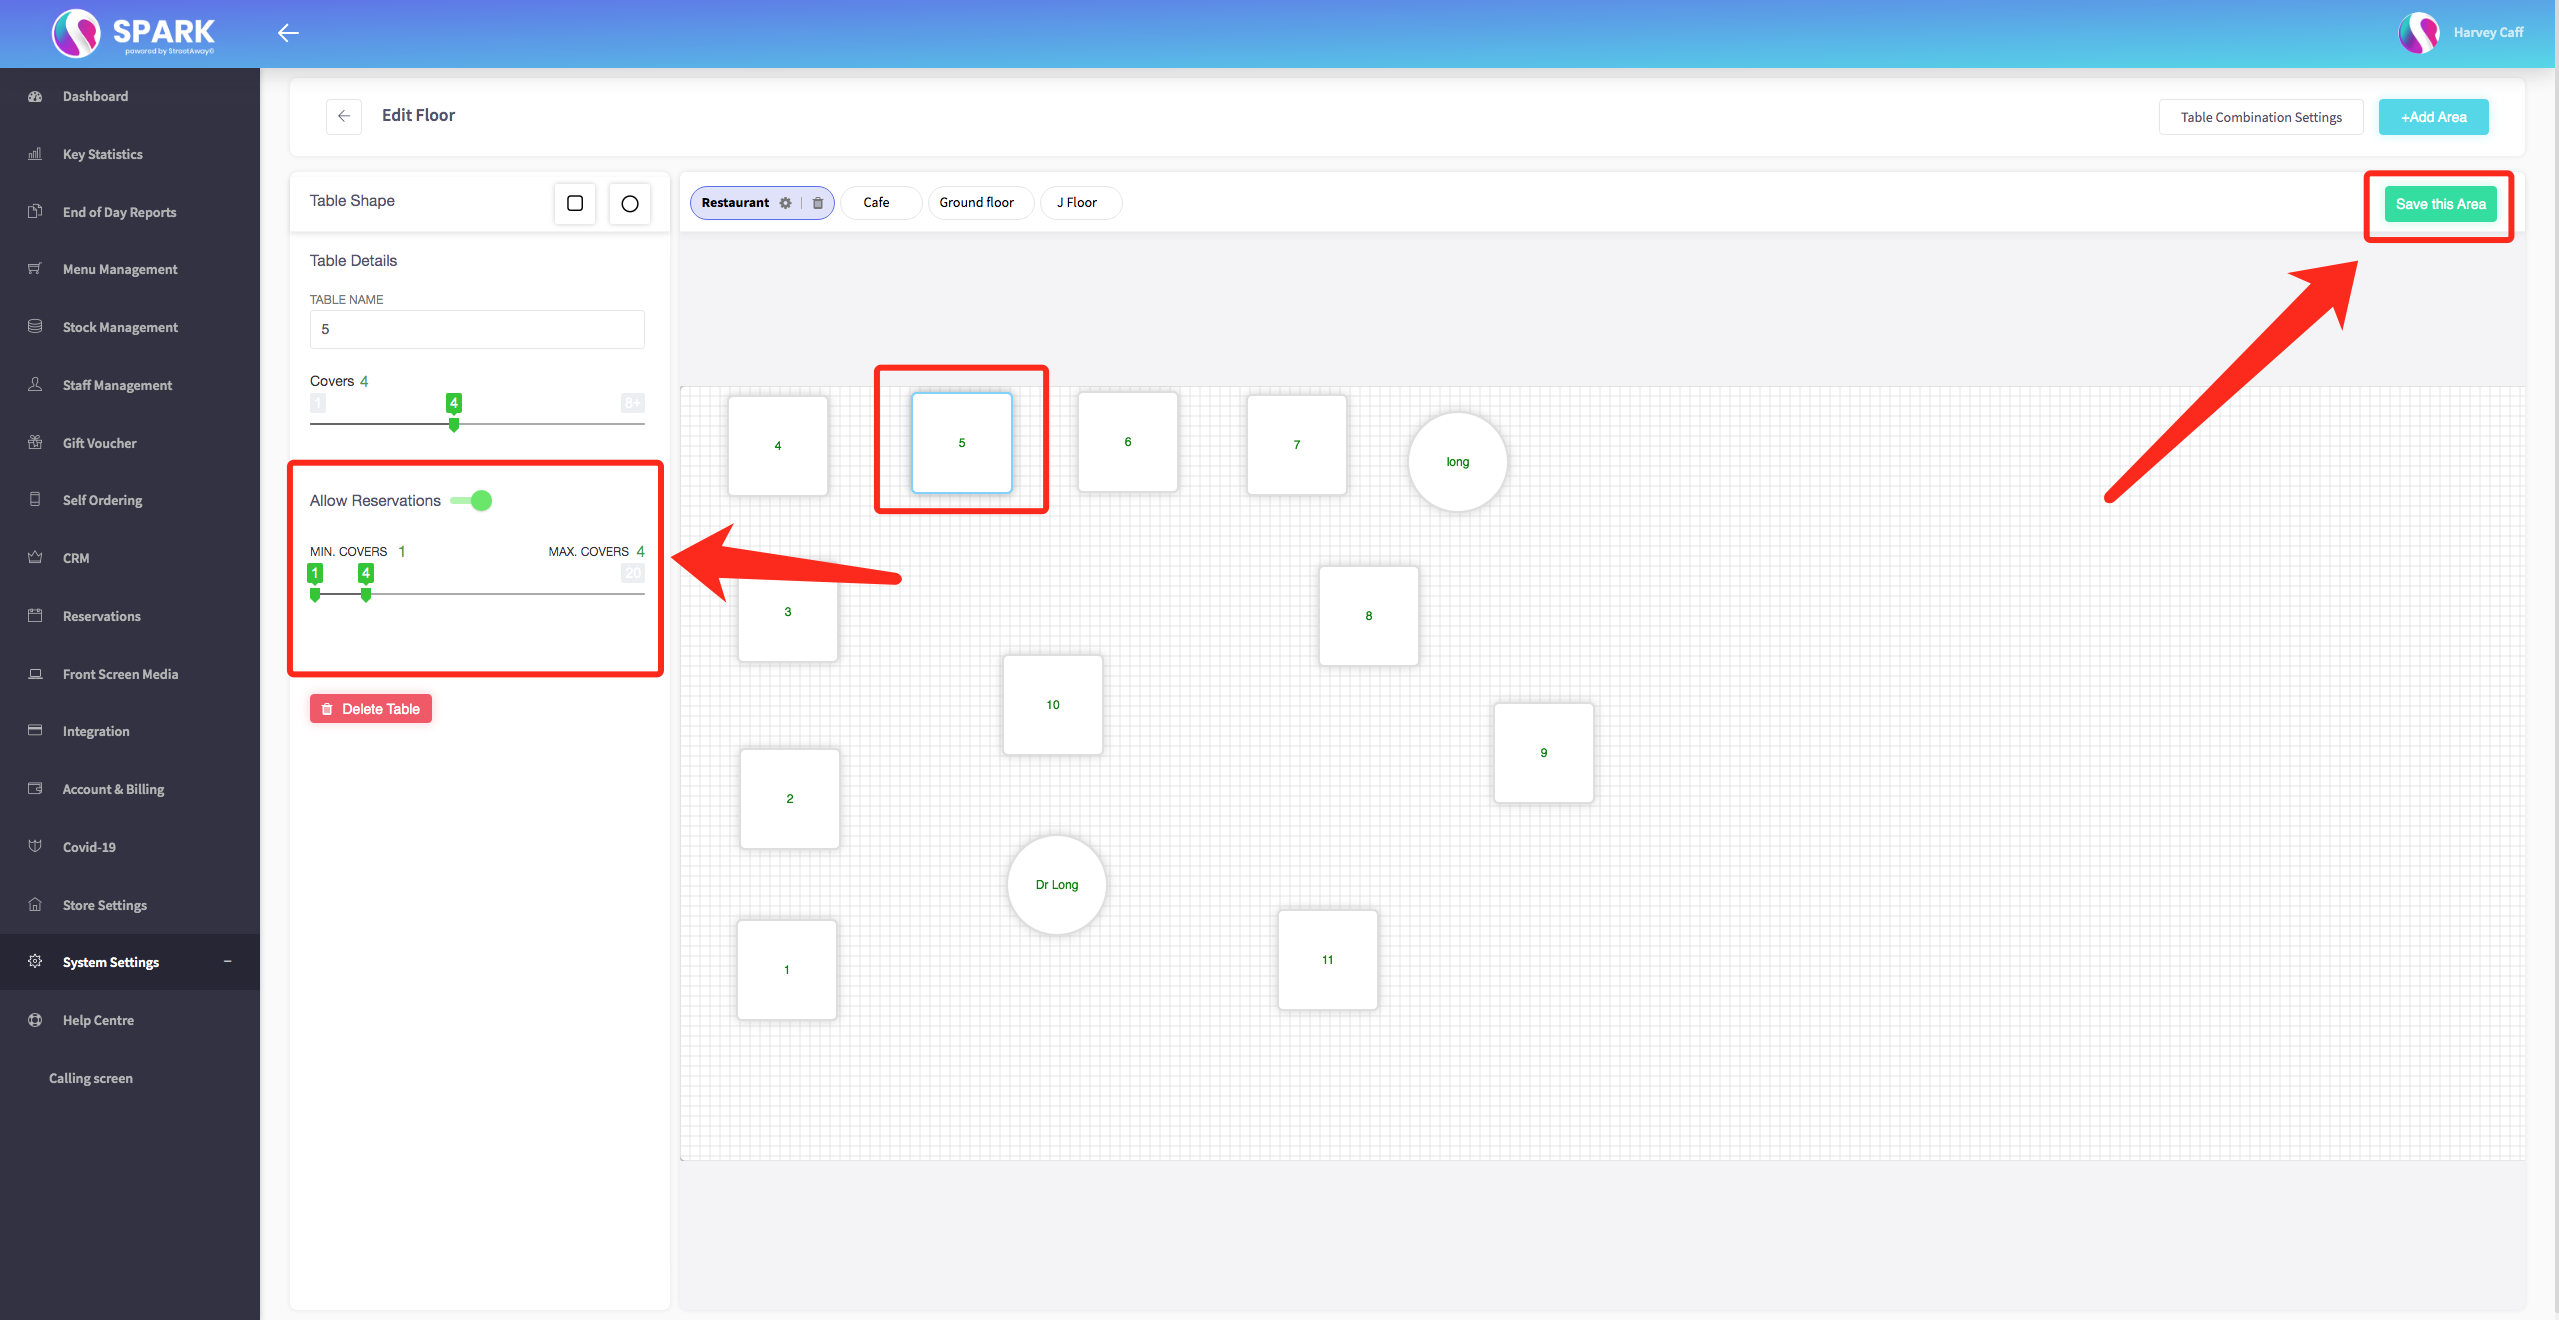
In the "Floor Plans" section, you'll have the ability to choose which specific table or tables you wish to enable reservations for.
Once you've selected the desired table, you'll find a toggle switch that allows you to turn reservations on or off. Additionally, you can set both the minimum and maximum seating capacity for reservations on this table.
-
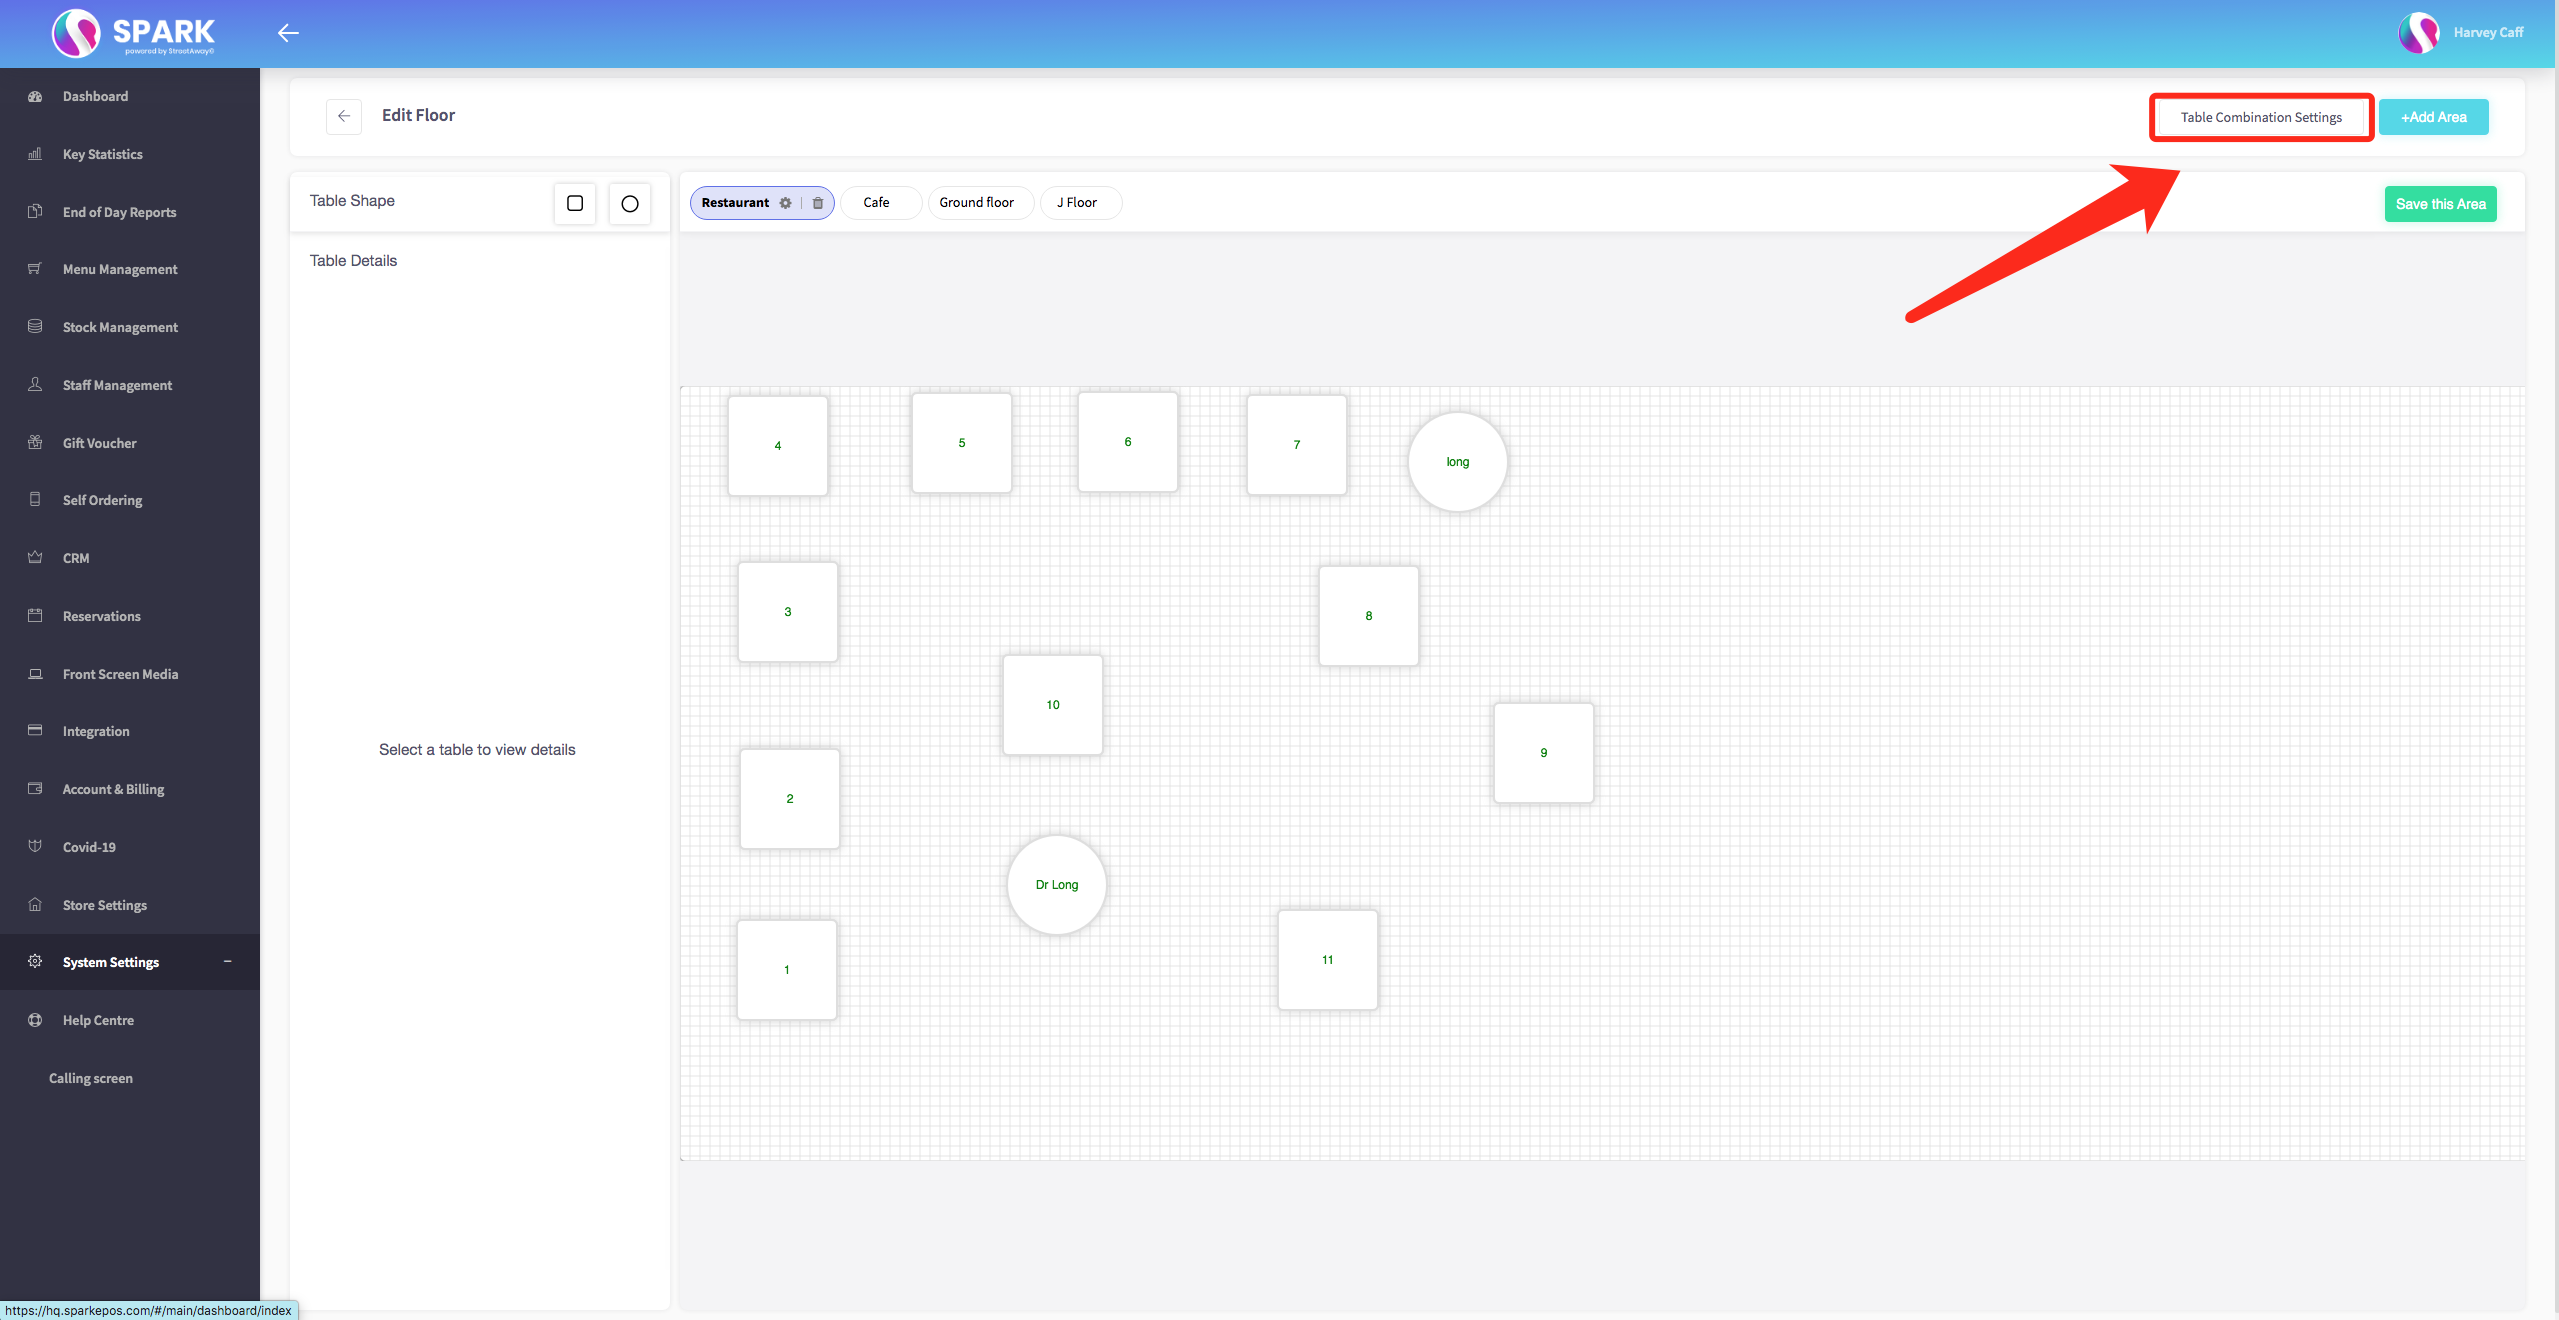
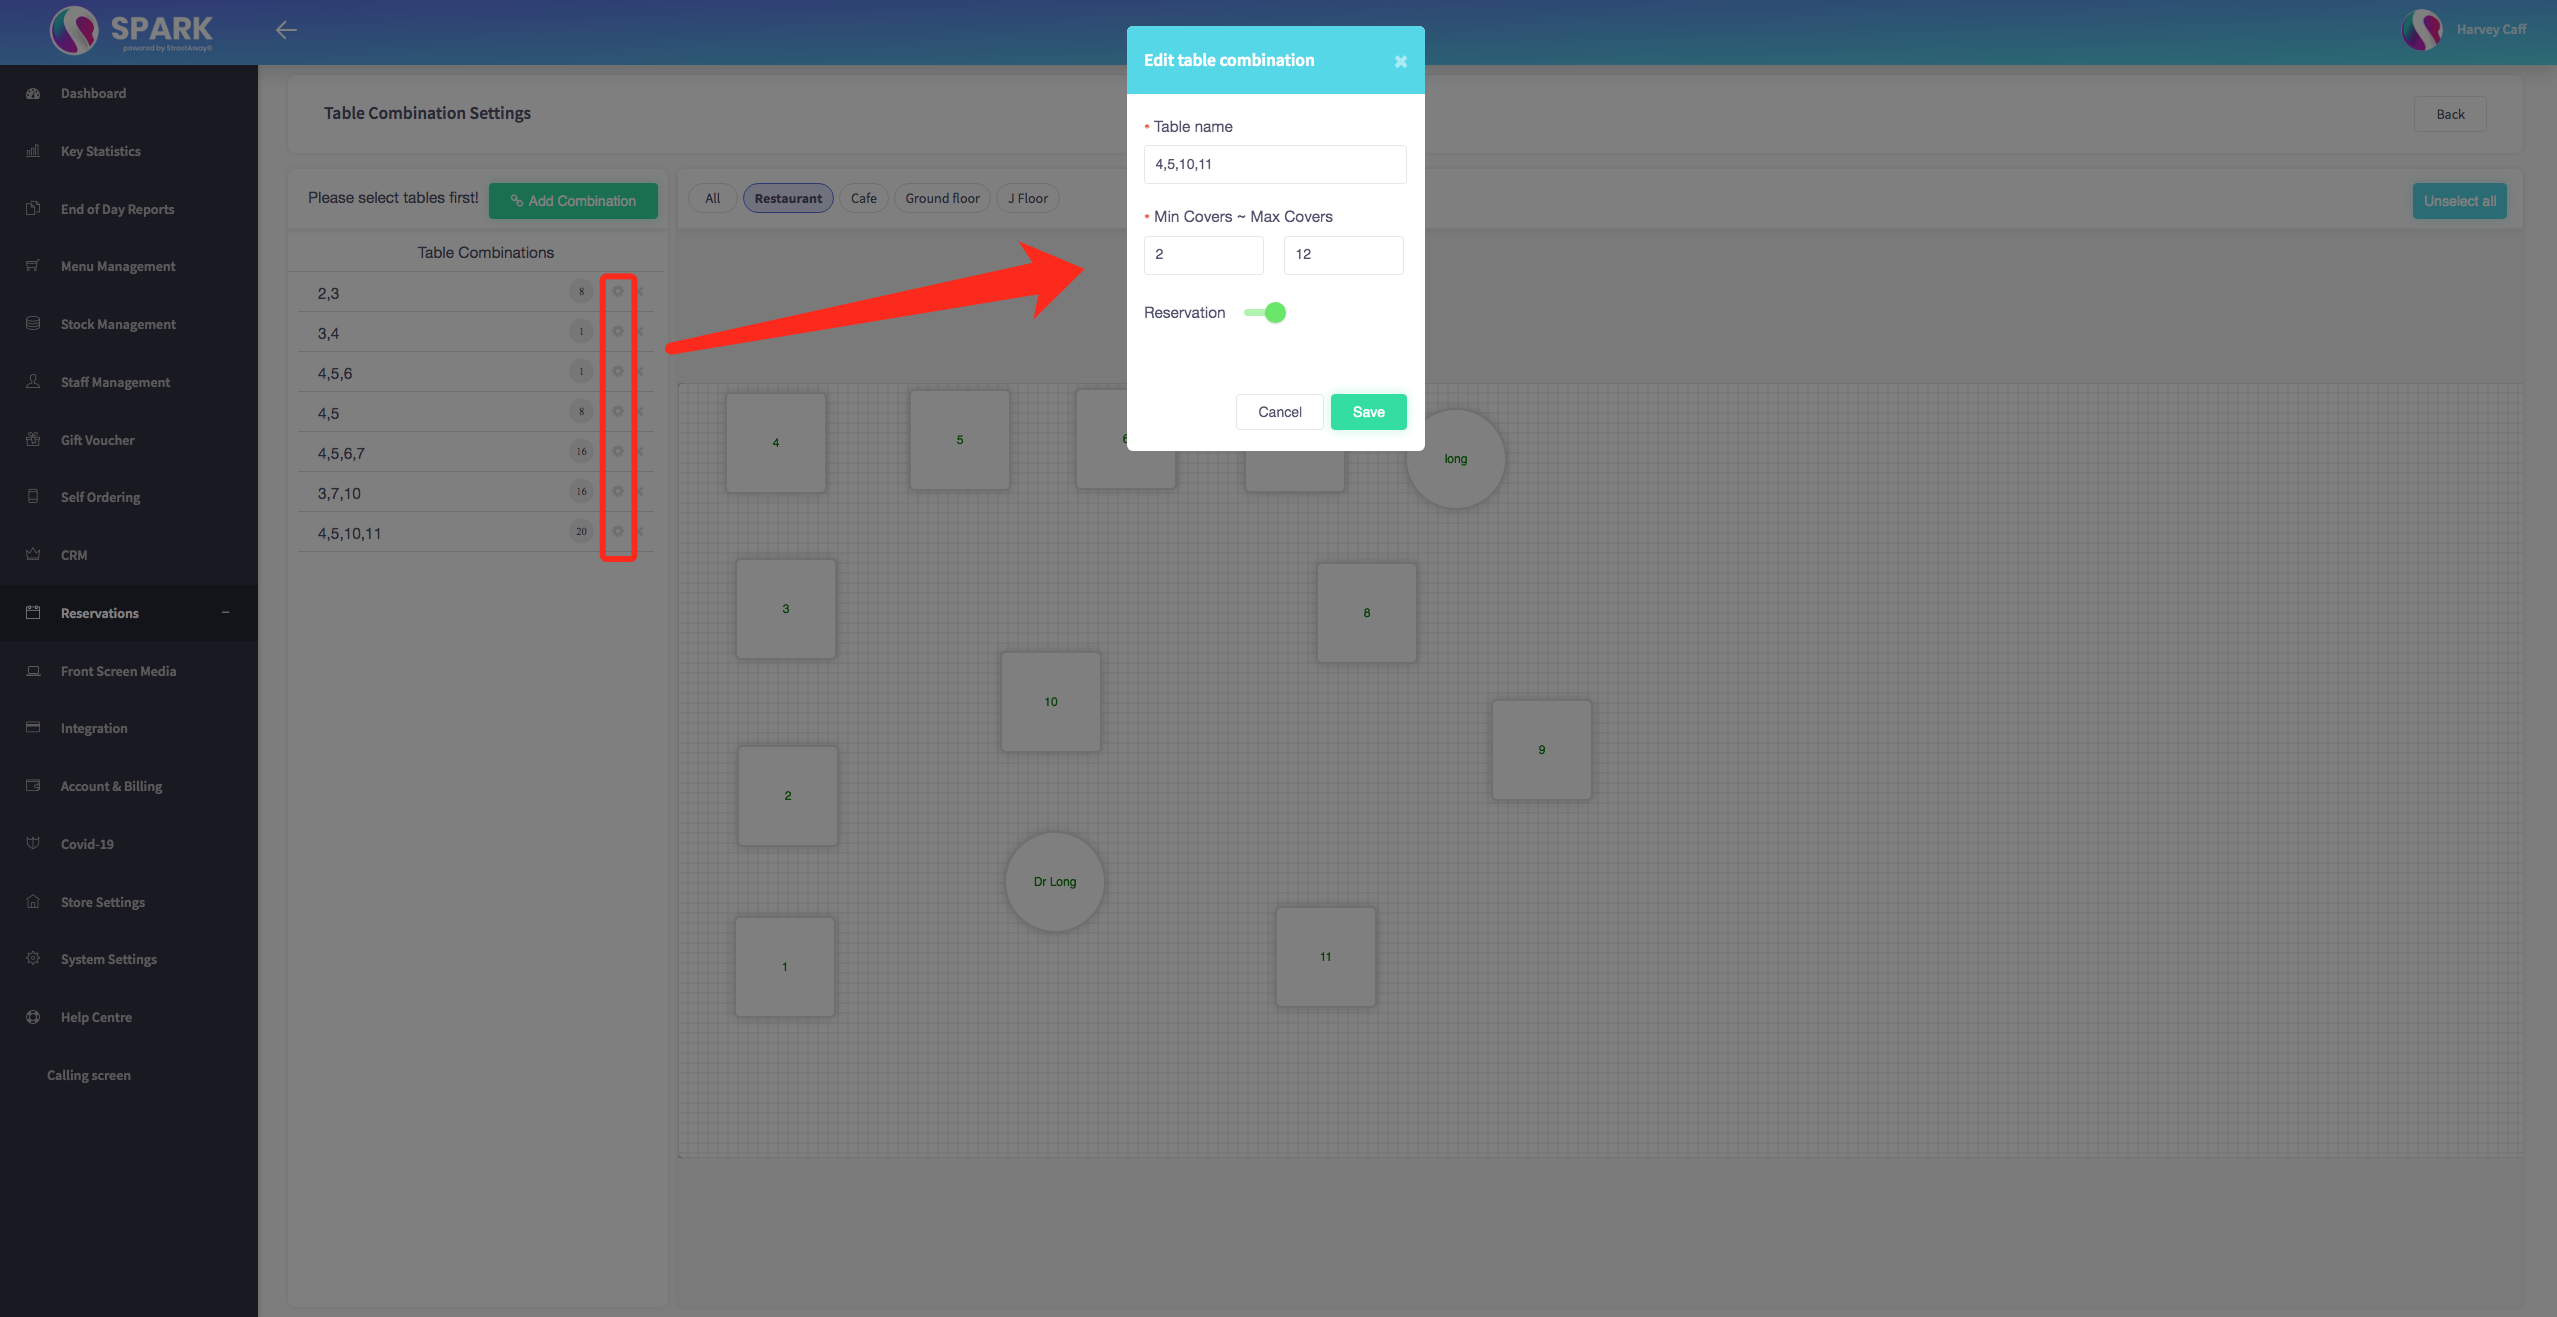
If you want to configure table combinations for reservations, you can access the "Table Combination Settings" option.
-
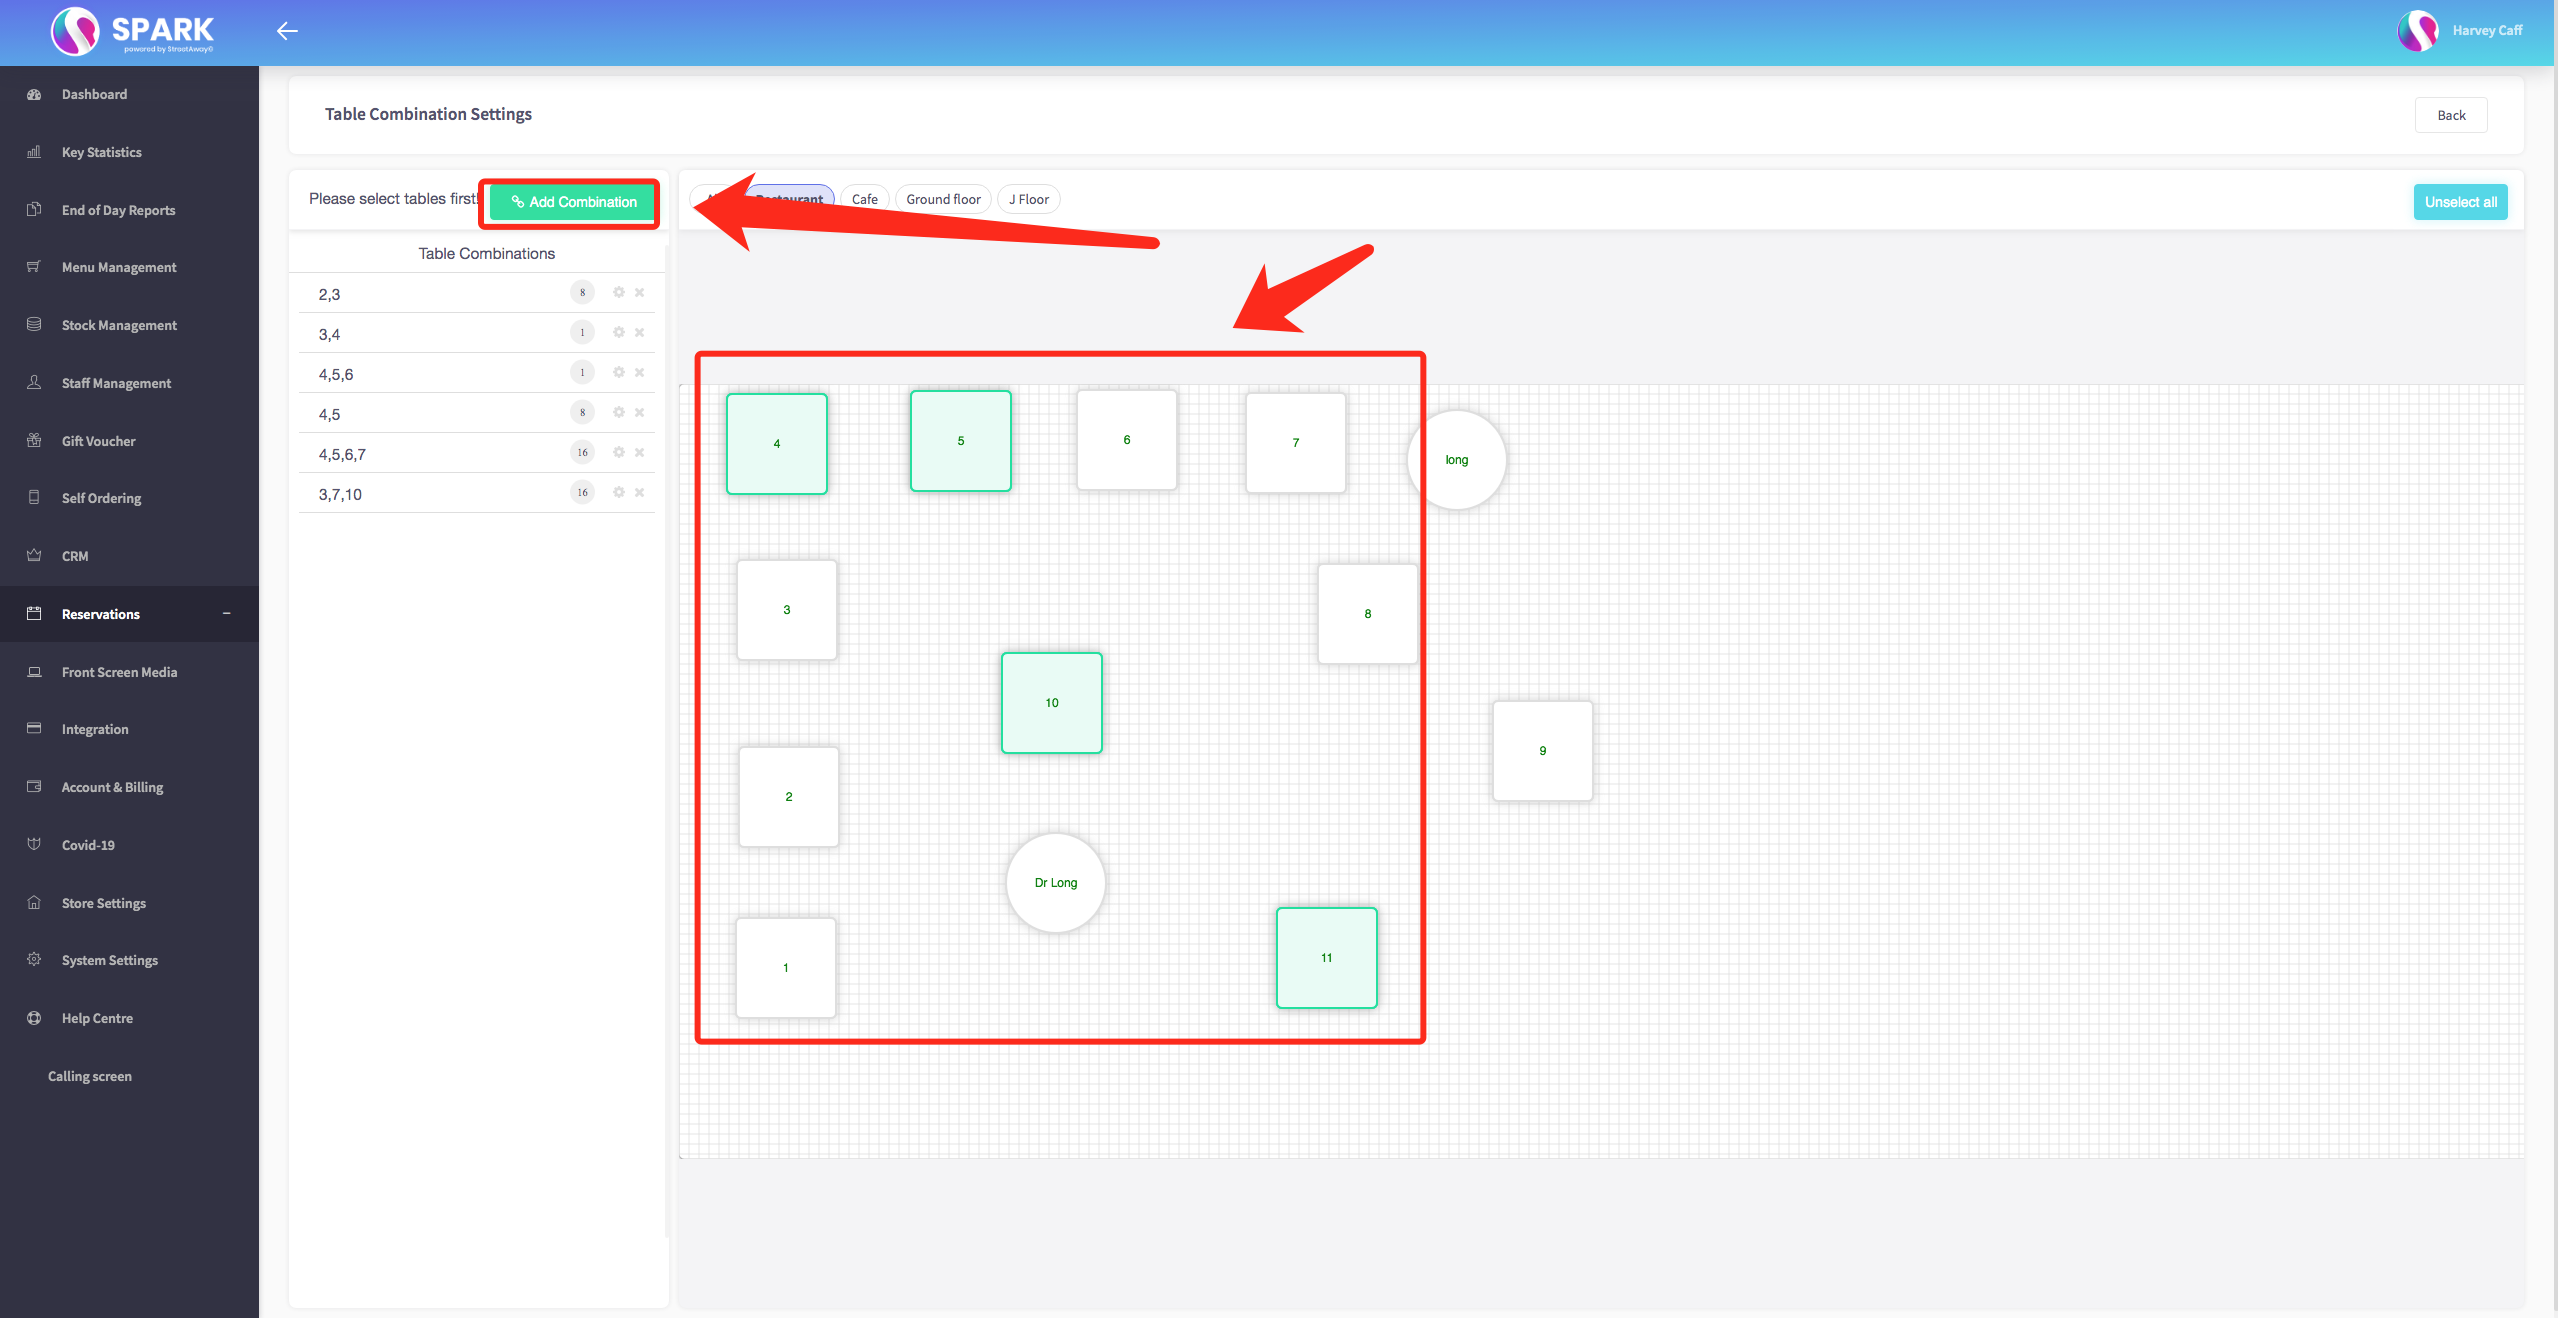
Within "Table Combination Settings," you'll be prompted to designate the tables you'd like to create combinations for.
After selecting the tables, click on "Add Combination." This will include your new combination in the list.
-
To activate reservations for a specific combination, click on the edit button (often represented as a gear icon) next to that combination.
Inside the editing section, you'll be asked to set the minimum and maximum seating capacity for the combination. You can also determine whether this specific table combination can accommodate reservations.
By following these steps, you'll be able to set up reservations for individual tables as well as for specific table combinations. If you need further assistance or have additional questions, please don't hesitate to ask.