Table plans offer a convenient way to visually organize your seating arrangement, eliminating any confusion when arranging your guests.
To craft a table plan, you'll need to access the back office or headquarters. Once you're in the back office, follow these steps:
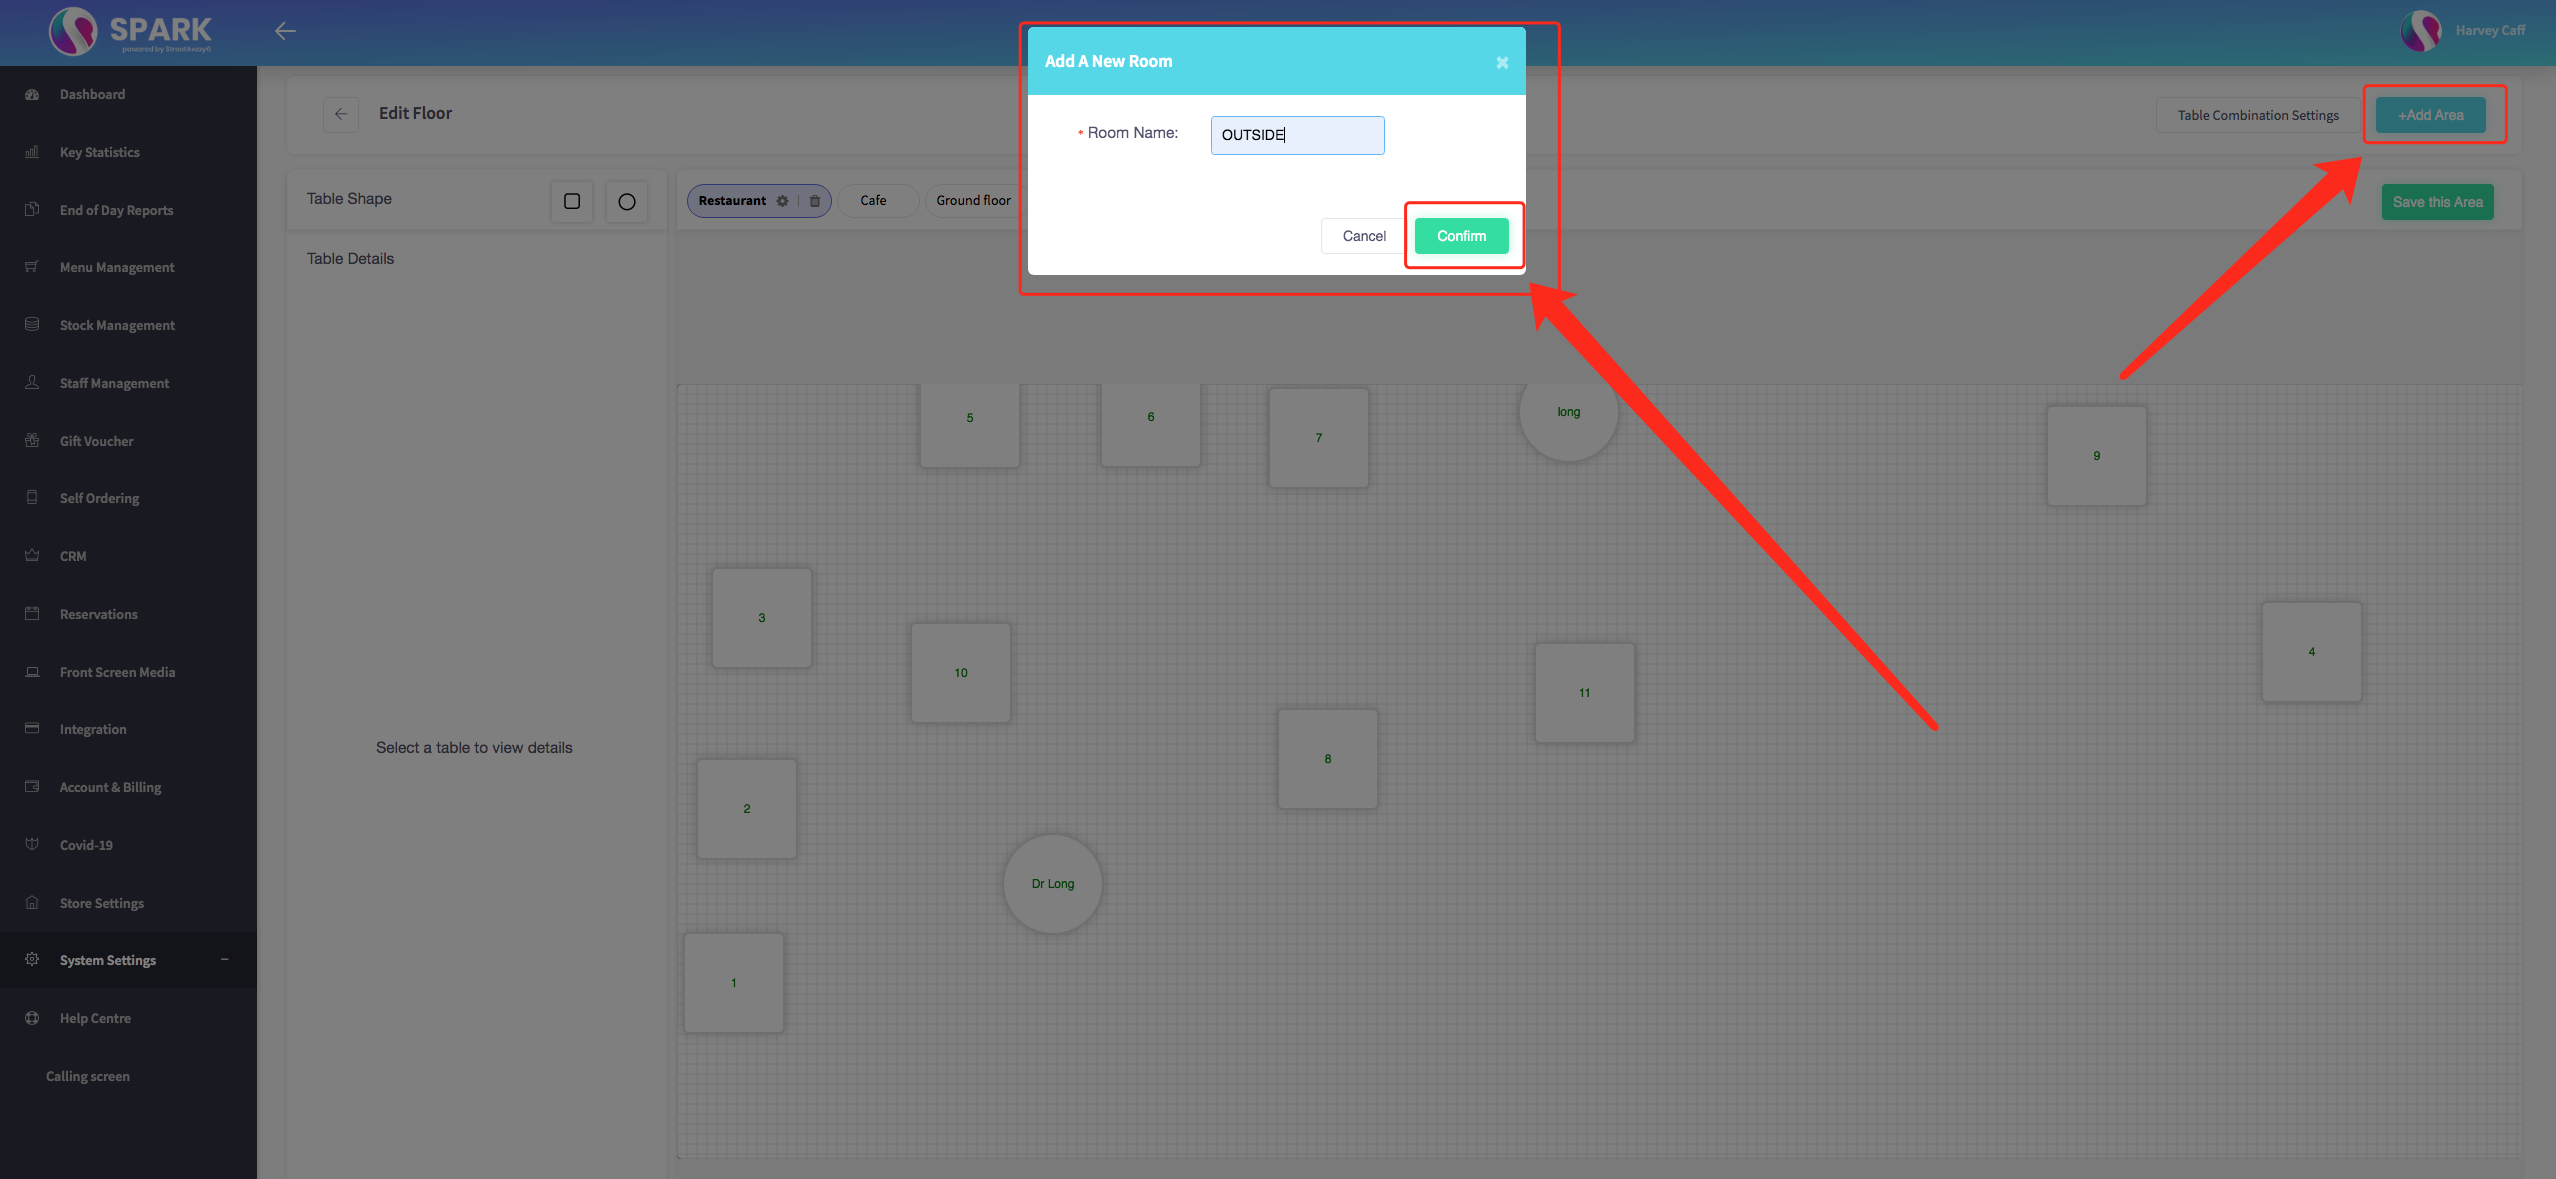
Navigate to "System Settings" and then choose "Floor Plans."
Creating a plan involves these steps:
-
Start by establishing a new area; simply click on the "+Add Area" button located in the top right corner of the screen. You'll be prompted to give it a name.
-
After creating the area, you can proceed to drag and drop tables. You have the option of using squares or circles.
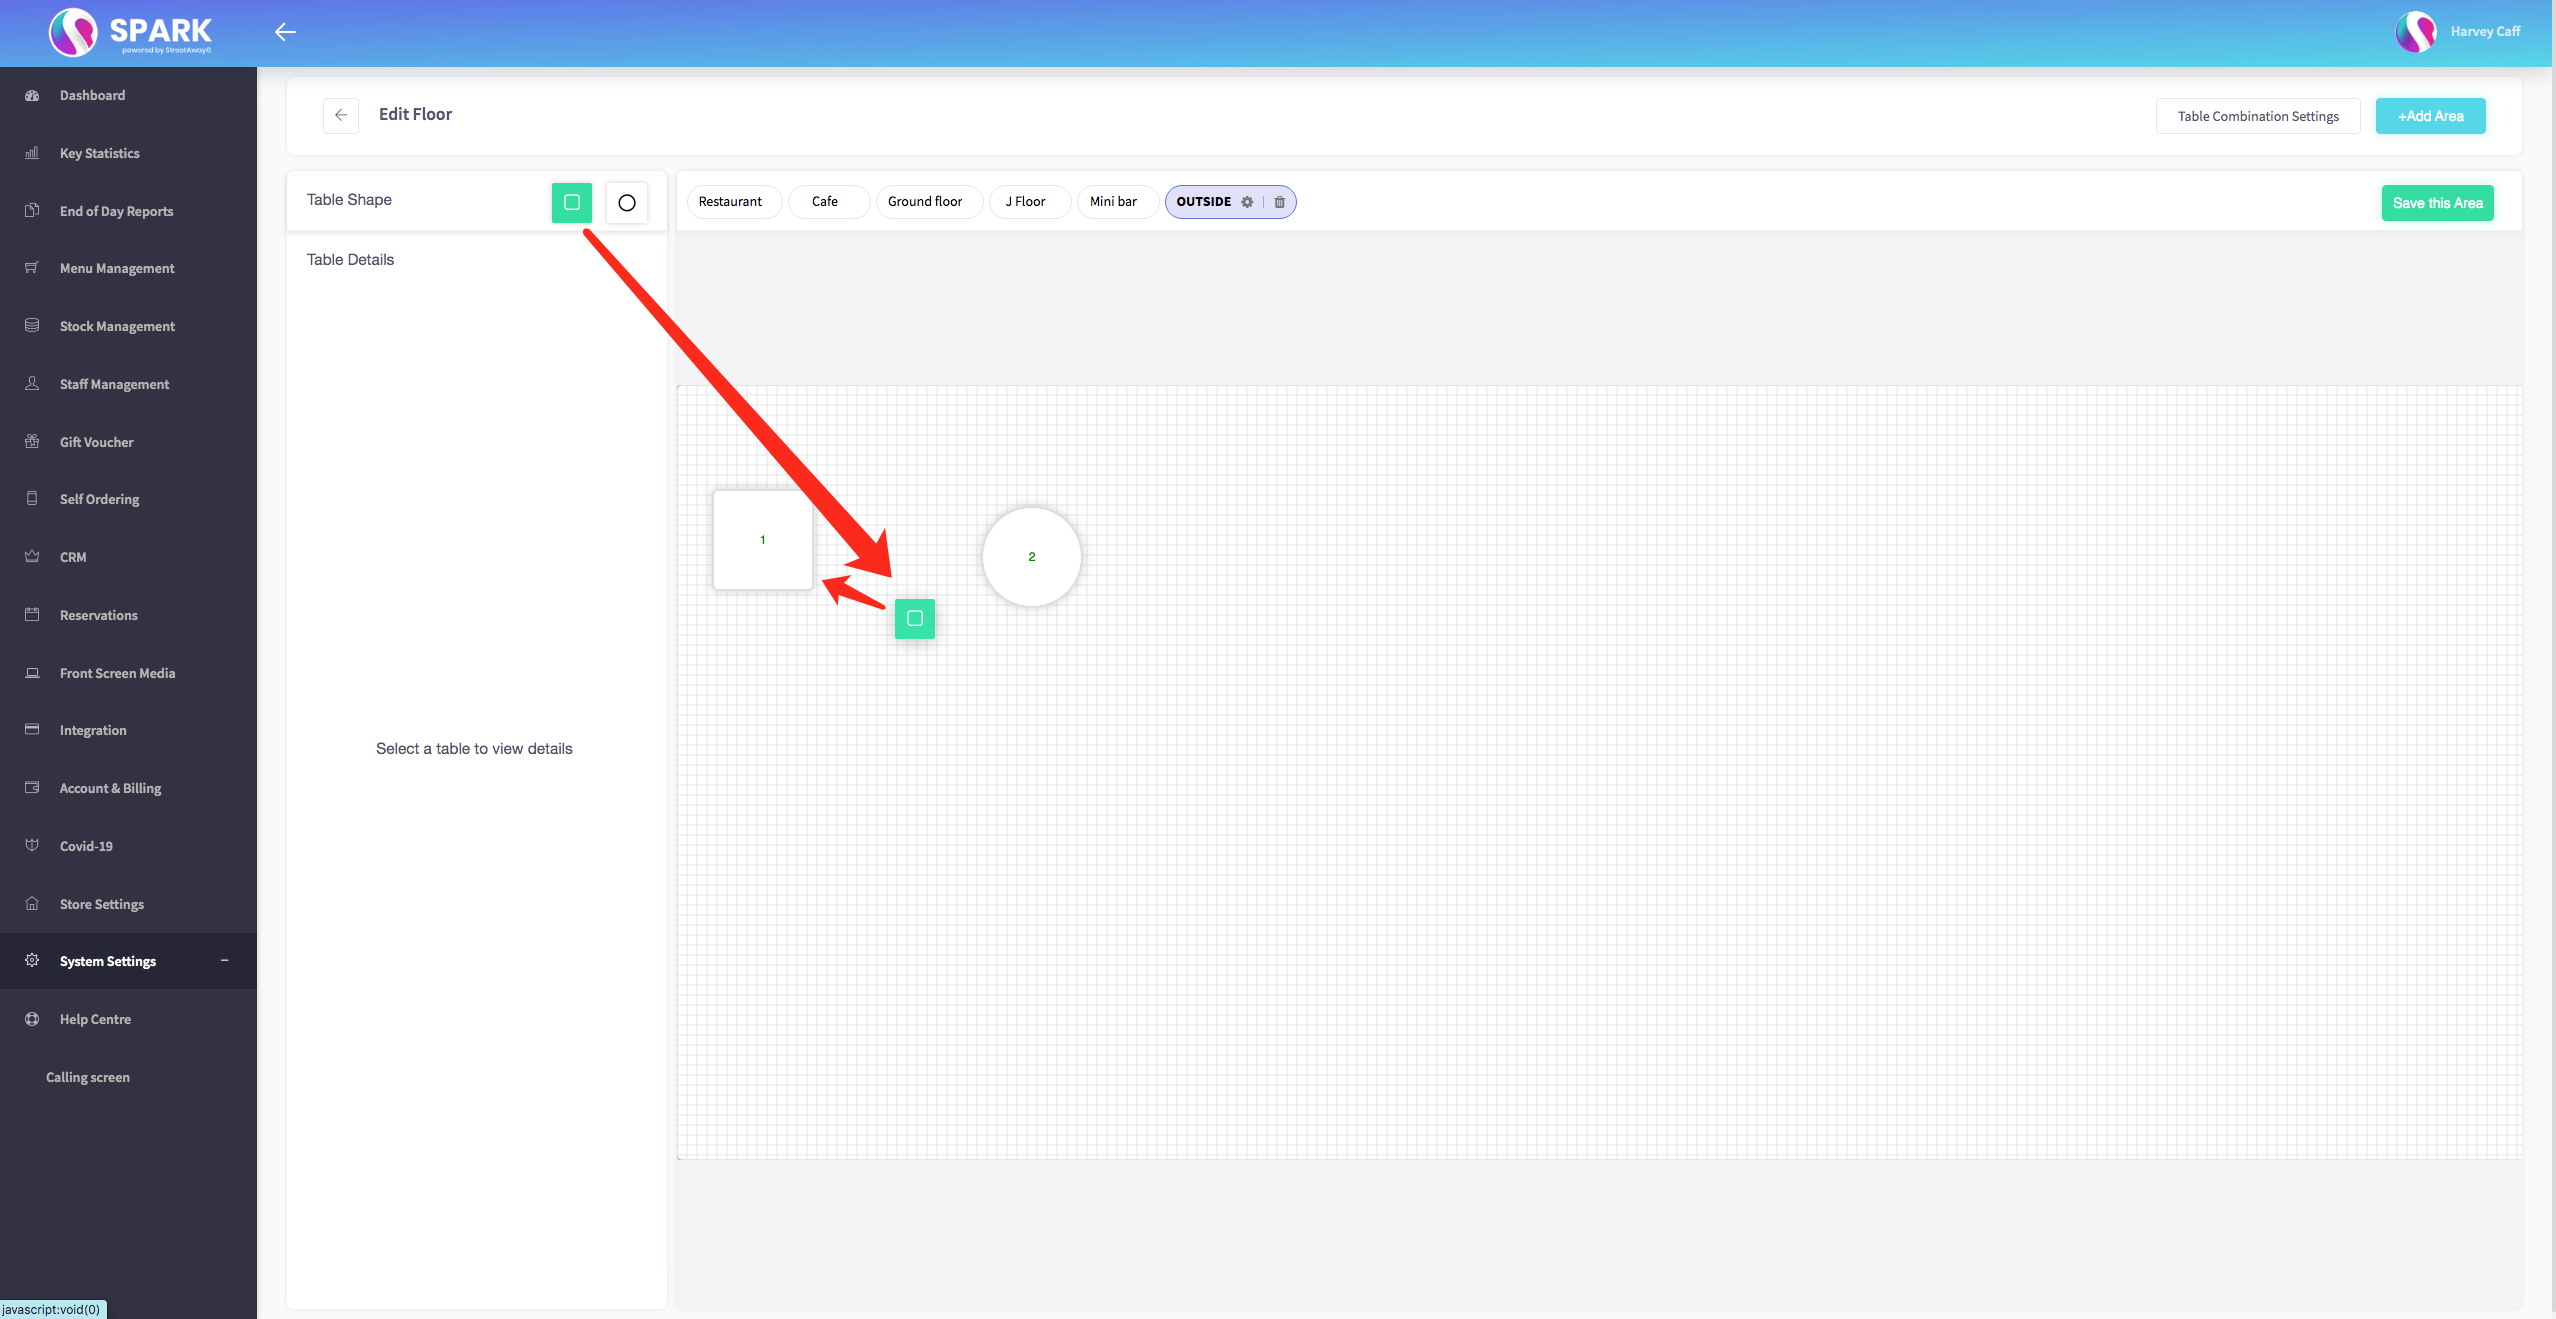
Note: If a square table accommodates eight or more people, it will automatically transform into a rectangle.
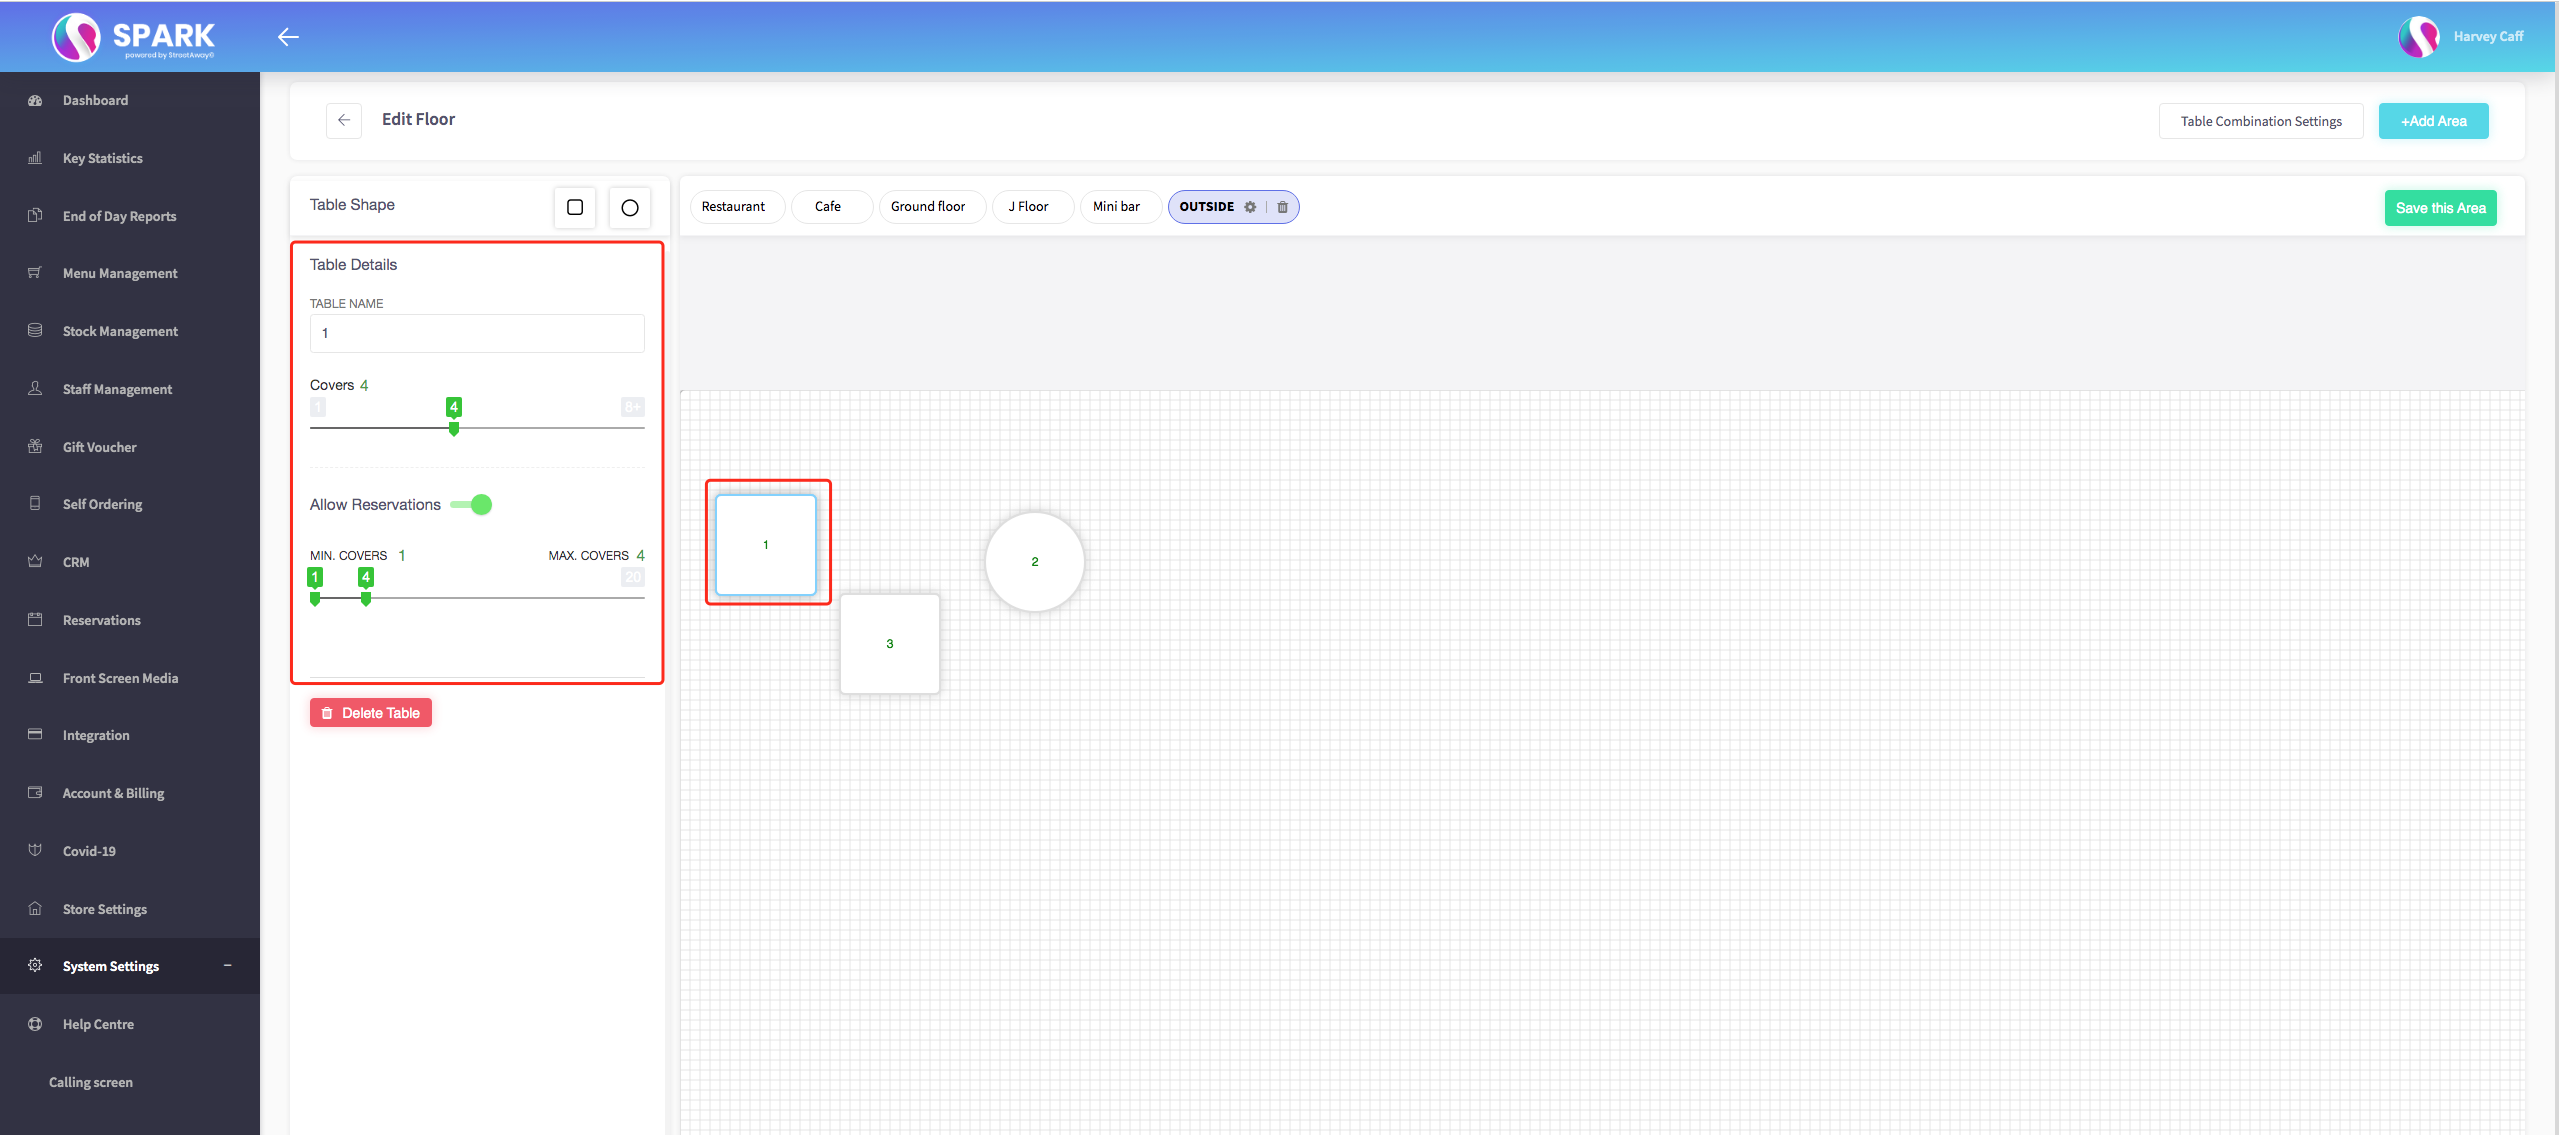
- Once a table is added to the area, you'll have various customisation options, including setting the table name, specifying the number of covers it can accommodate, and allowing reservations while choosing the minimum and maximum reservation limits.
Feel free to repeat these steps as many times as necessary to create your digital table plan.
How to make table combinations, click here.
How to customise your table plan on your terminal, click here.