Resetting your cloud printer
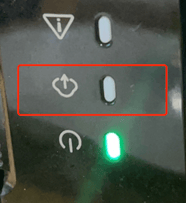
Press and hold the "PAIR" button on your printer until you hear two beeps, then press the "PAPER FEED" button. If done successfully, the blue Bluetooth light should turn off.


Setting up your cloud printer for Wi-Fi
- Ensure that your terminal's Bluetooth functionality has been turned ON in Android system settings.
- Ensure that your SPARK APP has its LOCATION PERMISSIONS enabled in the device's Android system settings.
- On your cloud printer, press and hold the "PAIR" button. Release the button when you hear "Please bind the device".
- On your terminal go to Settings > Printer Settings > Cloud Printer Settings
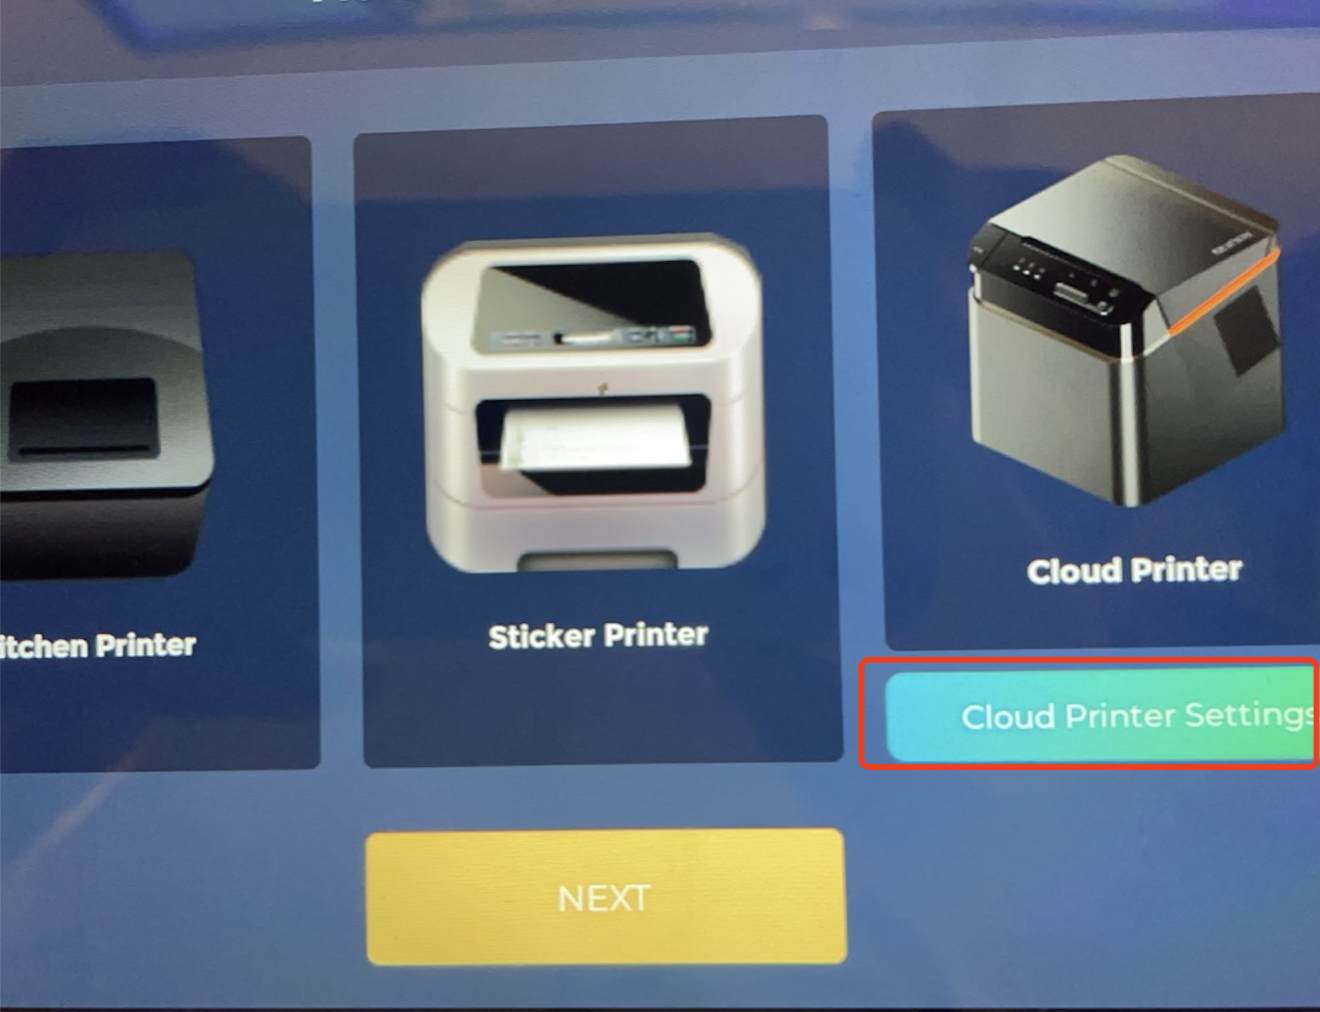
- Press the Setup Cloud Printer button
- Select the discovered cloud printer
- Configure your Wi-Fi information. If successful, the printer will announce "Wi-Fi connected"
Binding your cloud printer to a terminal
- Tap Cloud Printer > Next
- Select your cloud printer in the following list and tap "Add Device"
Note: If the Add Device button brings up a "Binding failed" error, make sure to sync your terminal with Cloud HQ before continuing
Configure your printing rules
- Select your cloud printer in the Radar Chart
- Tap Print Sort Settings
- Select which categories you would like your printer to receive the terminal