- How to change the table status to split
- How to change the table status to starters
- How to change the table status to mains
- How to change the table status to desserts
- How to change the table status to checked in
- How to change the table status to drinks
- How to change the table status to preview
- How to change the table status to over running
How to change the table status to split
This guide will show you how to change the table status to split.
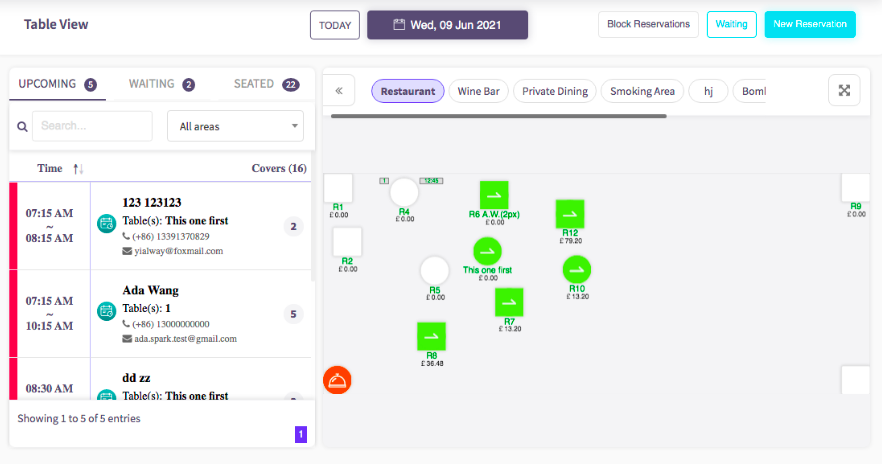
Firstly, click on the 'Reservations', then the 'Table view' option to the left hand menu.


This will then display the table view, shown here.
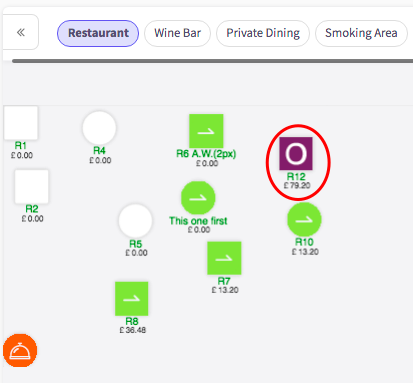
Secondly, click on a table icon, for example the table I have circled in red on here.
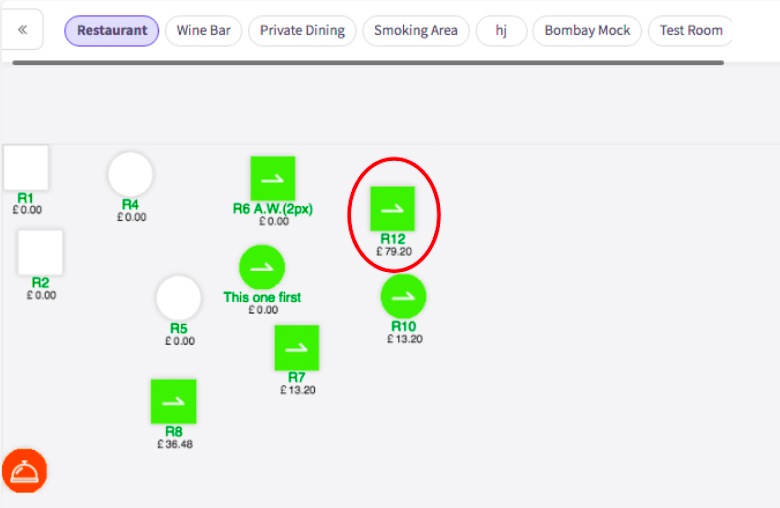
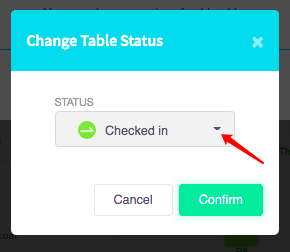
Clicking on the table will take you to this section below. The next step is clicking on the icon, circled in red.
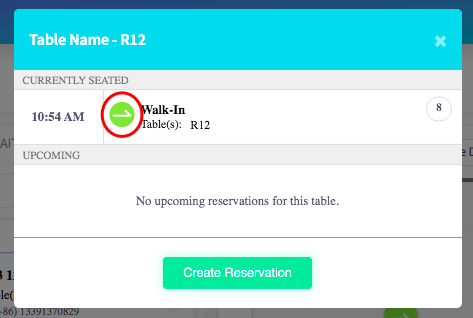
Now you will be able to change your table status, after clicking on the drop down menu shown here.
This menu will show you all of the available statuses.
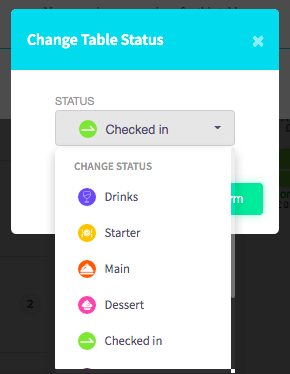
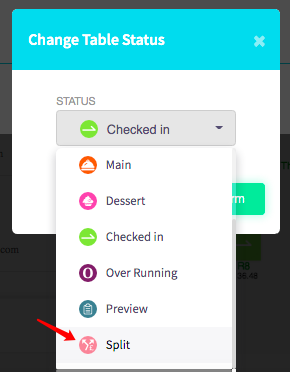
You may need to scroll down to find the status you are looking for. Once you have found the 'split' status, click on the status.
Now all you need to do is confirm this status, by pressing the confirm button below.
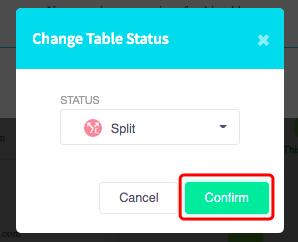
Great! Your status is confirmed, now you will see how it has changed compared to before. Step 2 showed this icon as green, and now this icon is pink with a different symbol.
How to change the table status to starters
This guide will show you how to change the table status to starters.
Firstly, click on the 'Reservations', then the 'Table view' option to the left hand menu.
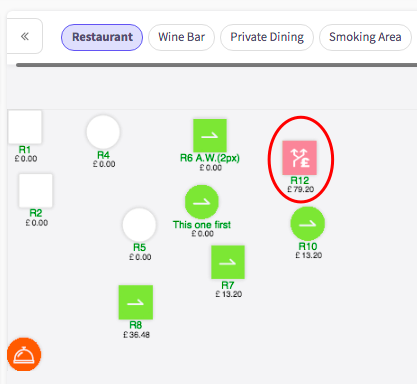
This will then display the table view, shown here.
Secondly, click on a table icon, for example the table I have circled in red on here.
Clicking on the table will take you to this section below. The next step is clicking on the icon, circled in red.
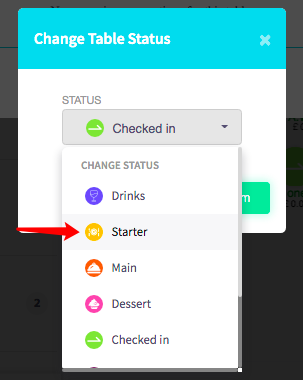
Now you will be able to change your table status, after clicking on the drop down menu shown here.
This menu will show you all of the available statuses.
You may need to scroll down to find the status you are looking for. Once you have found the 'starter' status, click on the status.
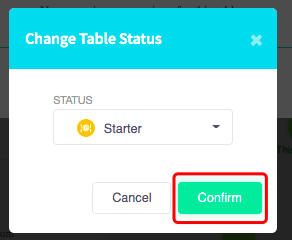
Now all you need to do is confirm this status, by pressing the confirm button below.
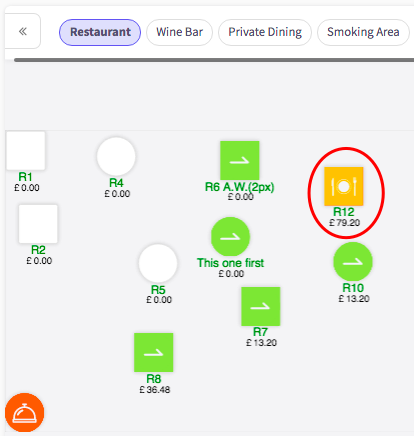
Great! Your status is confirmed, now you will see how it has changed compared to before. Step 2 showed this icon as green, and now this icon is orange with a different symbol.
How to change the table status to mains
This guide will show you how to change the table status to mains.
Firstly, click on the 'Reservations', then the 'Table view' option to the left hand menu.
This will then display the table view, shown here.
Secondly, click on a table icon, for example the table I have circled in red on here.
Clicking on the table will take you to this section below. The next step is clicking on the icon, circled in red.
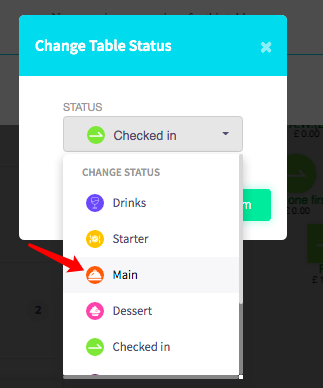
Now you will be able to change your table status, after clicking on the drop down menu shown here.
This menu will show you all of the available statuses.
You may need to scroll down to find the status you are looking for. Once you have found the 'main' status, click on the status.
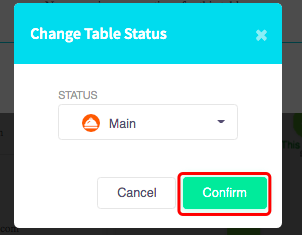
Now all you need to do is confirm this status, by pressing the confirm button below.
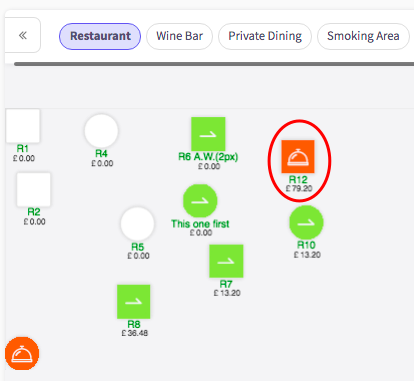
Great! Your status is confirmed, now you will see how it has changed compared to before. Step 2 showed this icon as green, and now this icon is orange with a different symbol.
How to change the table status to desserts
This guide will show you how to change the table status to desserts.
Firstly, click on the 'Reservations', then the 'Table view' option to the left hand menu.
This will then display the table view, shown here.
Secondly, click on a table icon, for example the table I have circled in red on here.
Clicking on the table will take you to this section below. The next step is clicking on the icon, circled in red.
Now you will be able to change your table status, after clicking on the drop down menu shown here.
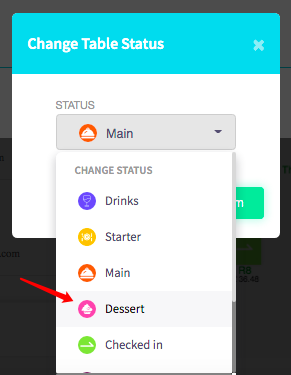
This menu will show you all of the available statuses.
You may need to scroll down to find the status you are looking for. Once you have found the 'dessert' status, click on the status.
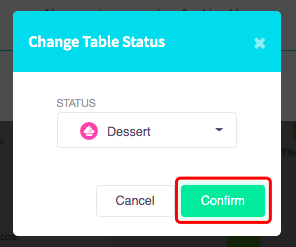
Now all you need to do is confirm this status, by pressing the confirm button below.
Great! Your status is confirmed, now you will see how it has changed compared to before. Step 2 showed this icon as green, and now this icon is dark pink with a different symbol.

How to change the table status to checked in
This guide will show you how to change the table status to checked in.
Firstly, click on the 'Reservations', then the 'Table view' option to the left hand menu.
This will then display the table view, shown here.
Secondly, click on a table icon, for example the table I have circled in red on here.

Clicking on the table will take you to this section below. The next step is clicking on the icon, circled in red.
Now you will be able to change your table status, after clicking on the drop down menu shown here.
This menu will show you all of the available statuses.
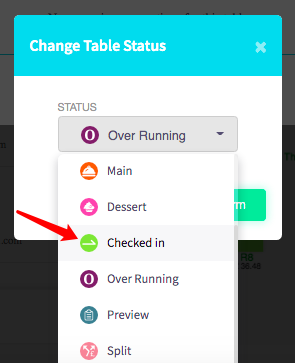
You may need to scroll down to find the status you are looking for. Once you have found the 'checked in' status, click on the status.
Now all you need to do is confirm this status, by pressing the confirm button below.
Great! Your status is confirmed, now you will see how it has changed compared to before. Step 2 showed this icon as pink, and now this icon is green with a different symbol.
How to change the table status to drinks
This guide will show you how to change the table status to drinks.
Firstly, click on the 'Reservations', then the 'Table view' option to the left hand menu.
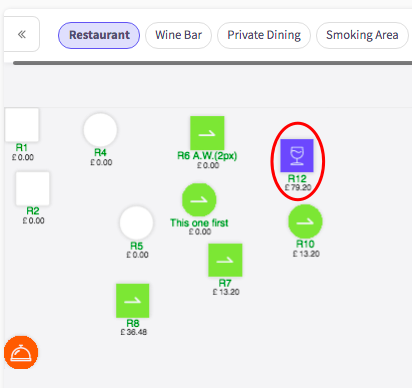
This will then display the table view, shown here.
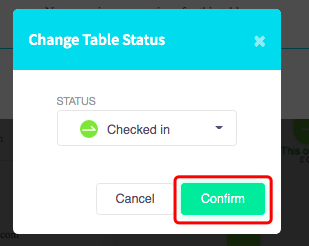
Secondly, click on a table icon, for example the table I have circled in red on here.
Clicking on the table will take you to this section below. The next step is clicking on the icon, circled in red.
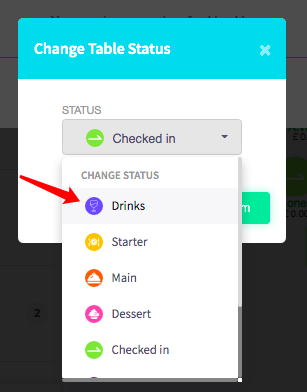
Now you will be able to change your table status, after clicking on the drop down menu shown here.
This menu will show you all of the available statuses.
You may need to scroll down to find the status you are looking for. Once you have found the 'drinks' status, click on the status.
Now all you need to do is confirm this status, by pressing the confirm button below.
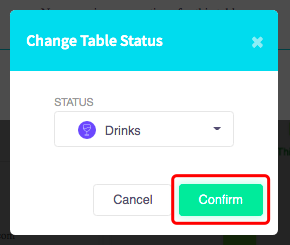
Great! Your status is confirmed, now you will see how it has changed compared to before. Step 2 showed this icon as green, and now this icon is blue with a different symbol.
How to change the table status to preview
This guide will show you how to change the table status to preview.
Firstly, click on the 'Reservations', then the 'Table view' option to the left hand menu.
This will then display the table view, shown here.
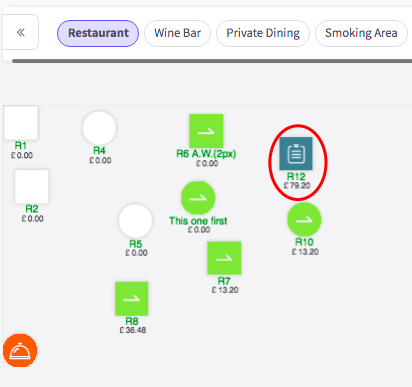
Secondly, click on a table icon, for example the table I have circled in red on here.
Clicking on the table will take you to this section below. The next step is clicking on the icon, circled in red.
Now you will be able to change your table status, after clicking on the drop down menu shown here.
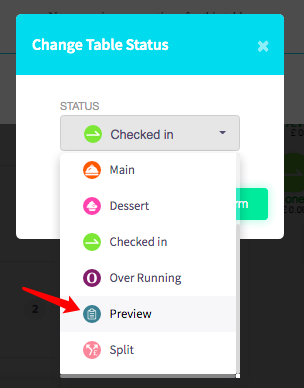
This menu will show you all of the available statuses.
You may need to scroll down to find the status you are looking for. Once you have found the 'preview' status, click on the status.
Now all you need to do is confirm this status, by pressing the confirm button below.
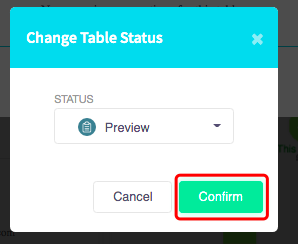
Great! Your status is confirmed, now you will see how it has changed compared to before. Step 2 showed this icon as green, and now this icon is blue with a different symbol.
How to change the table status to over running
This guide will show you how to change the table status to over running.
Firstly, click on the 'Reservations', then the 'Table view' option to the left hand menu.
This will then display the table view, shown here.
Secondly, click on a table icon, for example the table I have circled in red on here.
Clicking on the table will take you to this section below. The next step is clicking on the icon, circled in red.
Now you will be able to change your table status, after clicking on the drop down menu shown here.
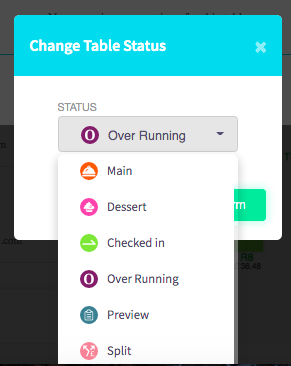
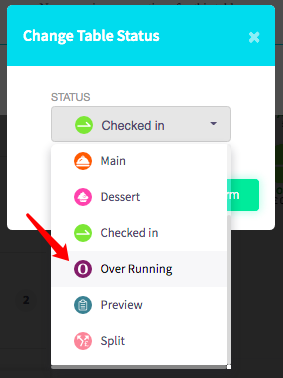
This menu will show you all of the available statuses.
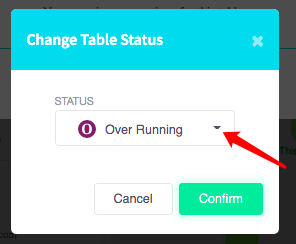
You may need to scroll down to find the status you are looking for. Once you have found the 'over running' status, click on the status.
Now all you need to do is confirm this status, by pressing the confirm button below.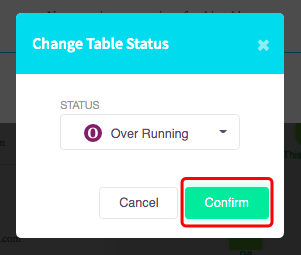
Great! Your status is confirmed, now you will see how it has changed compared to before. Step 2 showed this icon as green, and now this icon is purple with a different symbol.