How do I add a timer to my tables?
In this article, we'll look at adding timers to all tables, so you can get an idea of how long each customer stays, and how long they've been waiting.
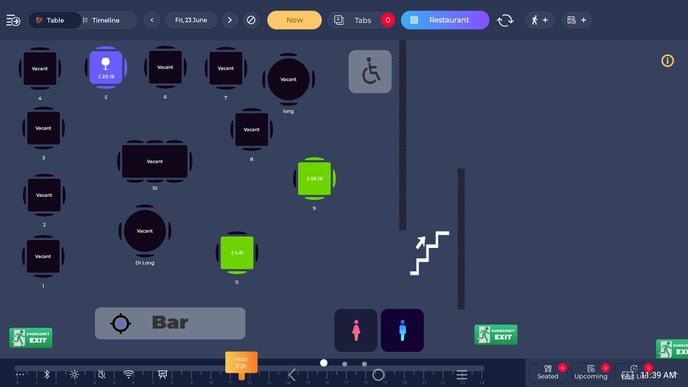
- To start off, your table plan is going to look similar to this. You'll be able to see your tables, and what stage of the meal they're on, but not how long your customers have actually been seated.

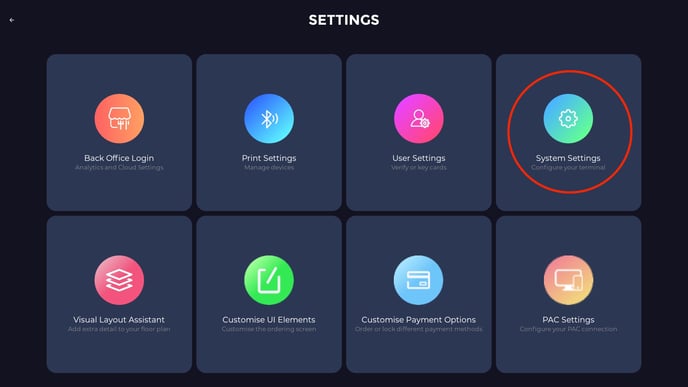
- To activate the timer setting, you'll first have to open the System Settings, go ahead and open the side menu, head into settings and press System Settings.

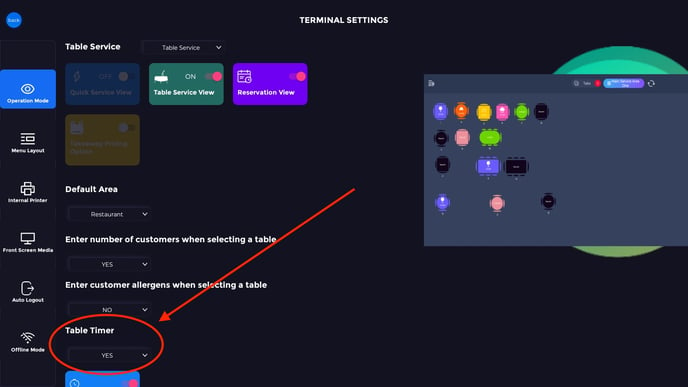
- From there you'll be greeted with the page you need. Just before the bottom of the page, you'll see a setting for a Table Timer. Go ahead and select YES from the drop down menu.

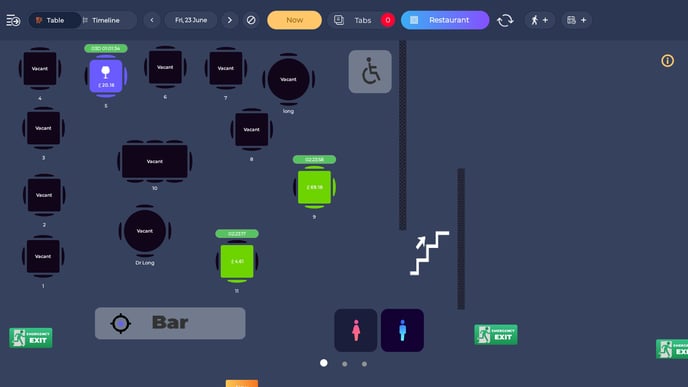
- If everything has been done correctly, when you return to your tableview, you should be able to see just how long each table has had their tab open. This is a great feature in helping to ensure that no customer gets left.
