Getting started with stock management
To make the most of our Cloud HQ service, you'll need to know how to do everything, from adding suppliers, to creating product categories, to doing an initial stock-take. The following guides will show you how.
- How to add a supplier to stock management
- How to create unit rules
- How to create a product category
- How to add a stock item
- How to do an initial stock take
Before we begin, make sure you're signed into the SPARK EPoS Cloud HQ.
How to add a supplier to stock management
Find the 'Stock Management' tab on the left-hand toolbar. Click 'All Suppliers' in the menu following menu.

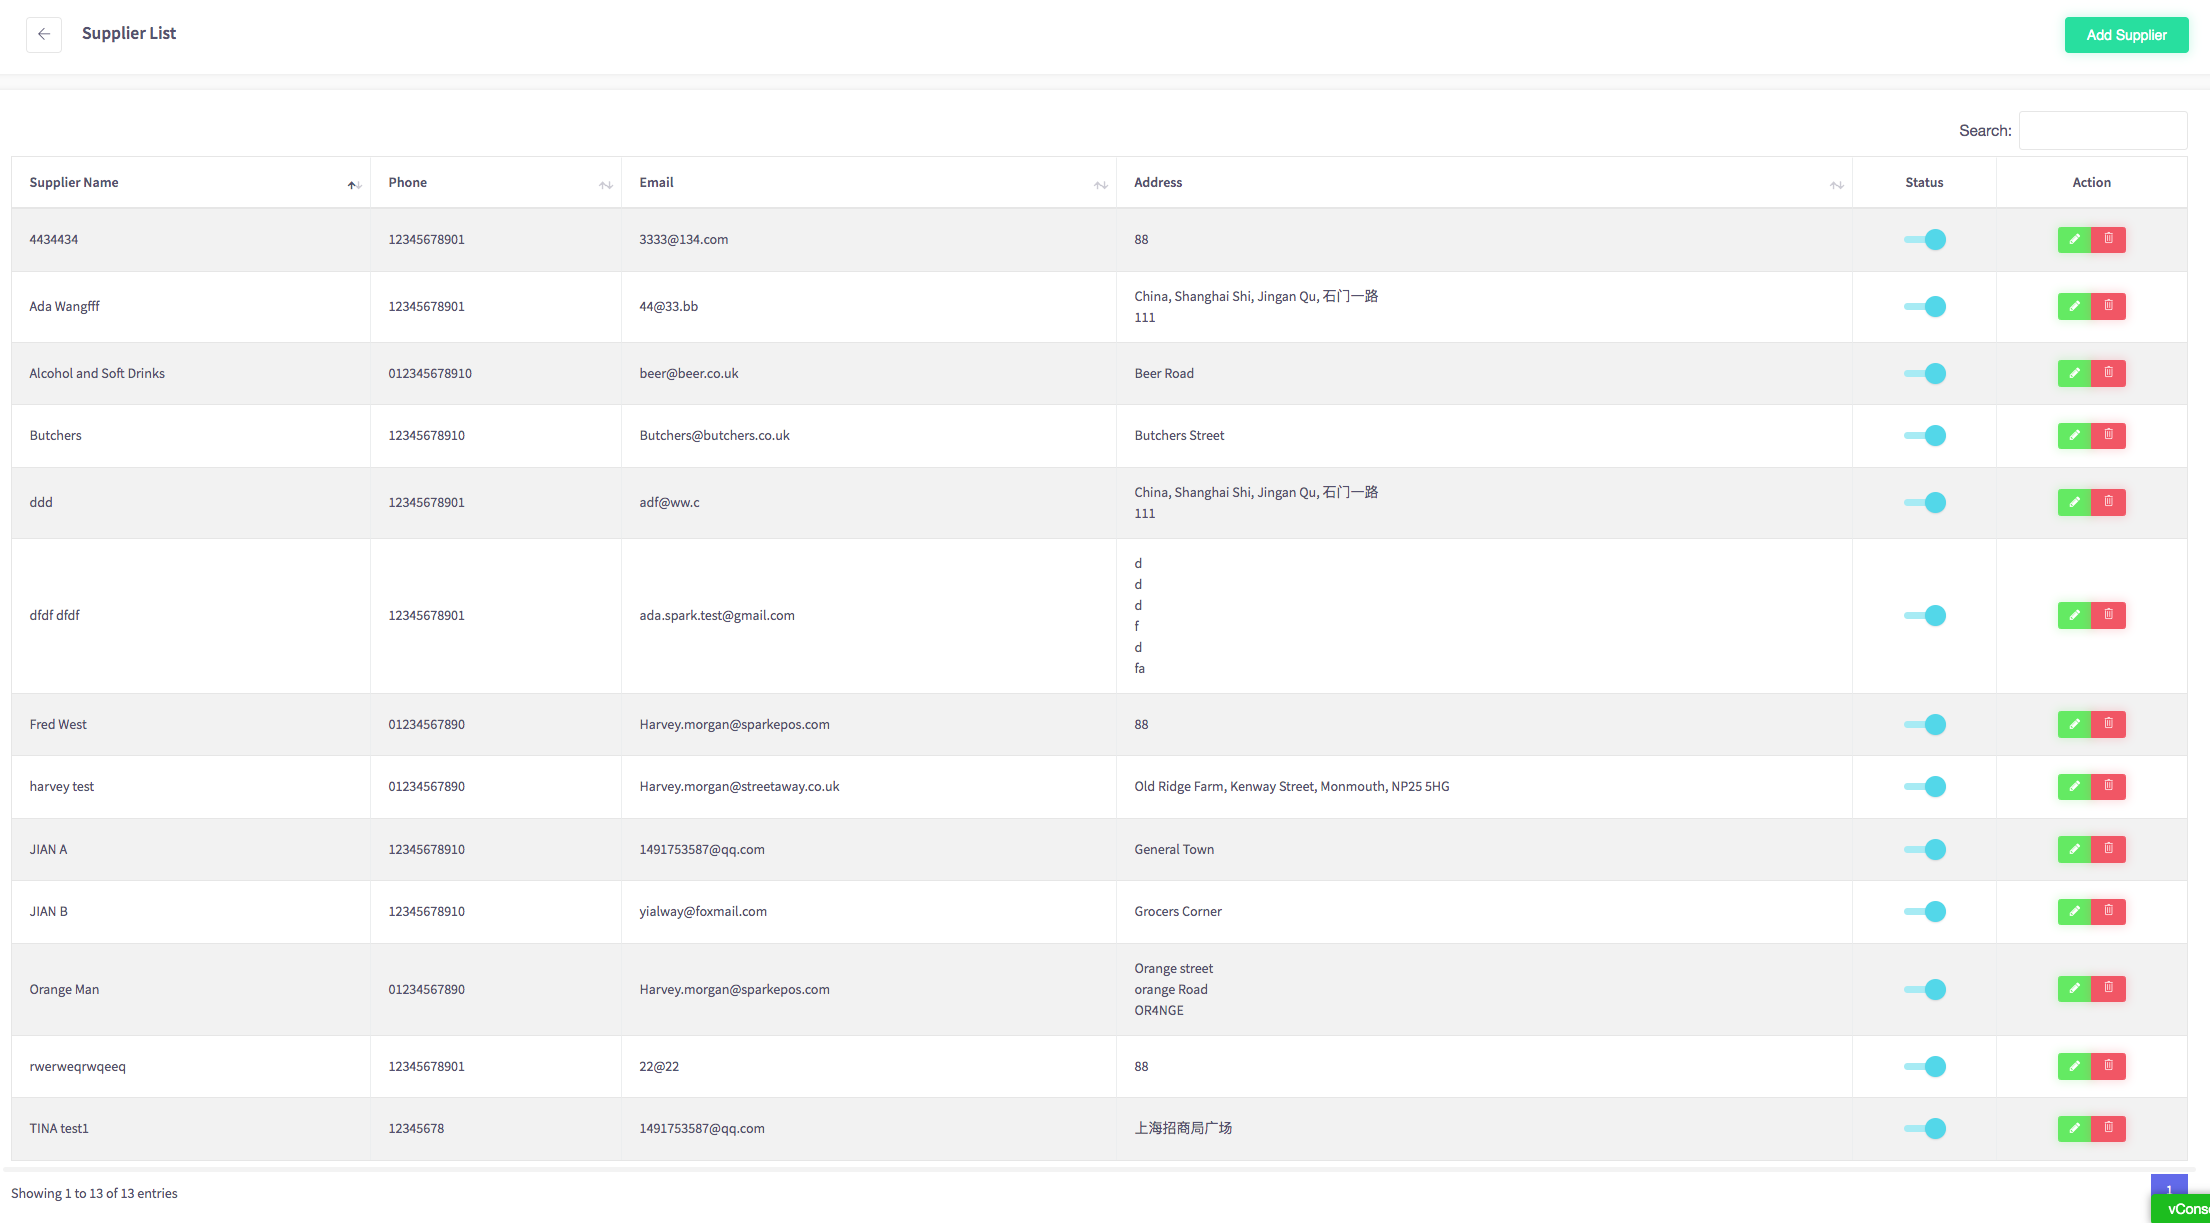
The table below will populate with a list of all your suppliers.
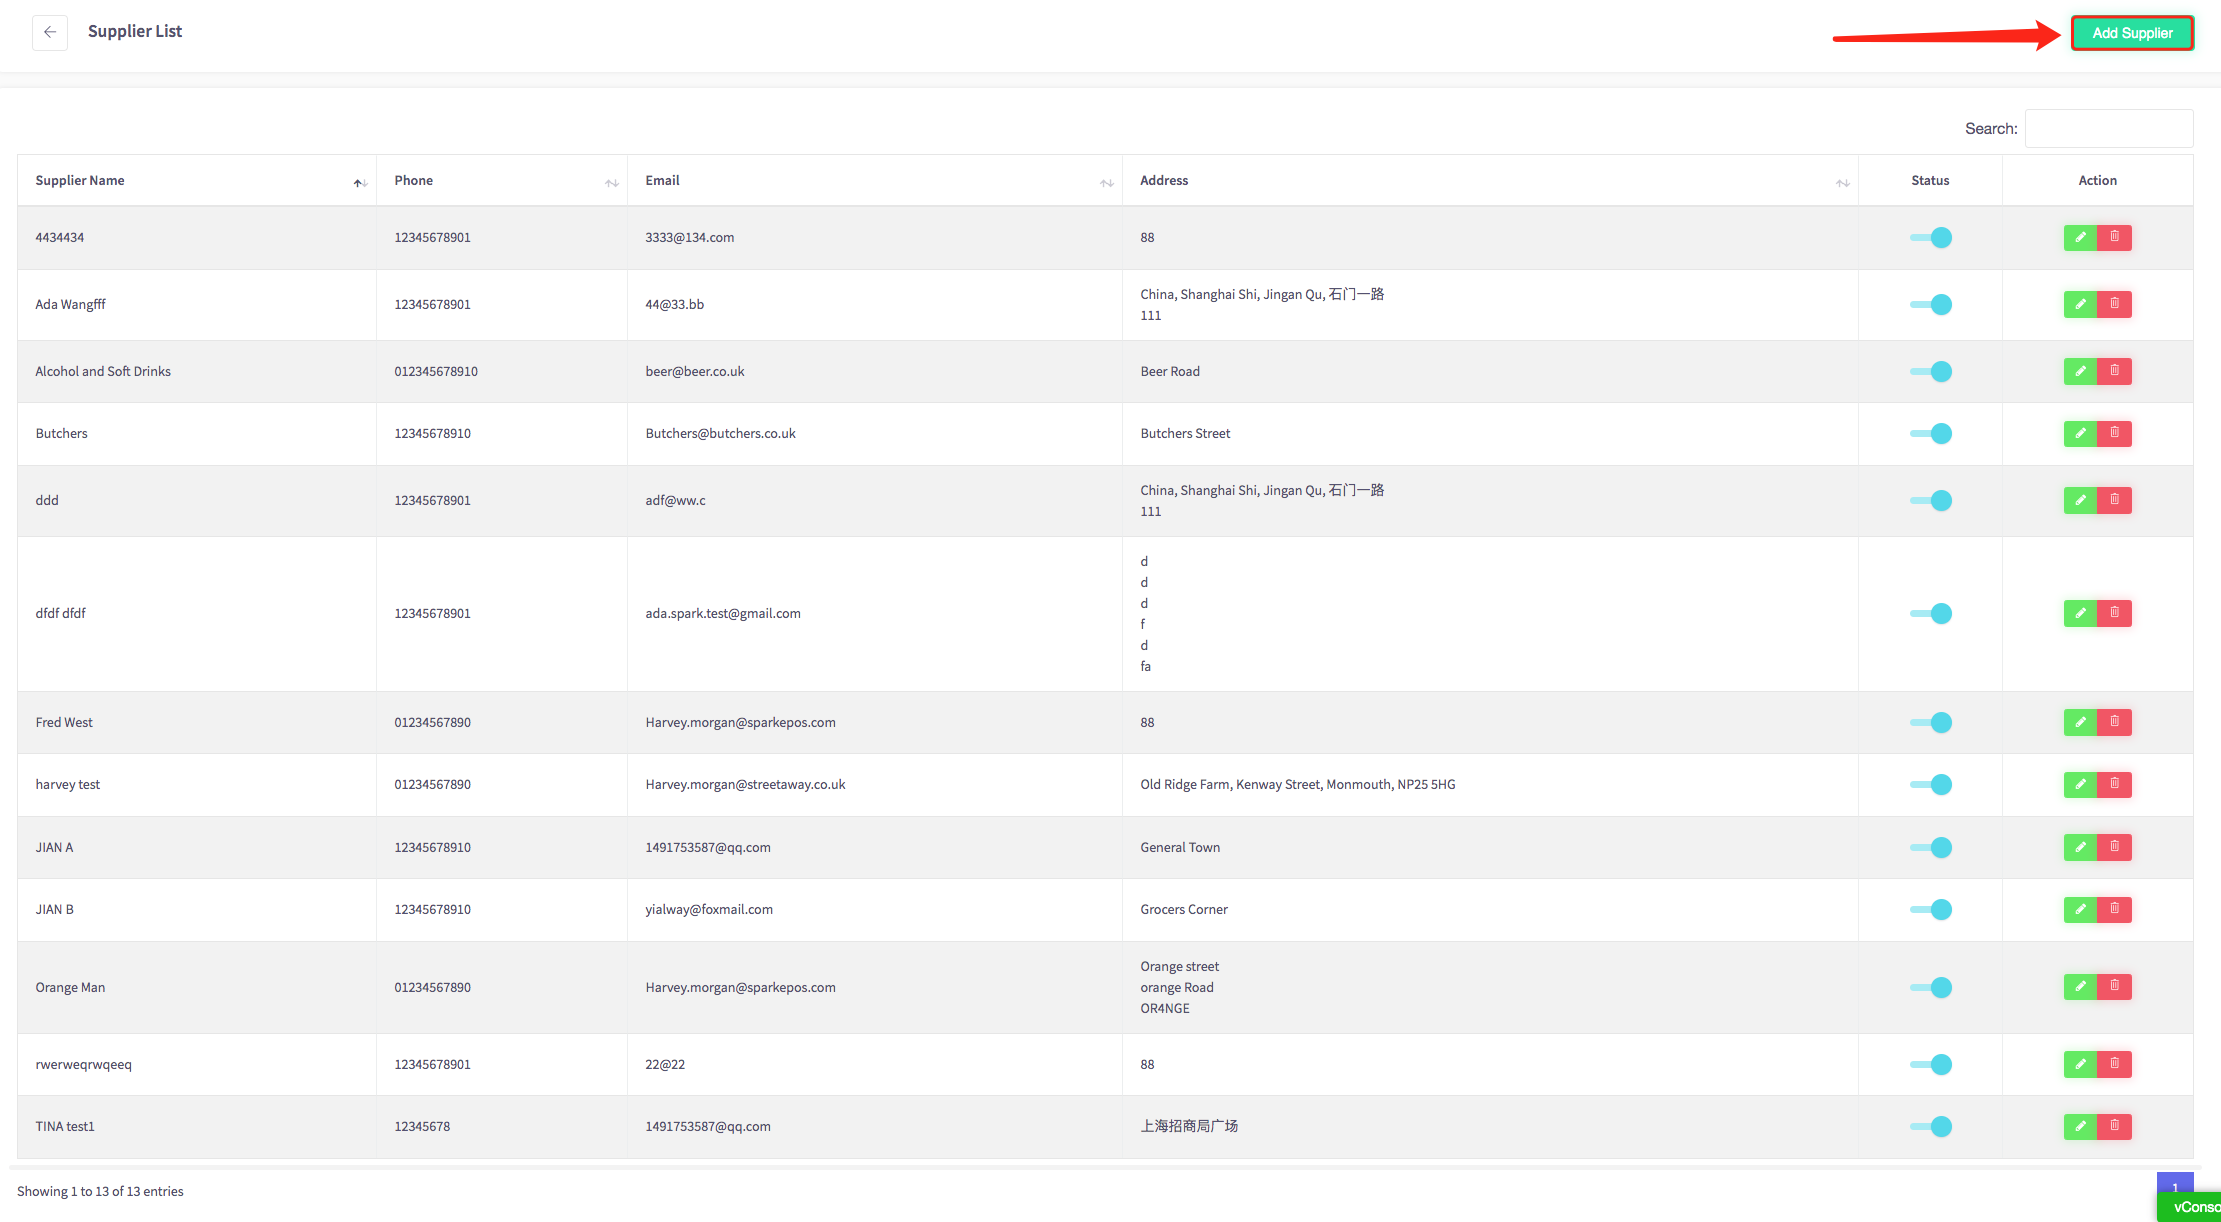
Click the green "Add Supplier" button at the top right of the page.
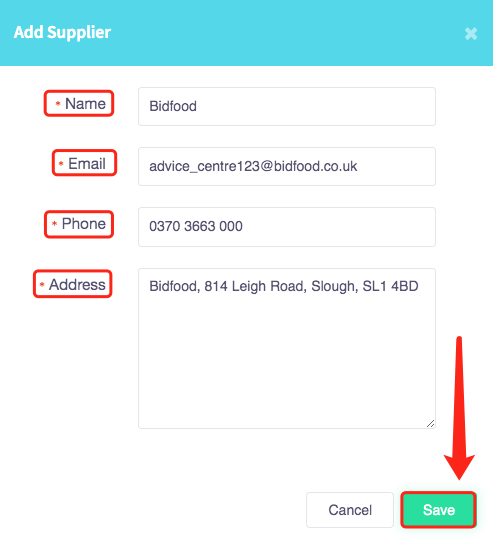
Fill in the fields with the relevant information. Click the  button at the bottom right of the window.
After you click save on 'Add Supplier' you should see a message pop up at the bottom right, as shown

Your new supplier has now been added.
How to create unit rules
Cloud HQ allows you to keep track of stock right down to each individual item. We'll show you how to do that here.
Find 'Stock Management' in the toolbar on the left-hand side. Click 'Measurement Units'.

Click 'Add Unit'.
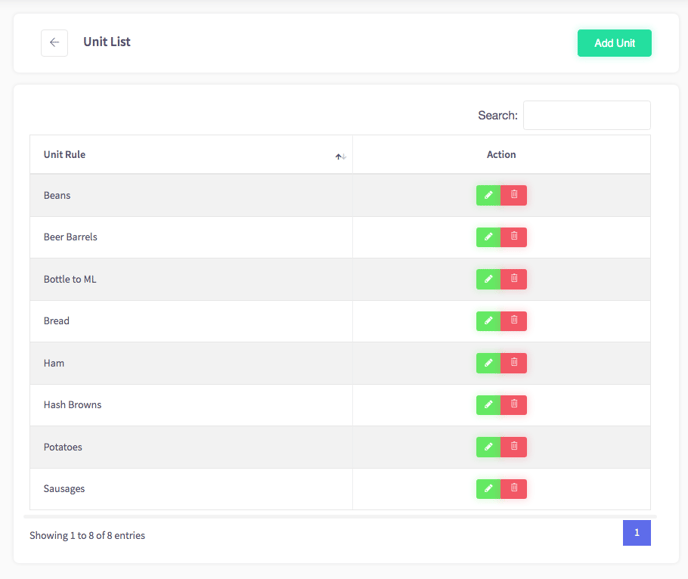
Let's look at the unit rule for sausages.
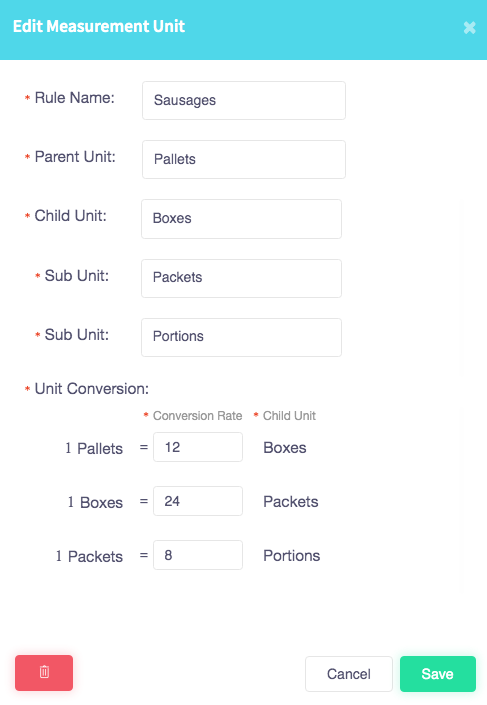
In this example, our sausages are delivered to us according to the following rules:
1. There are 8 portions of sausages in 1 packet.
2. There are 24 packets in 1 box.
3. There are 12 boxes in 1 pallet.
By breaking down our items at such a granular level, it becomes easier to keep track of stock in the event that, for example, a customer decides to cancel their order while it is being cooked. In that scenario, we would reduce our stock levels by 1 portion and the system would automatically track the rest.
Fill in the fields shown above according to your own needs, and then click the green 'Save' button when you're done.
How to create a product category
This guide will show you how to create a product category via Cloud HQ.
Find 'Stock Management' in the toolbar on the left-hand side. Click 'Stock Category'.

This will bring up all of your stock categories.
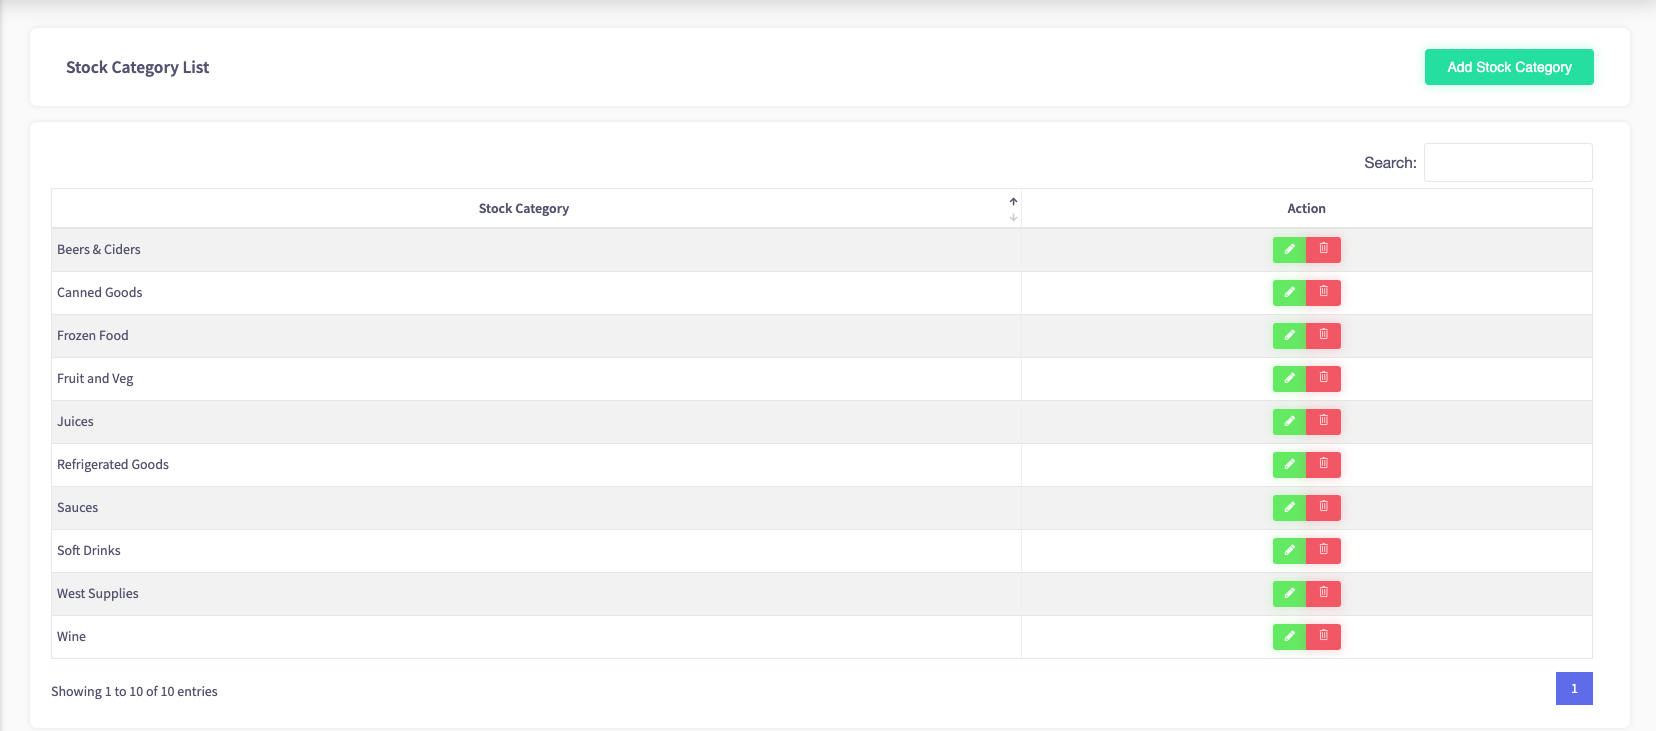
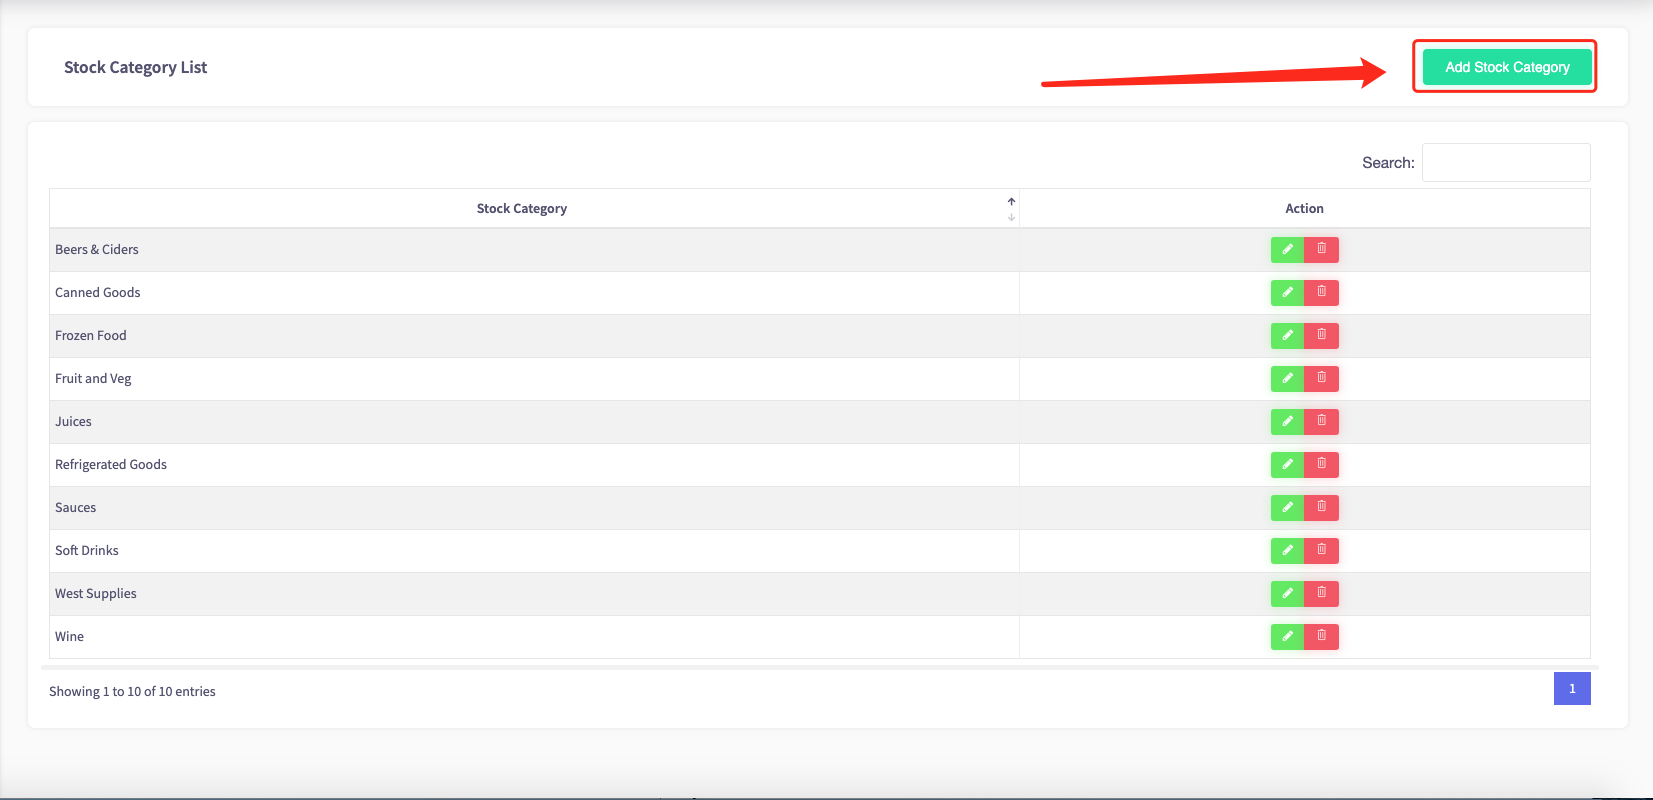
Click 'Add Stock Category' at the top-right of the page.
Select the stock category type by using the drop-down menu.
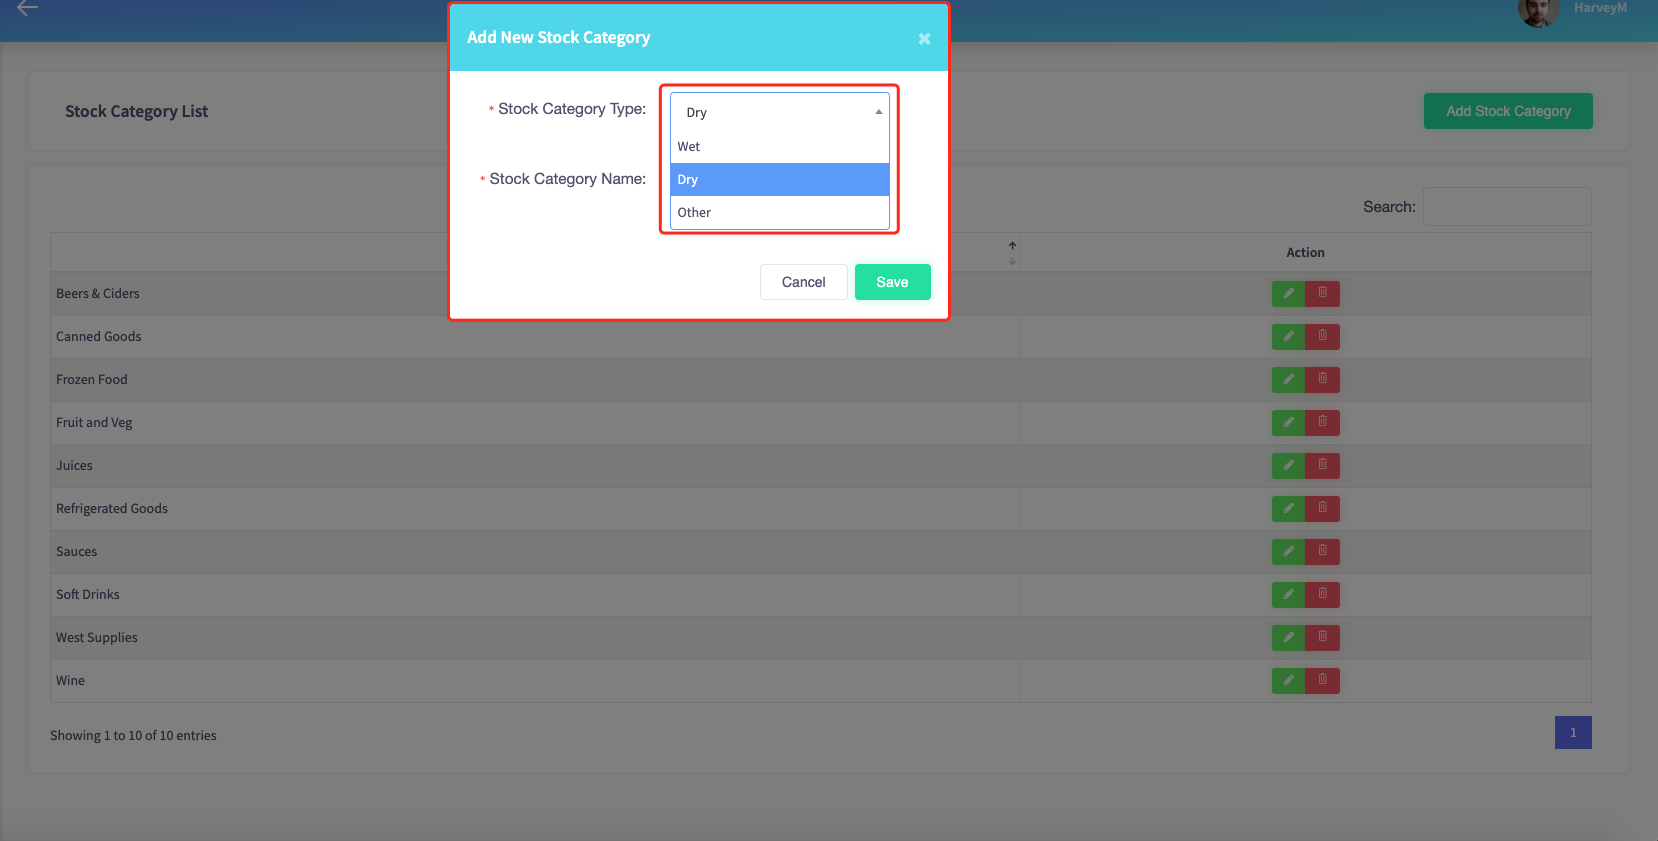
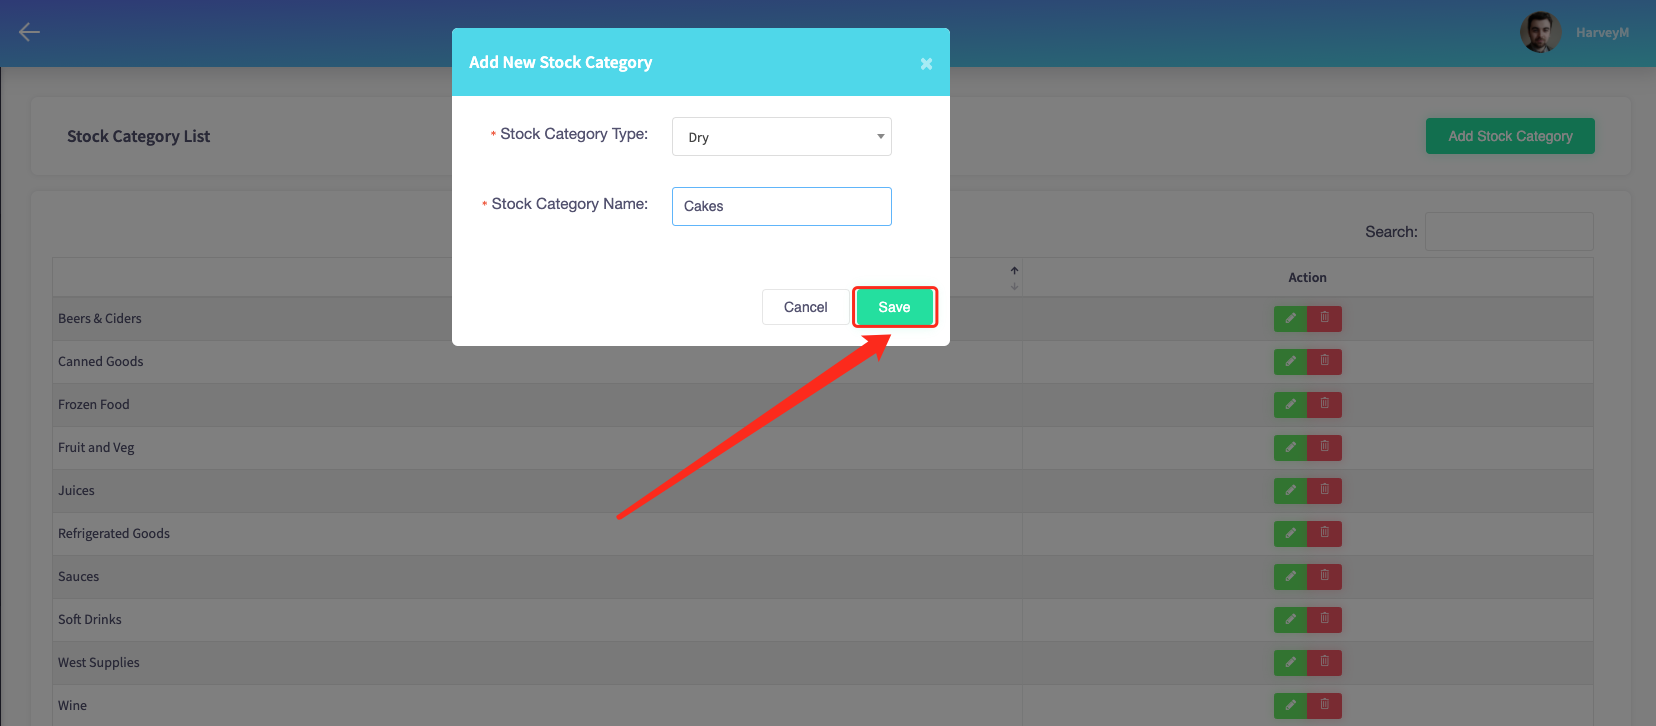
Give your stock category a name.

Click the green 'Save' button to finish.
How to add a stock item
Here, we'll show you how to add specific items of stock via Cloud HQ.
Find 'Stock Management' on the left-hand toolbar. Click 'All Stock Items'.

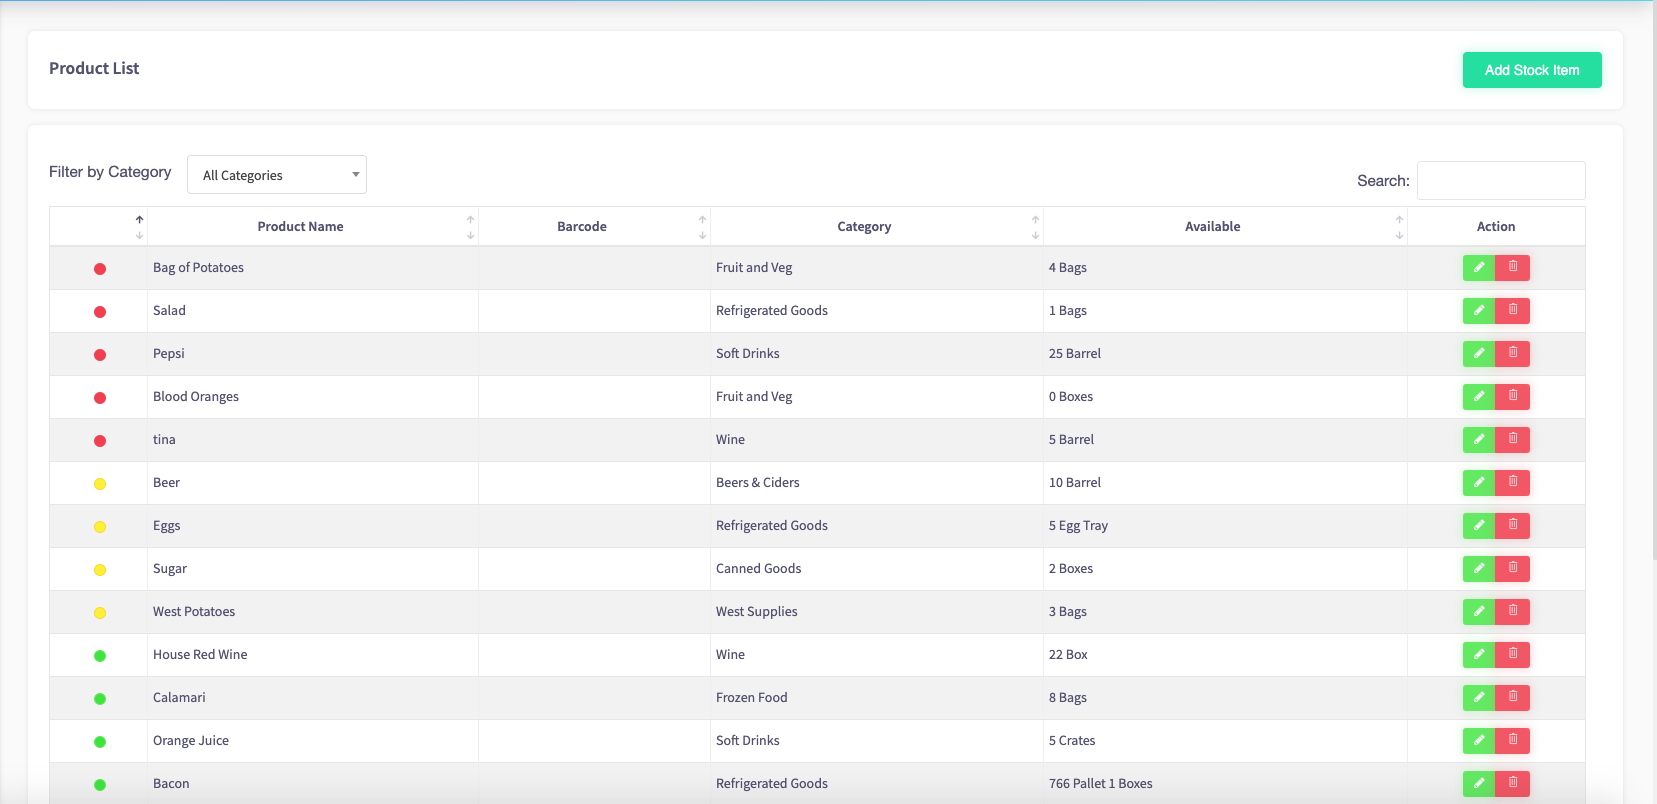
Your product list will appear in the following table.
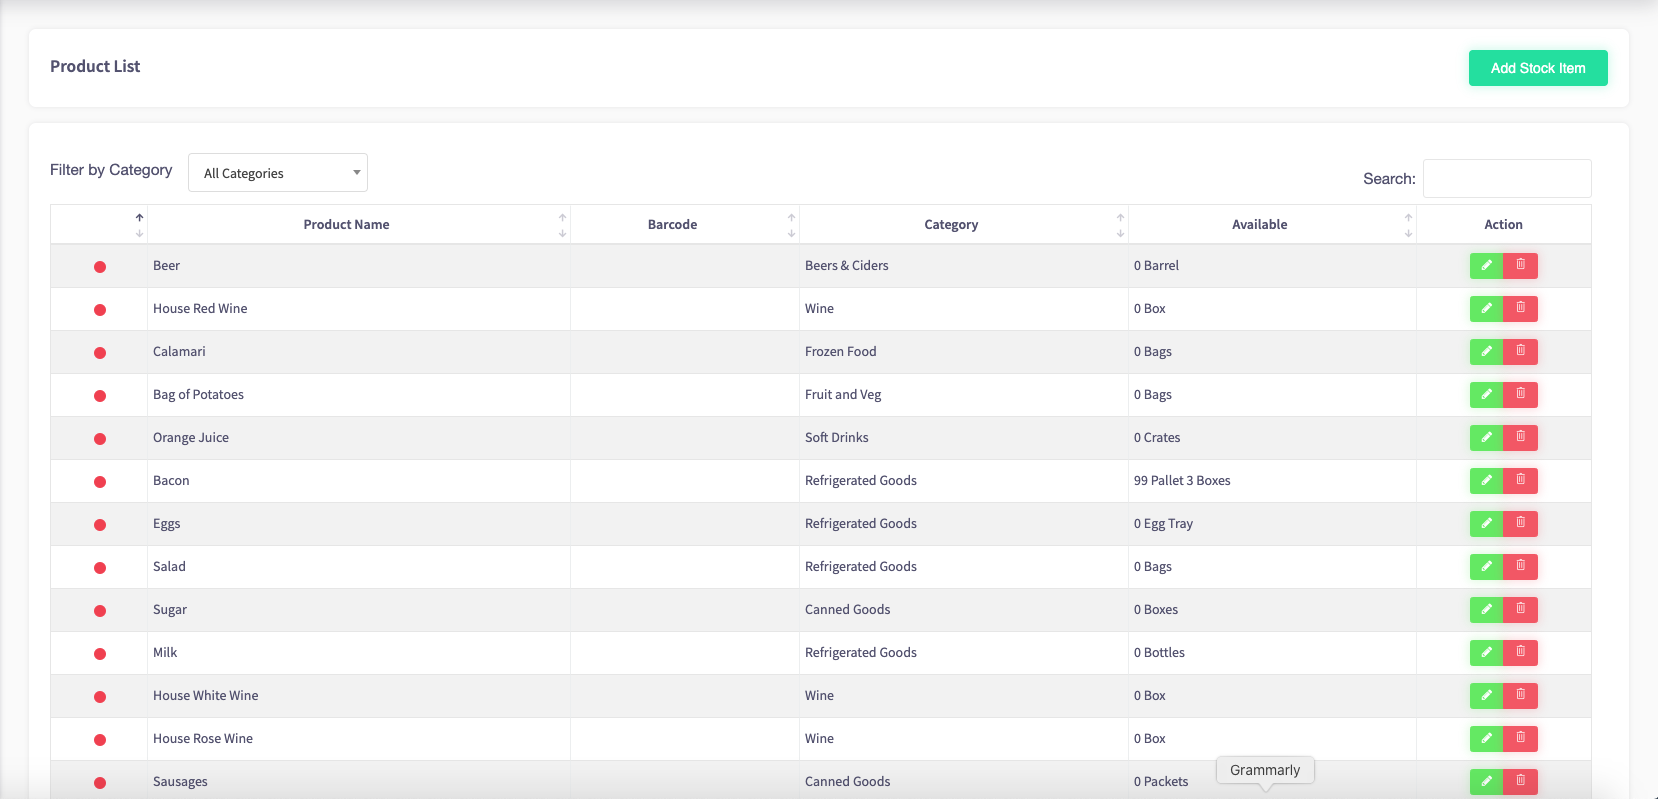
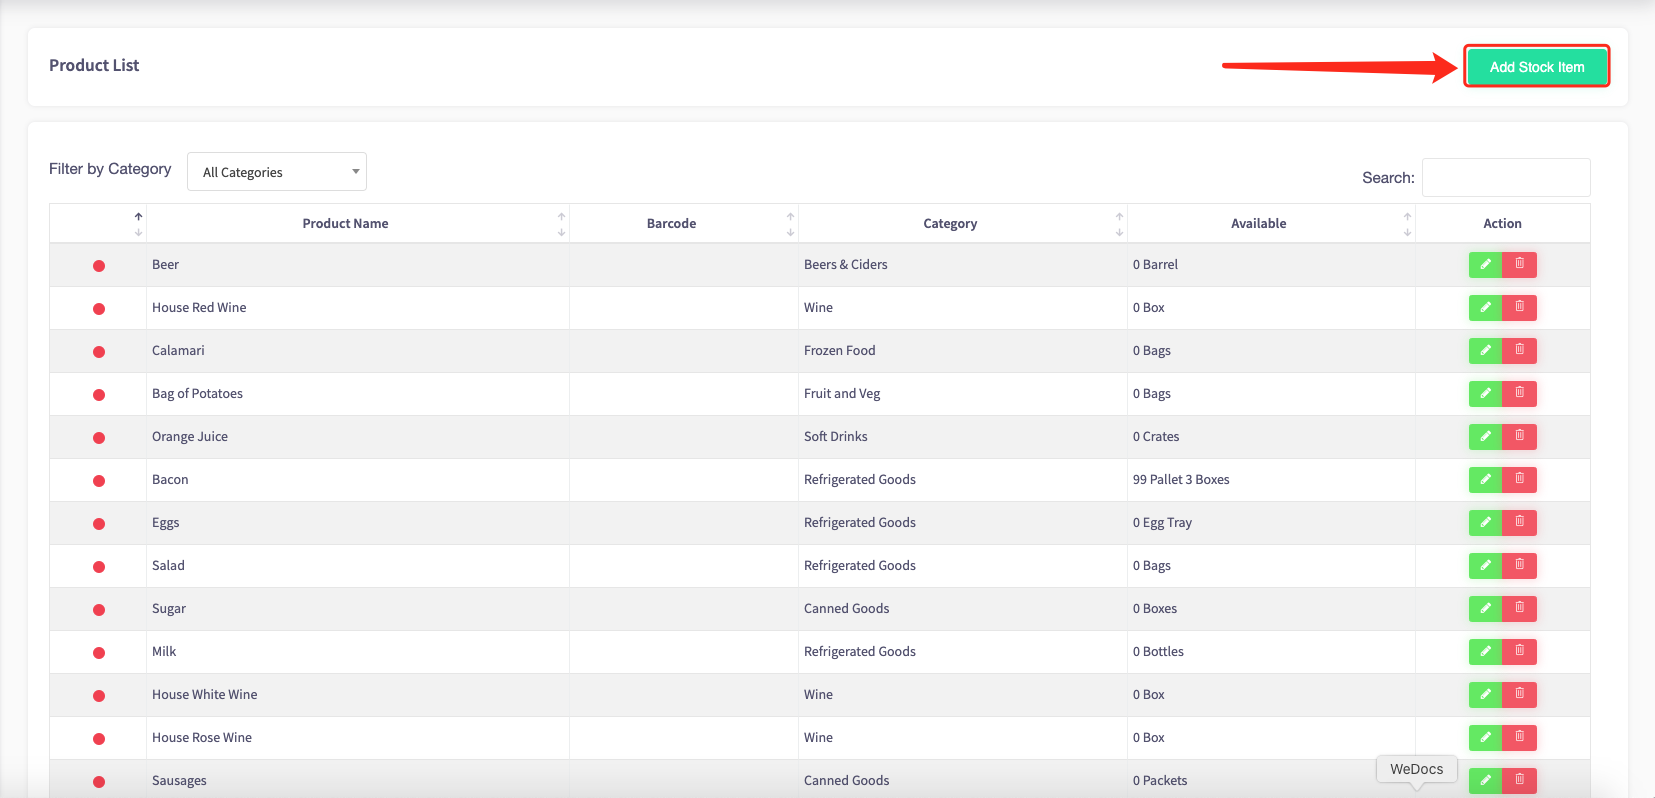
To add a new stock item, click "Add Stock Item" in the top-right corner of the screen.
Fill in each field as required:
Product name: What is your item called?
Product category: This list will display each of the categories you created in the previous guide. Choose the one most appropriate for your item.
Supplier: Where will you source this particular from? You can select multiple suppliers here.
Unit rule: Select the unit of measurement you will use to keep track of stock for this item.z
Par level: Set the minimum level of stock for this item before you need to order more. The system will warn you when your stock reaches this level.
Tax rate: Assign a tax rate to your item. You can keep track of current VAT rates via the UK Government website here.
Barcode: If your item has a barcode number, input it in this field.
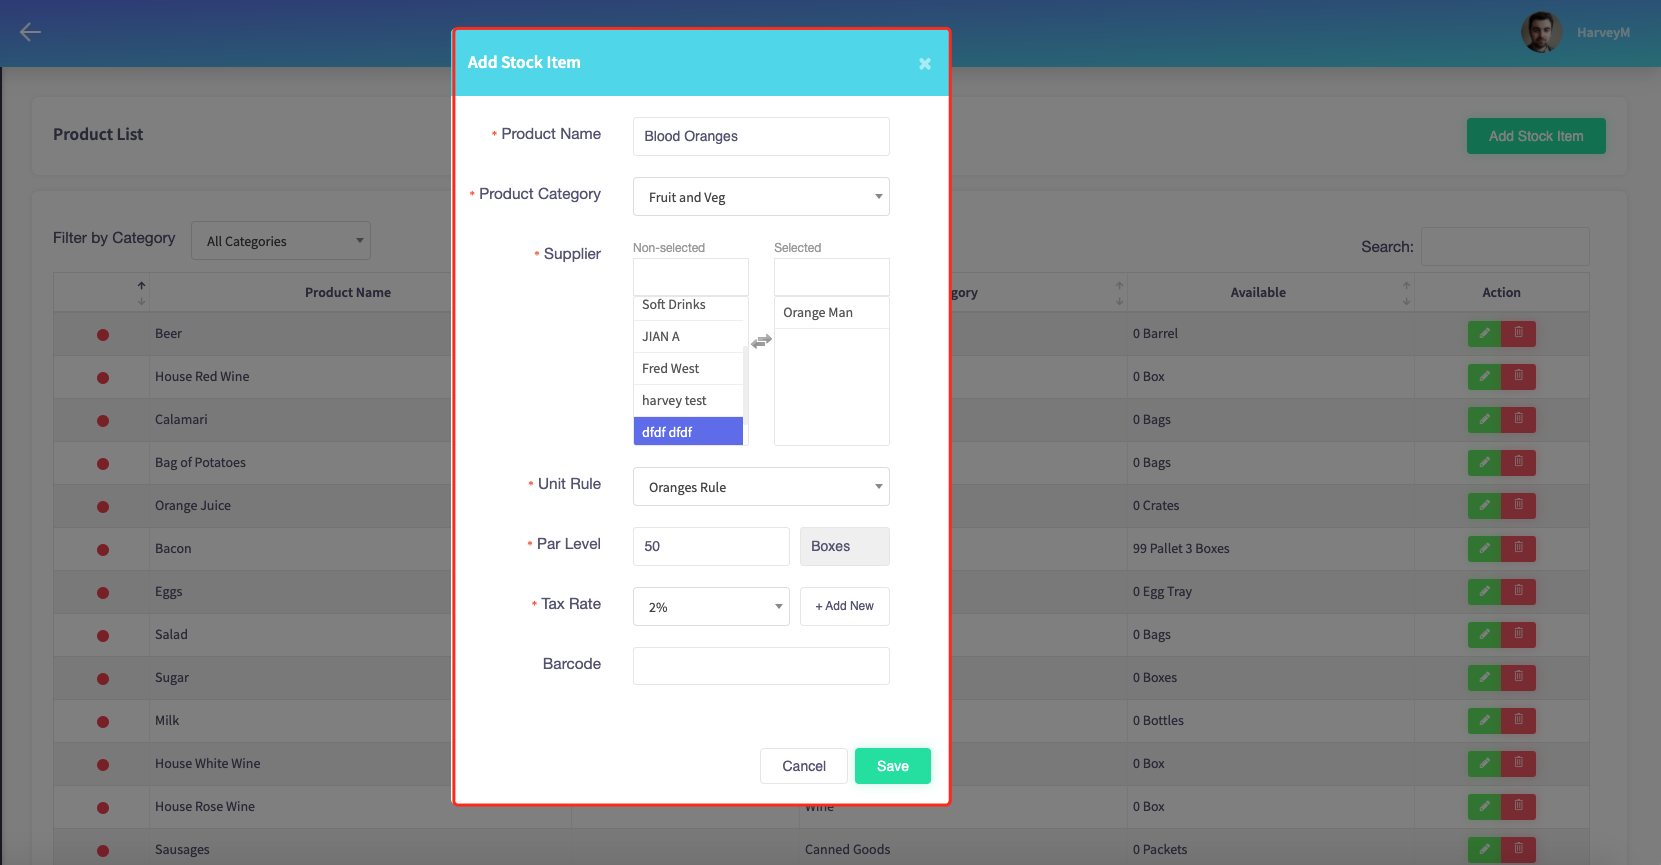
When you're done, click 'Save'.
How to do an initial stock take
This guide will show you how to do an initial stock take to your Cloud HQ.
We recommend performing an initial stock take only once you have added your items, suppliers, measurement units and stock categories to Cloud HQ. The above guides will walk you through the process of doing so.
Find 'Stock Management' on the left-hand toolbar. Click 'All Orders'.

You will see a list of all previous orders made in the table that appears on the next screen.
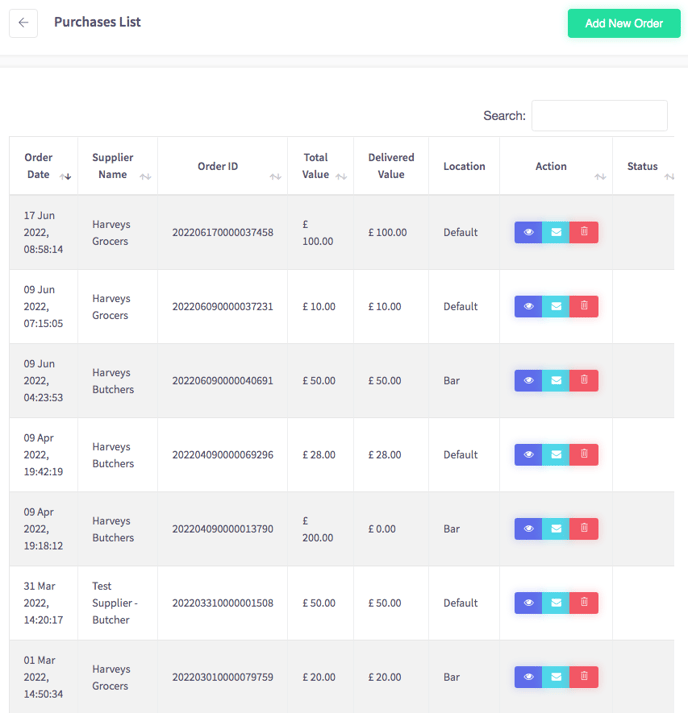
Click 'Add New Order' in the top-right.
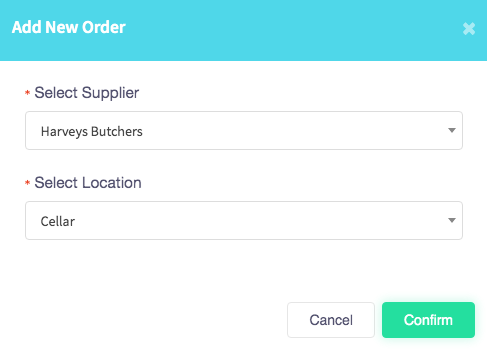
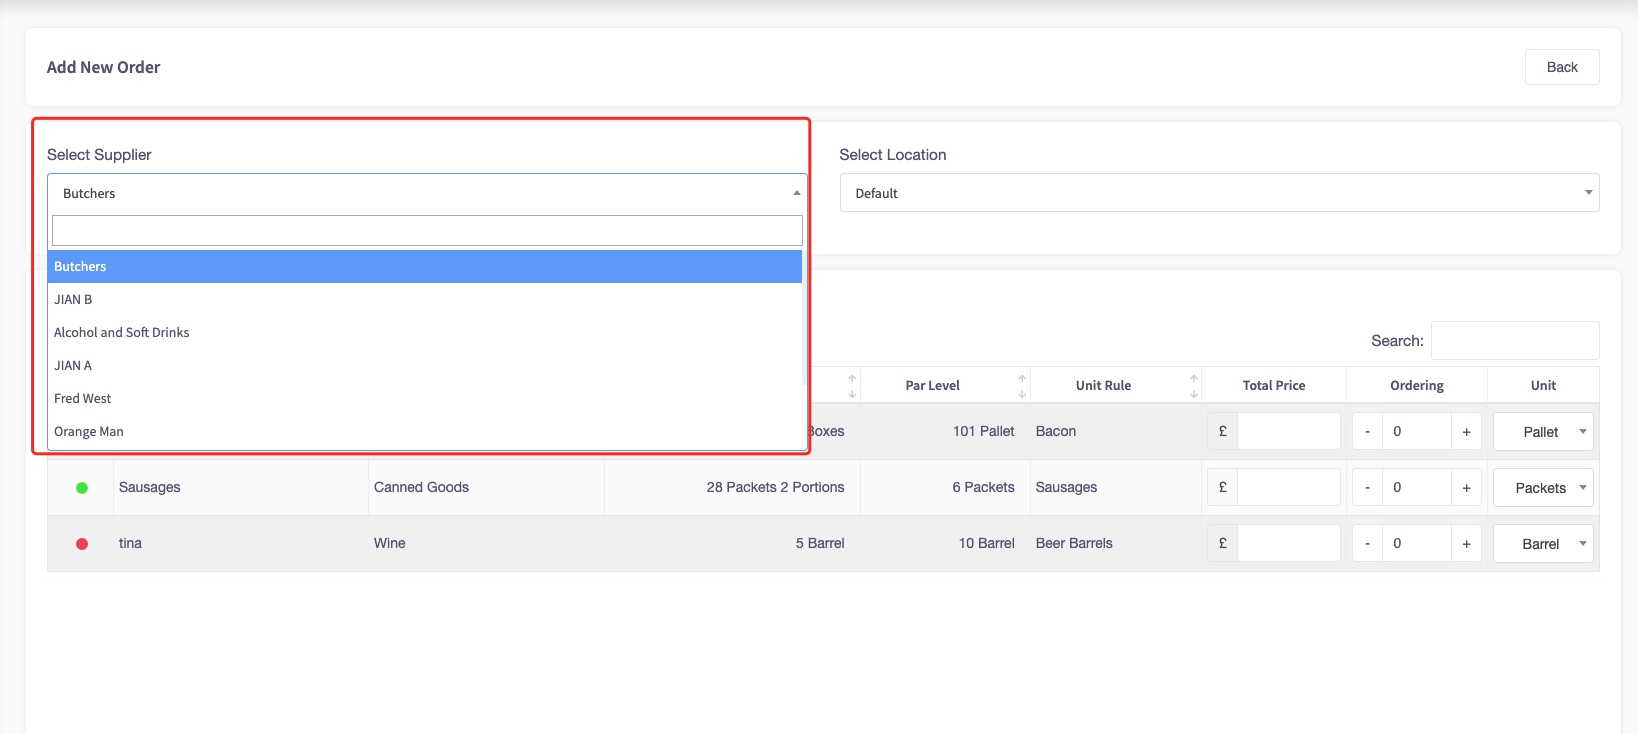
Select the supplier you wish to order from, and where you intend to store these items once they have been delivered.
A full list of items purchasable from this supplier will show up on the next screen.
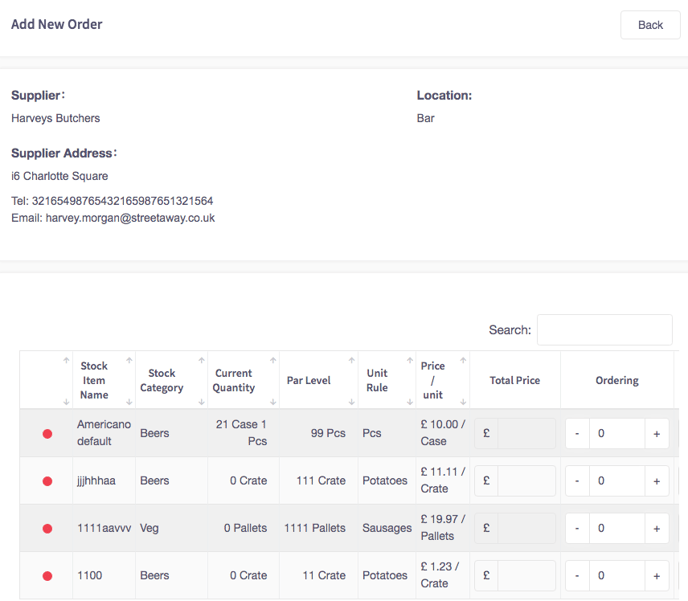
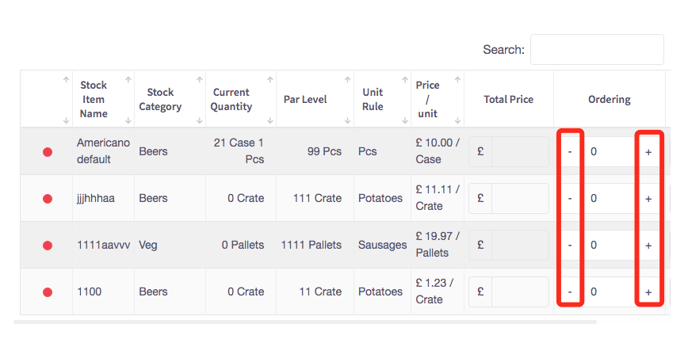
Using the + and - buttons, adjust the number of each item you would like to add to your order. You can also click into the text box between the buttons and type a specific value manually.
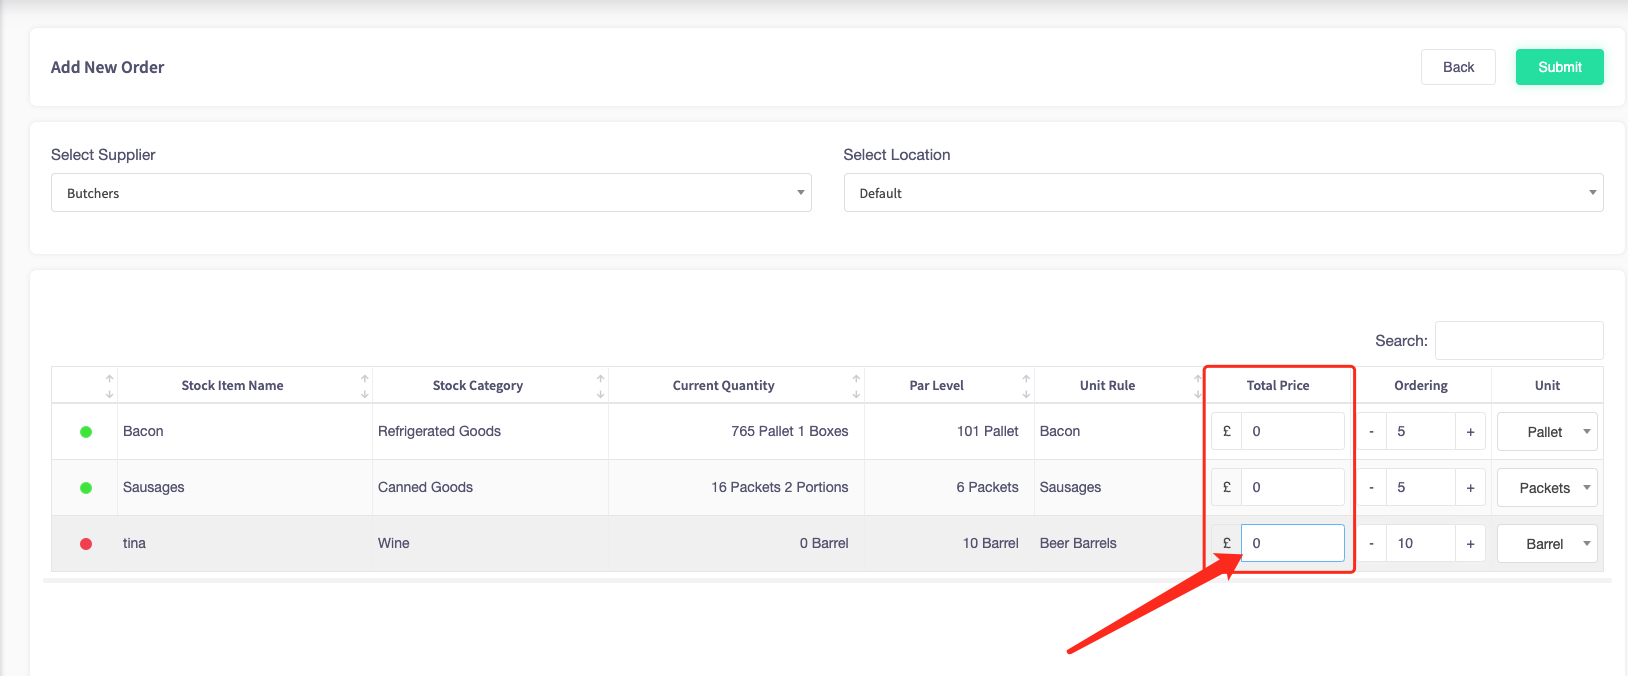
To do an initial stock check set the price as zero (£0) as you already own the stock, to get the stock onto the system.
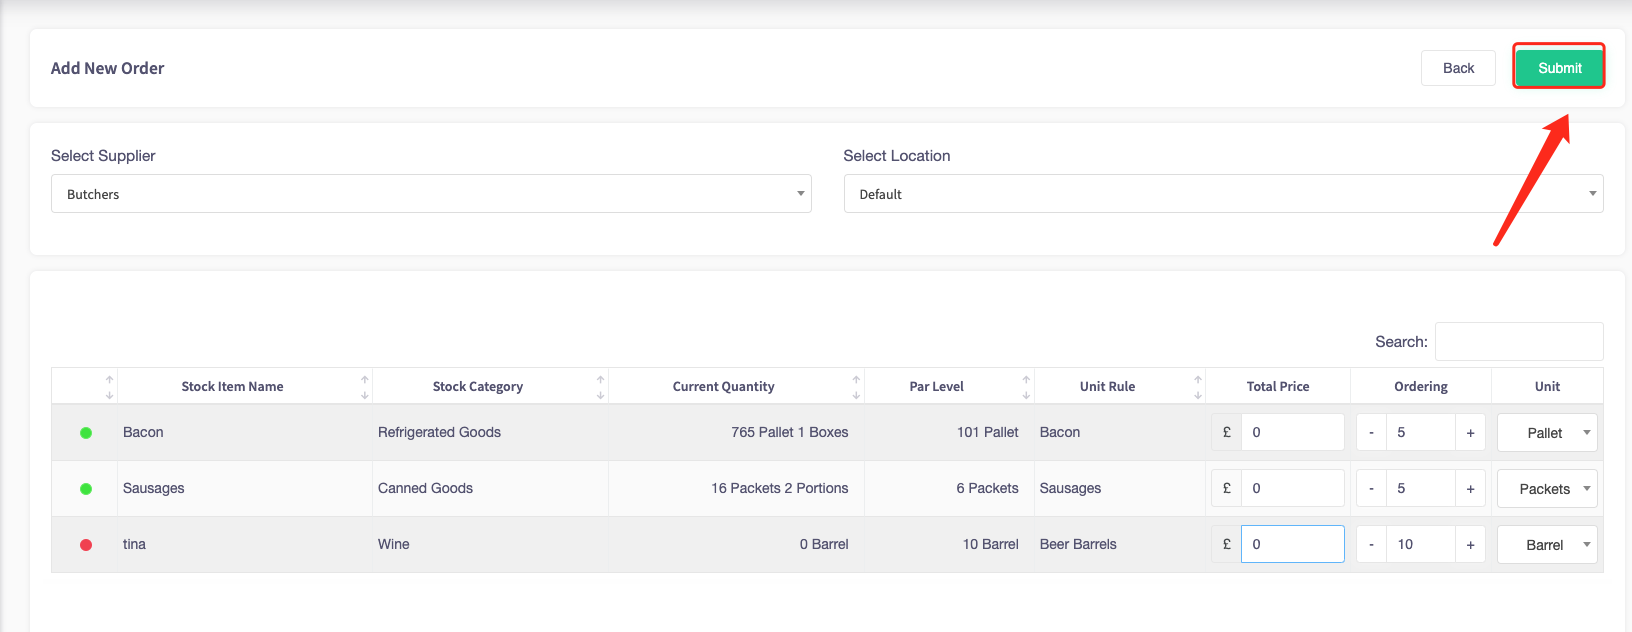
Click 'Submit'.
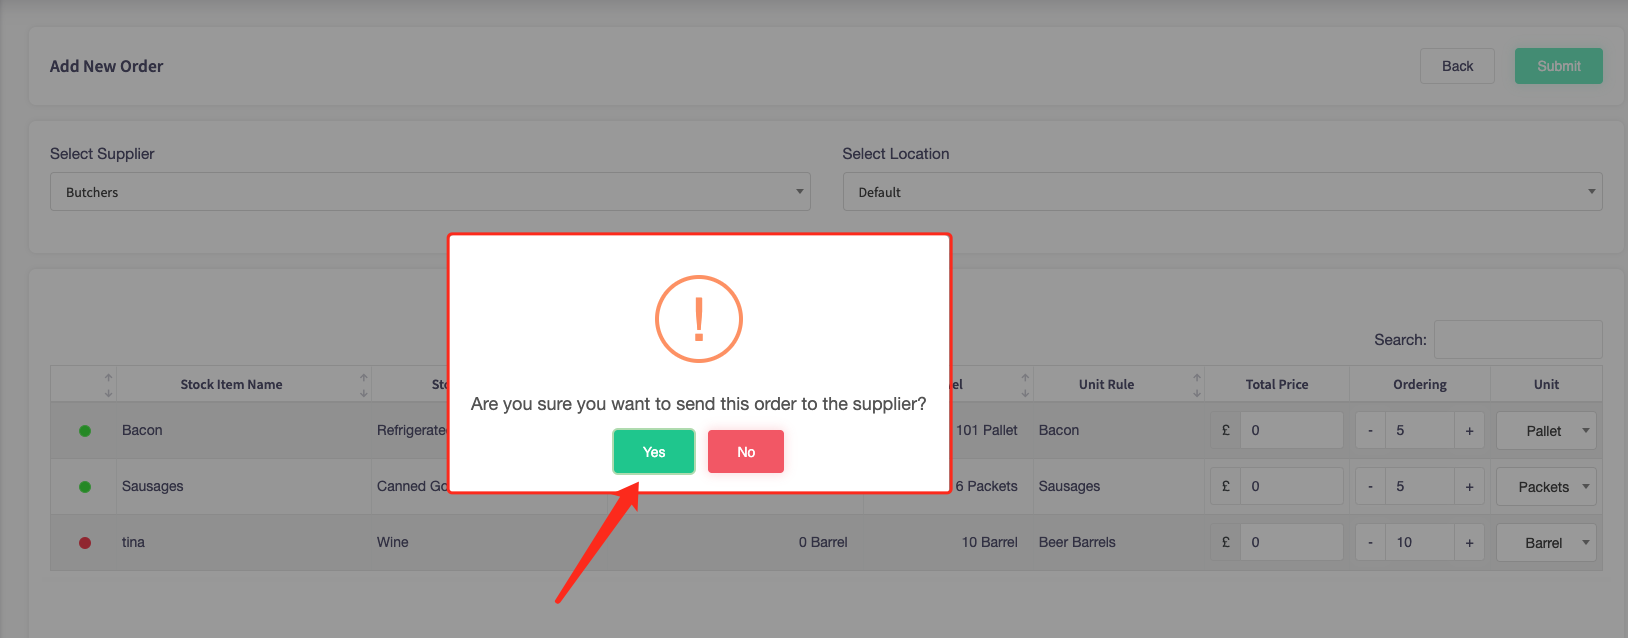
A warning message will appear. Click 'Yes' to confirm and send the order to your suppliers.
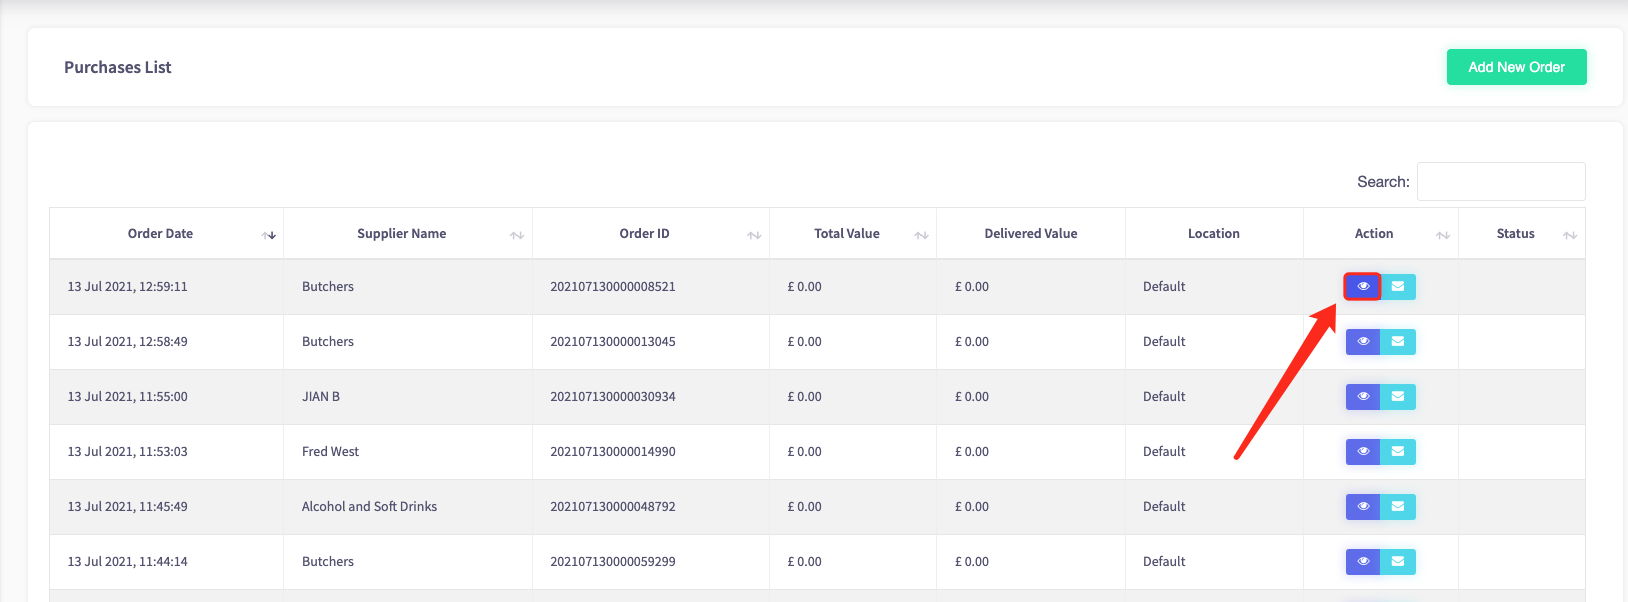
Return to the Purchases List. Then, click the purple eye icon next to your most recent order to view it.
Click the blue 'Correct' button to inform the system that your order has been received.
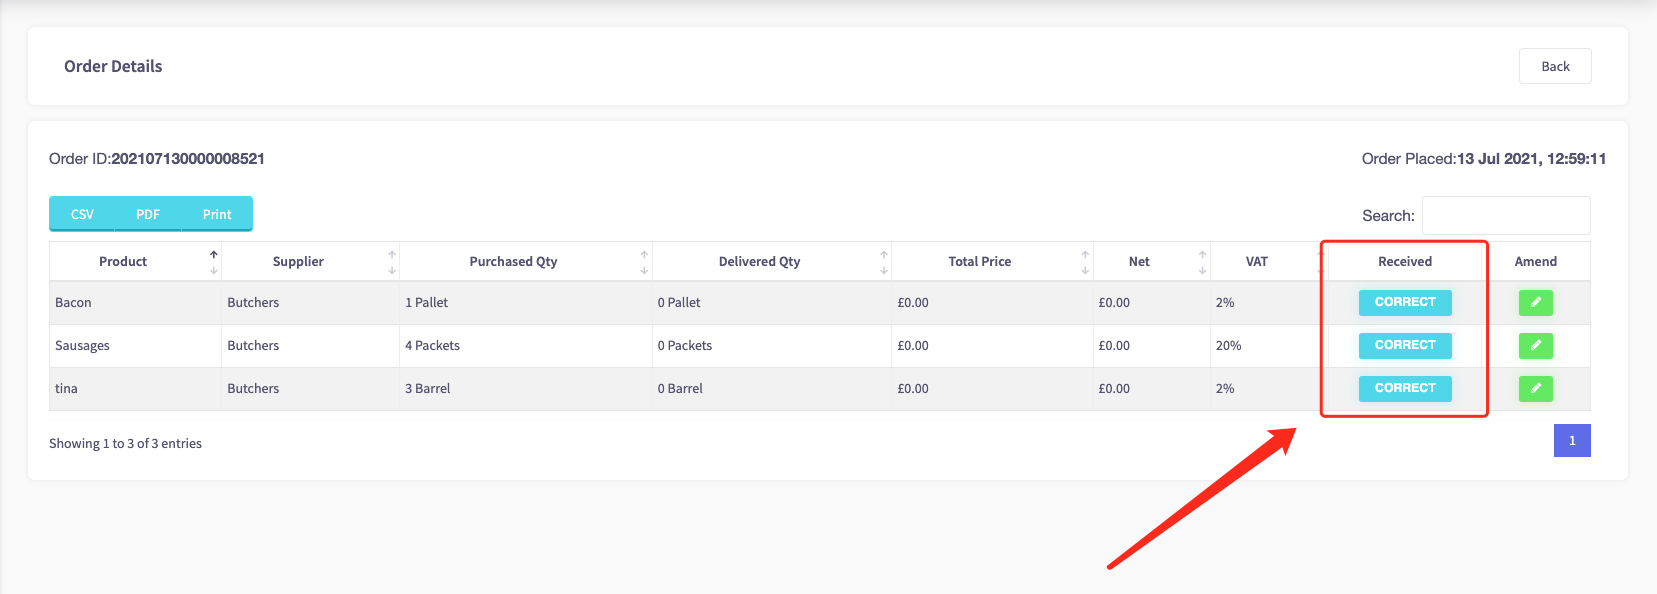
The button will then grey out.

Repeat this process for every item of stock.
Finally, go to 'Stock Management' on the left-hand side, then 'All Stock Items'.

The table will show your full inventory, including how much of each item is in stock.
