- How to add a reason for Refunds
- How to add a reason for Petty Cash
- How to add a reason for Voids
- How to add a reason for Checking Inventory
- How to add a reason for Comp
- How to add a reason for Discount
- How to add a reason for Panic Button
- How to add a reason for Refusals
- How to add a reason for Wastage
Before you do anything, make sure you login into your store account SparkEpos.
How to add a reason for refunds
This guide will show you how to add a reason for refunds on your Cloud HQ.
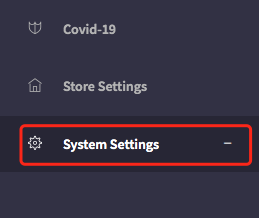
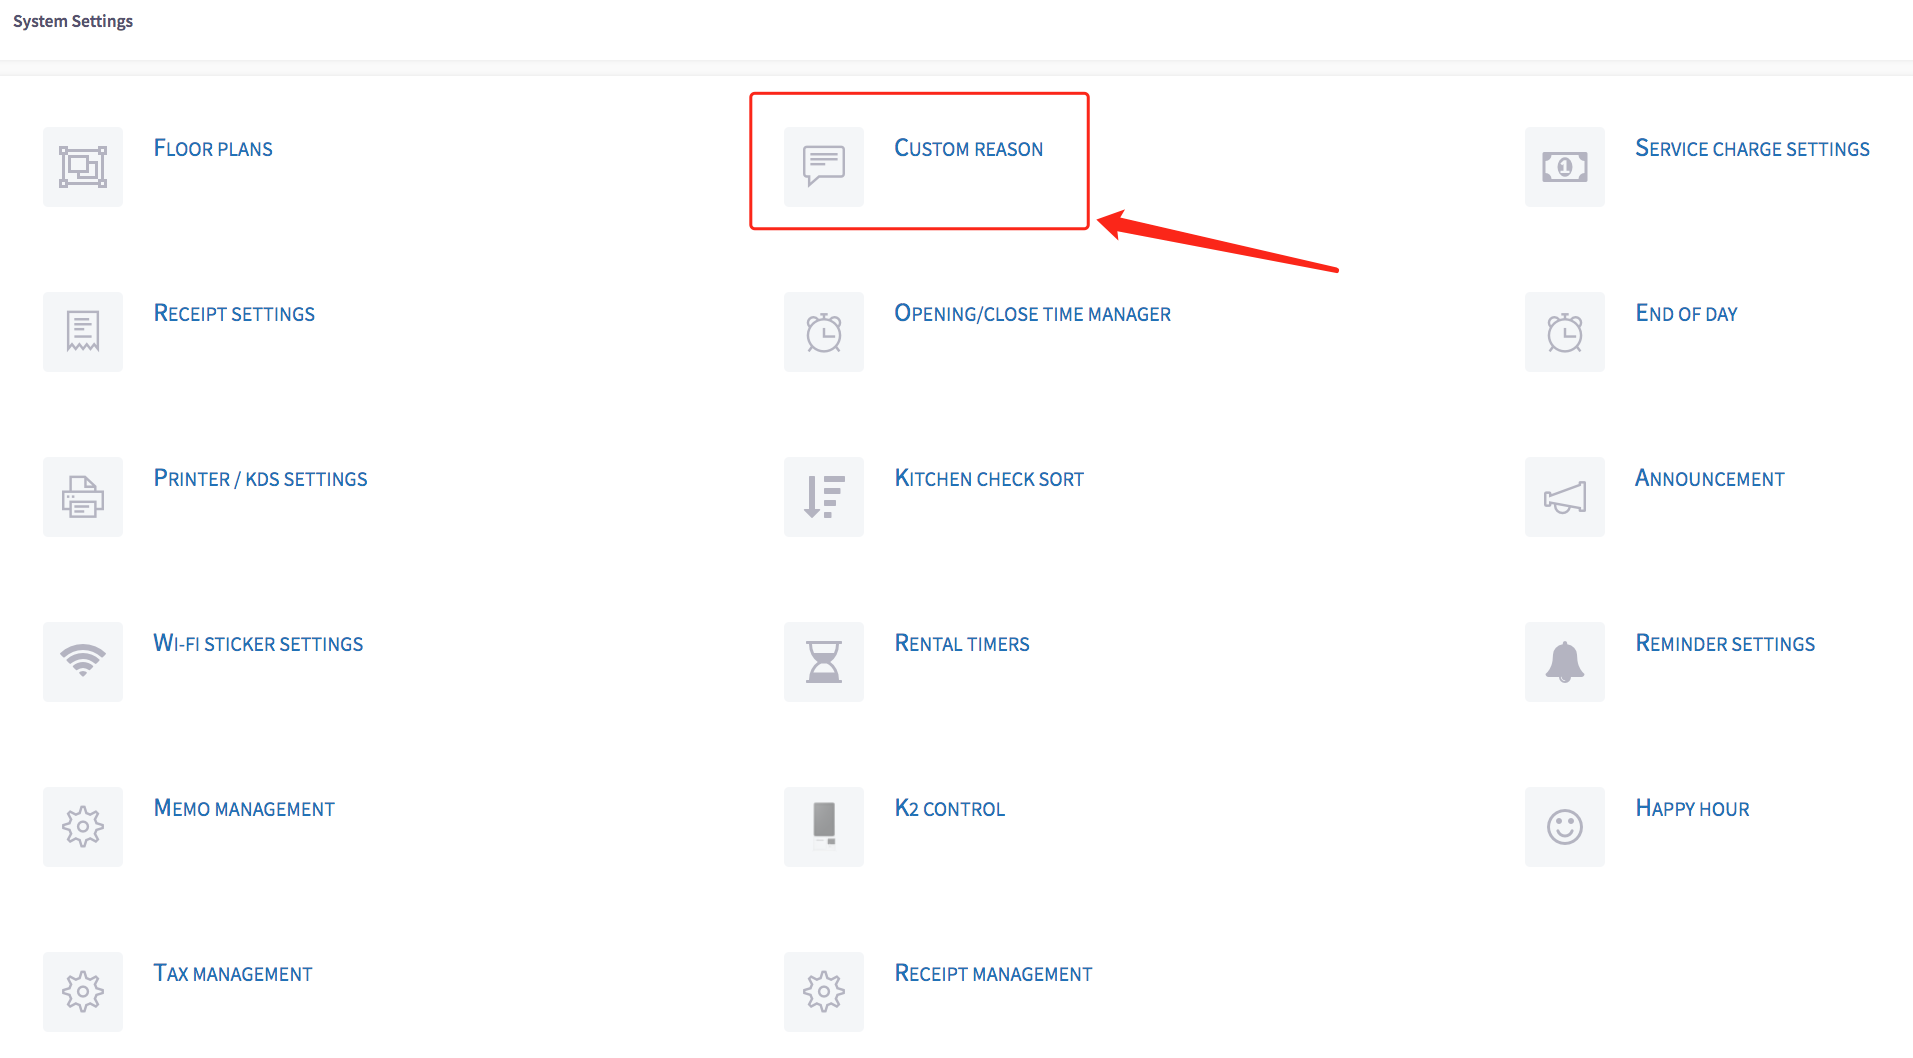
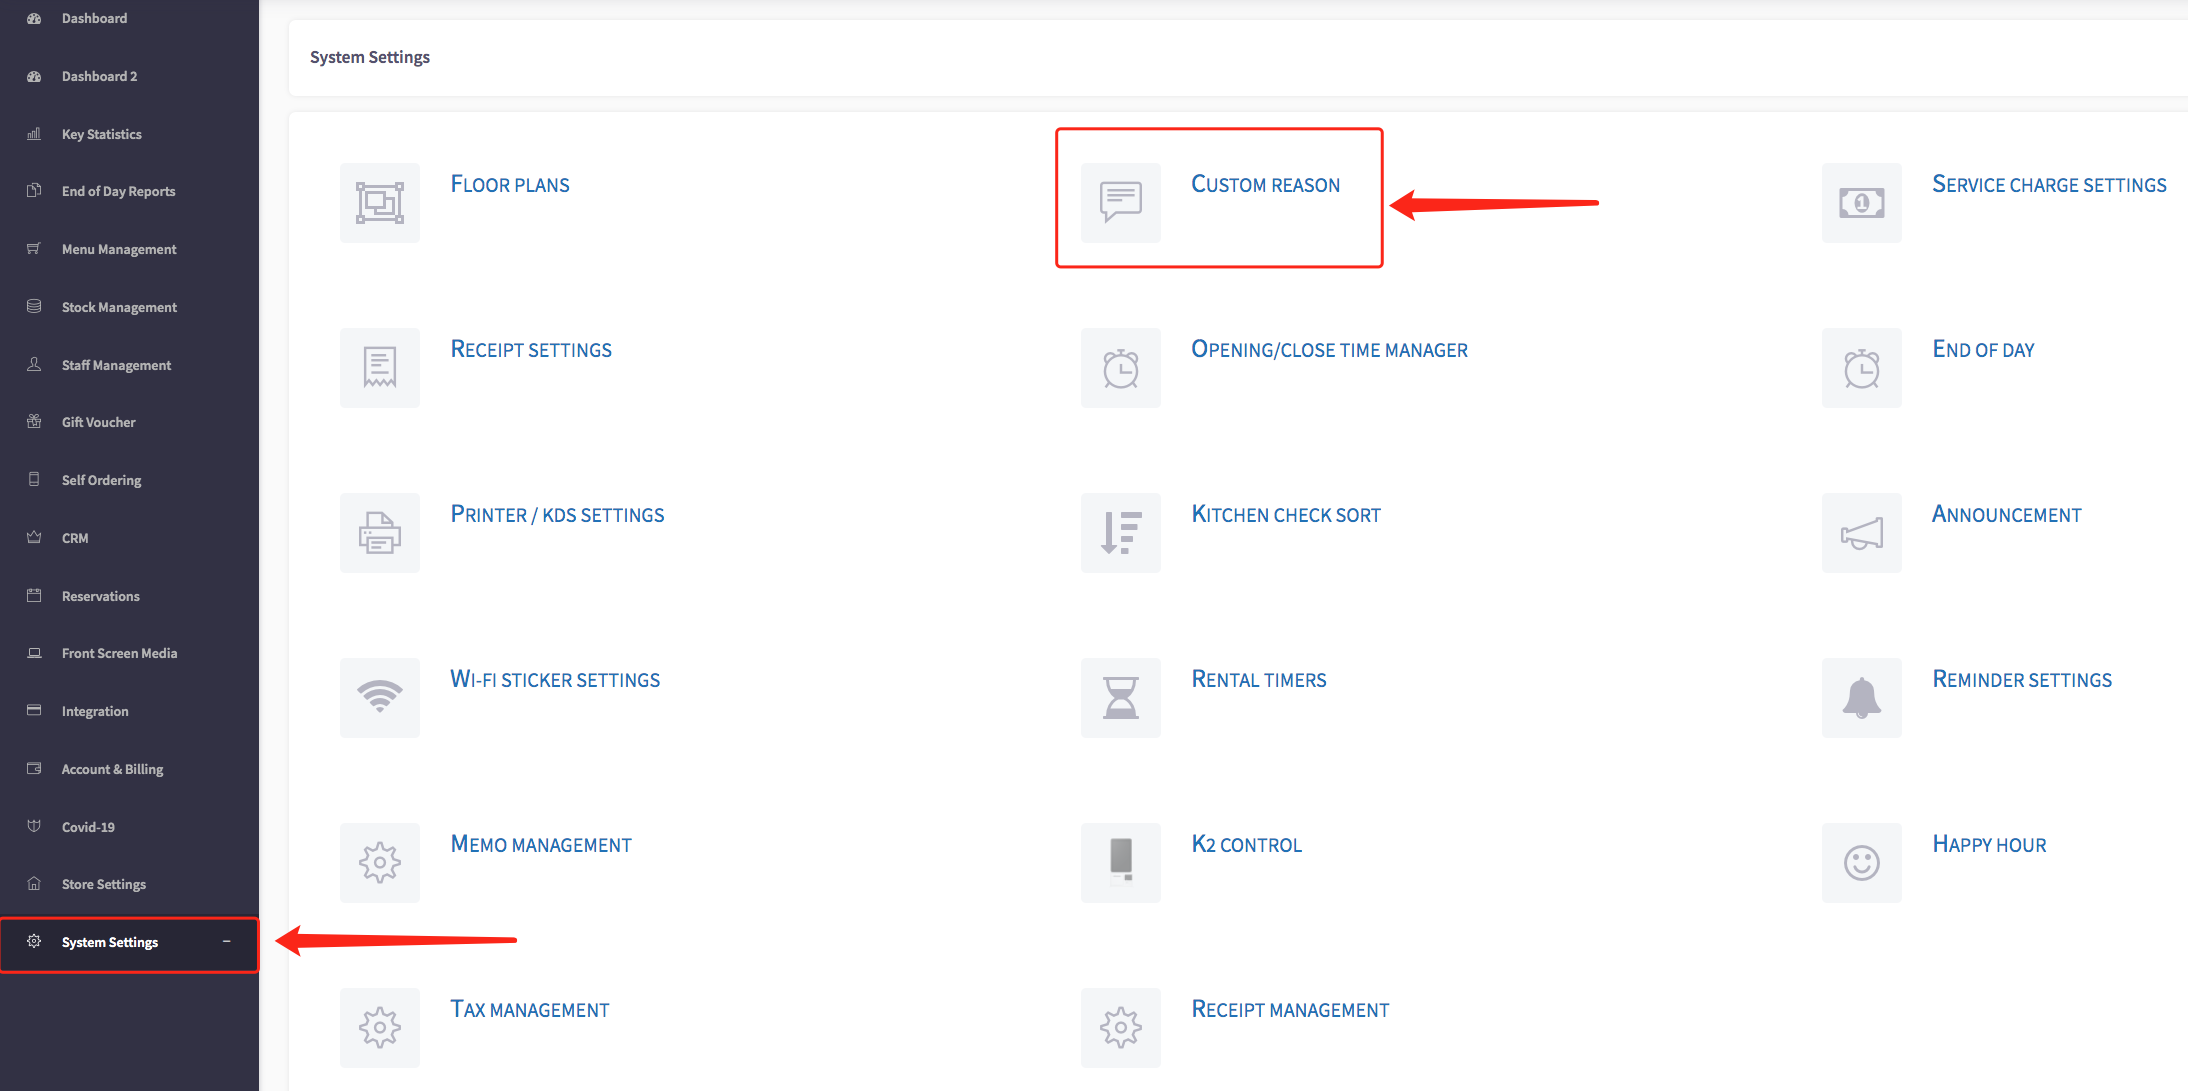
Once you have logged on scroll down to "System Settings" on the left-hand side and then the 'Custom Reason' option in the menu.
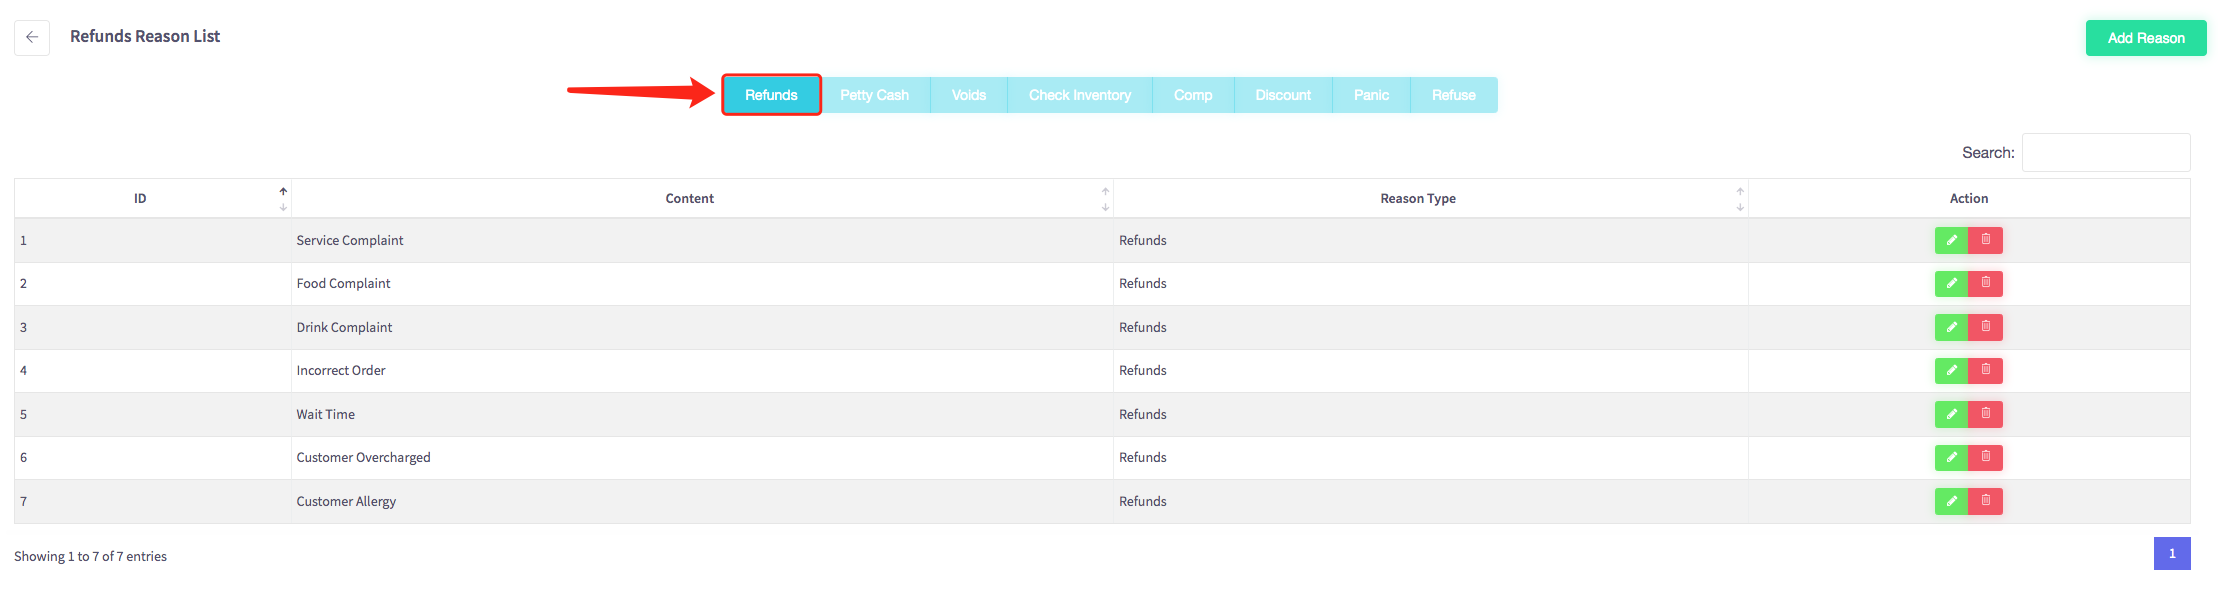
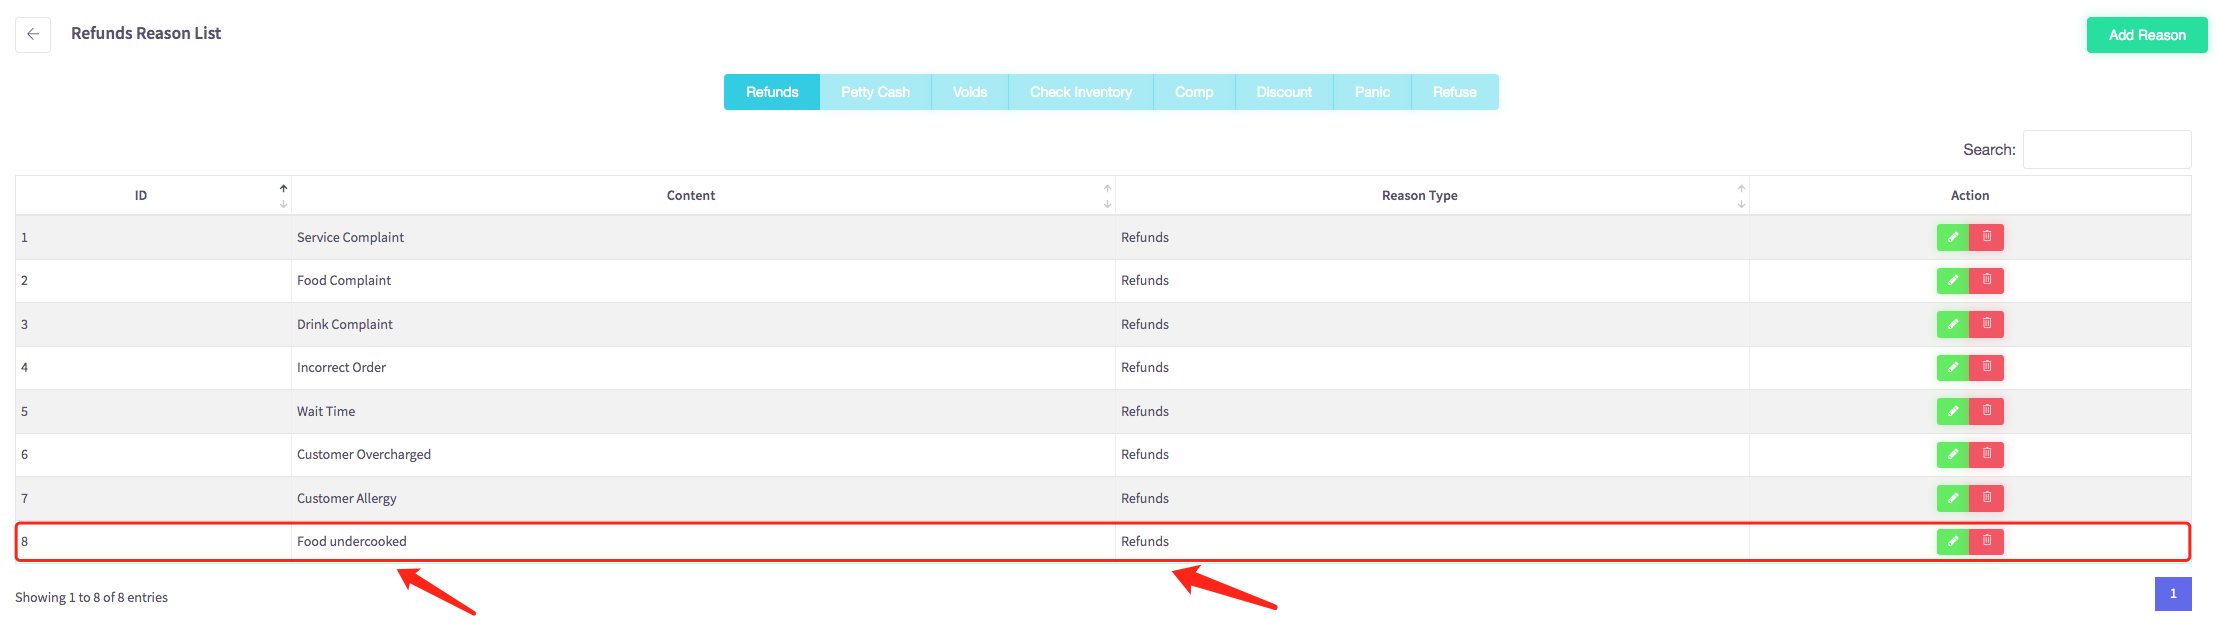
The refunds reason list menu should appear, shown below. Make sure you select 'Refunds' on the blue bar located near the top of the page.
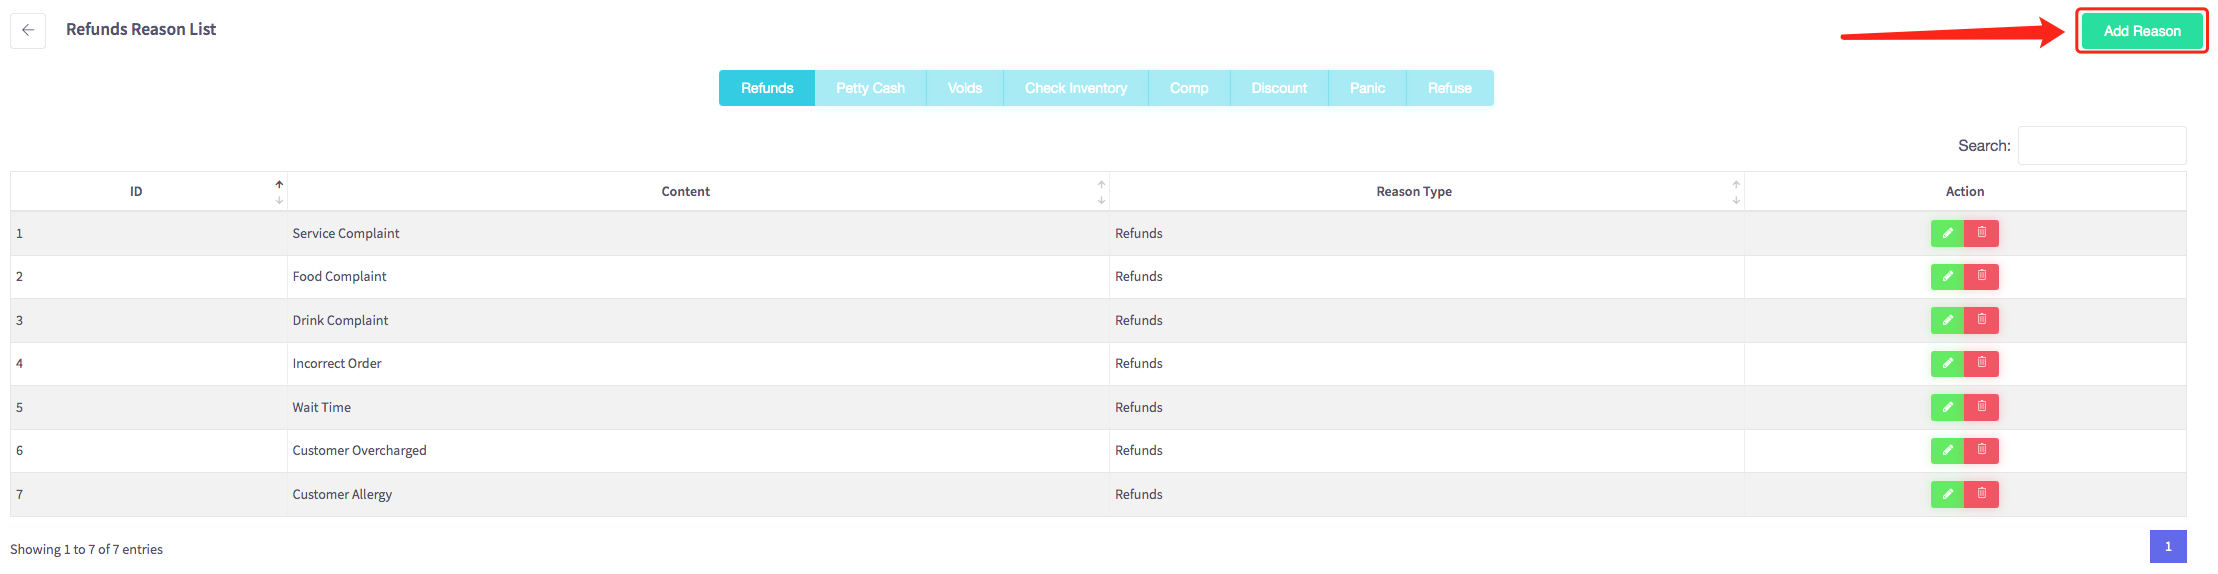
To add a new refund reason click on the green "Add Reason" button at the top right of the page.
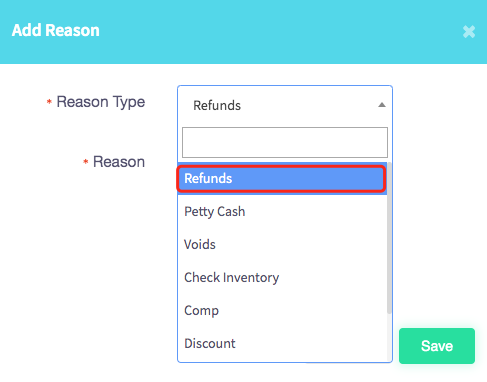
Then this menu will appear, first select your reason type, which will be refunds.
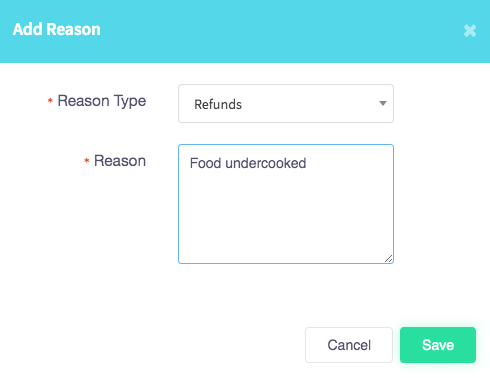
Then add a reason for your refund, for example, "Food Undercooked".
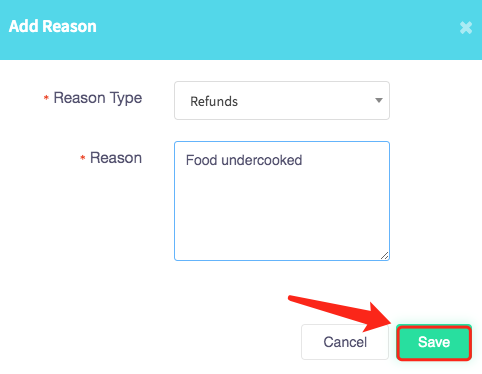
When completed press the green "Save" button in the right-hand corner of the menu.
Your refund reason will be added to your refund reason list.
How to add a reason for petty cash
This guide will show you how to add a reason for petty cash on your Cloud HQ.
Once you have logged on scroll down to "System Settings" on the left-hand side and then the 'Custom Reason' option in the menu.

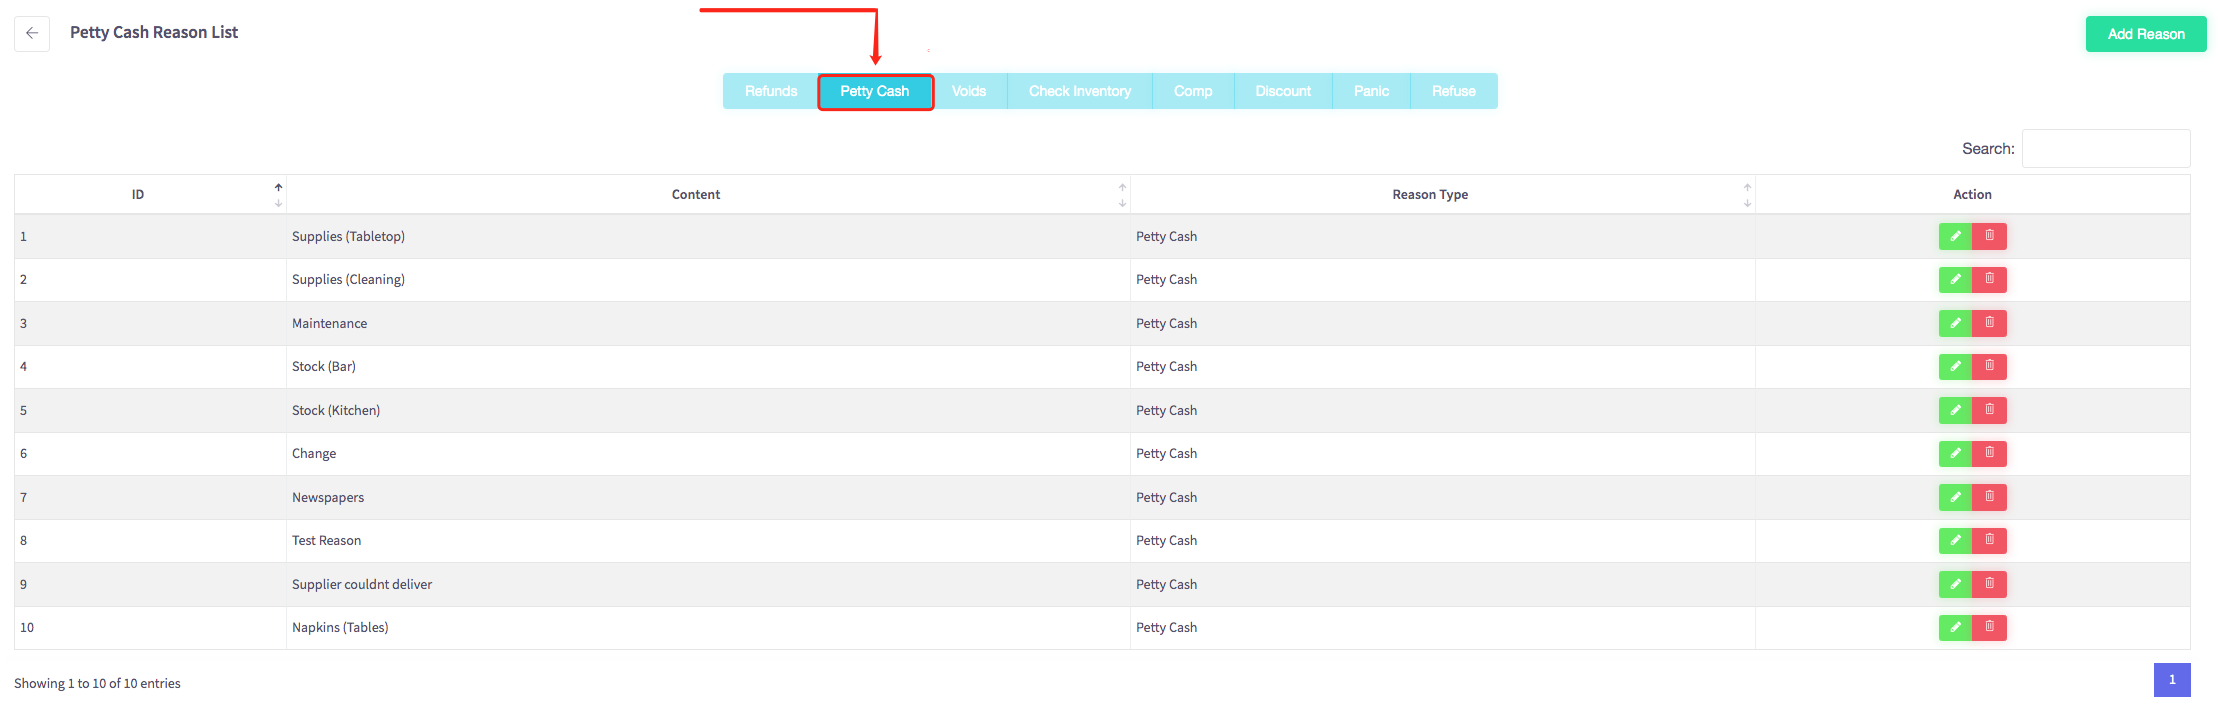
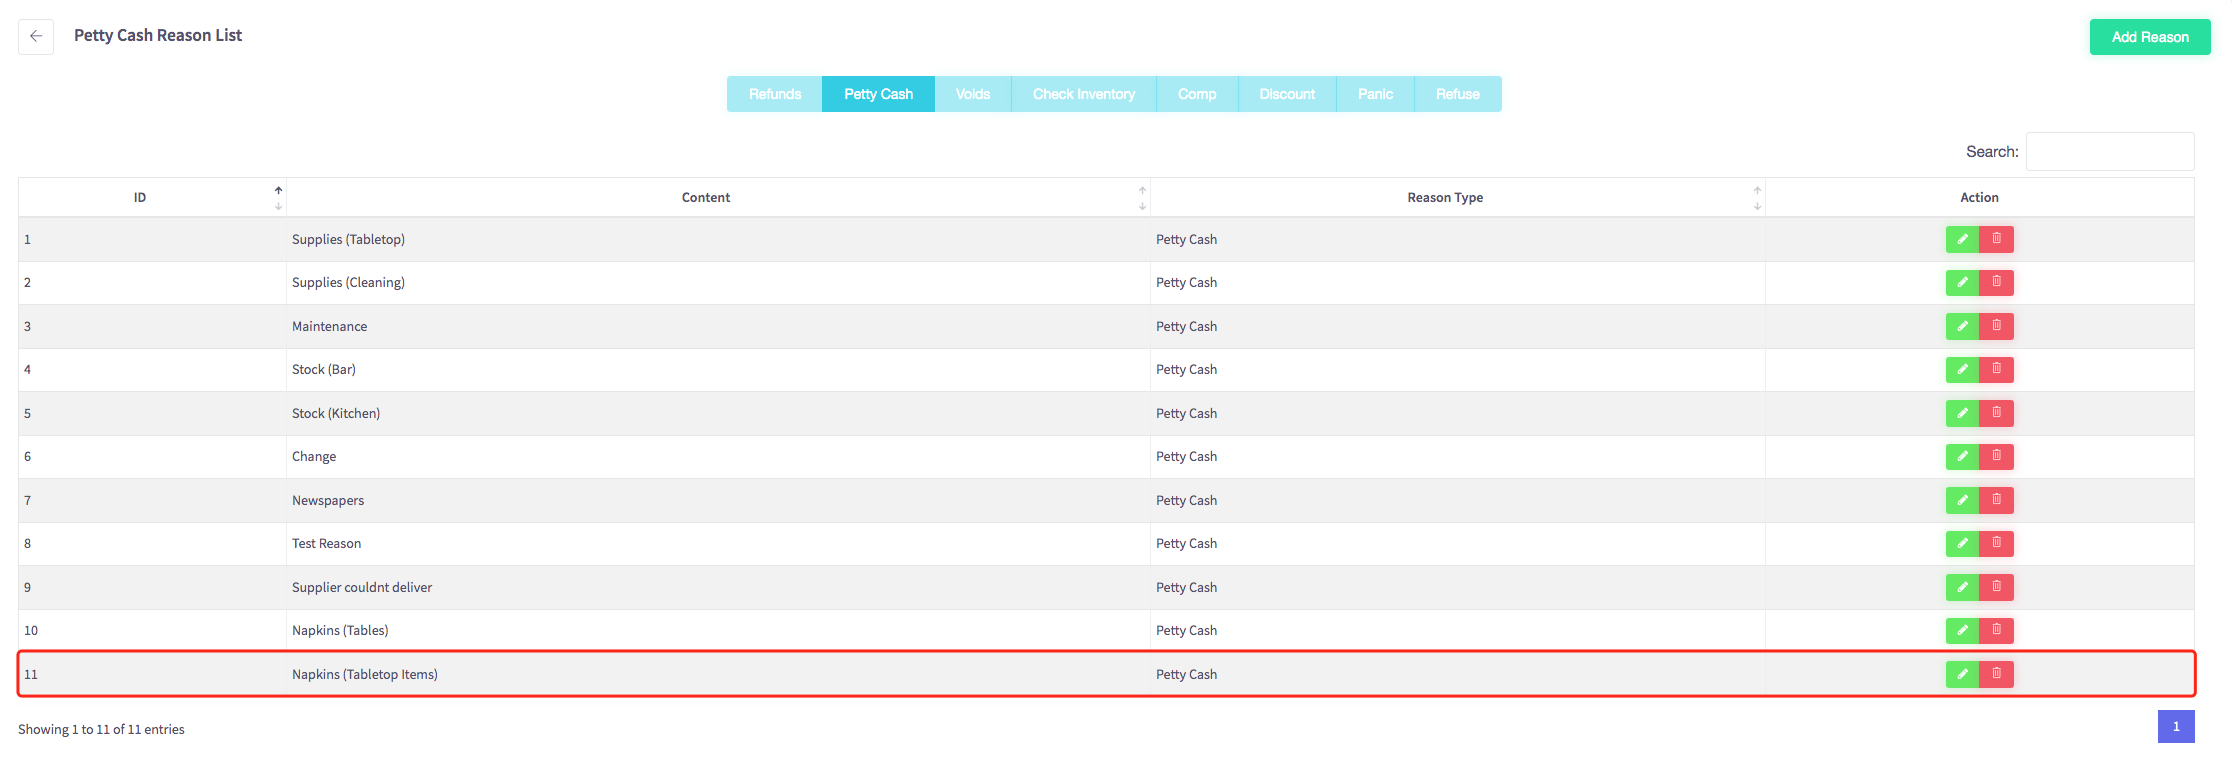
The petty cash menu should appear, shown below. Make sure you select petty cash on the blue bar located near the top of the page.
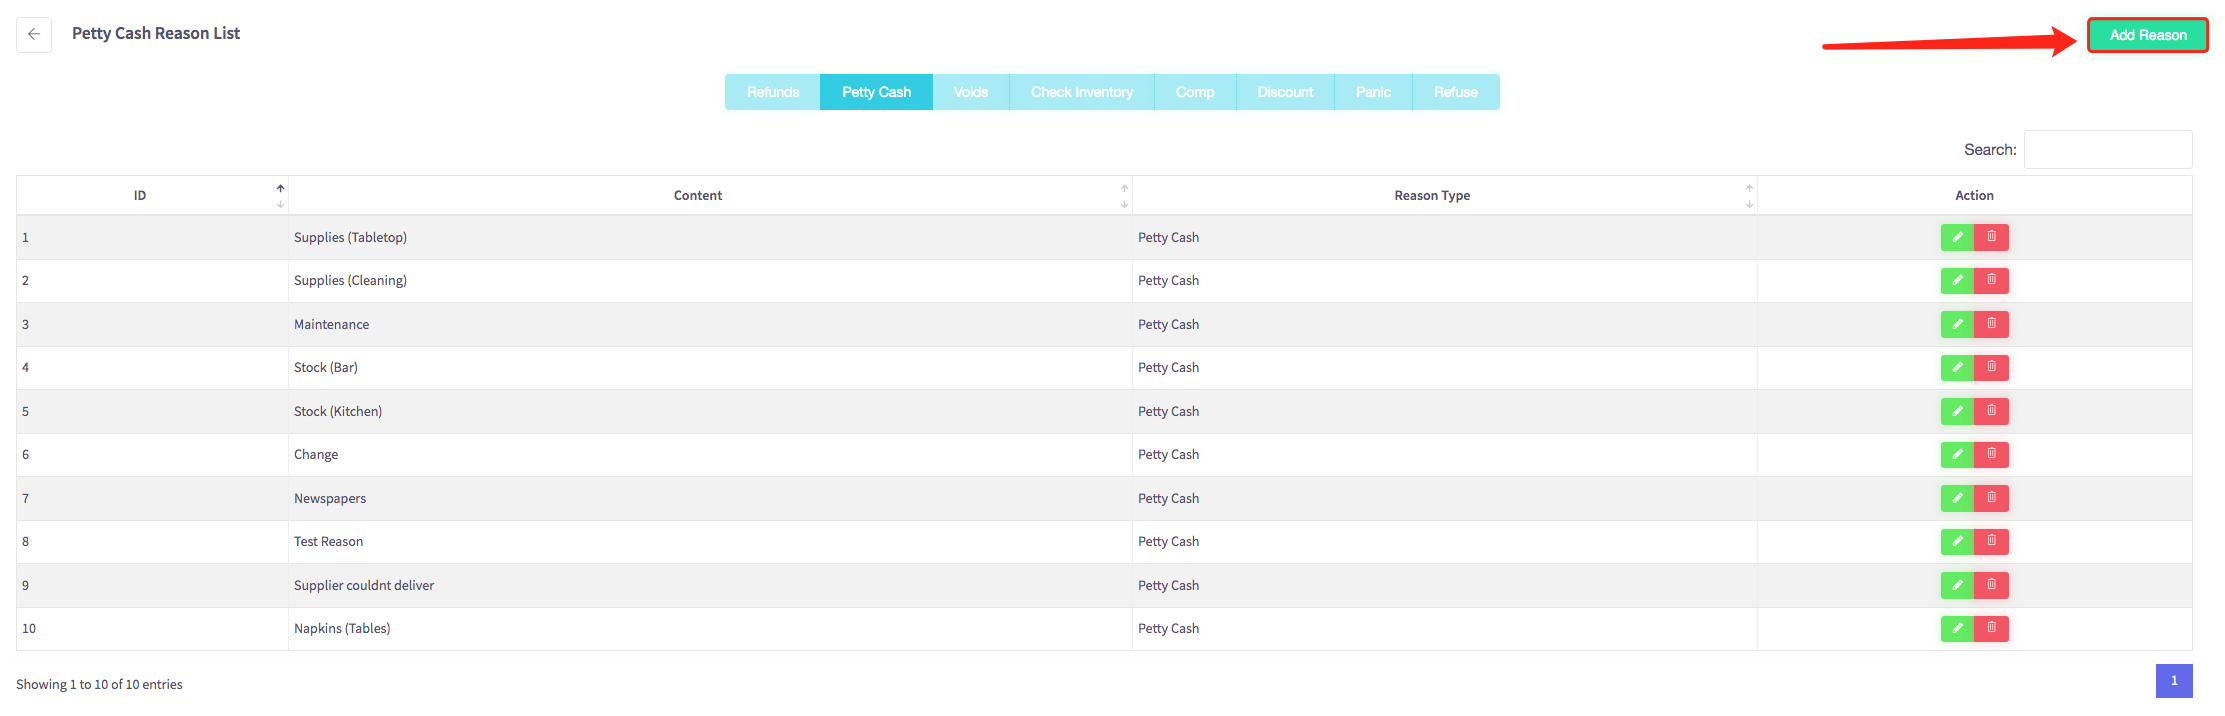
To add a new petty cash reason click on the green "Add Reason" button at the top right of the page.
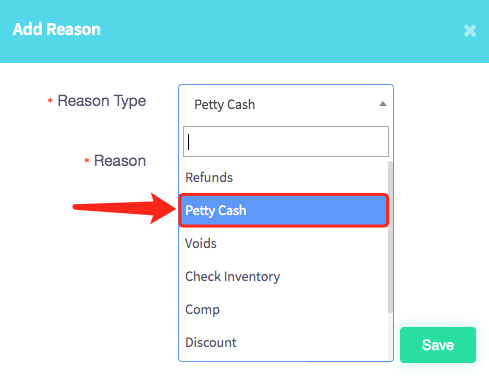
Then this menu will appear, first select your reason type, which will be petty cash.
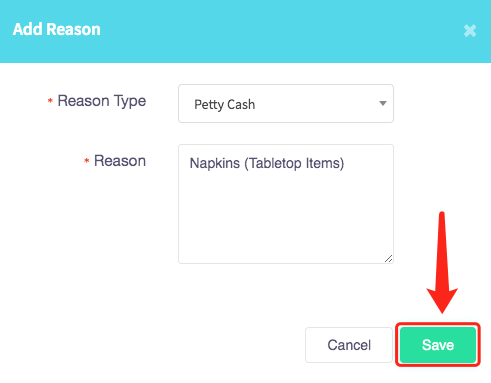
Then add a reason for your petty cash, for example, "Napkins (Tabletop Items)".

When completed press the green "Save" button in the right-hand corner of the menu.
Your petty cash reason will be added to your petty cash reason list.
How to add a reason for voids
This guide will show you how to add a reason for voids on your Cloud HQ.
Once you have logged on scroll down to "System Settings" and then the 'Custom Reason' option on the left-hand menu.
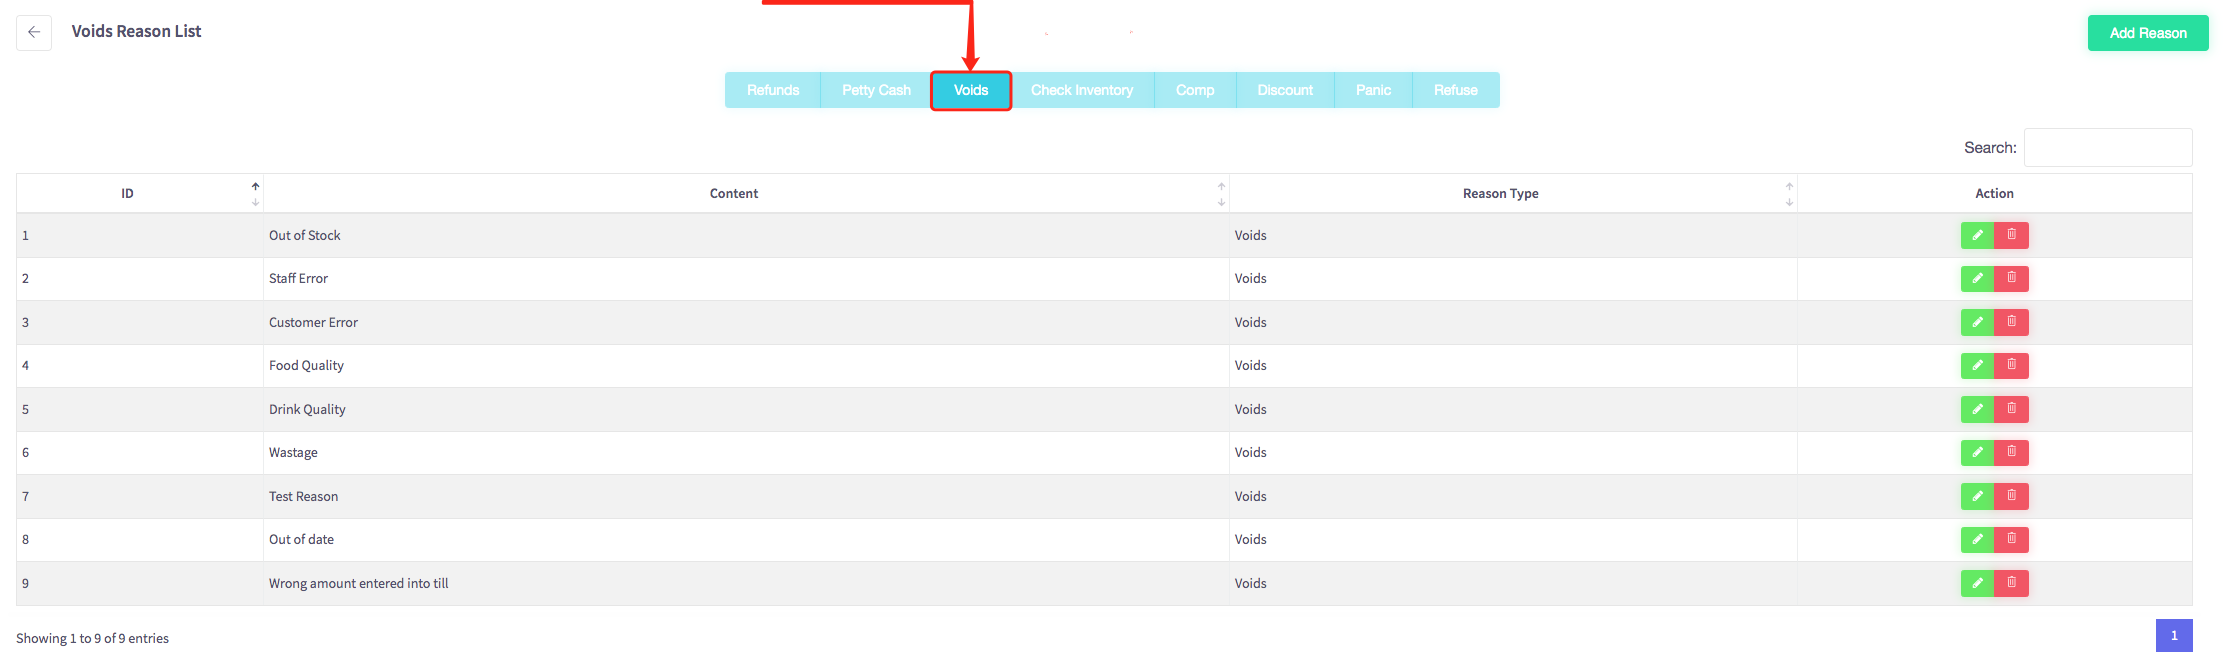
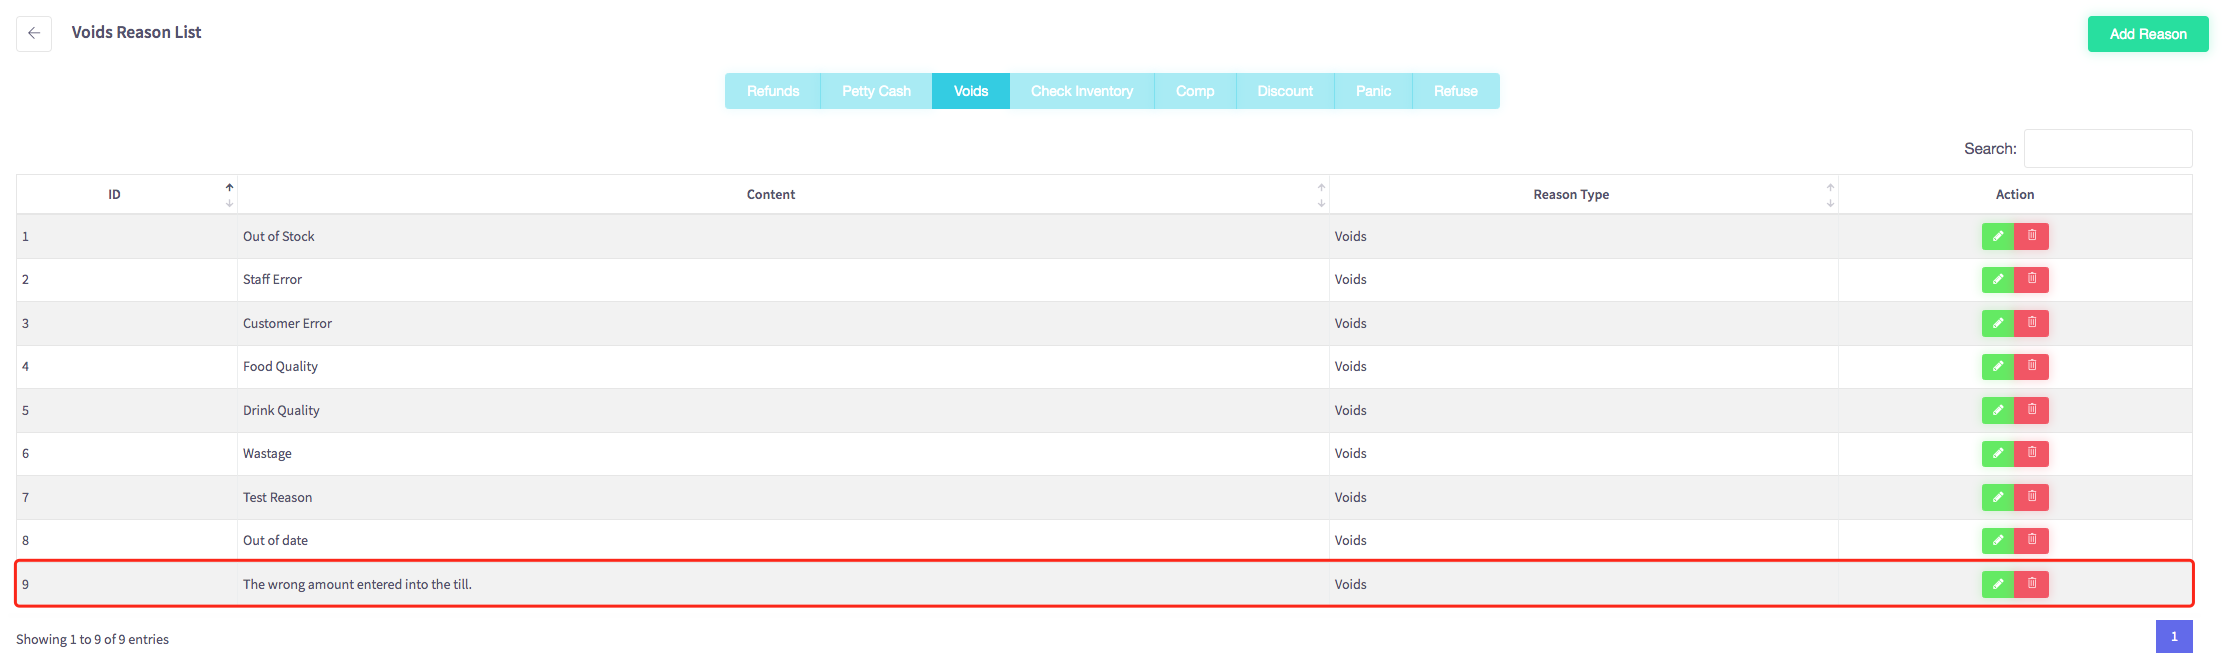
The void reason list menu should appear, shown below. Make sure you select voids on the blue bar located near the top of the page.
To add a new void reason click on the green "add reason" button at the top right of the page.

Then this menu will appear, first select your reason type, which will be voids.
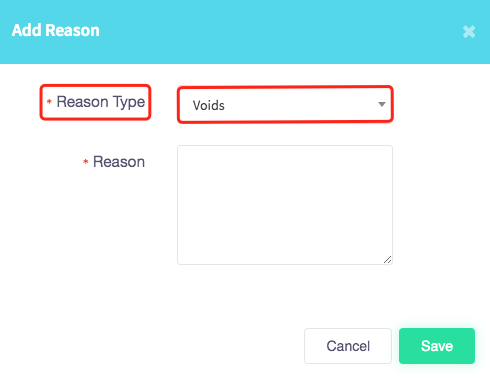
Then add a reason for your void, for example, "The wrong amount entered into the till".
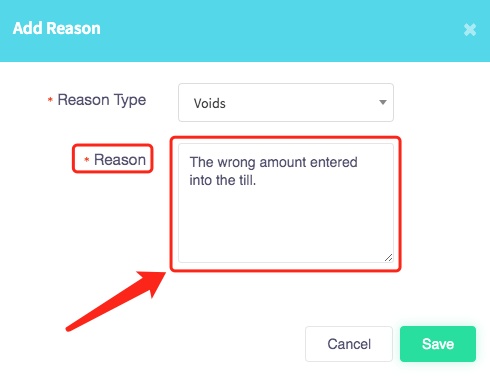
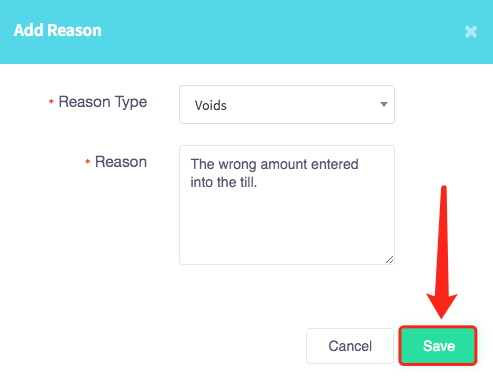
When completed press the green "Save" button in the right-hand corner of the menu.
Your void reason will be added to your voids reason list.
How to add a reason for checking inventory
This guide will show you how to add a reason for checking inventory on your Cloud HQ.
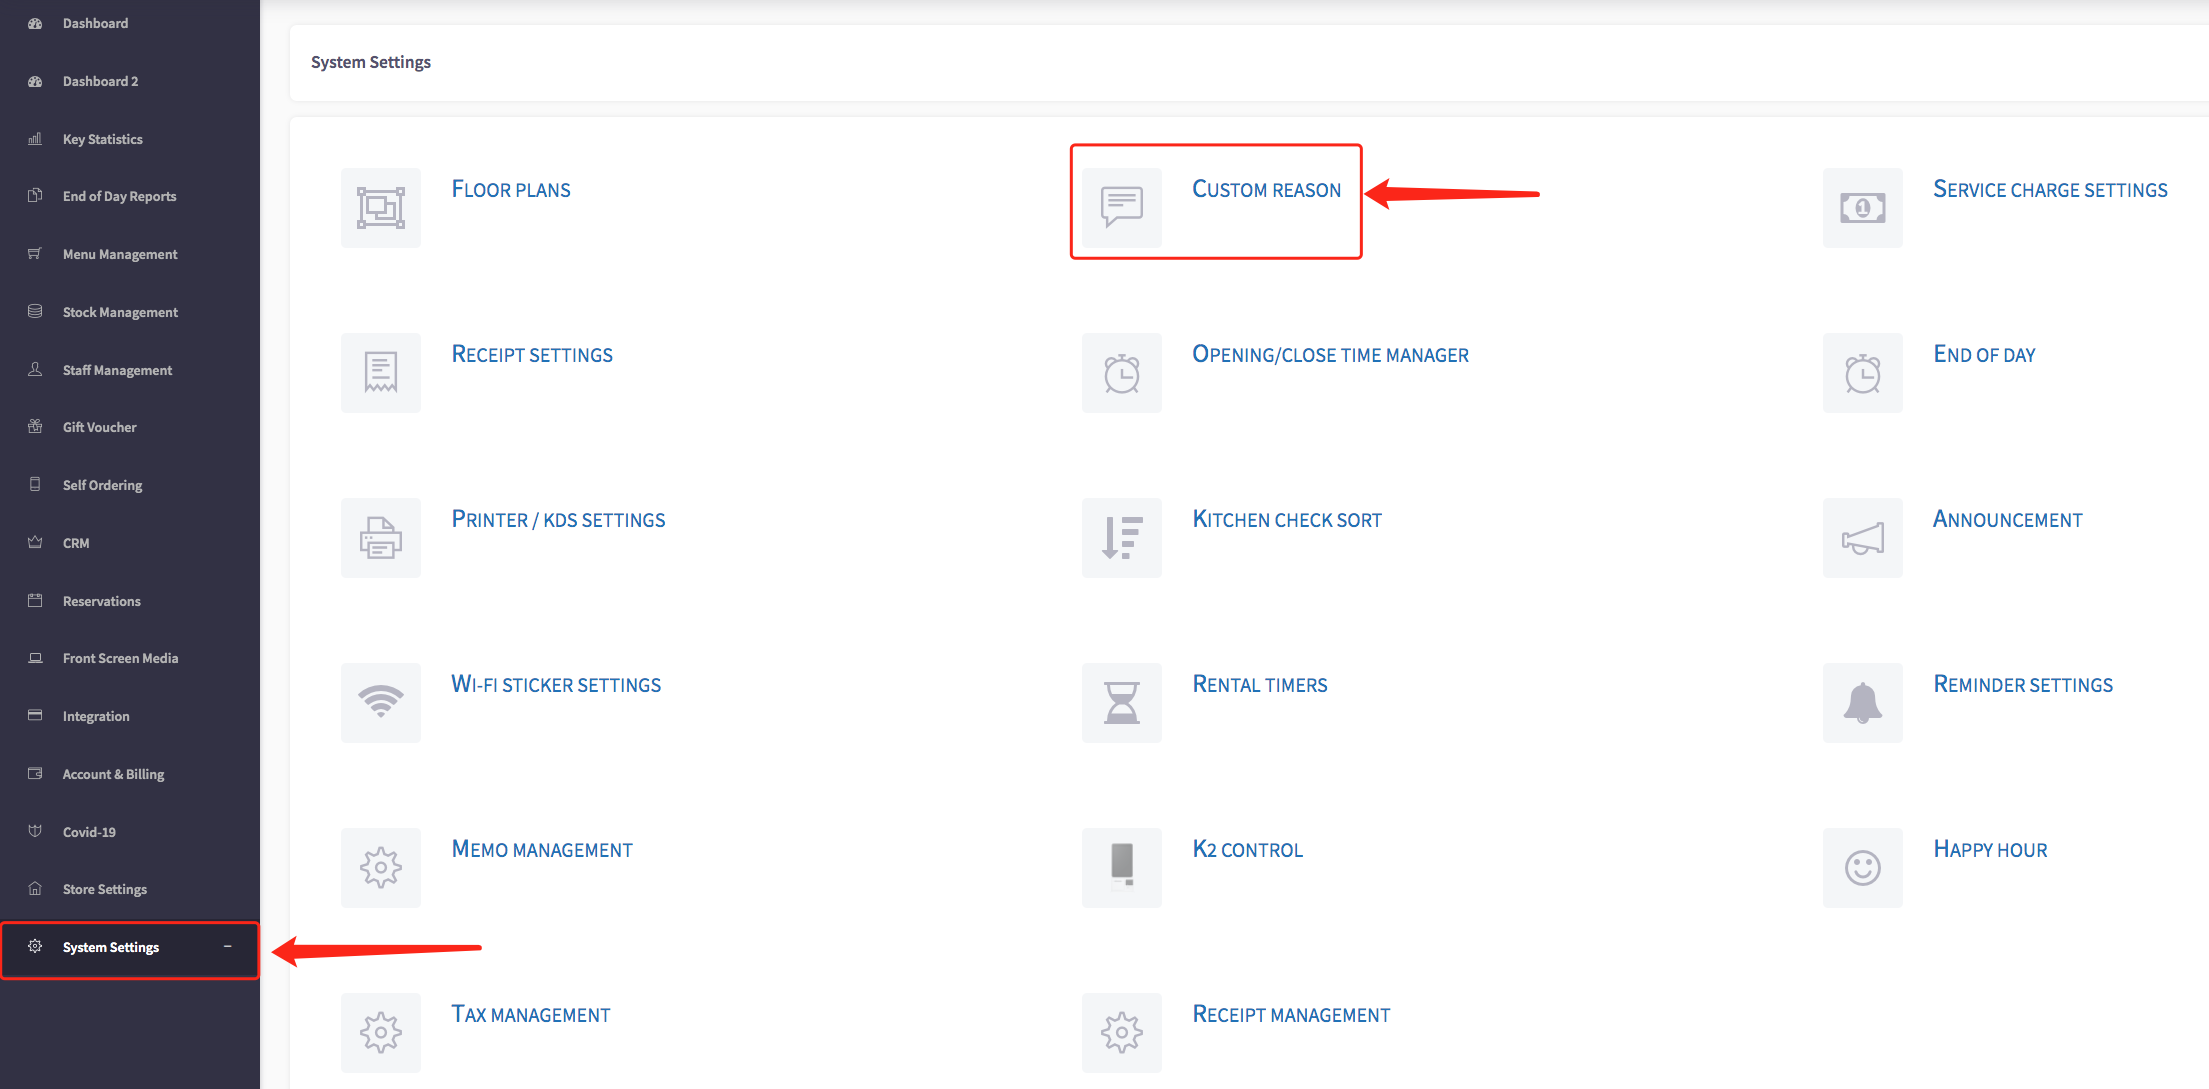
Once you have logged on scroll down to "System Settings" on the left-hand side and then the 'Custom Reason' option in the menu.

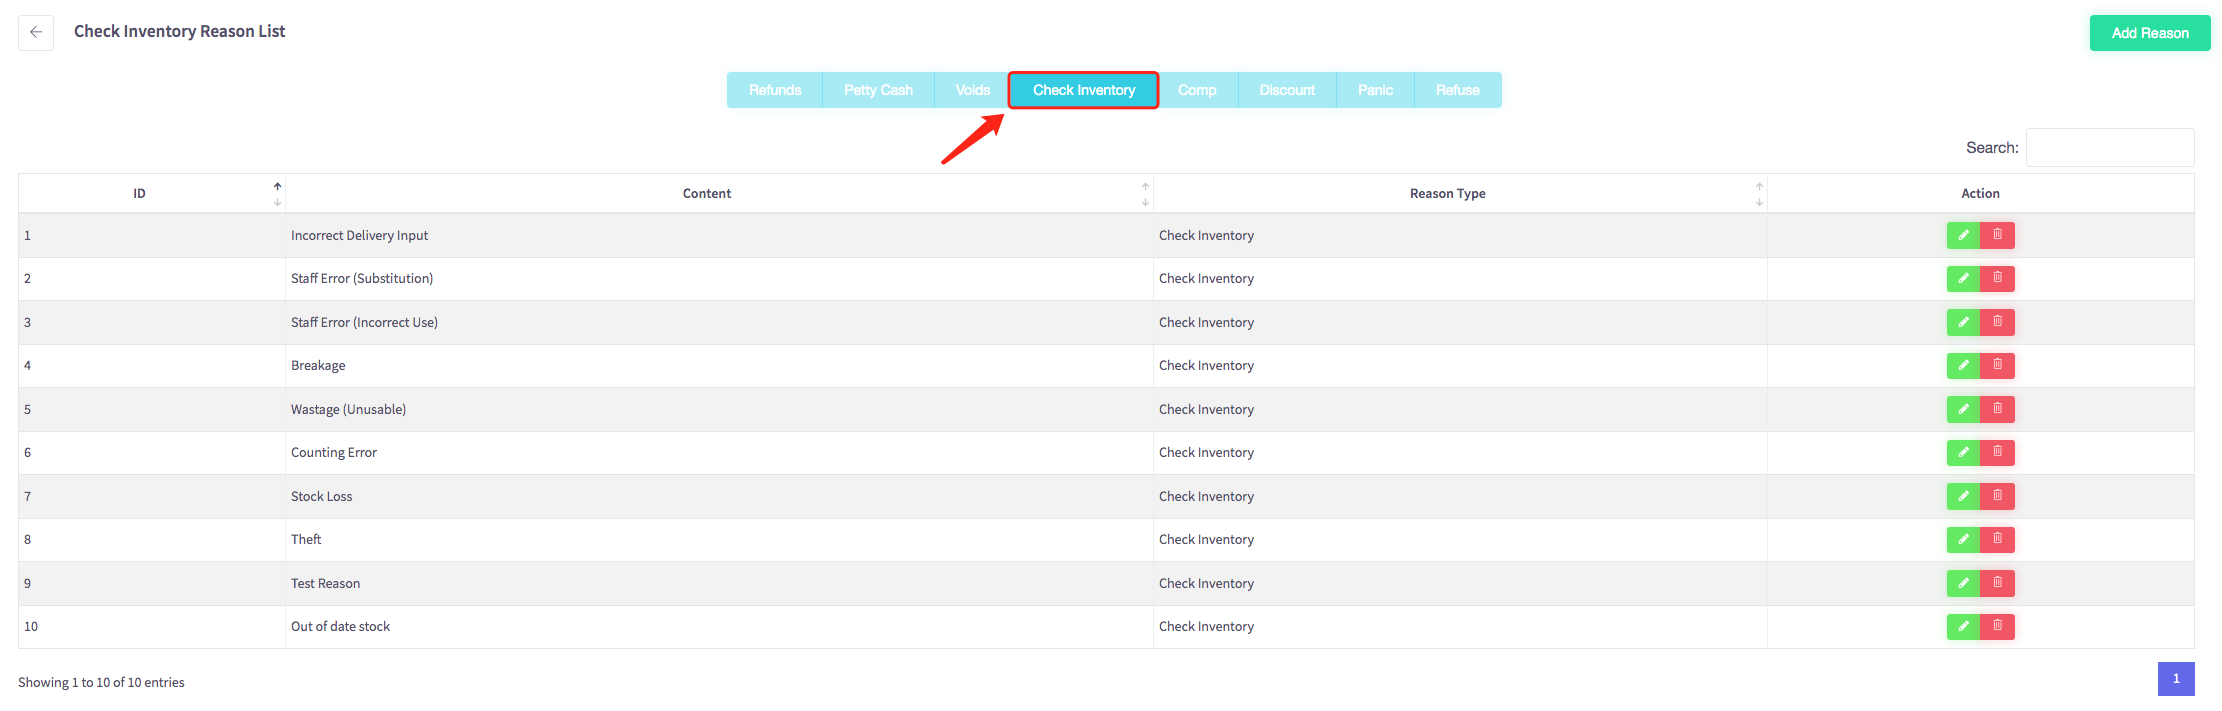
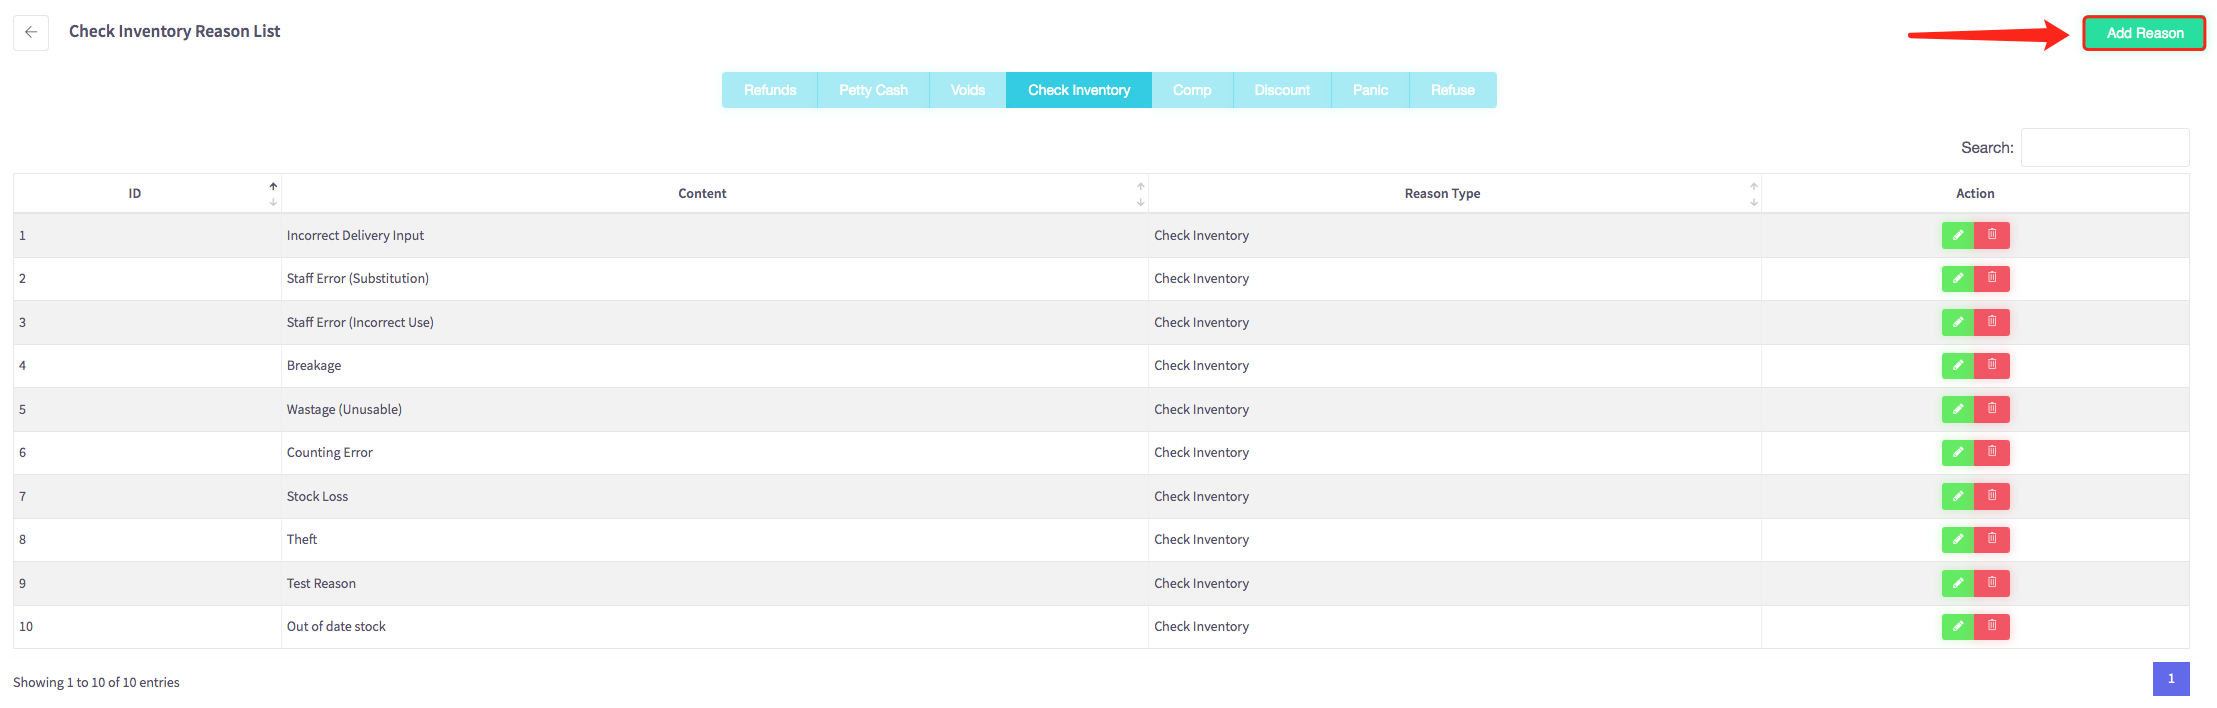
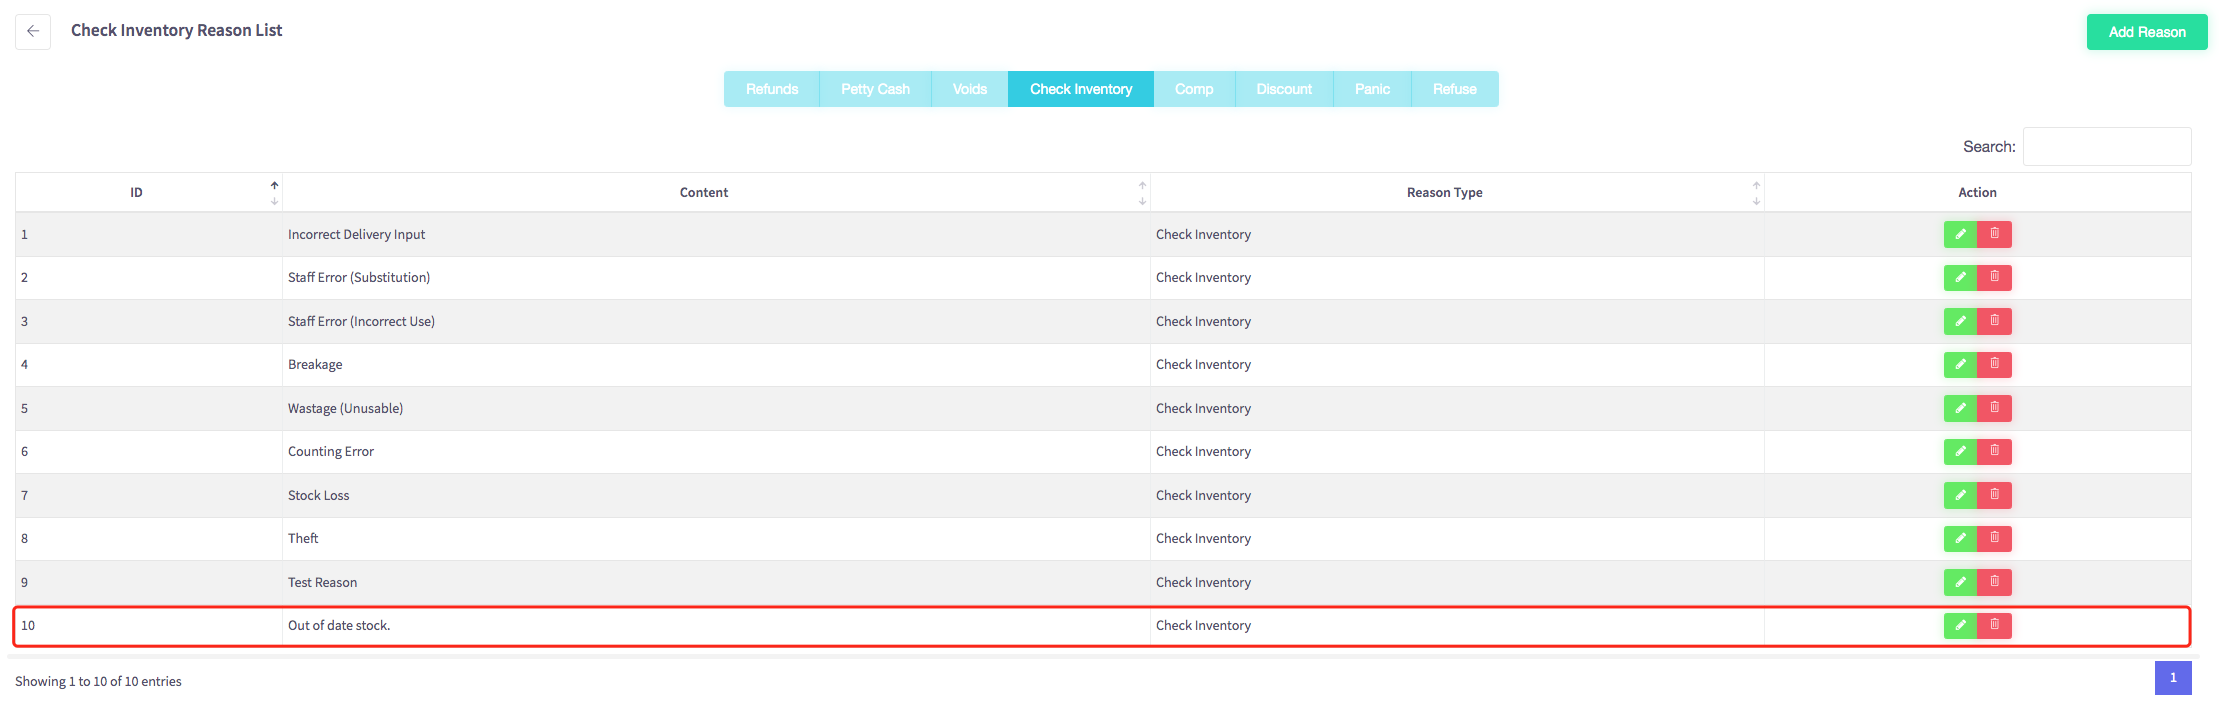
The check inventory reason list menu should appear, shown below. Make sure you select checking inventory on the blue bar located near the top of the page.
To add a new checking inventory reason click on the green "add reason" button at the top right of the page.
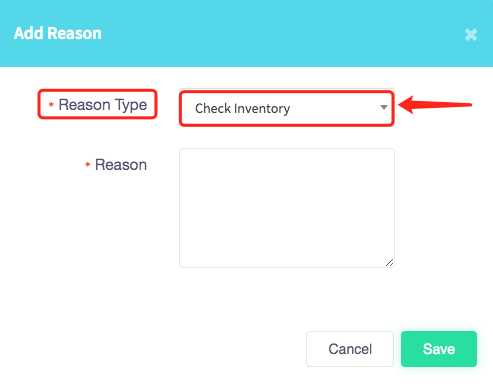
Then this menu will appear, first select your reason type, which will be 'Check Inventory'.
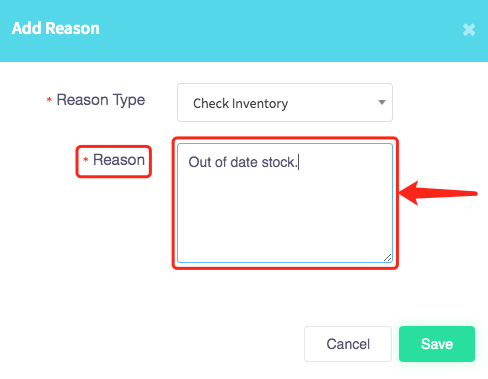
Then add a reason for your check inventory, for example, "Out of date stock".
When completed press the green "Save" button in the right-hand corner of the menu.
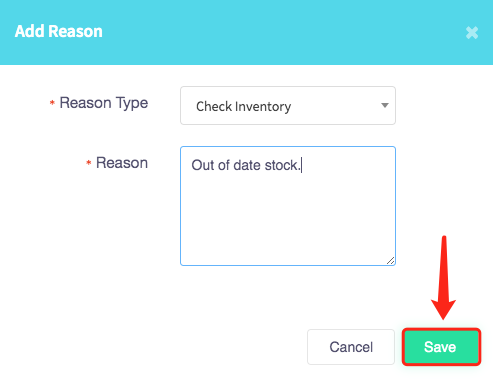
Your check inventory reason will be added to your check inventory reason list.
How to add a reason for comp
This guide will show you how to add a reason for comp on your Cloud HQ.
Once you have logged on scroll down to "System Settings" on the left-hand side and then click the 'Custom Reason' option in the menu.
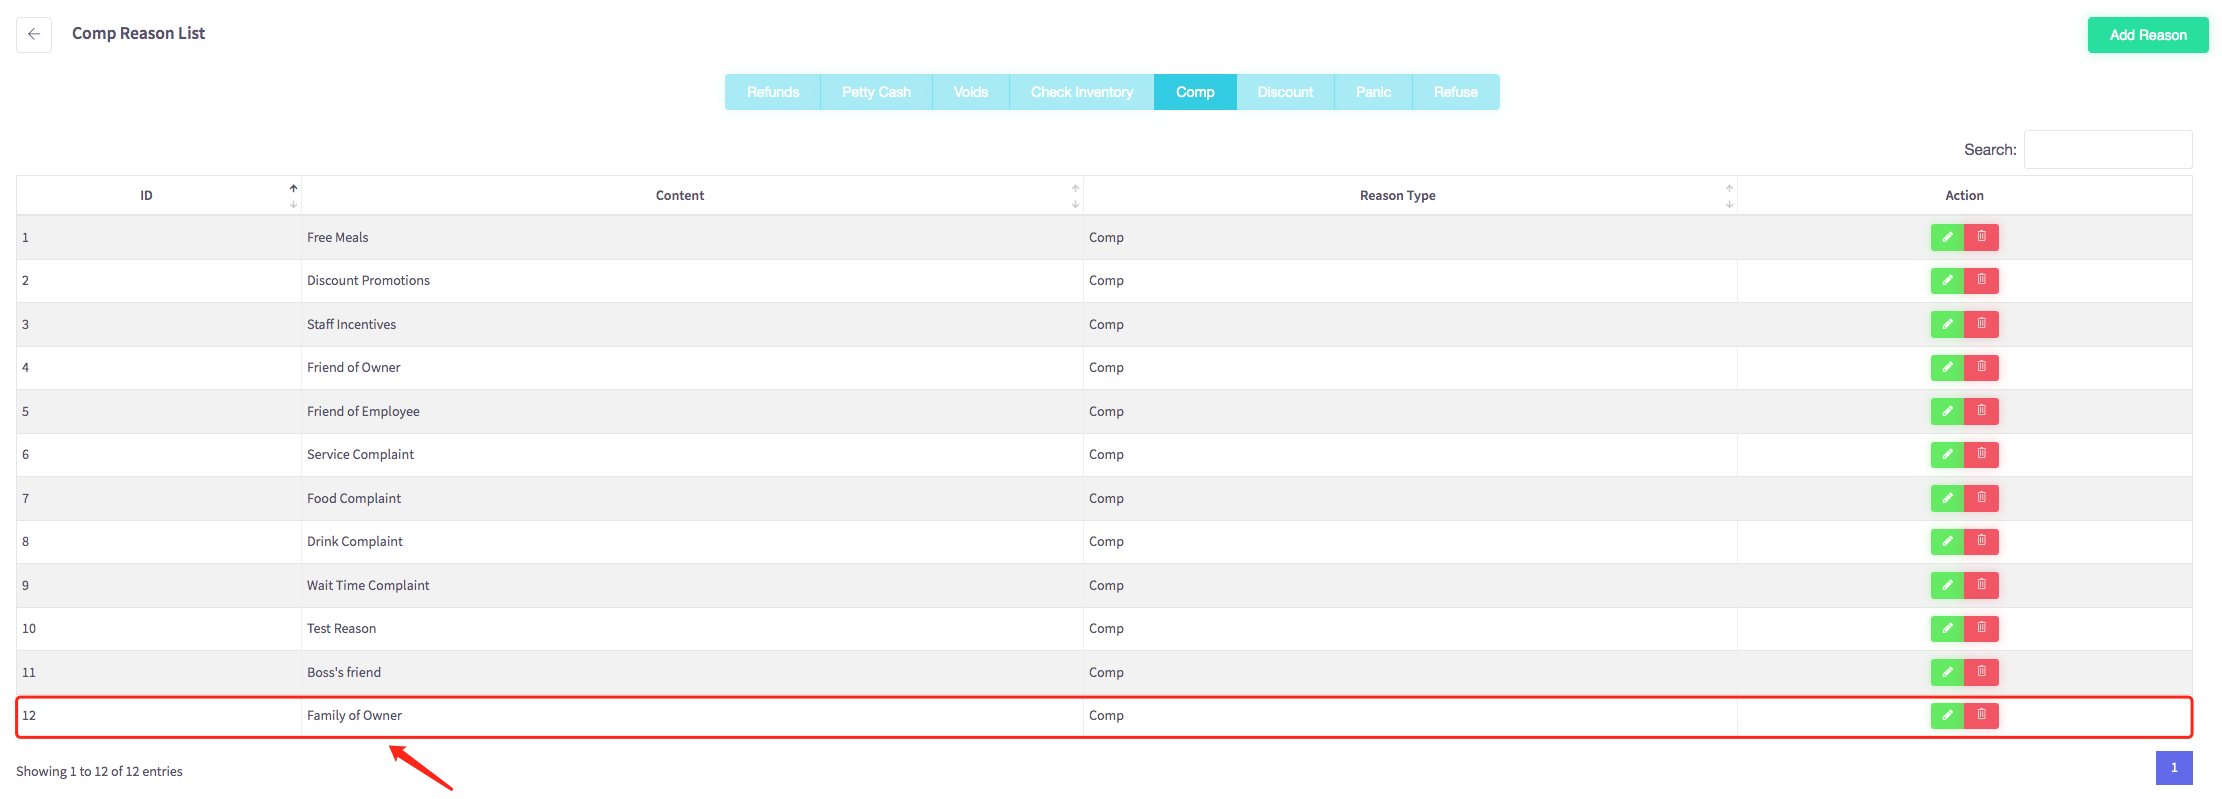
The comp reason list menu should appear, shown below. Make sure you select comp on the blue bar located near the top of the page.
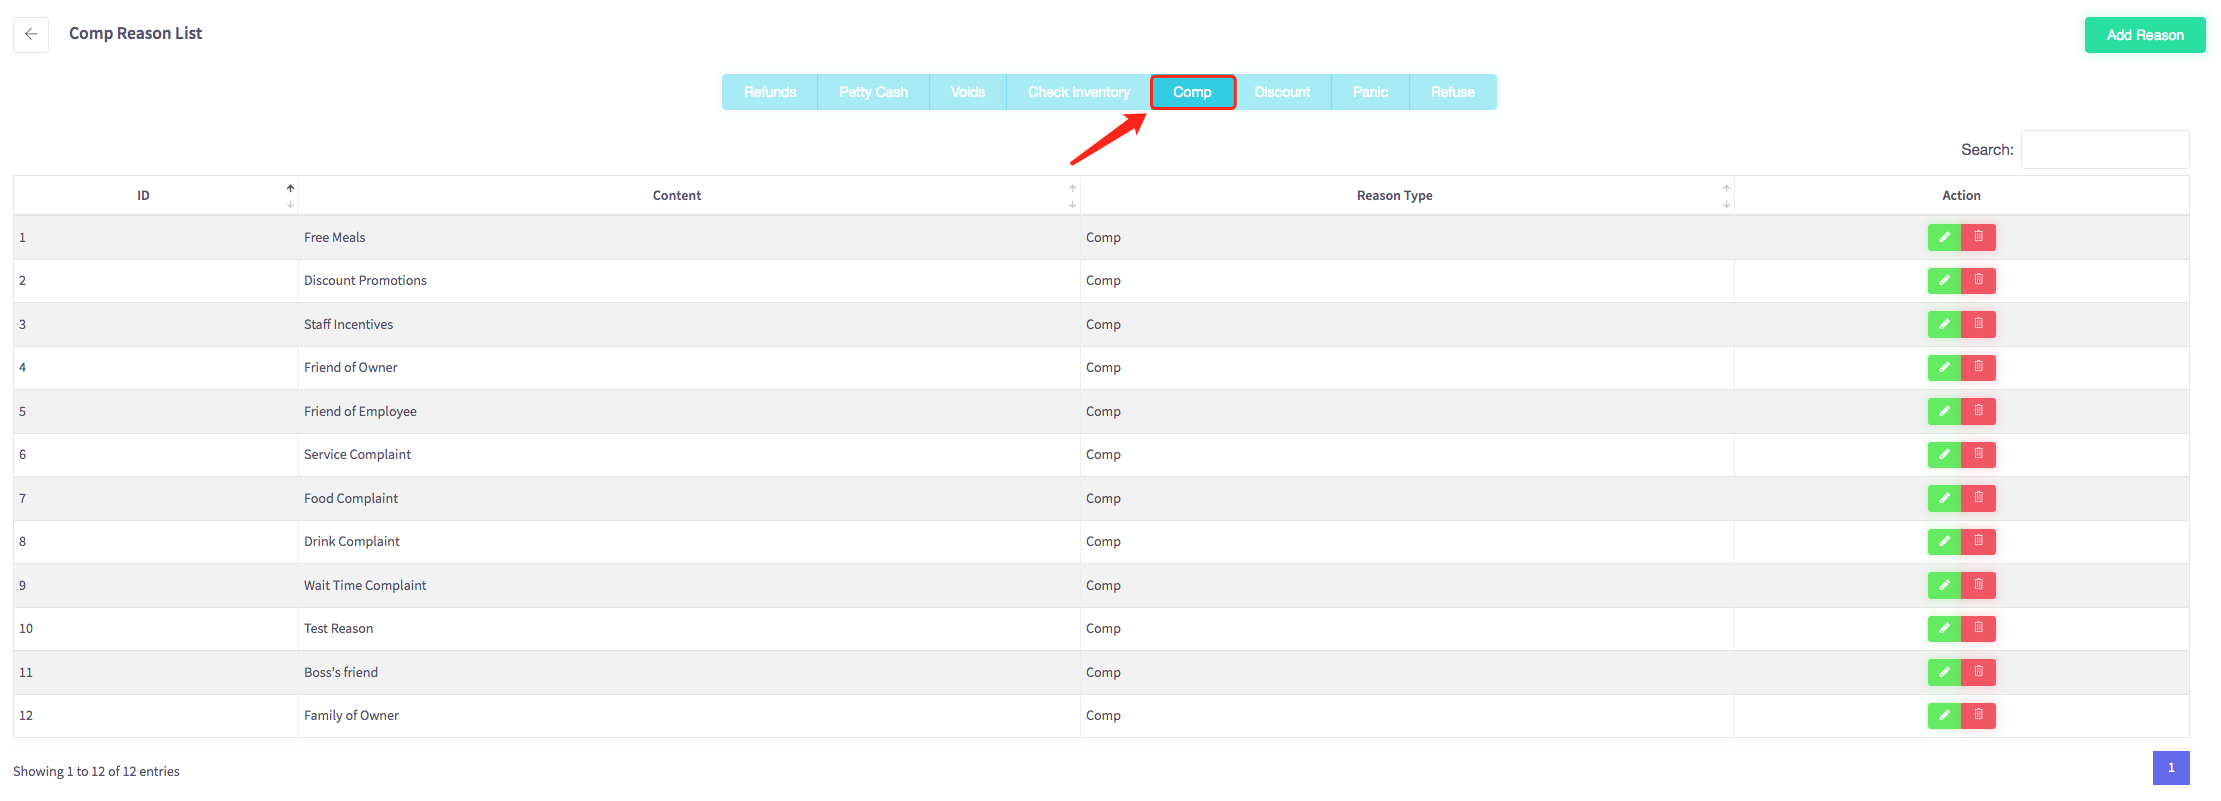
To add a new comp reason click on the green "Add Reason" button at the top right of the page.

Then this menu will appear, first select your reason type, which will be comp.
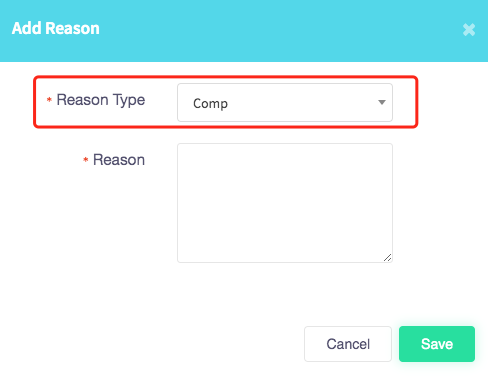
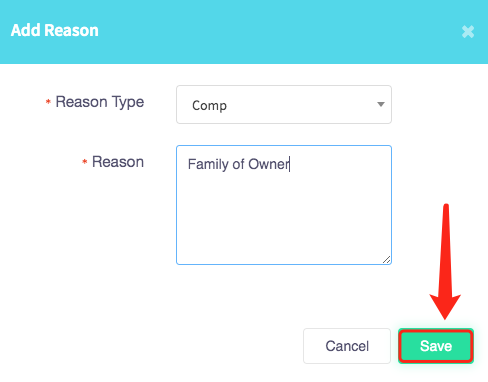
Then add a reason for your comp, for example, "Family of Owner".
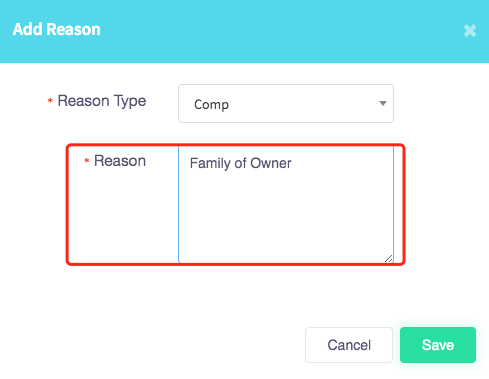
When completed press the green "Save" button in the right-hand corner of the menu.
Your comp reason will be added to your comp reason list.
How to add a reason for discount
This page will show you how to add a reason for a discount on your Cloud HQ.
Once you have logged on scroll down to "System Settings" on the left-hand side and then click the 'Custom Reason' option in the menu.
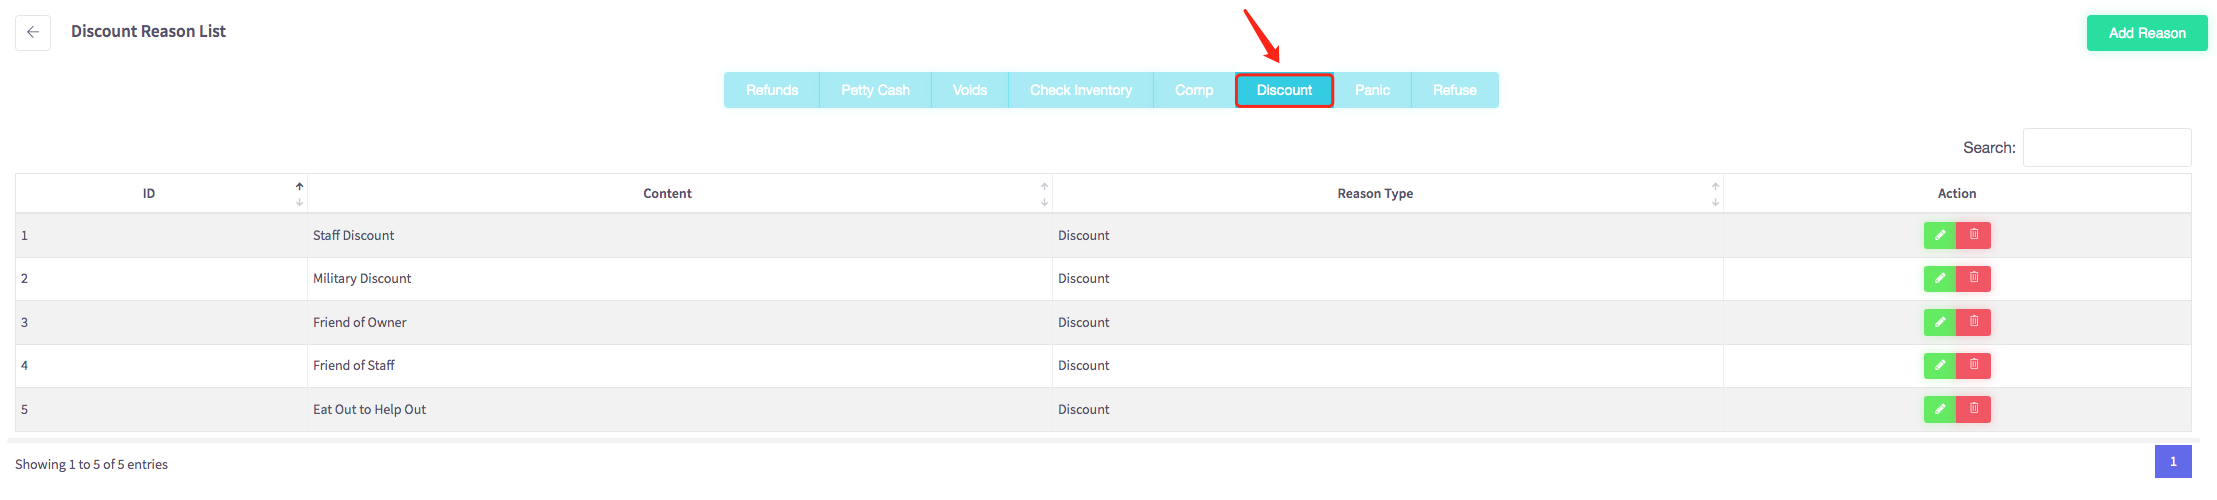
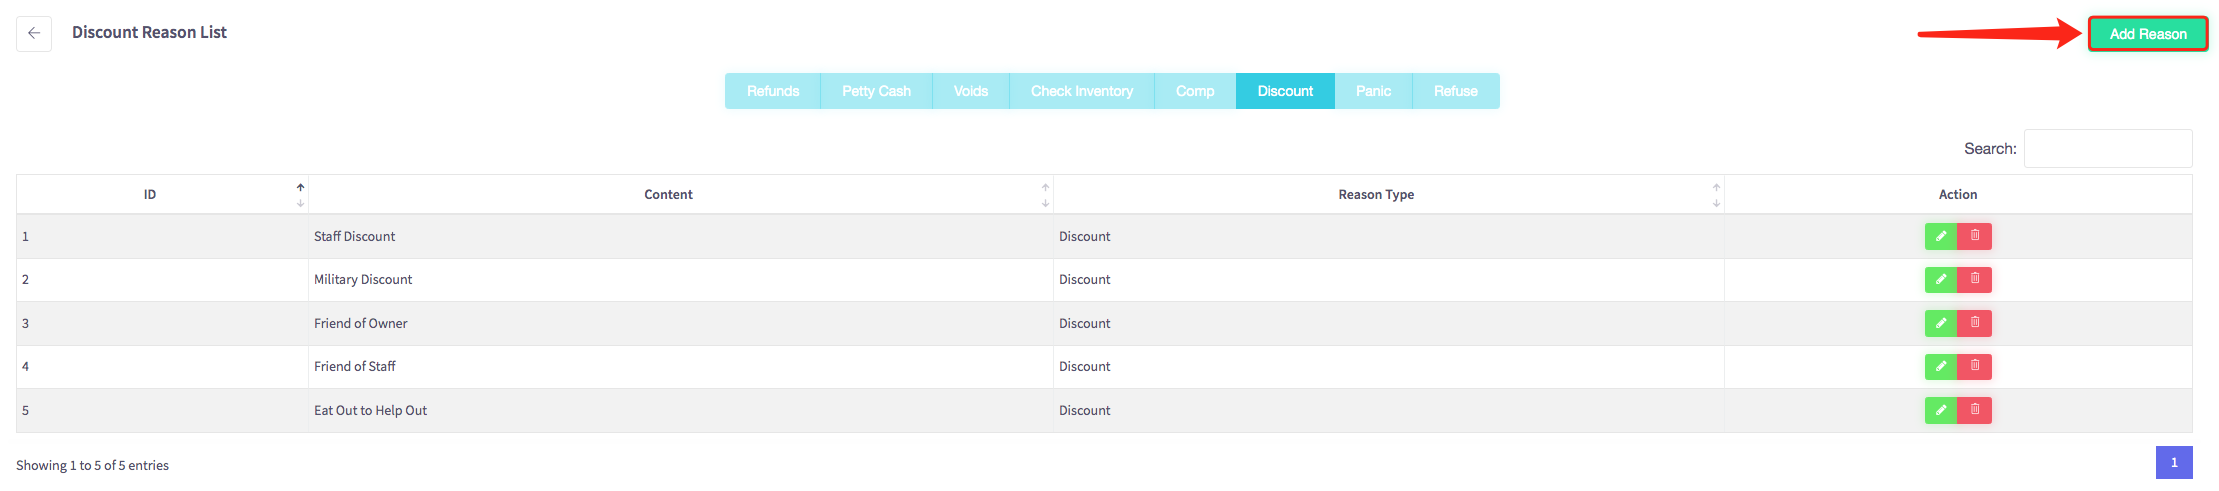
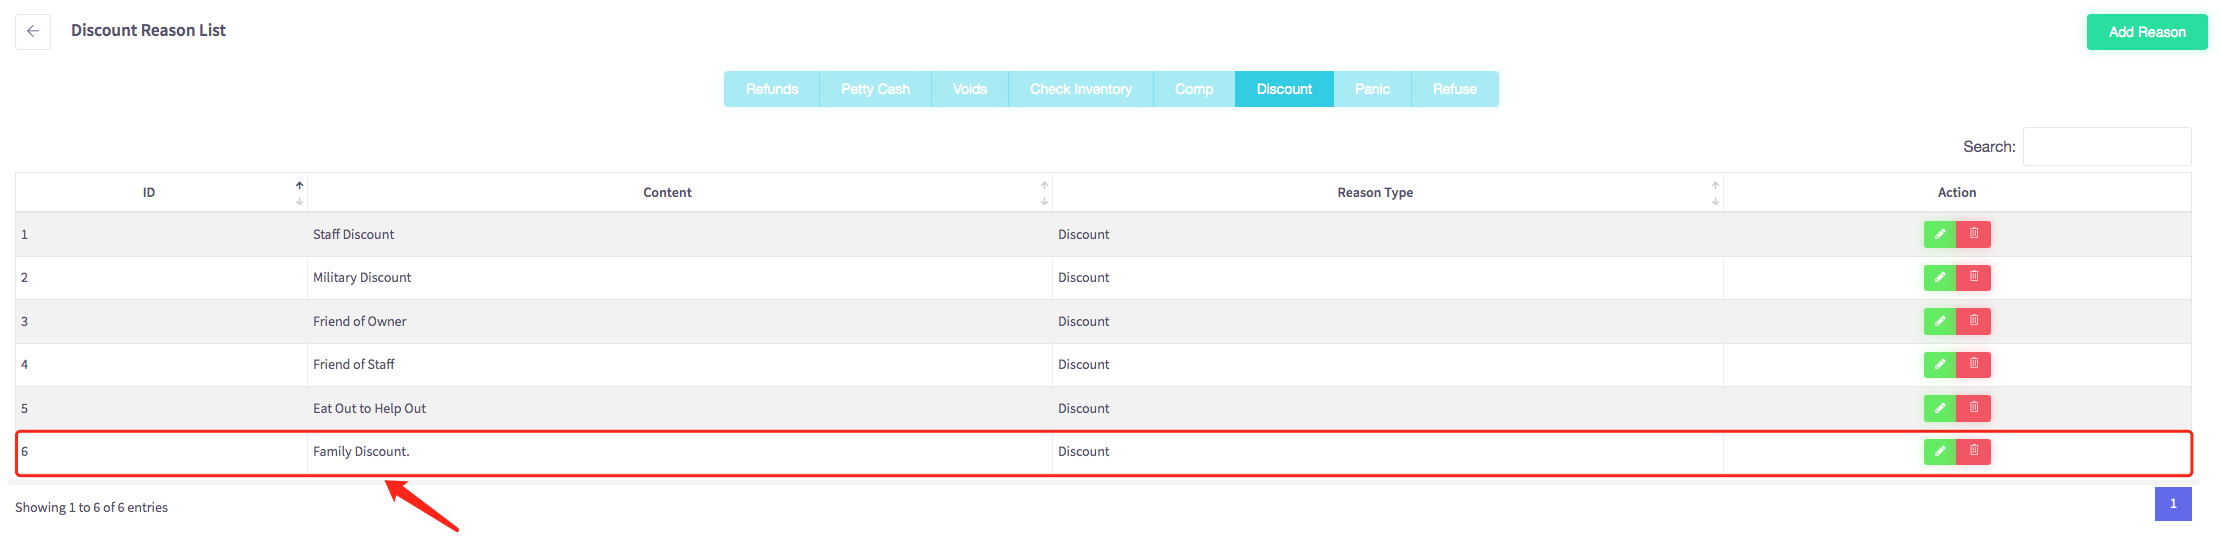
The discount menu should appear, shown below. Make sure you select discount on the blue bar located near the top of the page.
To add a new discount reason click on the green "Add Reason" button at the top right of the page.
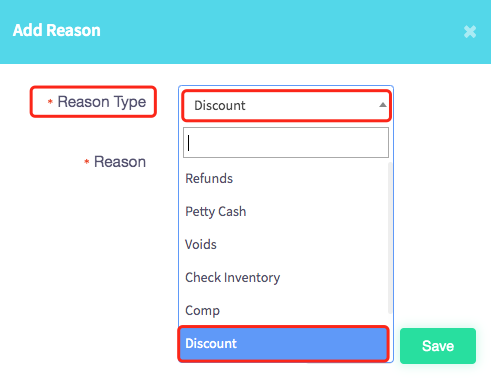
Then this menu will appear, first select your reason type, which will be discount.
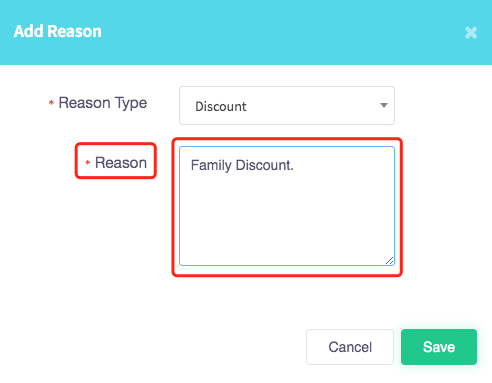
Then add a reason for your discount, for example, "Family Discount".
When completed press the green "Save" button in the right-hand corner of the menu.
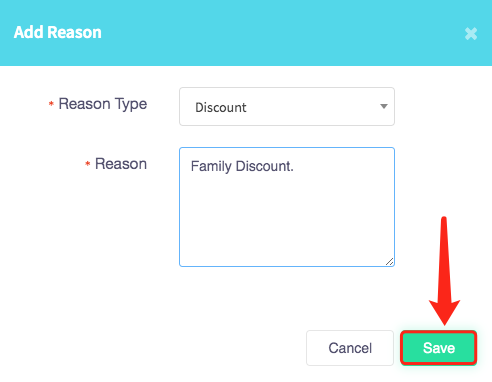
Your discount reason will be added to your discount reason list.
How to add a reason for panic button
This guide will show you how to add a reason for panic button on your Cloud HQ.
Once you have logged on scroll down to "System Settings" on the left-hand side and then click the 'Custom Reason' option in the menu.
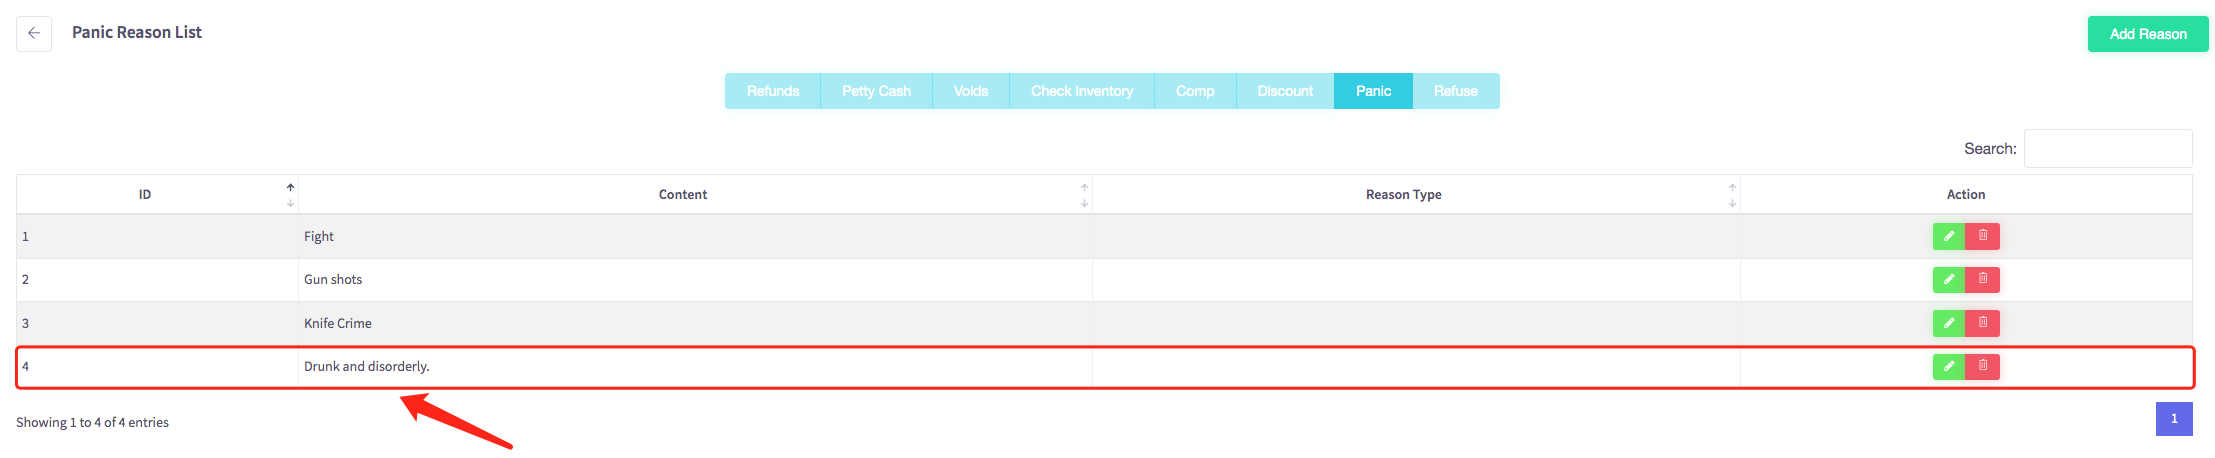
The panic button menu should appear, shown below. Make sure you select panic on the blue bar located near the top of the page.

To add a new panic reason click on the green "add reason" button at the top right of the page.

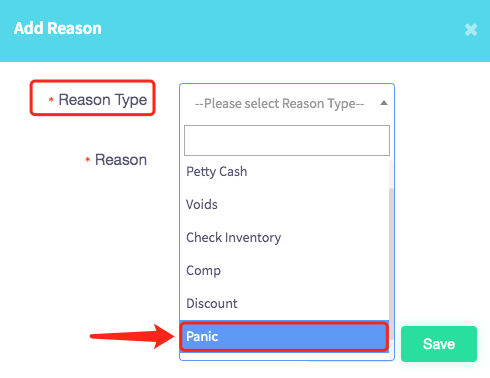
Then this menu will appear, first select your reason type, which will be panic.
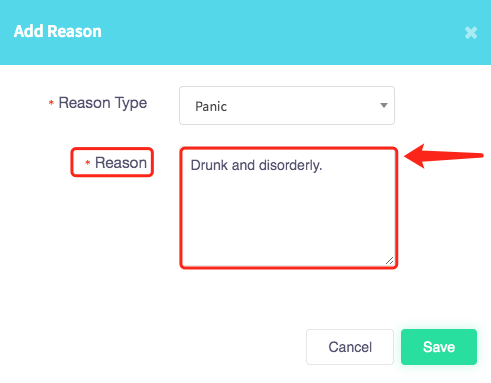
Then add a reason for your panic buttons, for example, "Drunk and disorderly.".
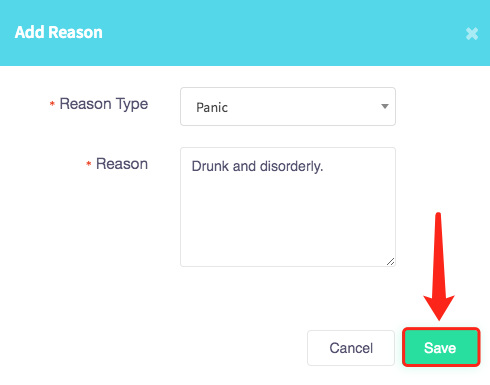
When completed press the green "Save" button in the right-hand corner of the menu.
Your panic reason will be added to your panic reason list.
How to add a reason for refusals
This guide will show you how to add a reason for refusals on your Cloud HQ.
Once you have logged on scroll down to "System Settings" on the left-hand side and then click the 'Custom Reason' option in the menu.
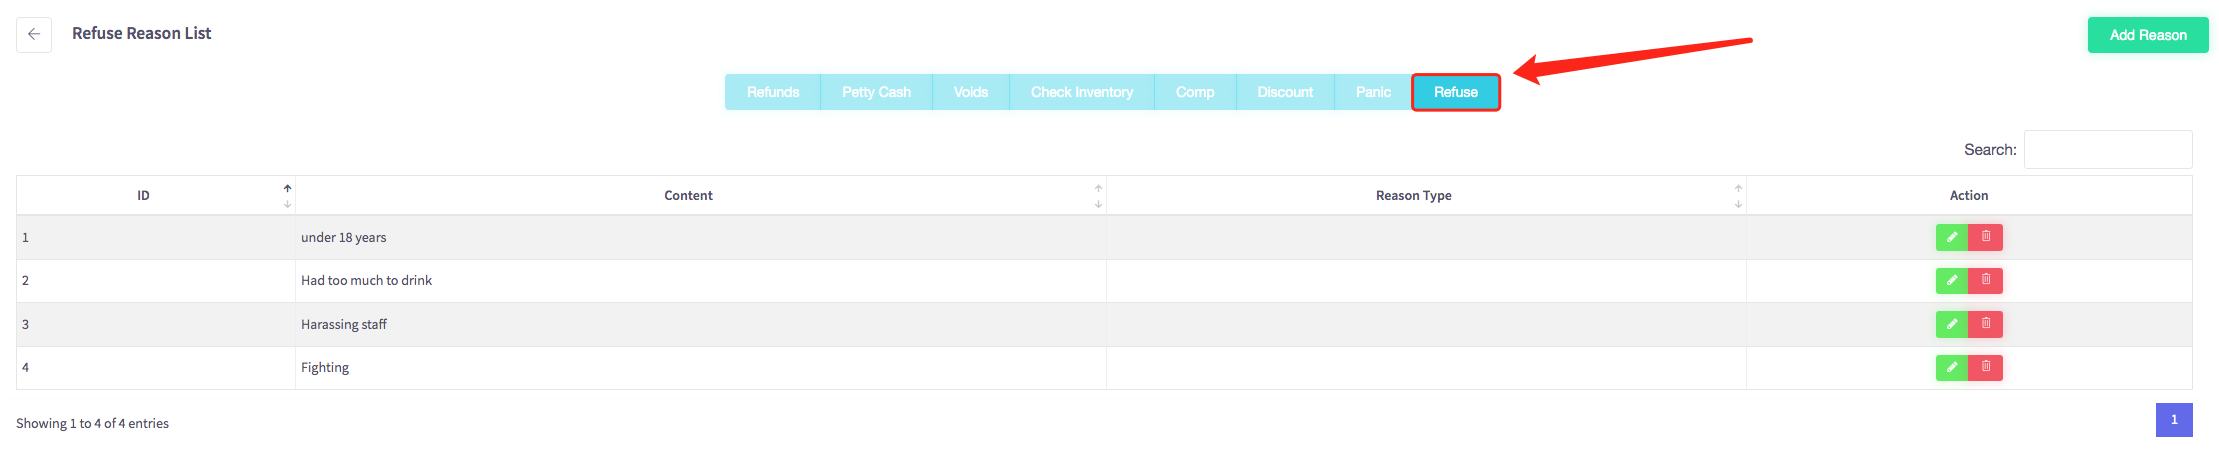
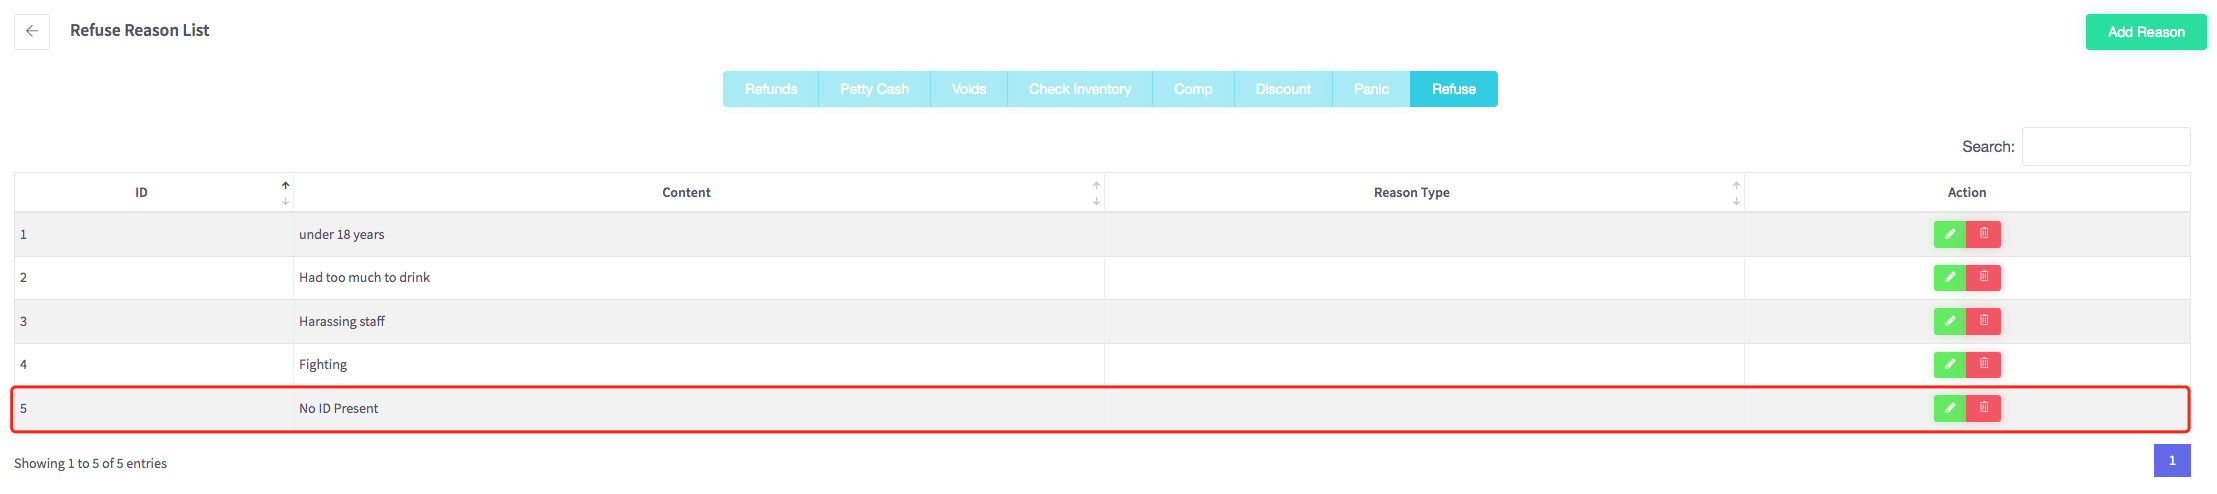
The refusal reason list menu should appear, shown below. Make sure you select 'Refuse' on the blue bar located near the top of the page.
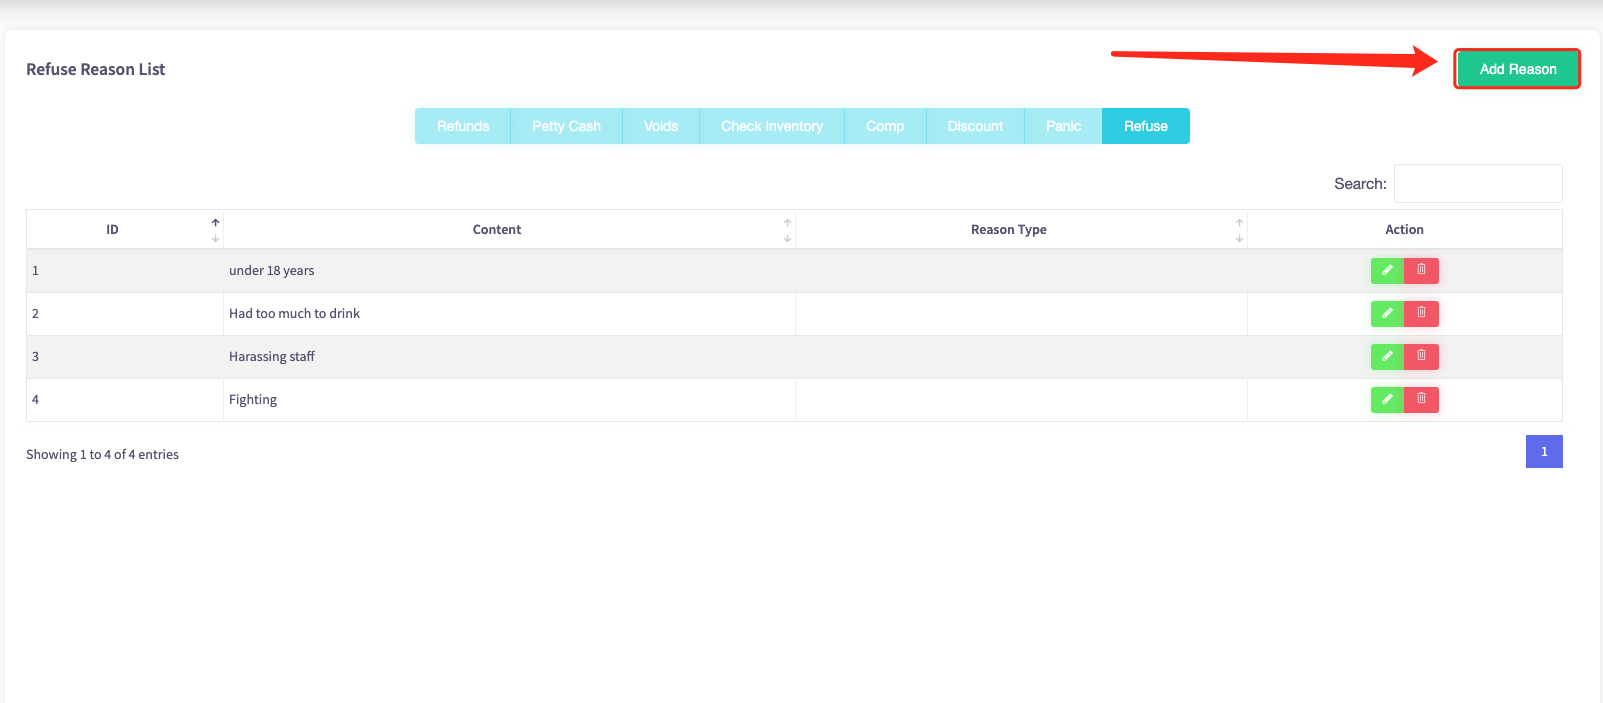
To add a new refusal reason click on the green "Add Reason" button at the top right of the page.
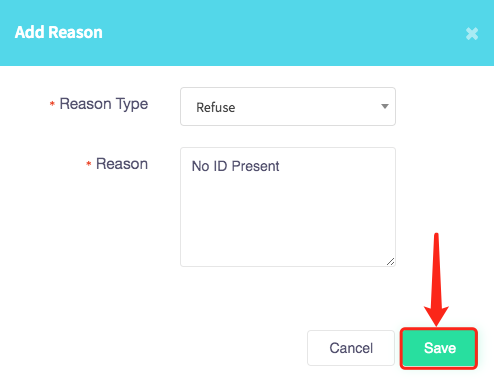
Then this menu will appear, first select your reason type, which will be refuse.
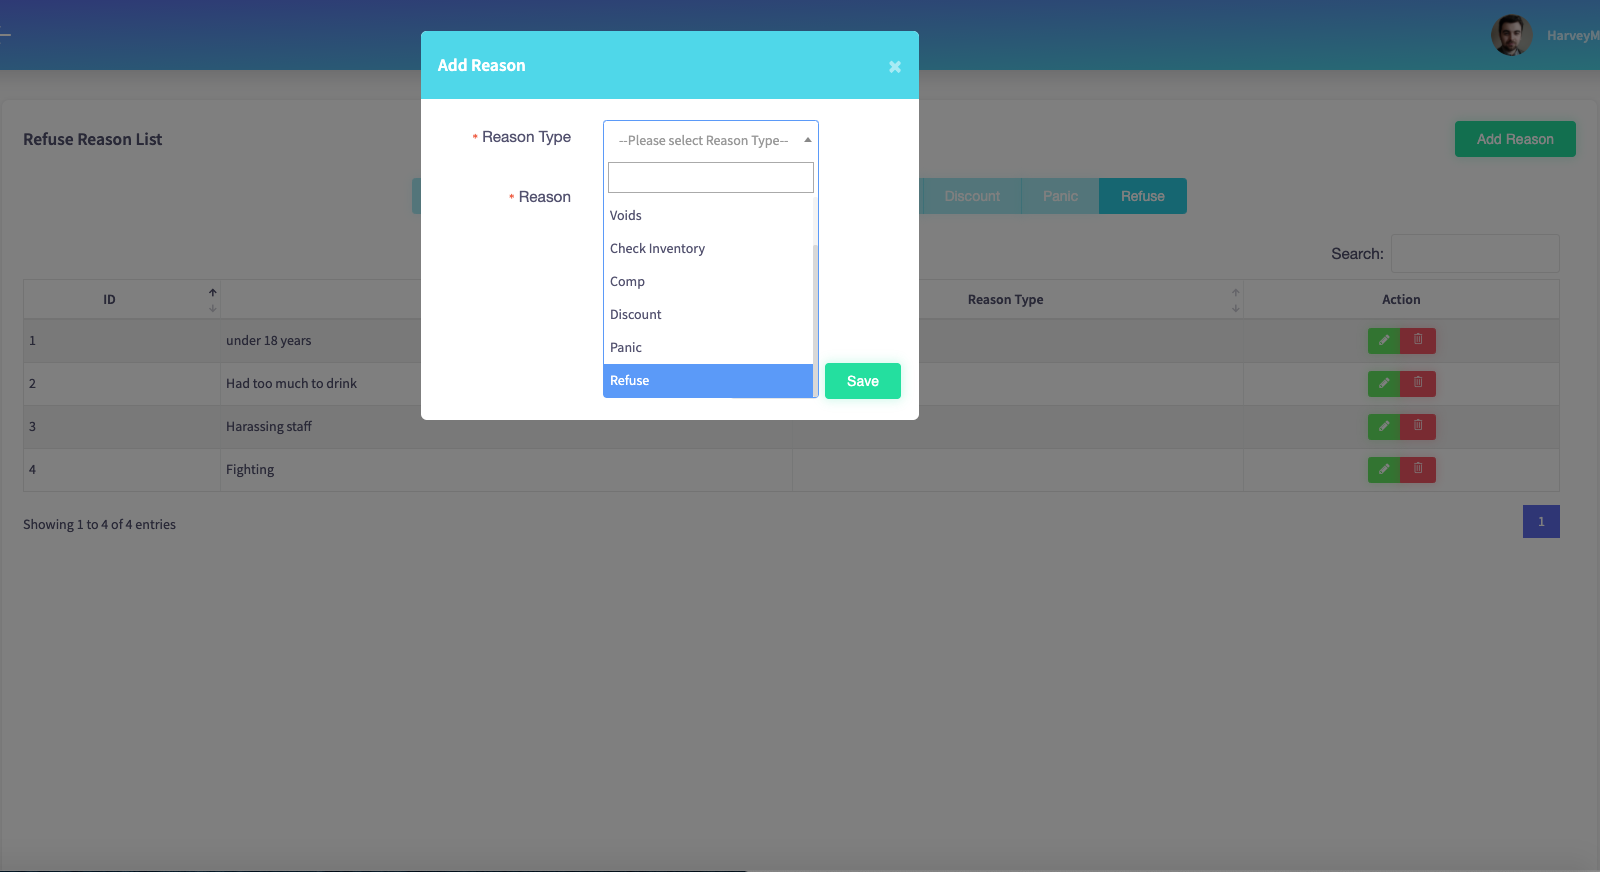
Then add a reason for your refusals, for example, "No ID Present".

When completed press the green "Save" button in the right-hand corner of the menu.
Your refusal reason will be added to your refuse reason list.
How to add a reason for wastage
This guide will show you how to add a reason for wastage on your Cloud HQ.
Once you have logged on scroll down to "System Settings" on the left-hand side and then the 'Custom Reason' option in the menu.

The wastage menu should appear, shown below. Make sure you select wastage on the blue bar located near the top of the page.

To add a new wastage reason click on the green "Add Reason" button at the top right of the page.

Then this menu will appear, first select your reason type, which will be wastage.

Then add a reason for your wastage, for example, "Out of Date Stock".

When completed press the green "Save" button in the right-hand corner of the menu.

Your wastage reason will be added to your wastage reason list.
